Advertisement:

Read Later
In this article, I will discuss using the DFRobot optical fingerprint sensor with Raspberry Pi, which detects and verifies fingerprints. It includes a high-powered DSP chip that does image rendering, calculation, feature-finding, and searching. Although these sensors were incipiently developed for Arduino, they can be connected to any microcontroller or system with TTL serial to enroll and detect fingerprints.
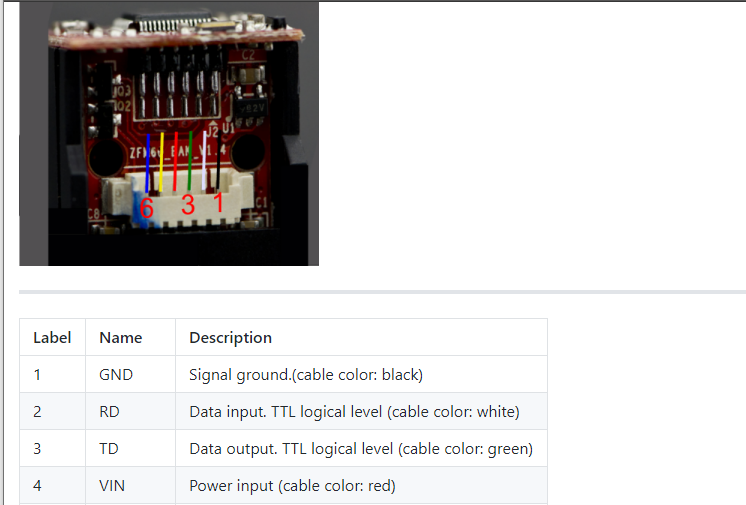
I utilized a USB-to-Serial Converter (CP2102) to connect the fingerprint sensor (5V) to Raspberry Pi since the built-in UART on the Pi's TX/RX pins (pin 8 / GPIO 14 and pin 10 / GPIO 15) works with 3.3V.
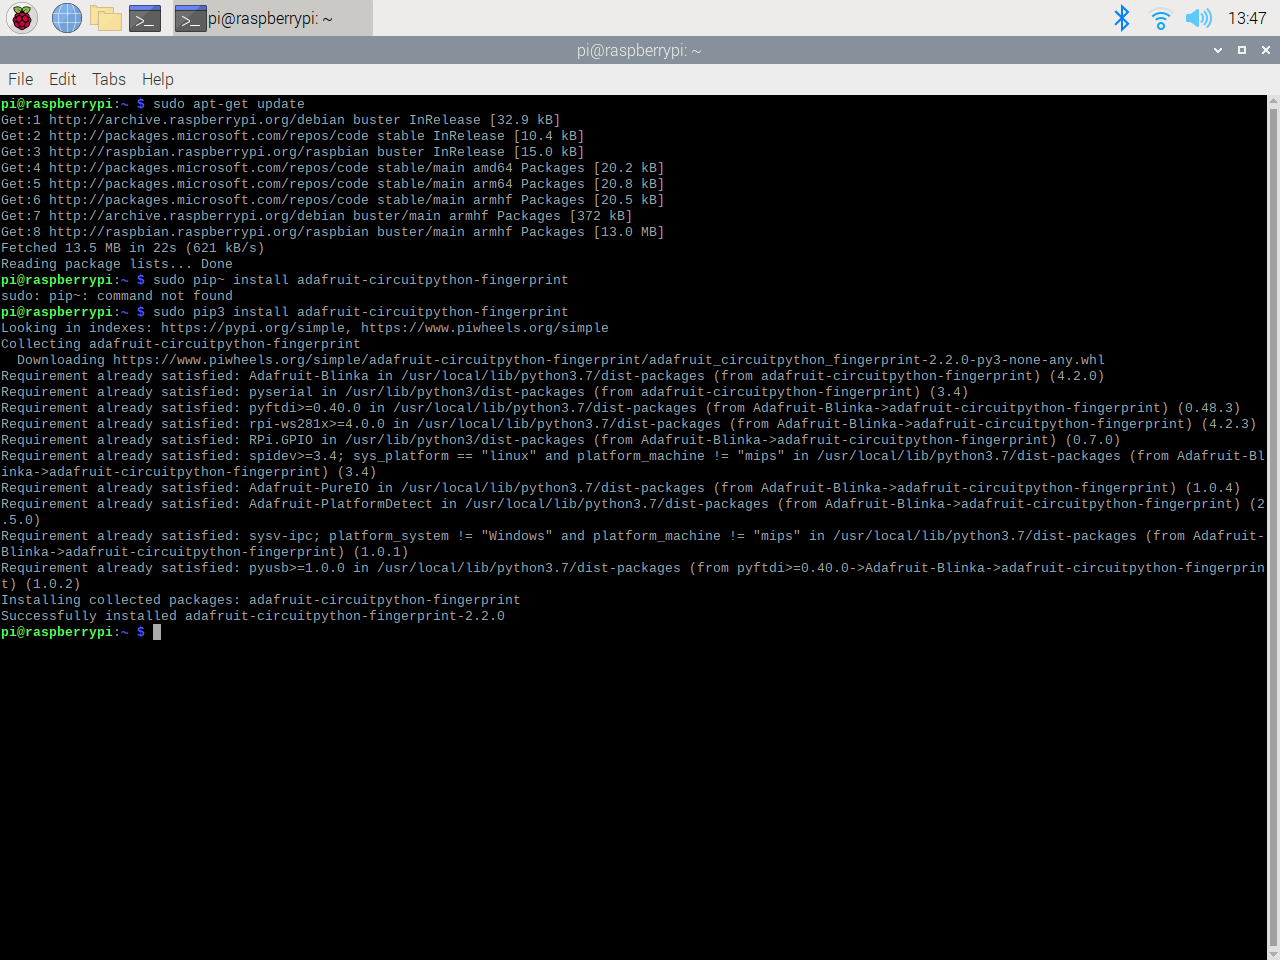
⭐ After connecting the sensor to Pi, download the Adafruit Fingerprint Library by entering this command to the terminal:
sudo pip3 install adafruit-circuitpython-fingerprint
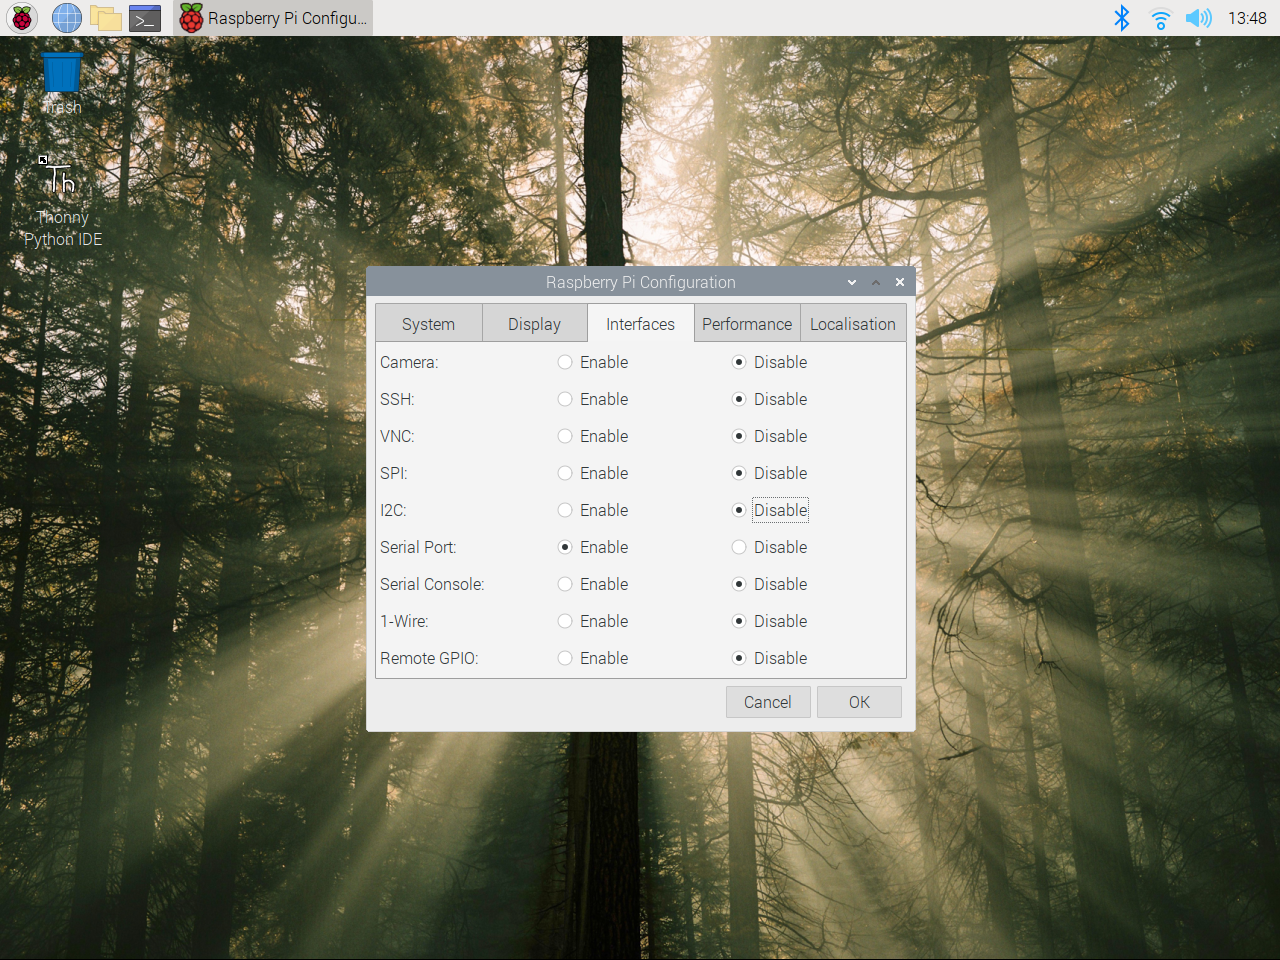
⭐ If you want to use the built-in UART, disable the serial console and enable the serial port hardware in raspi-config.
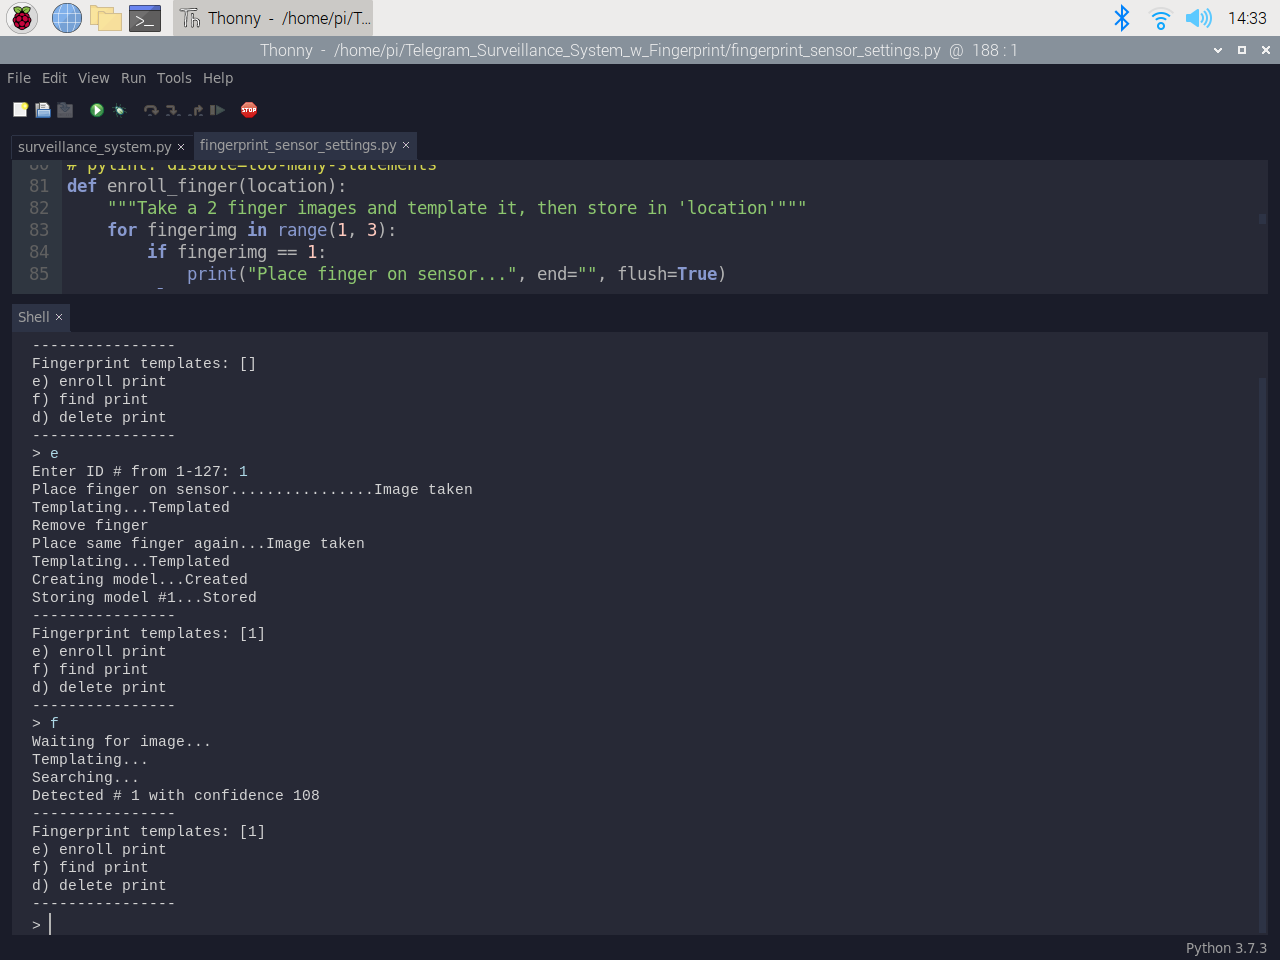
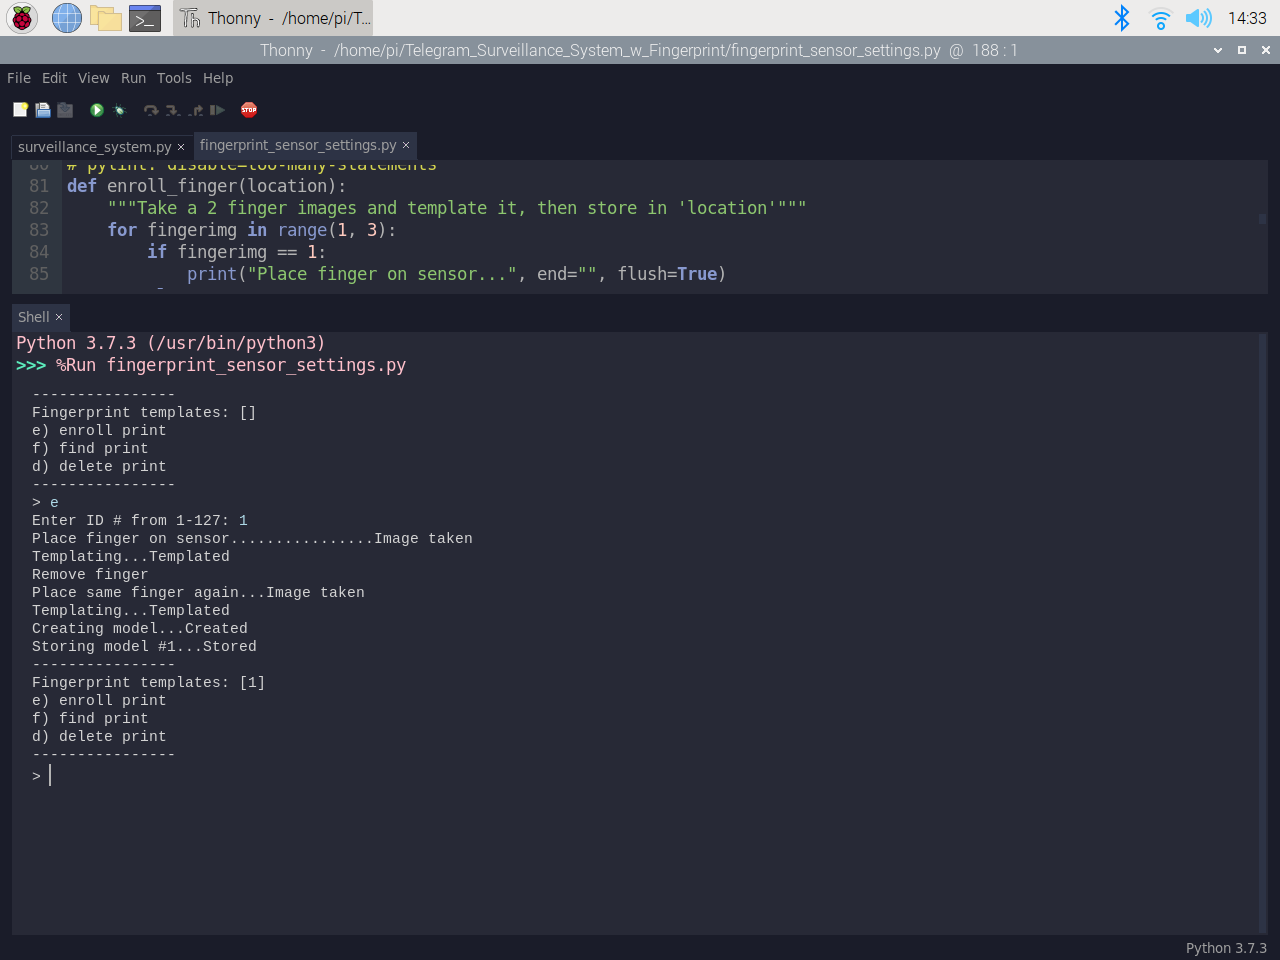
After installing the library, to test the sensor and enroll fingerprints, I modified the example code provided by Adafruit - fingerprint_sensor_settings.py.
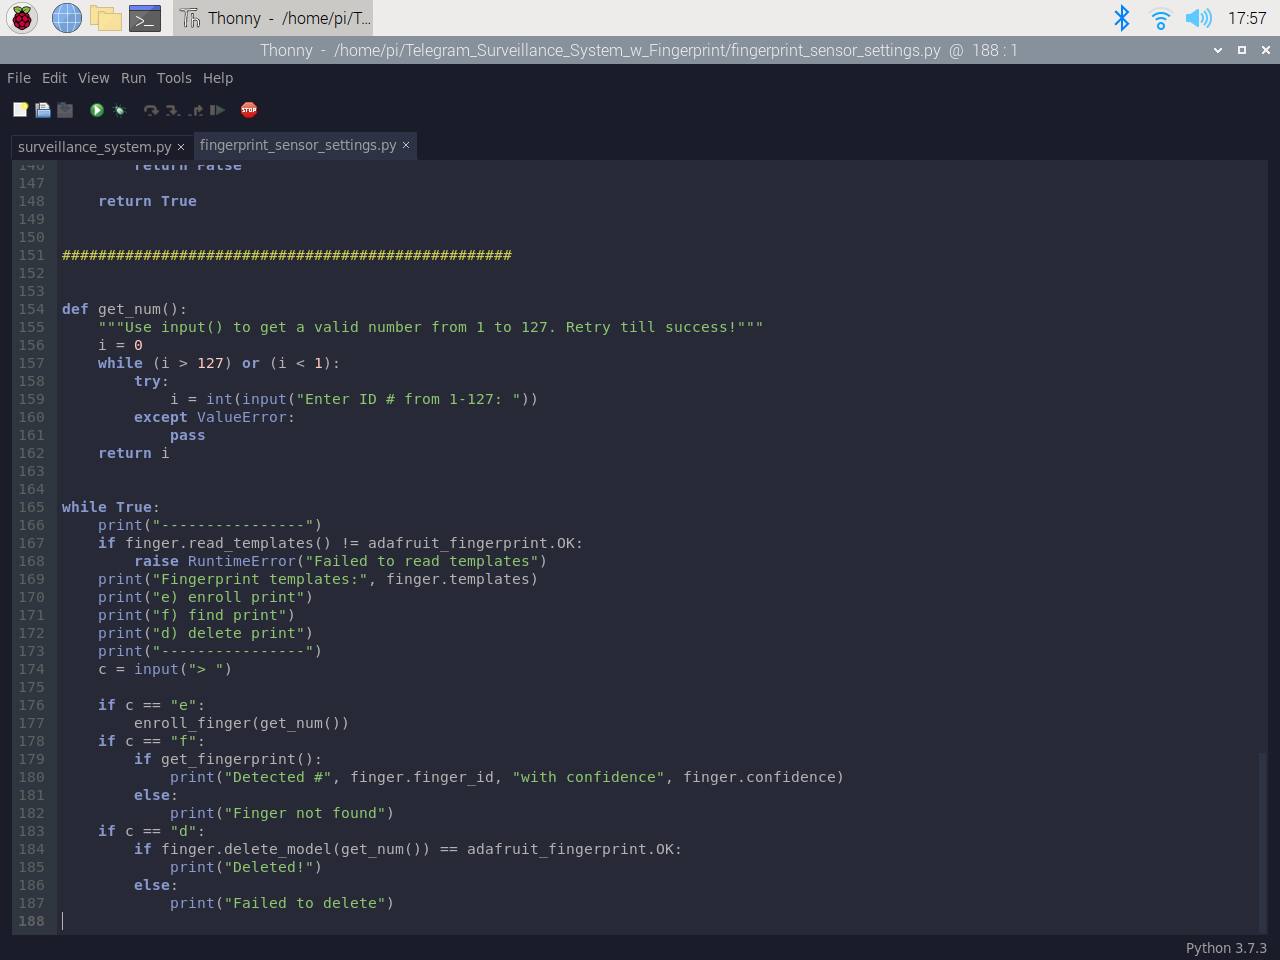
⭐ First, run the fingerprint_sensor_settings.py that gives three options:
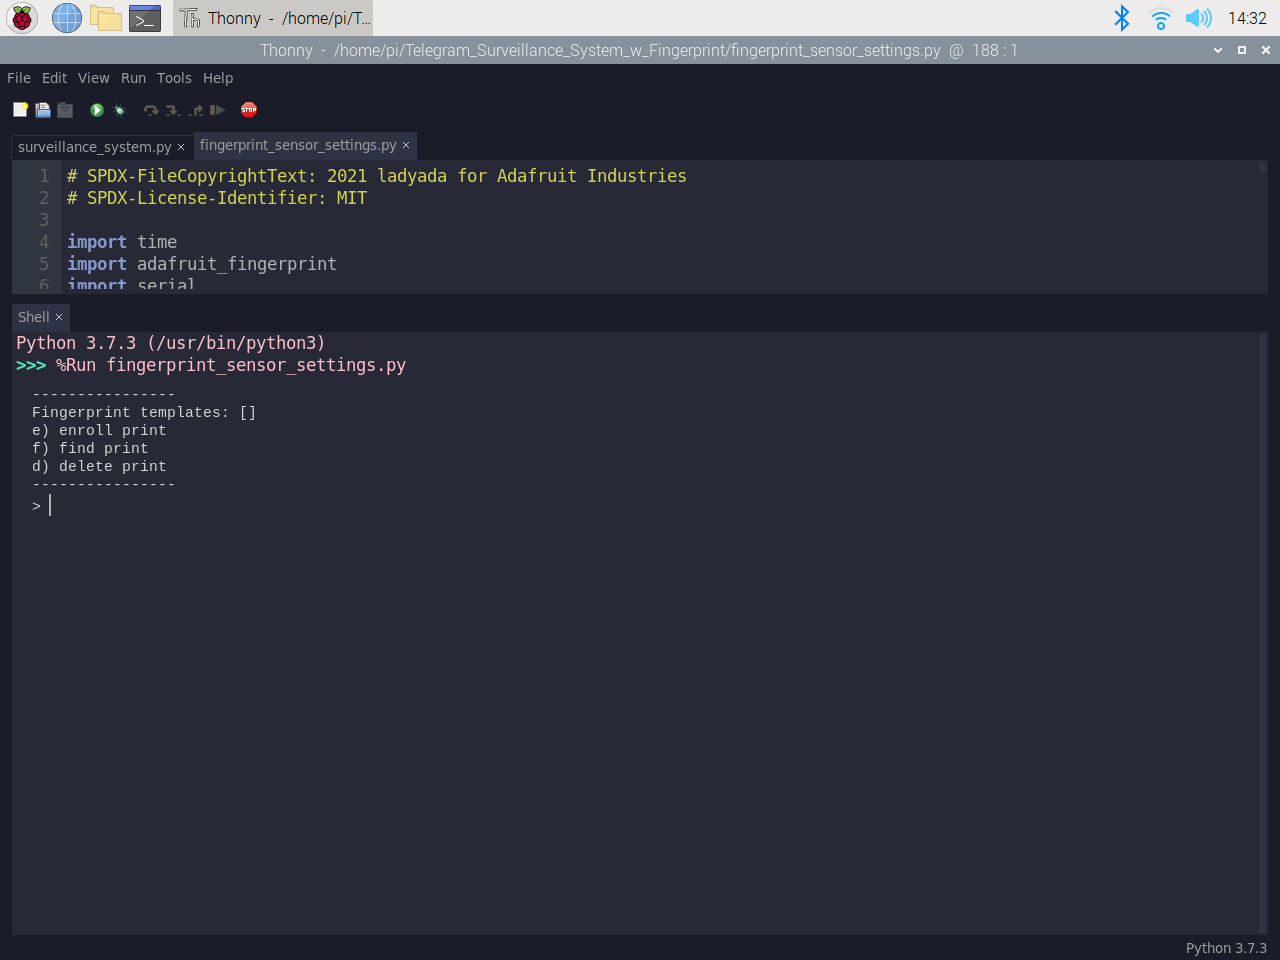
⭐ Enter e to template a new fingerprint and store it in the given location (from 1 to 127) - that means assigning an ID number to the print.
⭐ Enter f to test the fingerprint sensor by searching enrolled fingerprints and identifying which ID (if any) is currently being photographed.
⭐ Enter d to remove an enrolled fingerprint model from the sensor.