As you may have seen, I have created a similar remote Bluetooth-enabled lighting system for my room. After utilizing that project for a while, I decided to improve it with new features and design. Since I did not have a 3D printer back then, I had to improvise with some easy-to-acquire parts, such as a flower pot, to build my lighting system. Therefore, my previous remote lamp looked like a cumbersome contraption. In that regard, I wanted to design the lighting system structure and appearance from scratch instead of employing irreconcilable components to make this iteration more stylish and elegant.
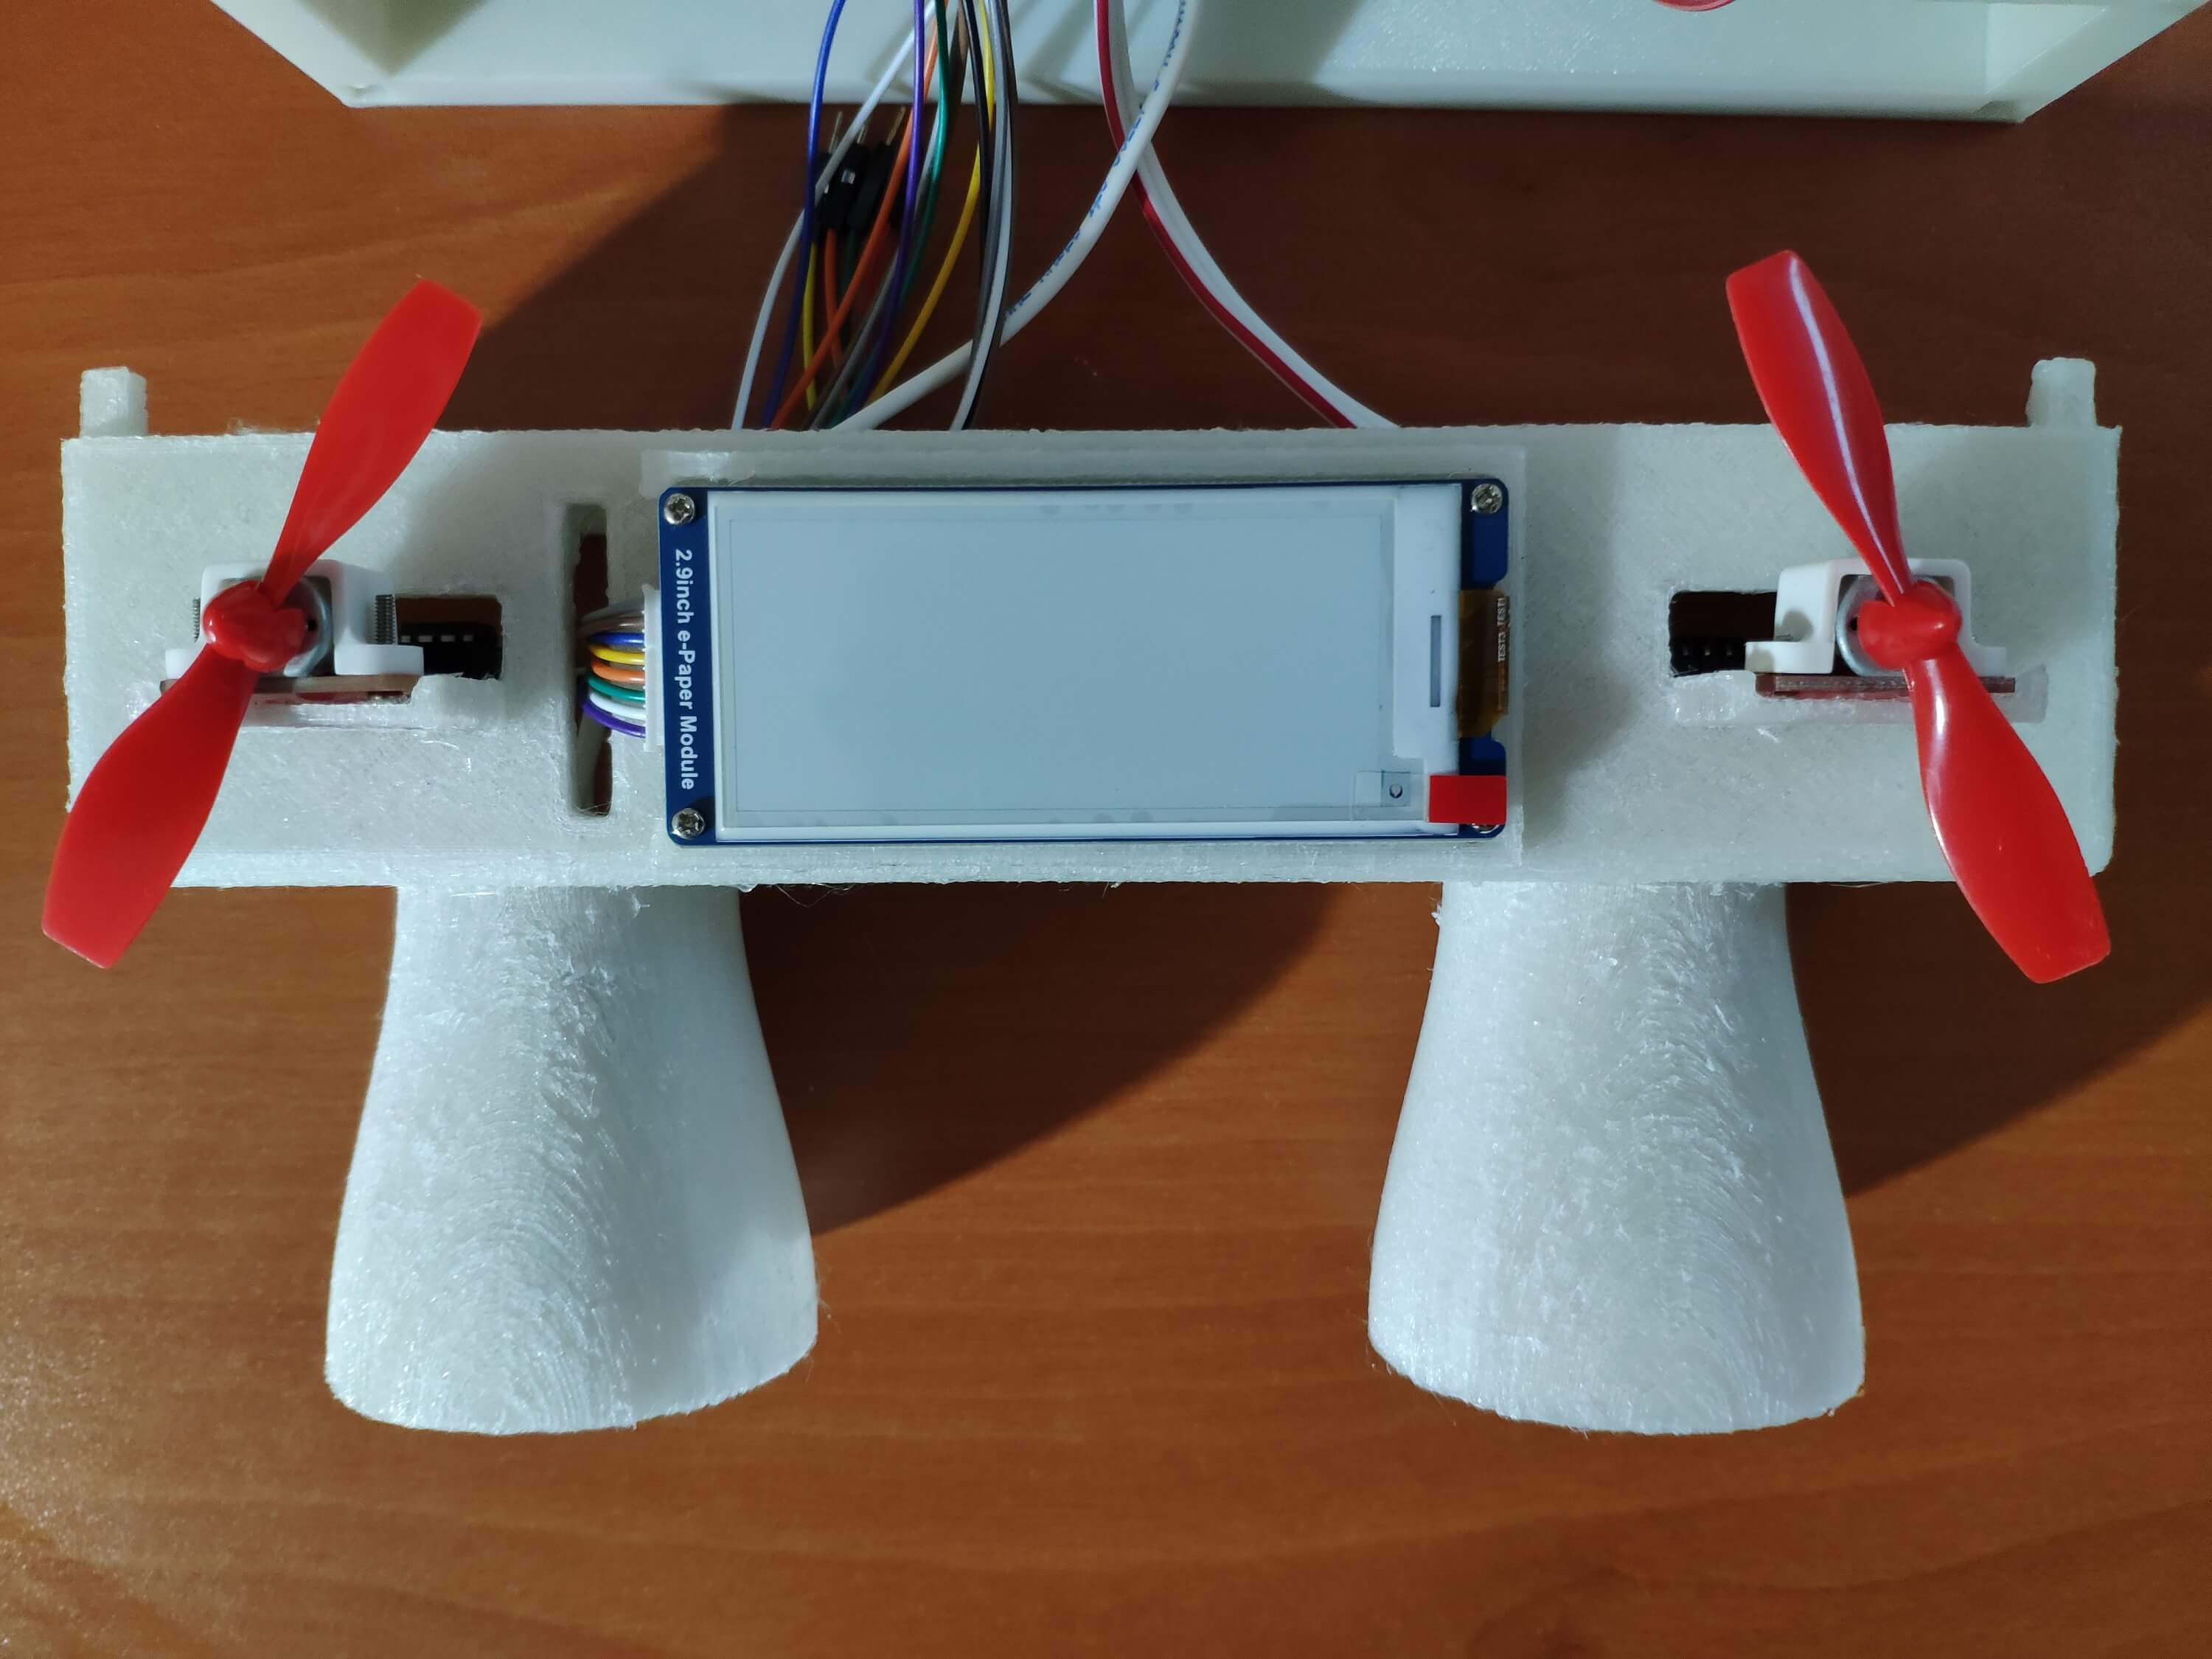
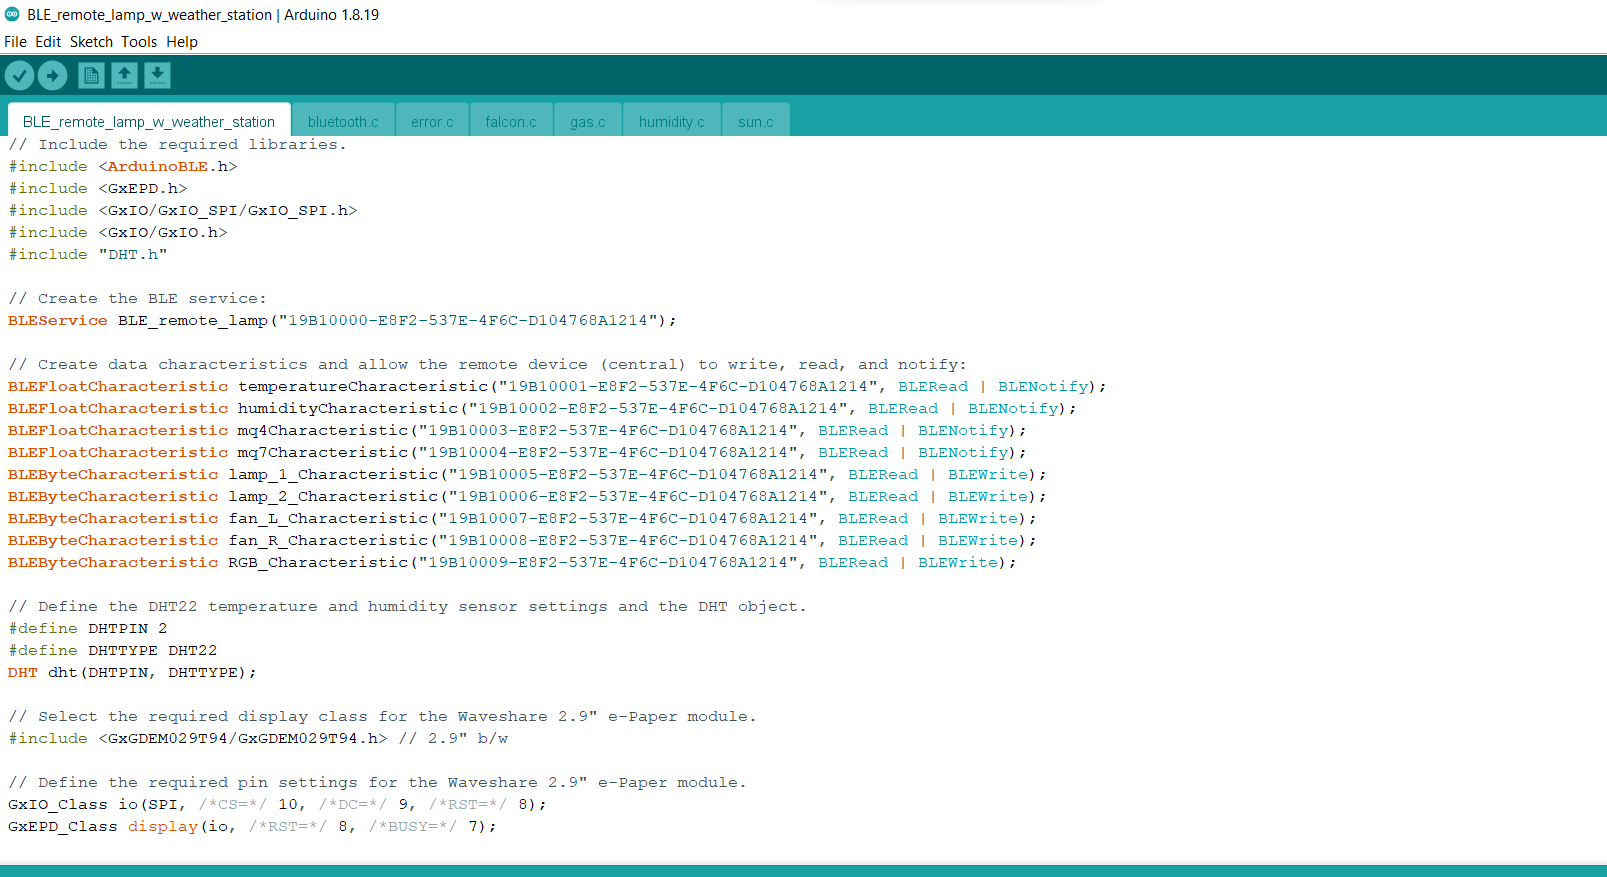
To remove the redundant HC-06 Bluetooth module and be able to utilize BLE (Bluetooth Low Energy), I decided to employ an Arduino Nano 33 BLE to build my new room lighting system. In addition to adjusting room lighting, I wanted this project to report weather and gas information, so I added an MQ-4 air quality sensor, an MQ-7 air quality sensor, and a DHT22 temperature and humidity sensor. Also, I added a buzzer to notify the user of a potential gas leak.
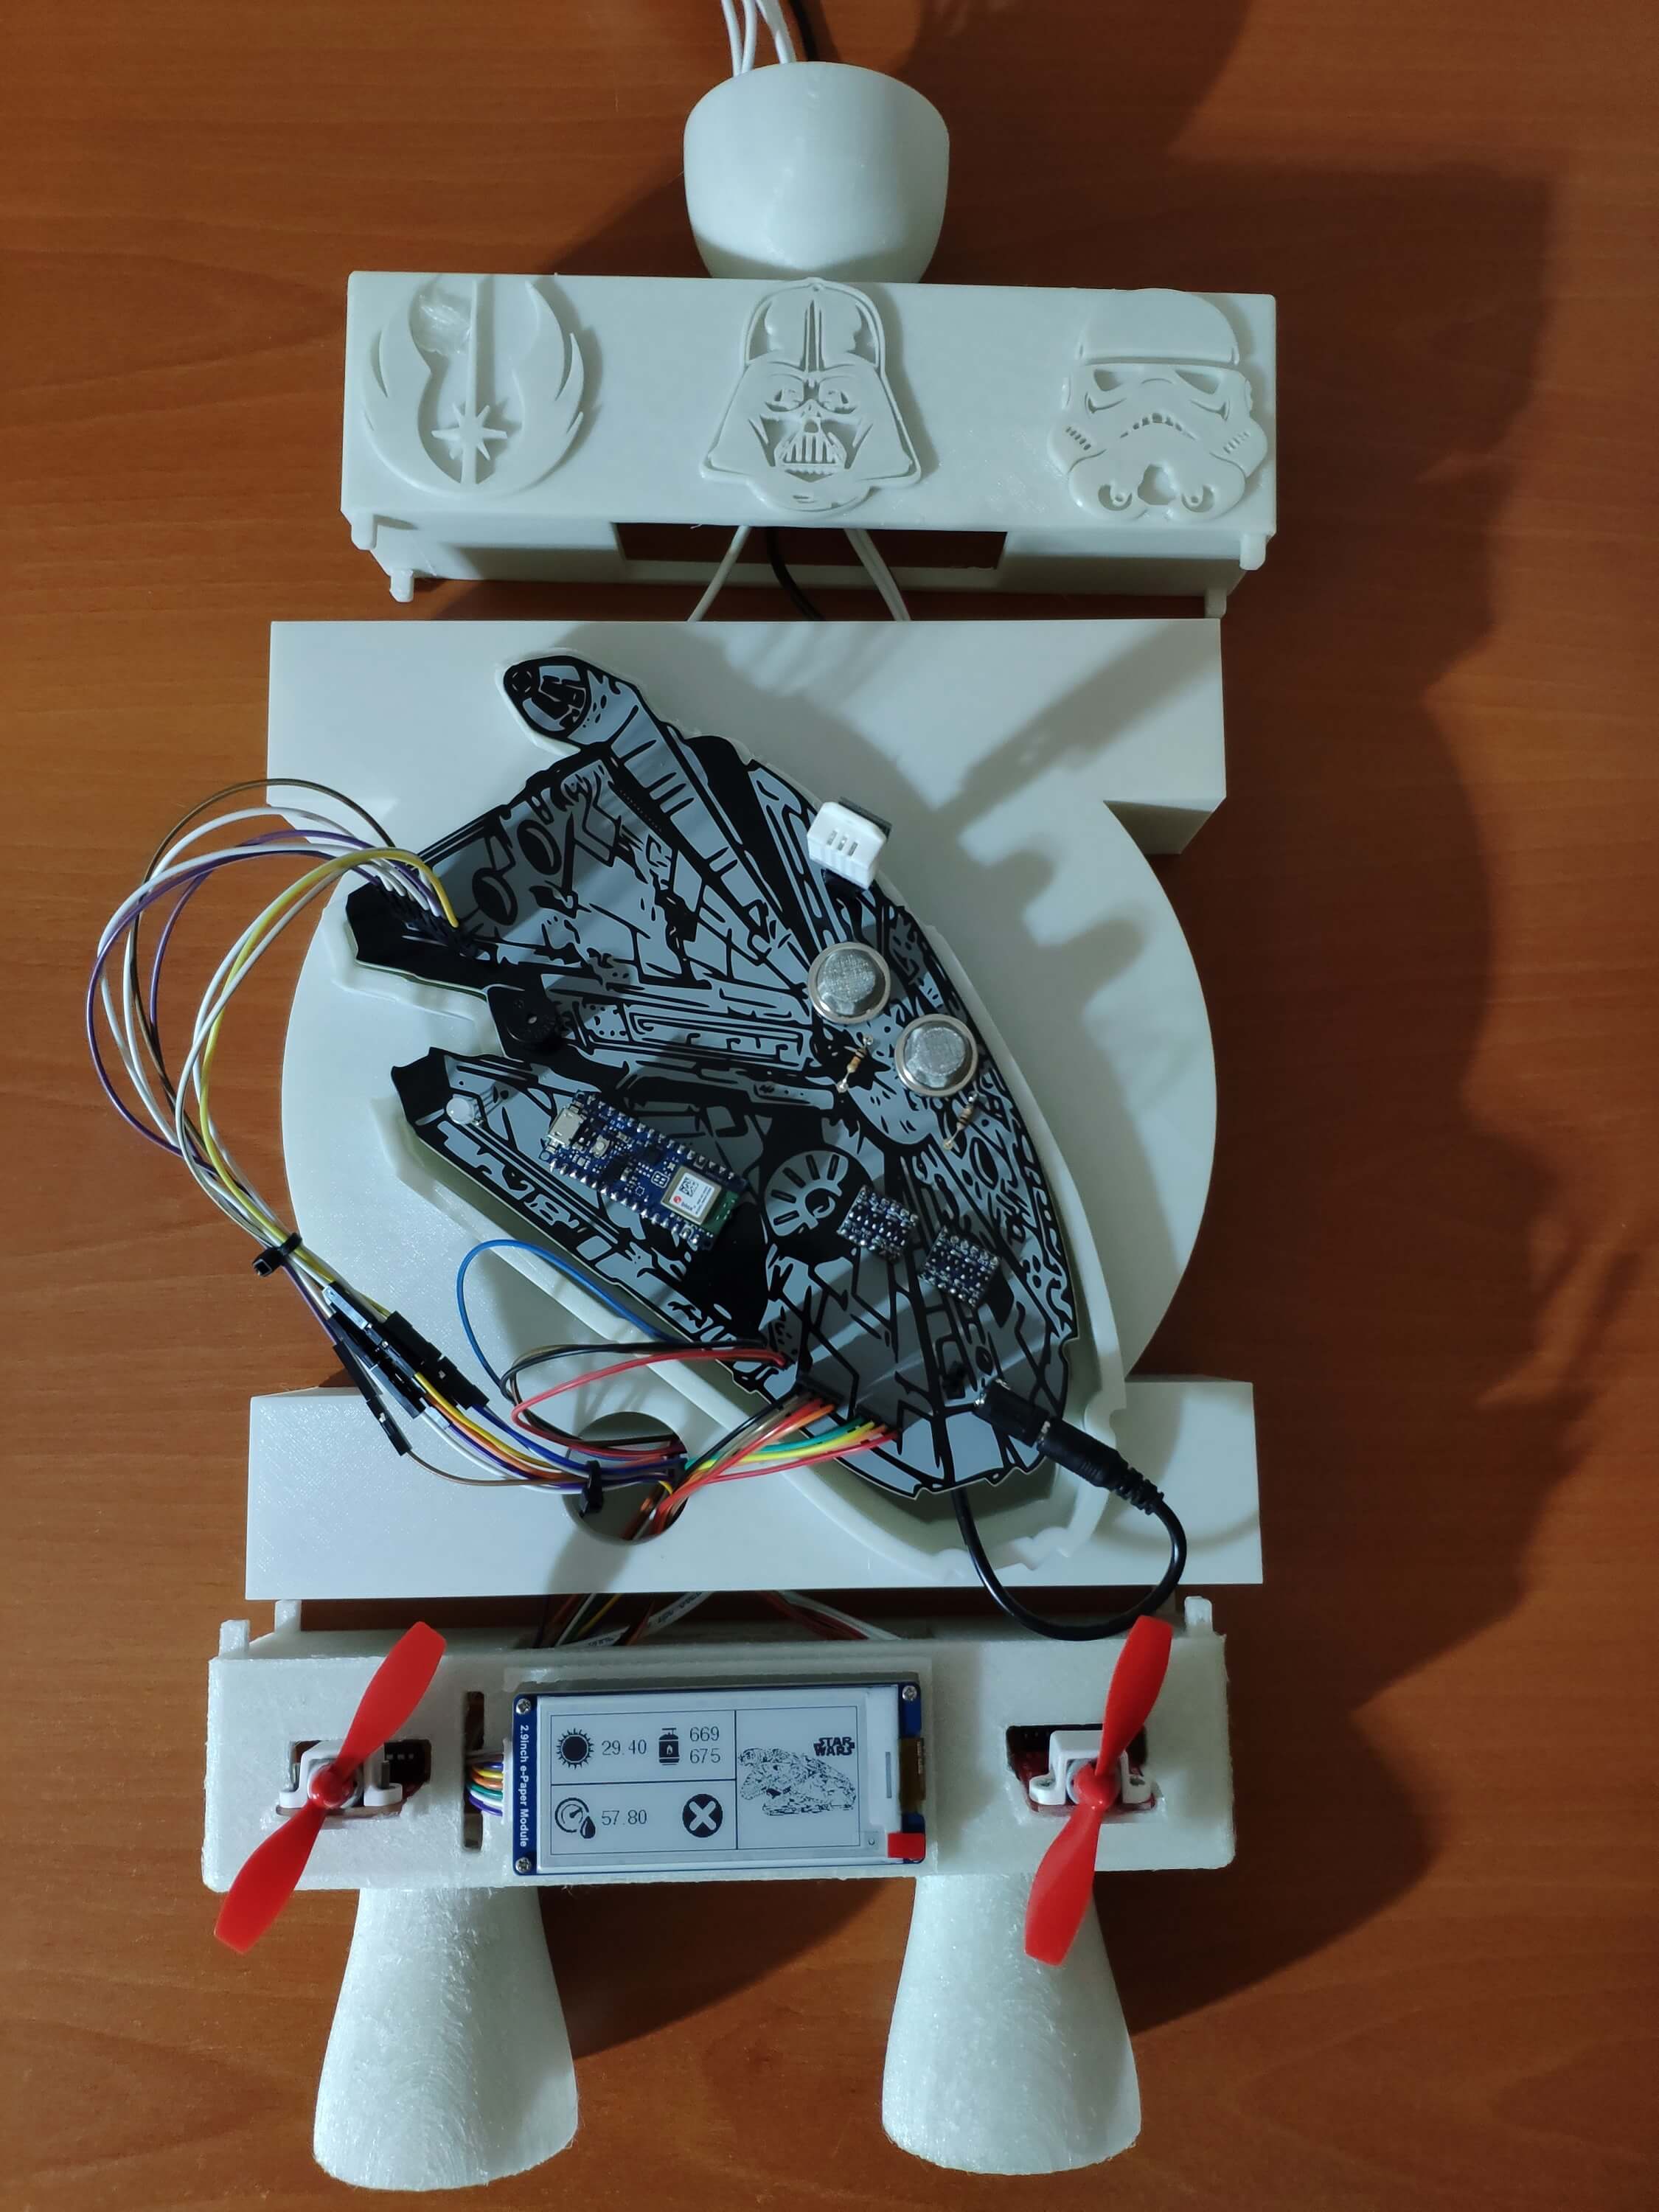
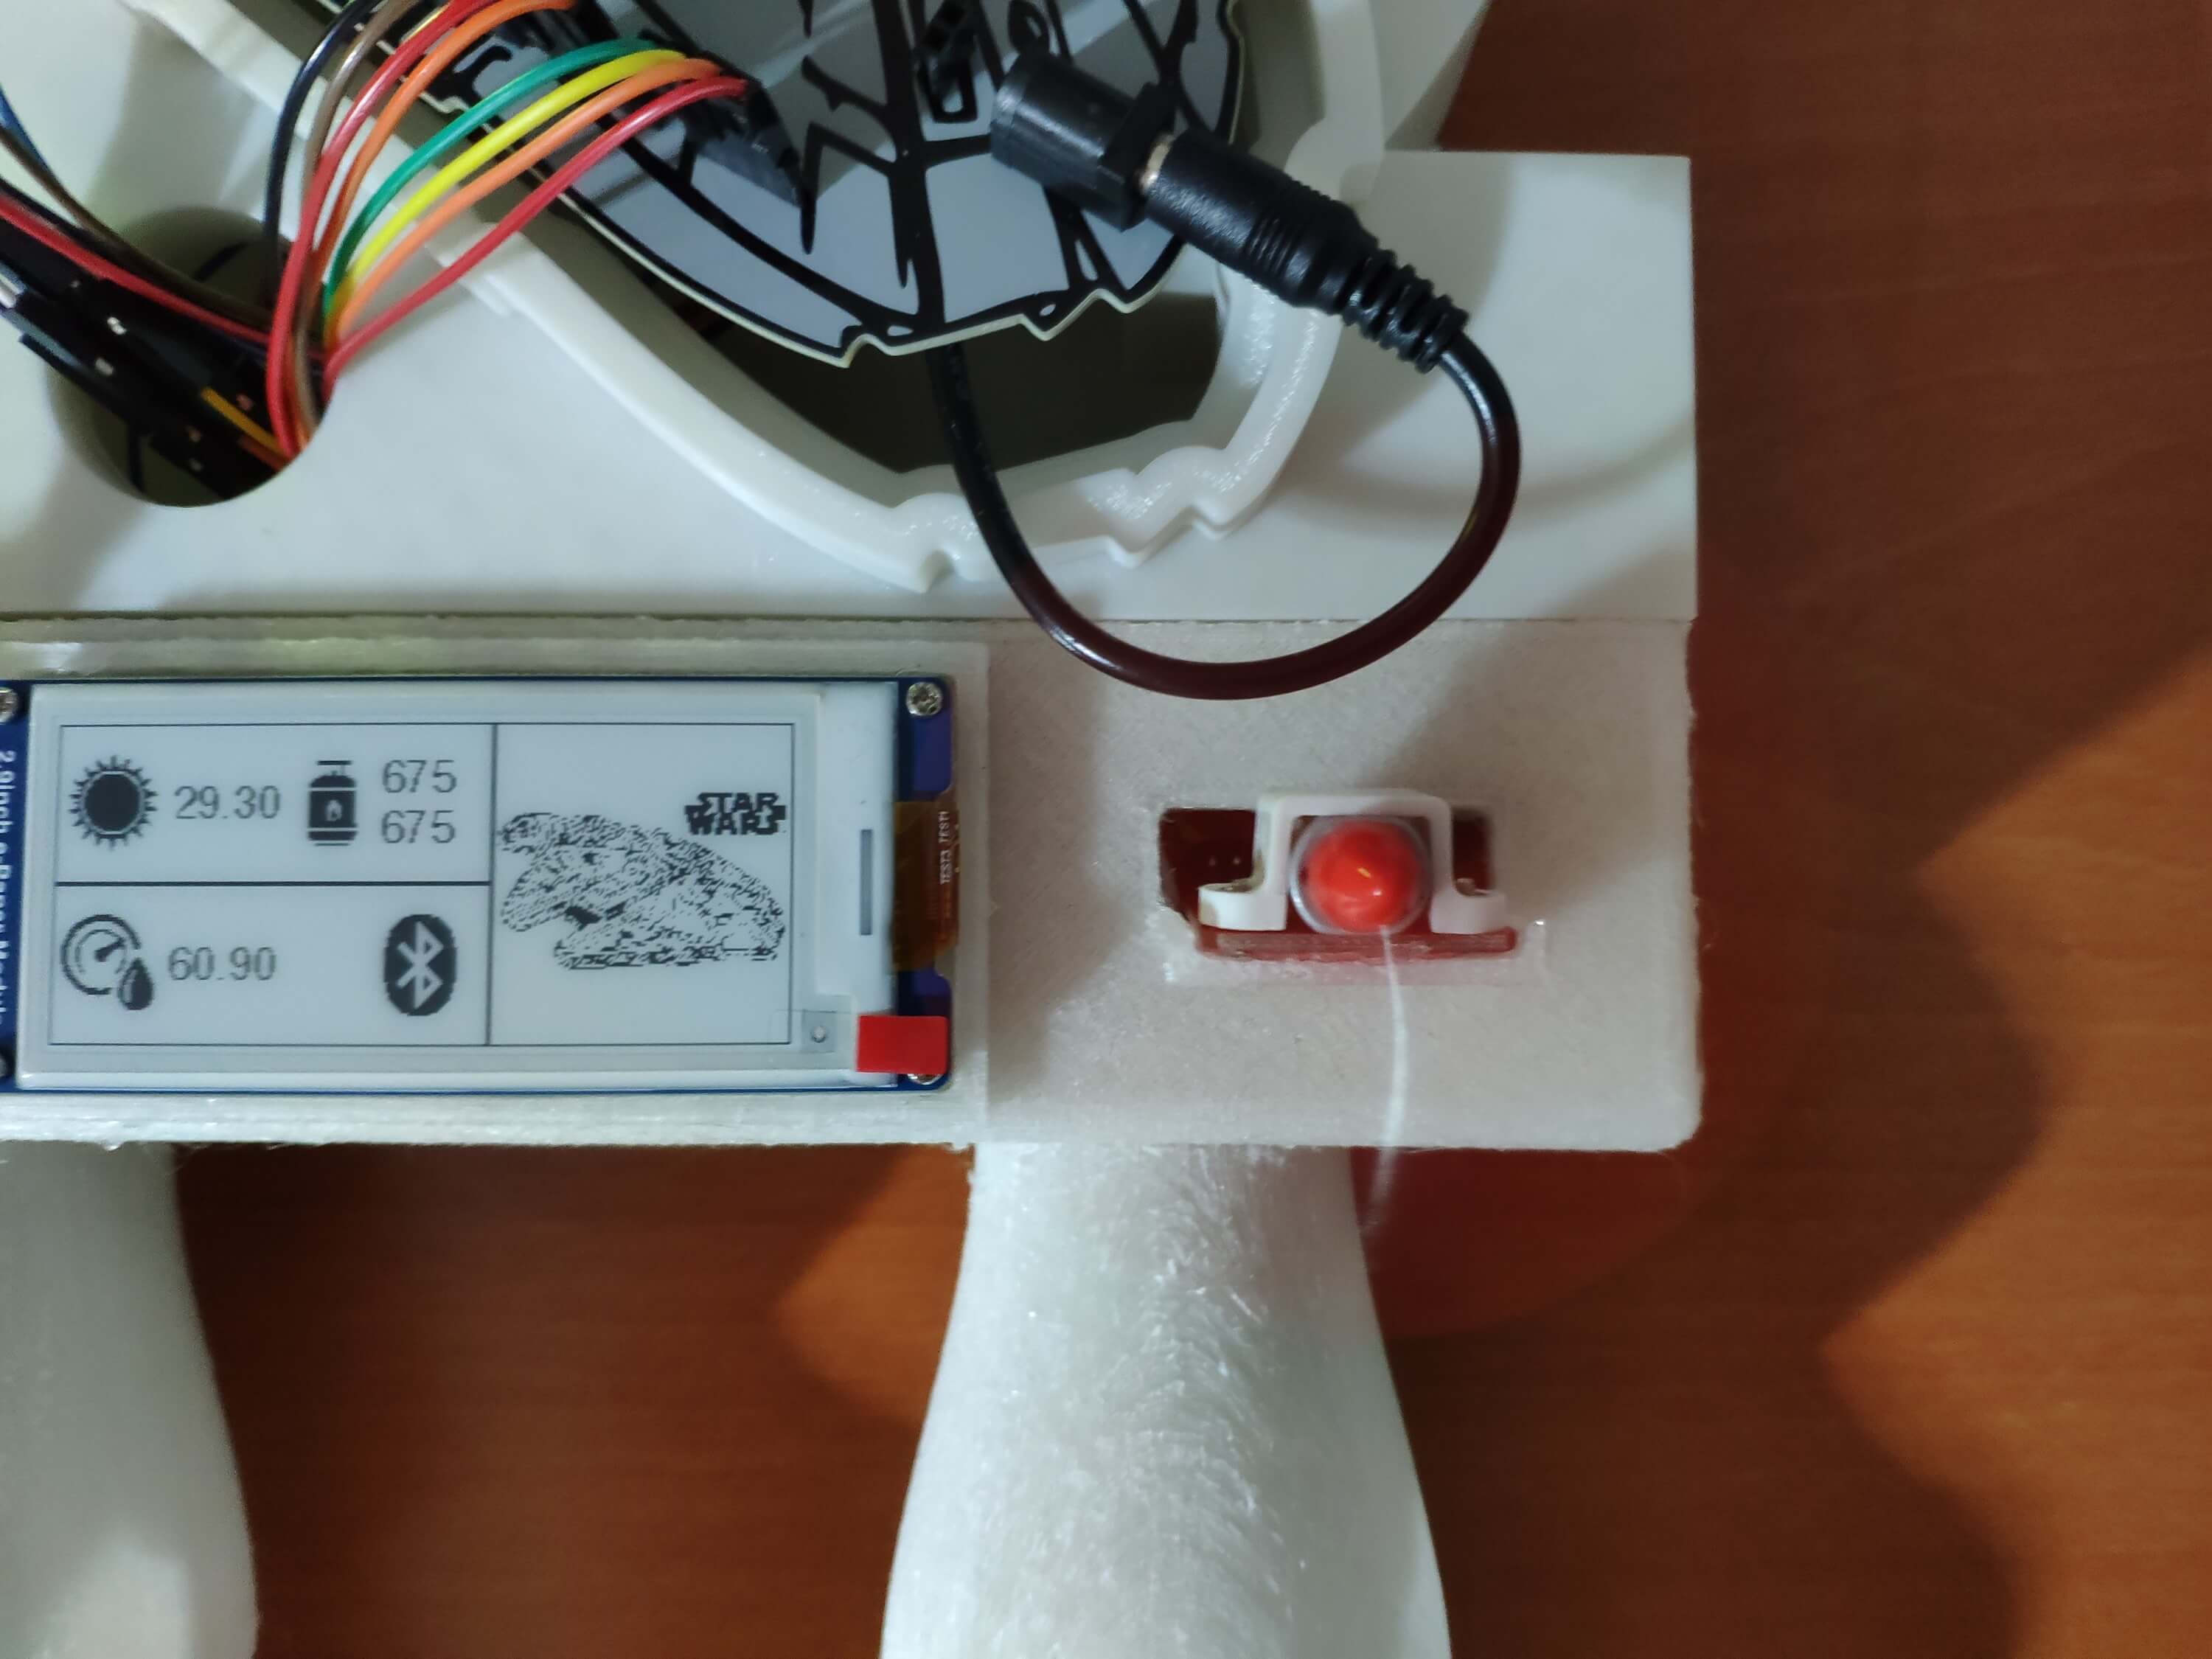
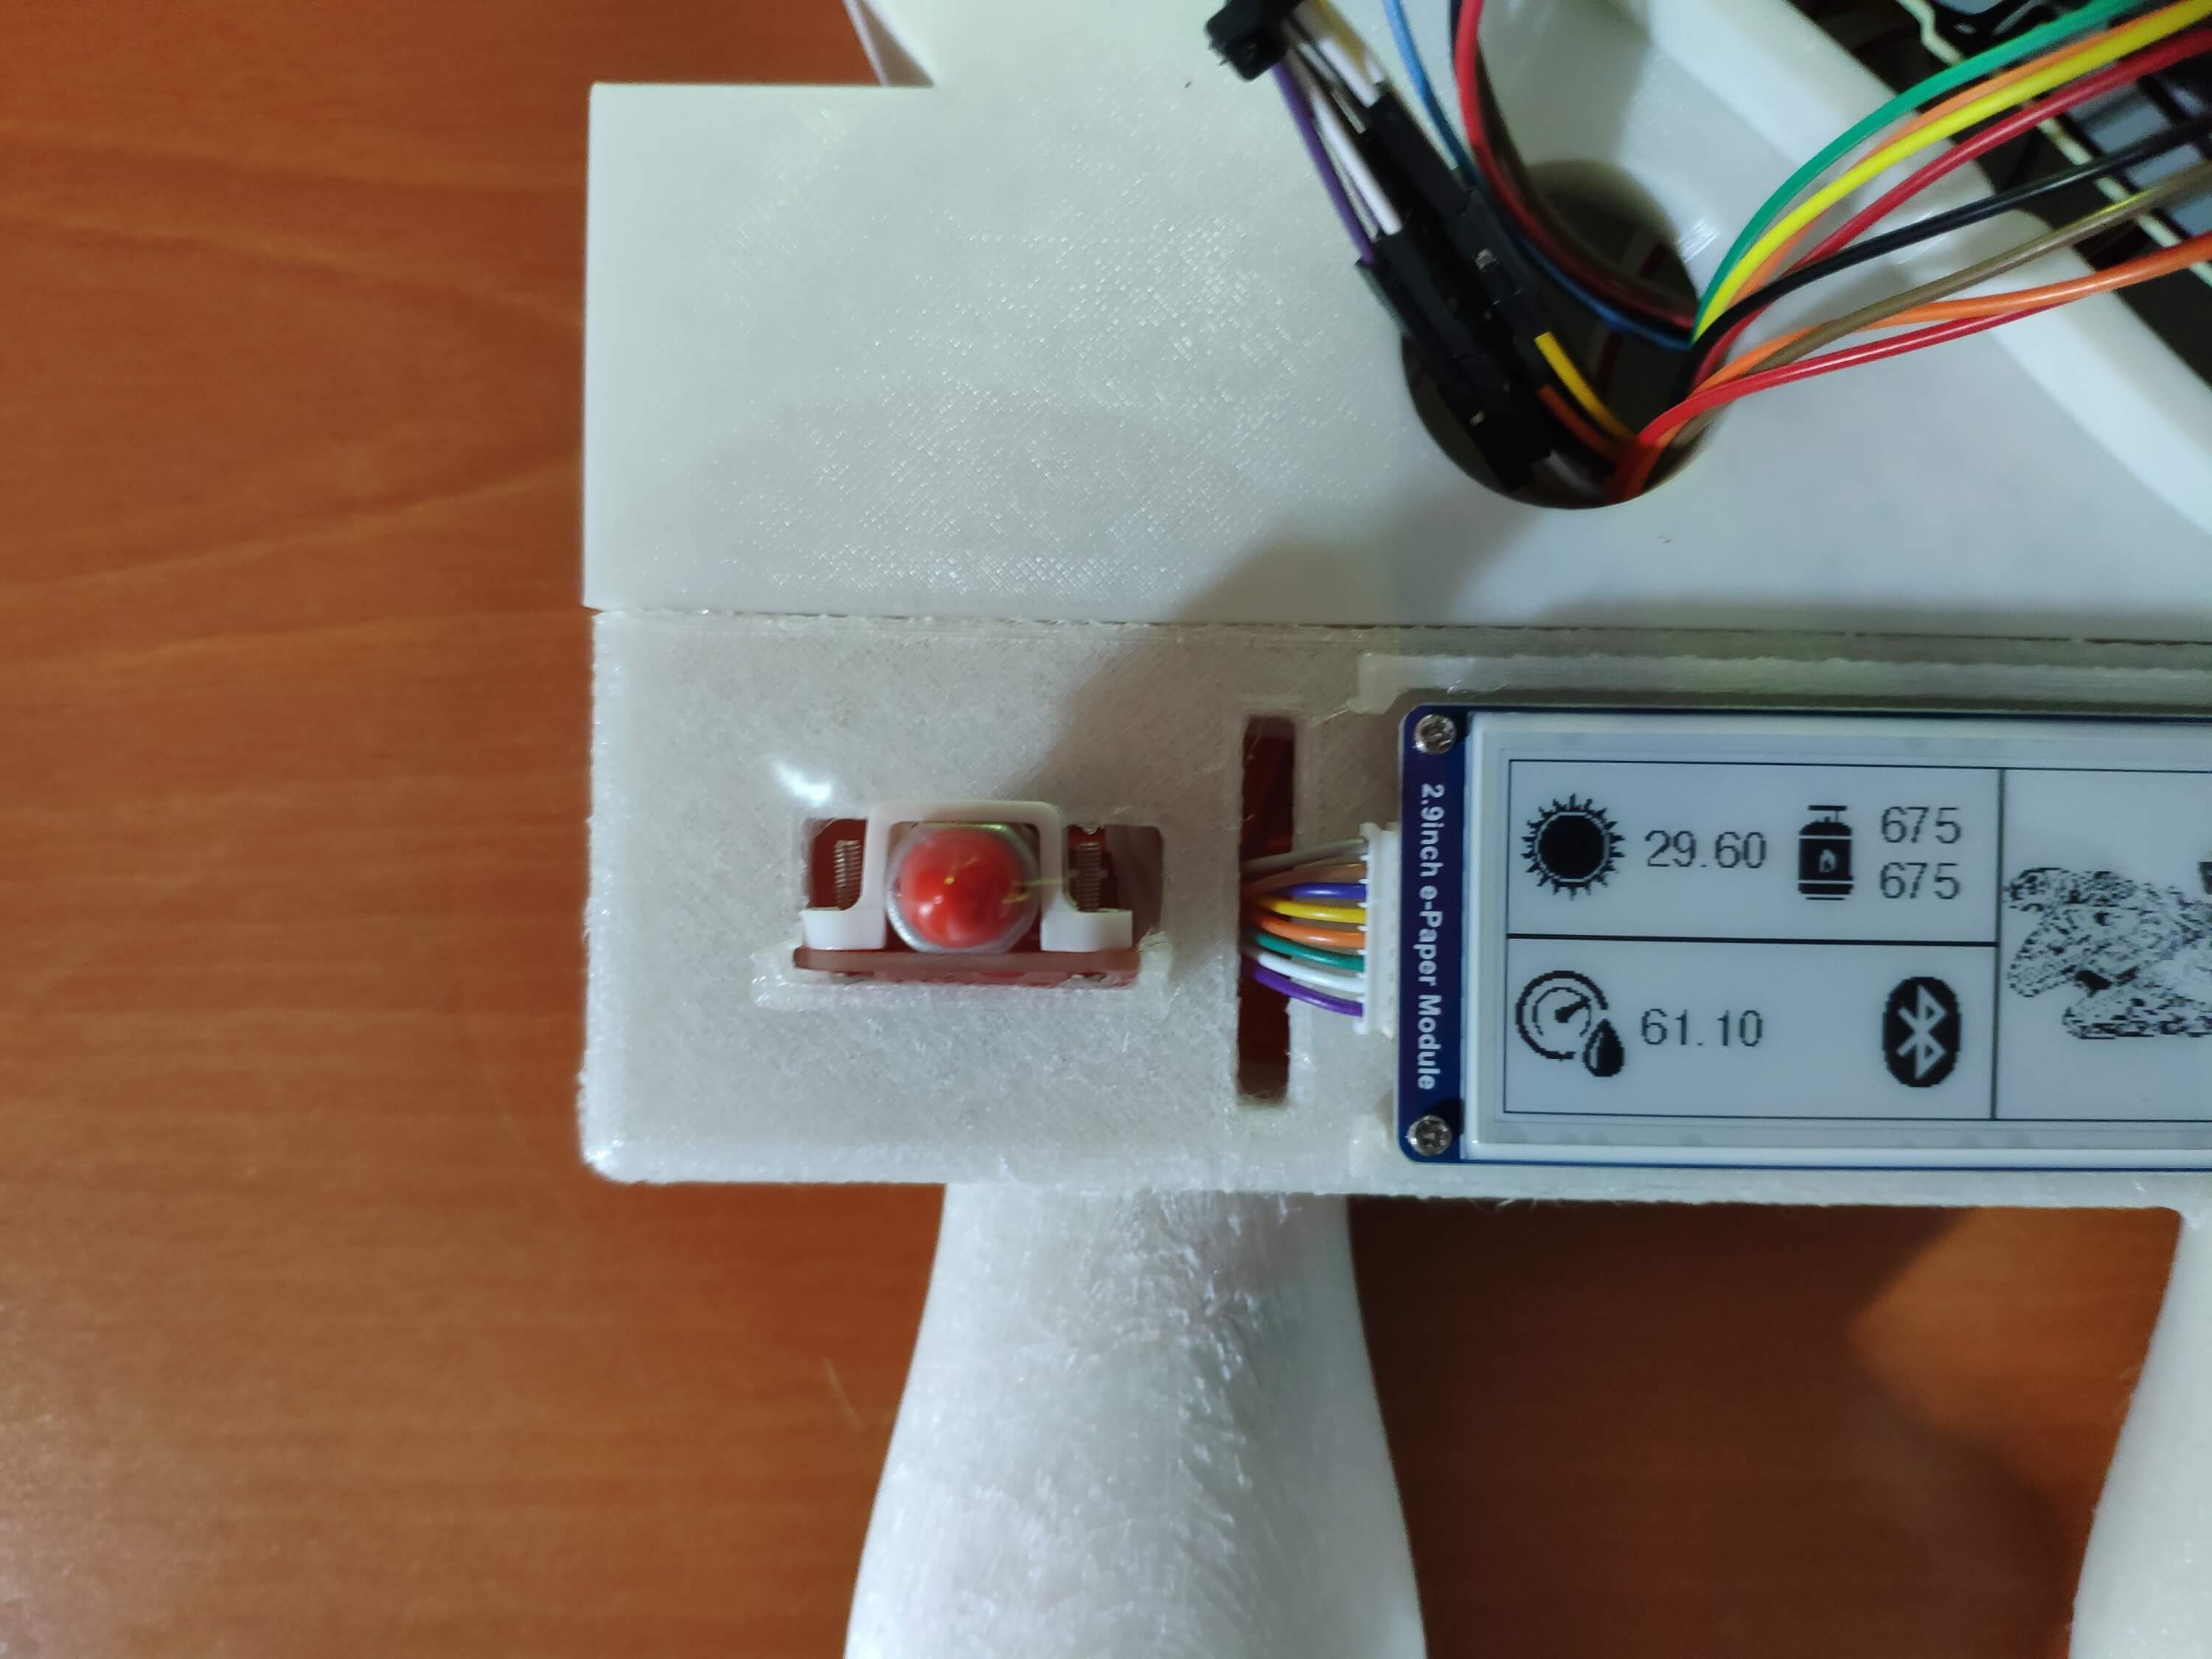
I decided to add a screen to display the BLE connection status and the collected weather and gas information. However, I realized a disturbing design flaw while using my previous lighting system: Looking directly at the LCD screen on the remote lamp induced eye fatigue and eyestrain, especially after sunset. Hence, I employed a Waveshare 2.9" e-Paper module instead of using an LCD or OLED screen as I did in my previous project.
Then, I developed a complementing Android application from scratch to adjust lighting settings, control integrated L9110 fan motors, and get informed of the collected weather and gas information over BLE. The Android application lets the user:
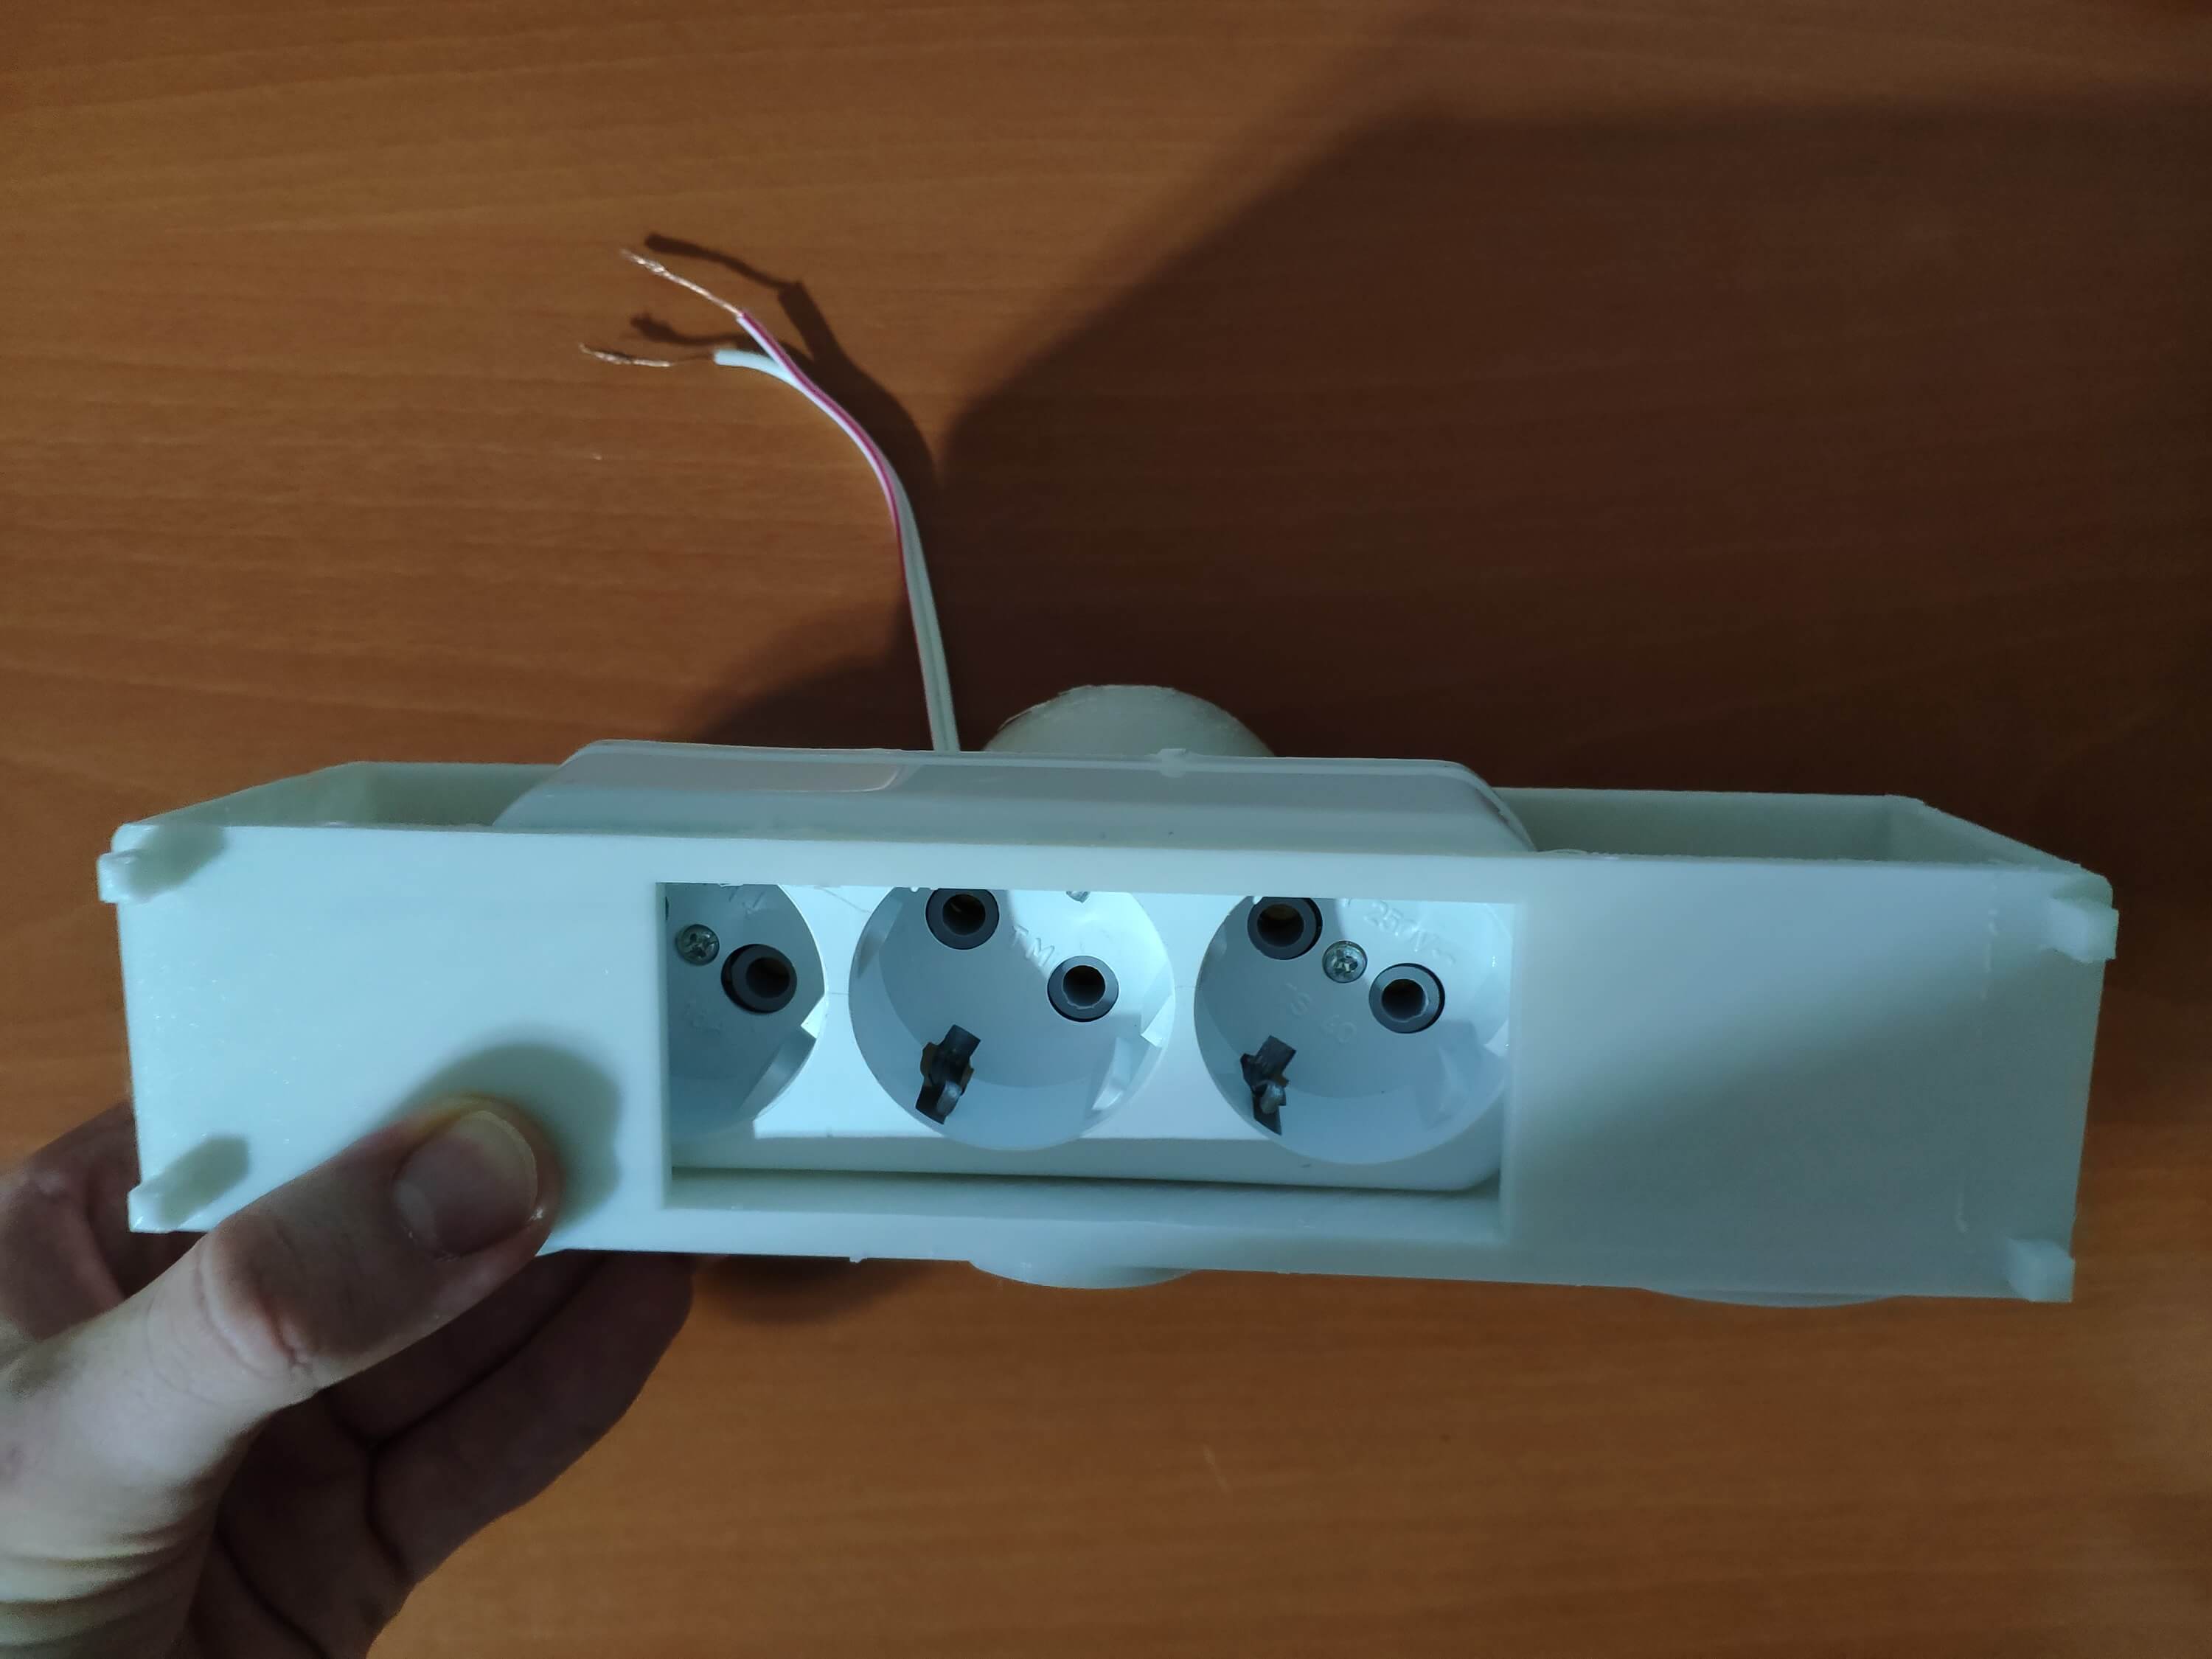
turn on or off two light bulbs via a 2-way relay,
make the integrated fan motors turn right, left, or stop,
adjust the built-in RGB LED color.
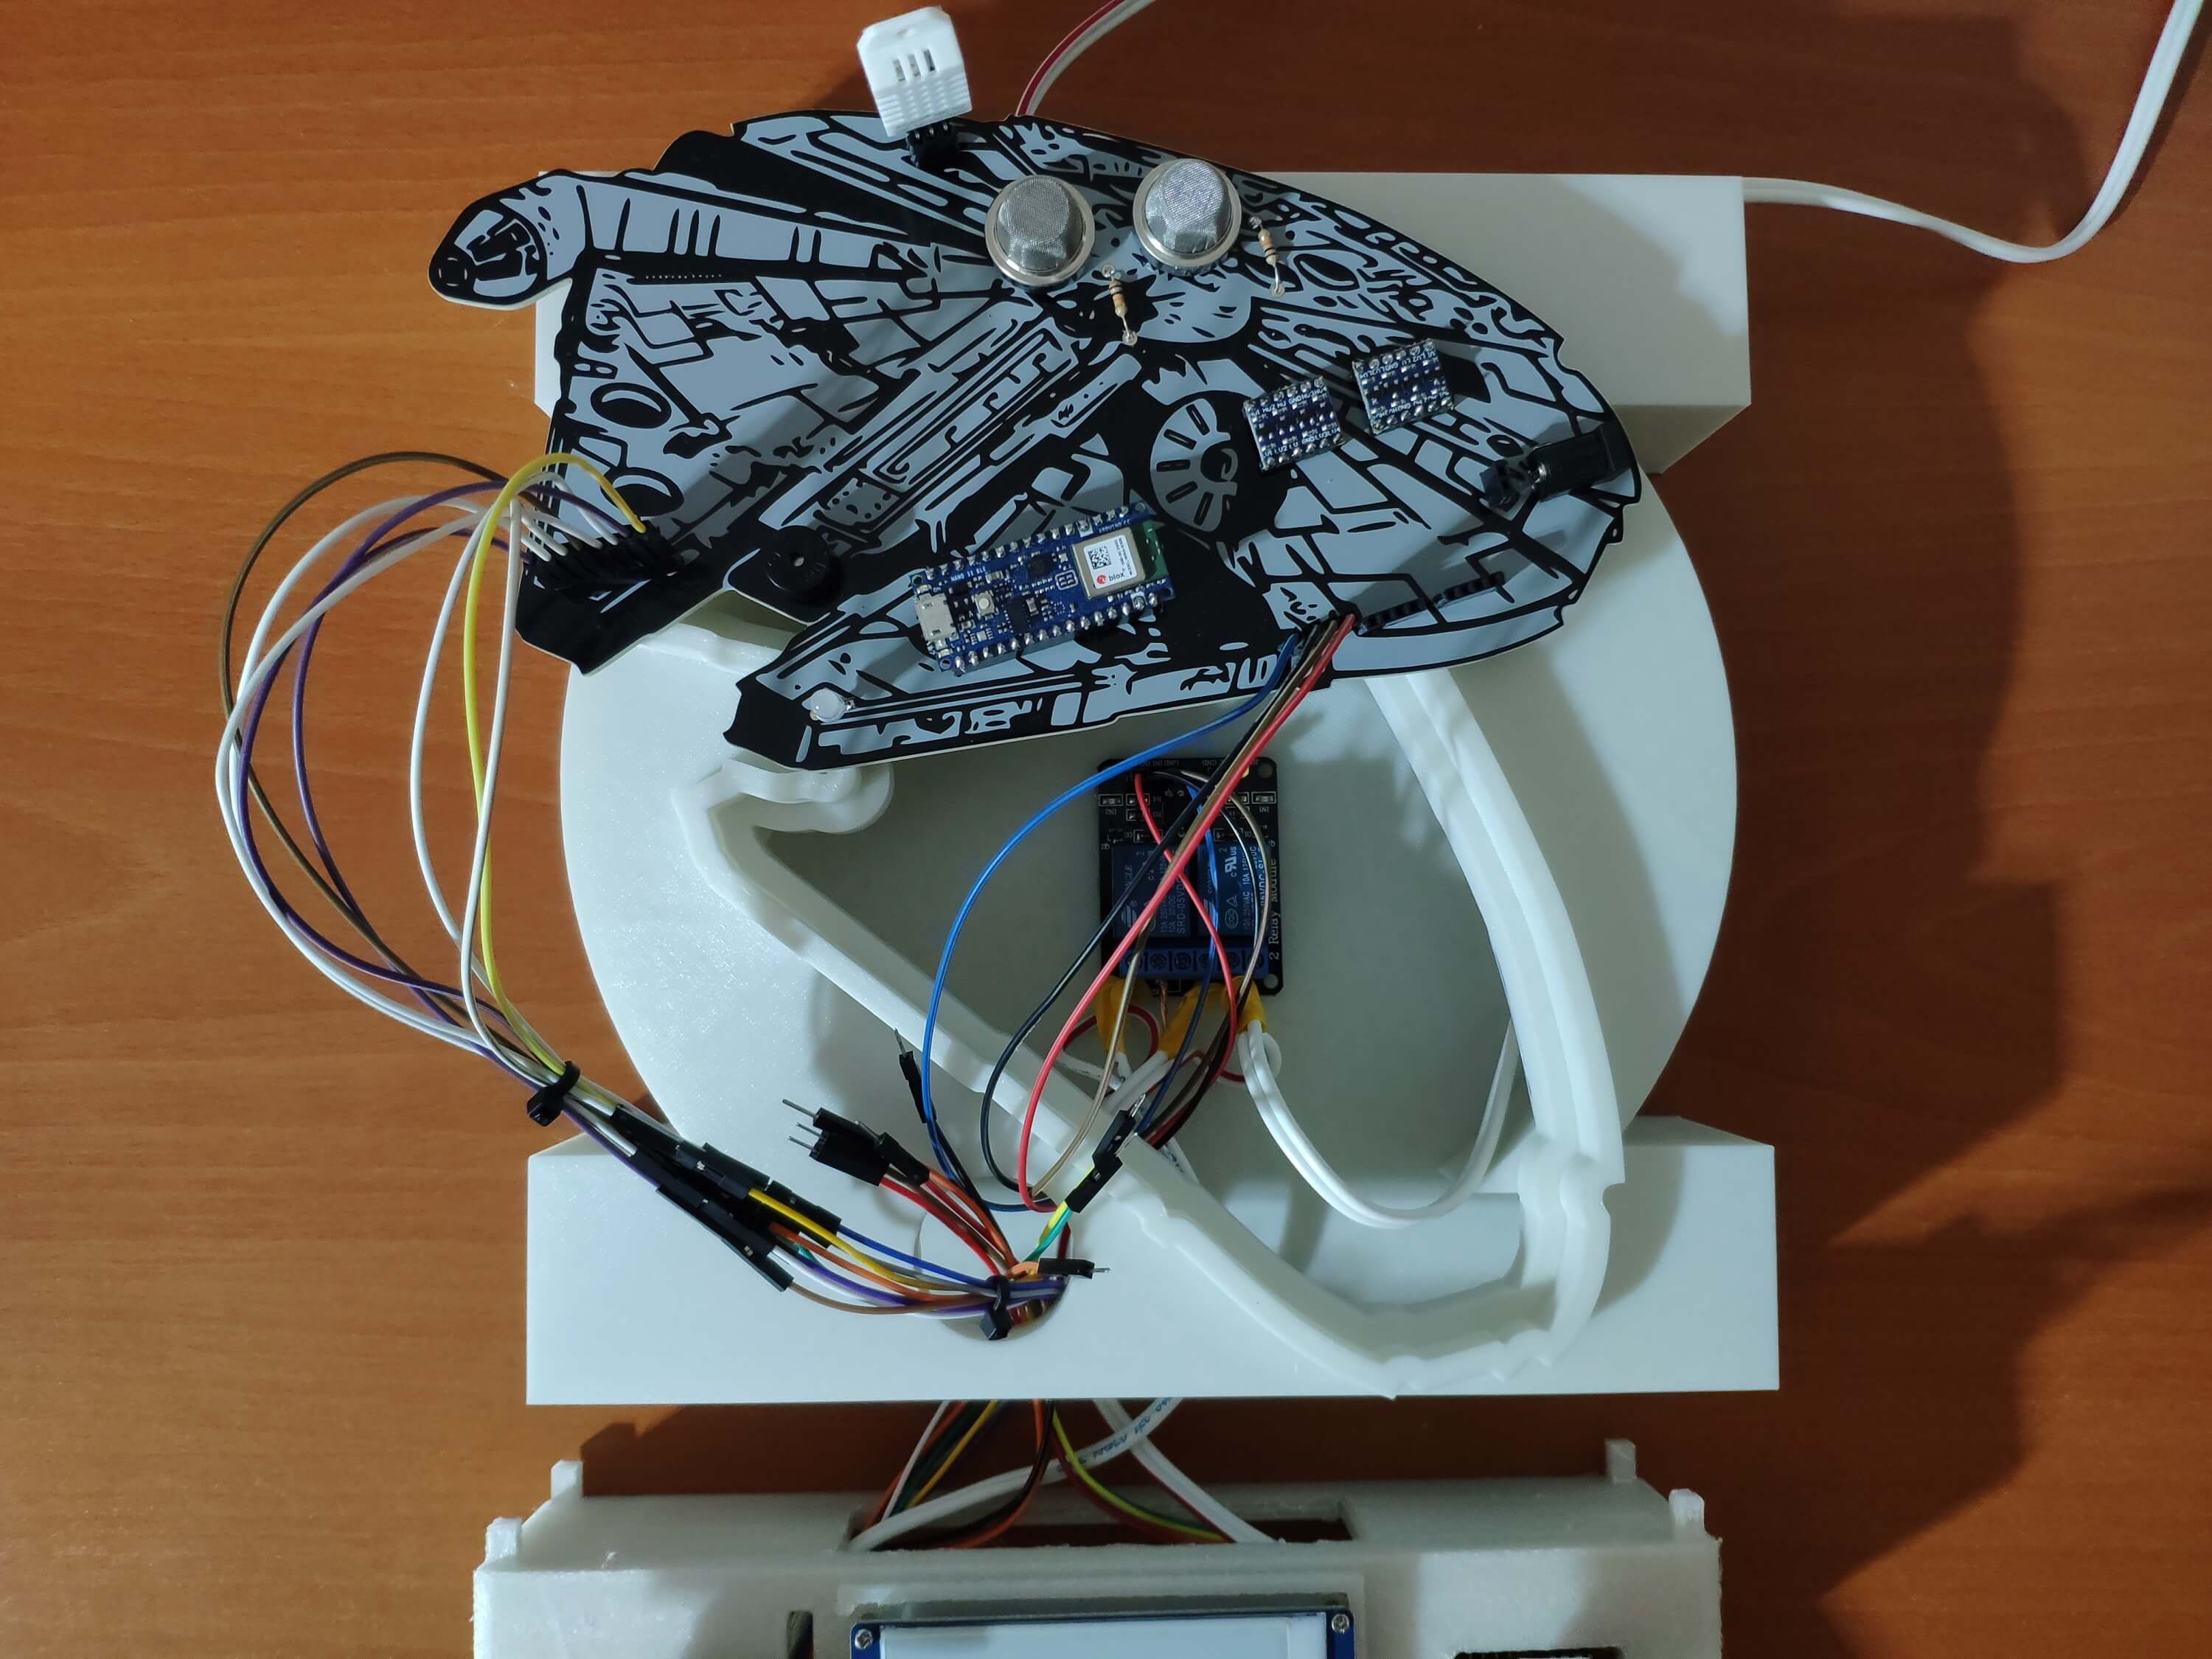
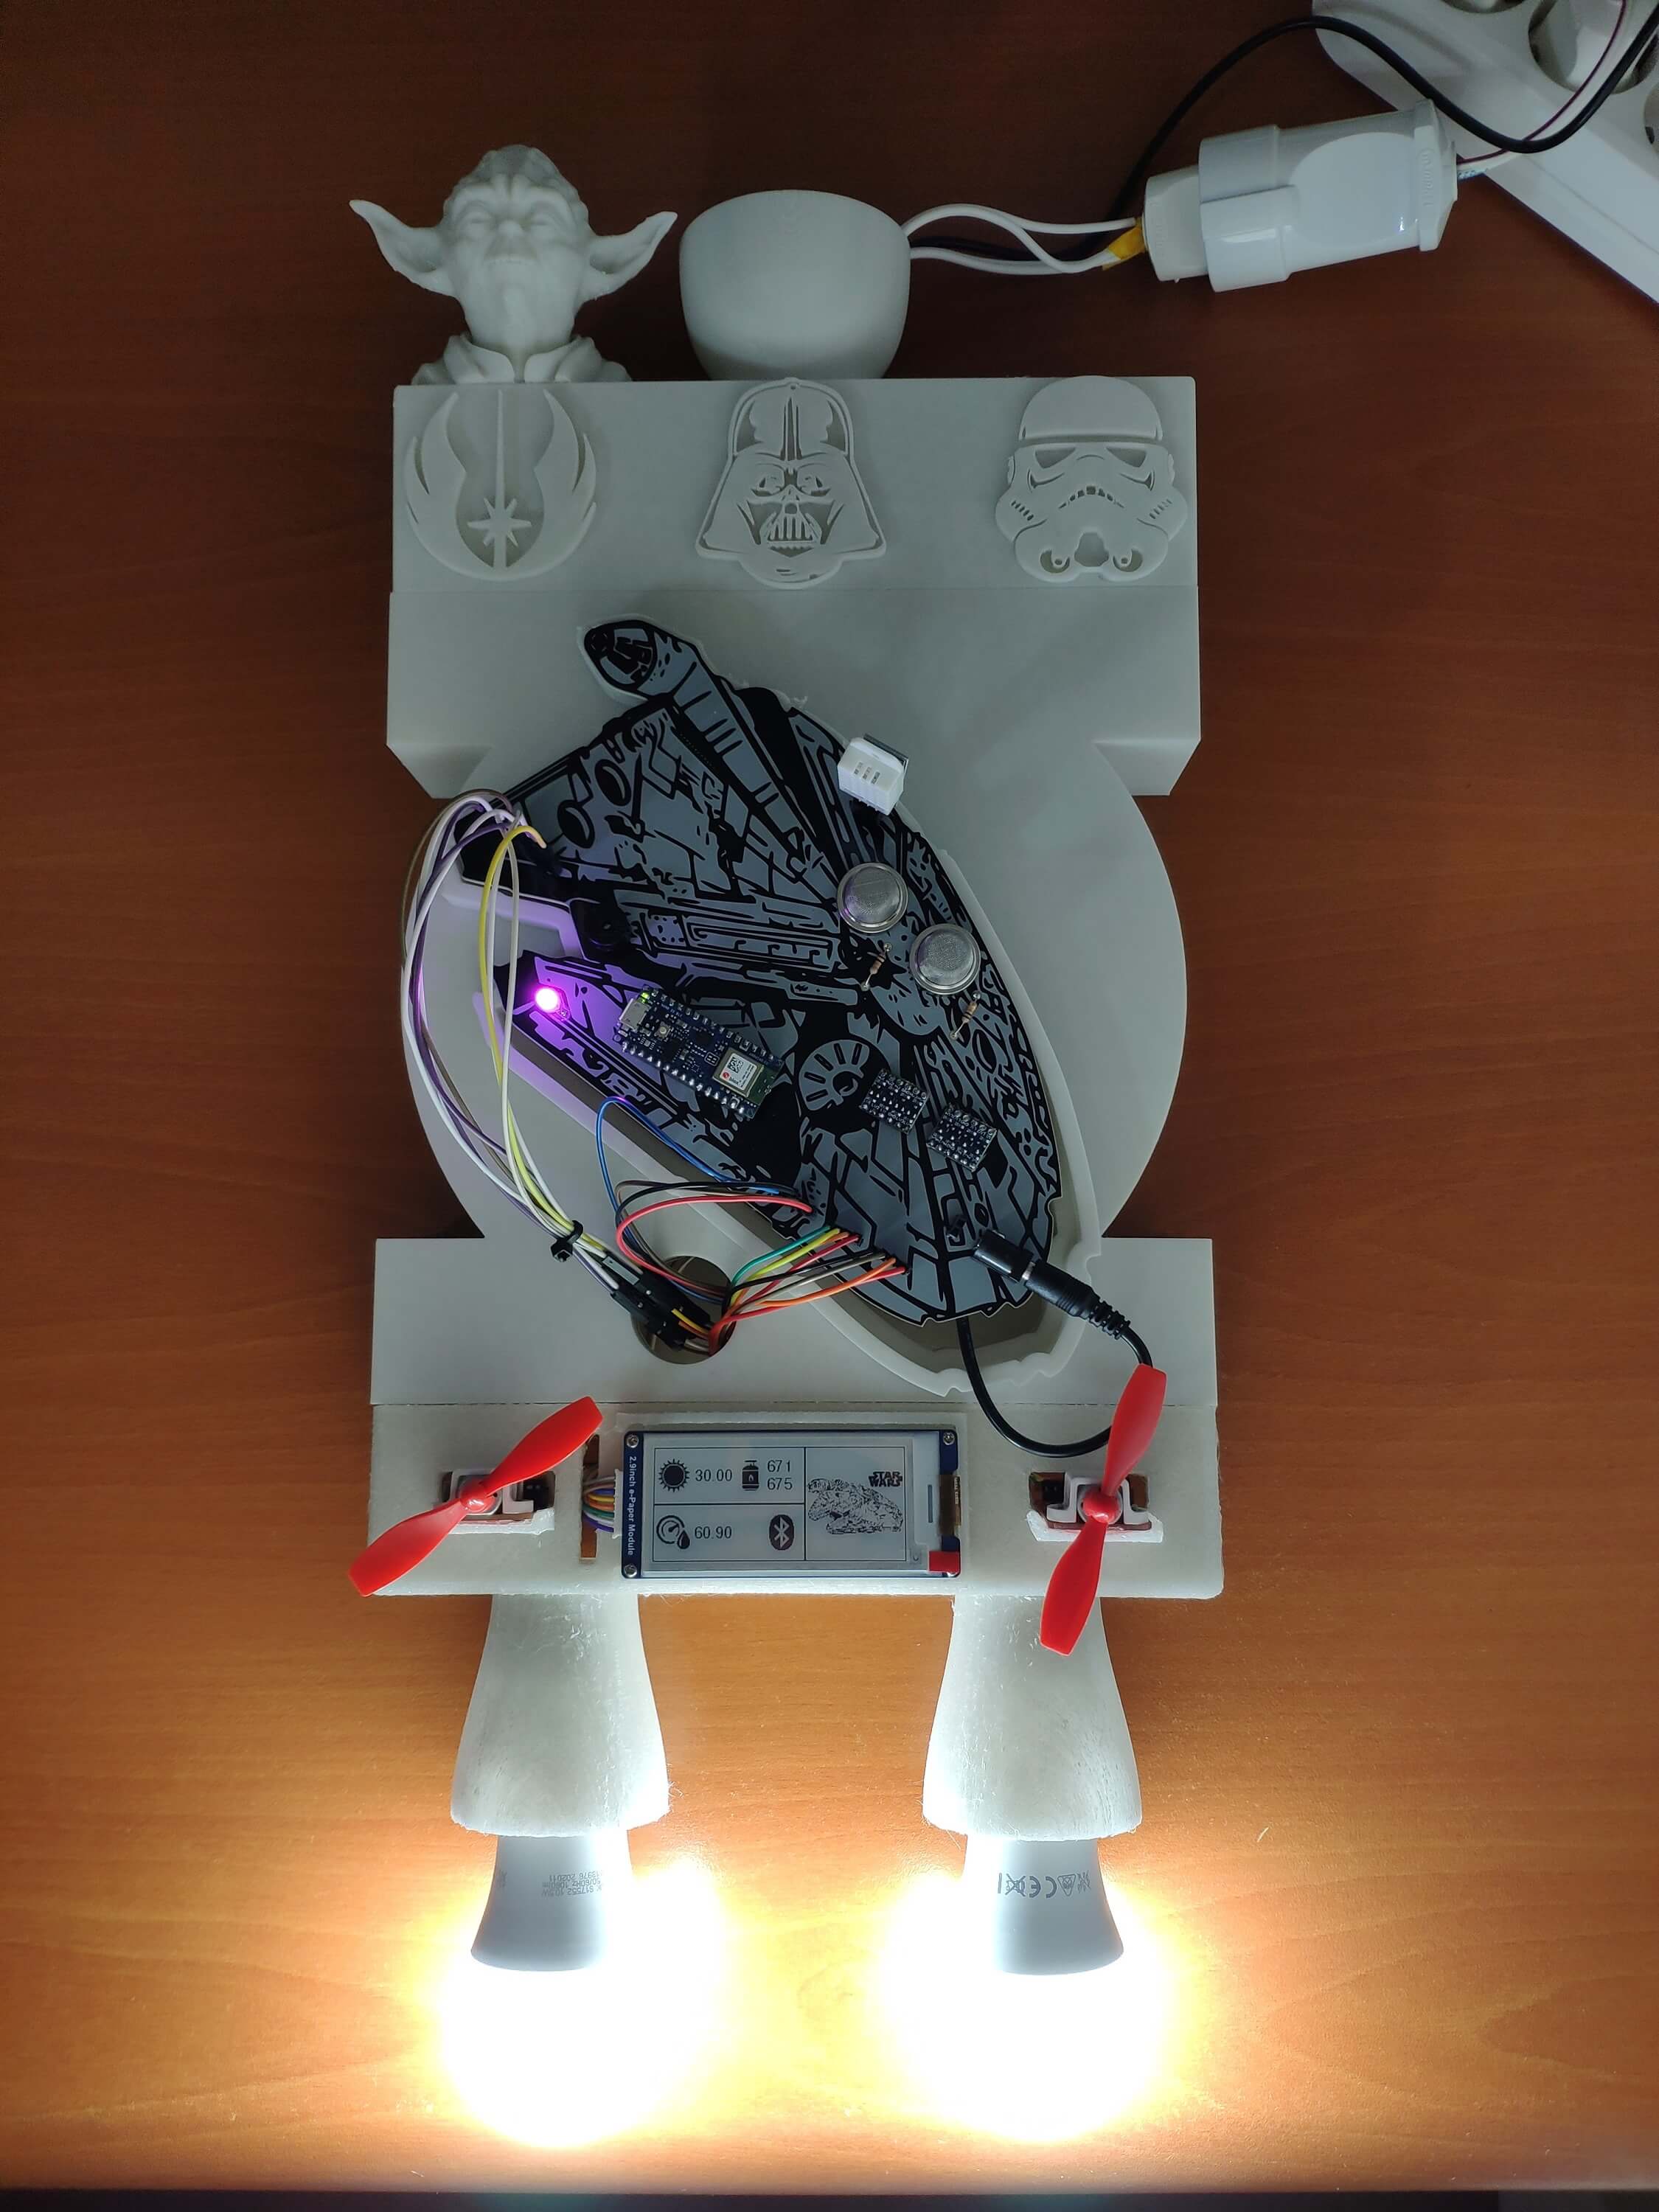
Due to my predilection for Star Wars, I based my entire project theme on Star Wars characters and airborne vehicles: Millennium Falcon, AT-AT, Yoda, Darth Vader, and Stormtrooper.
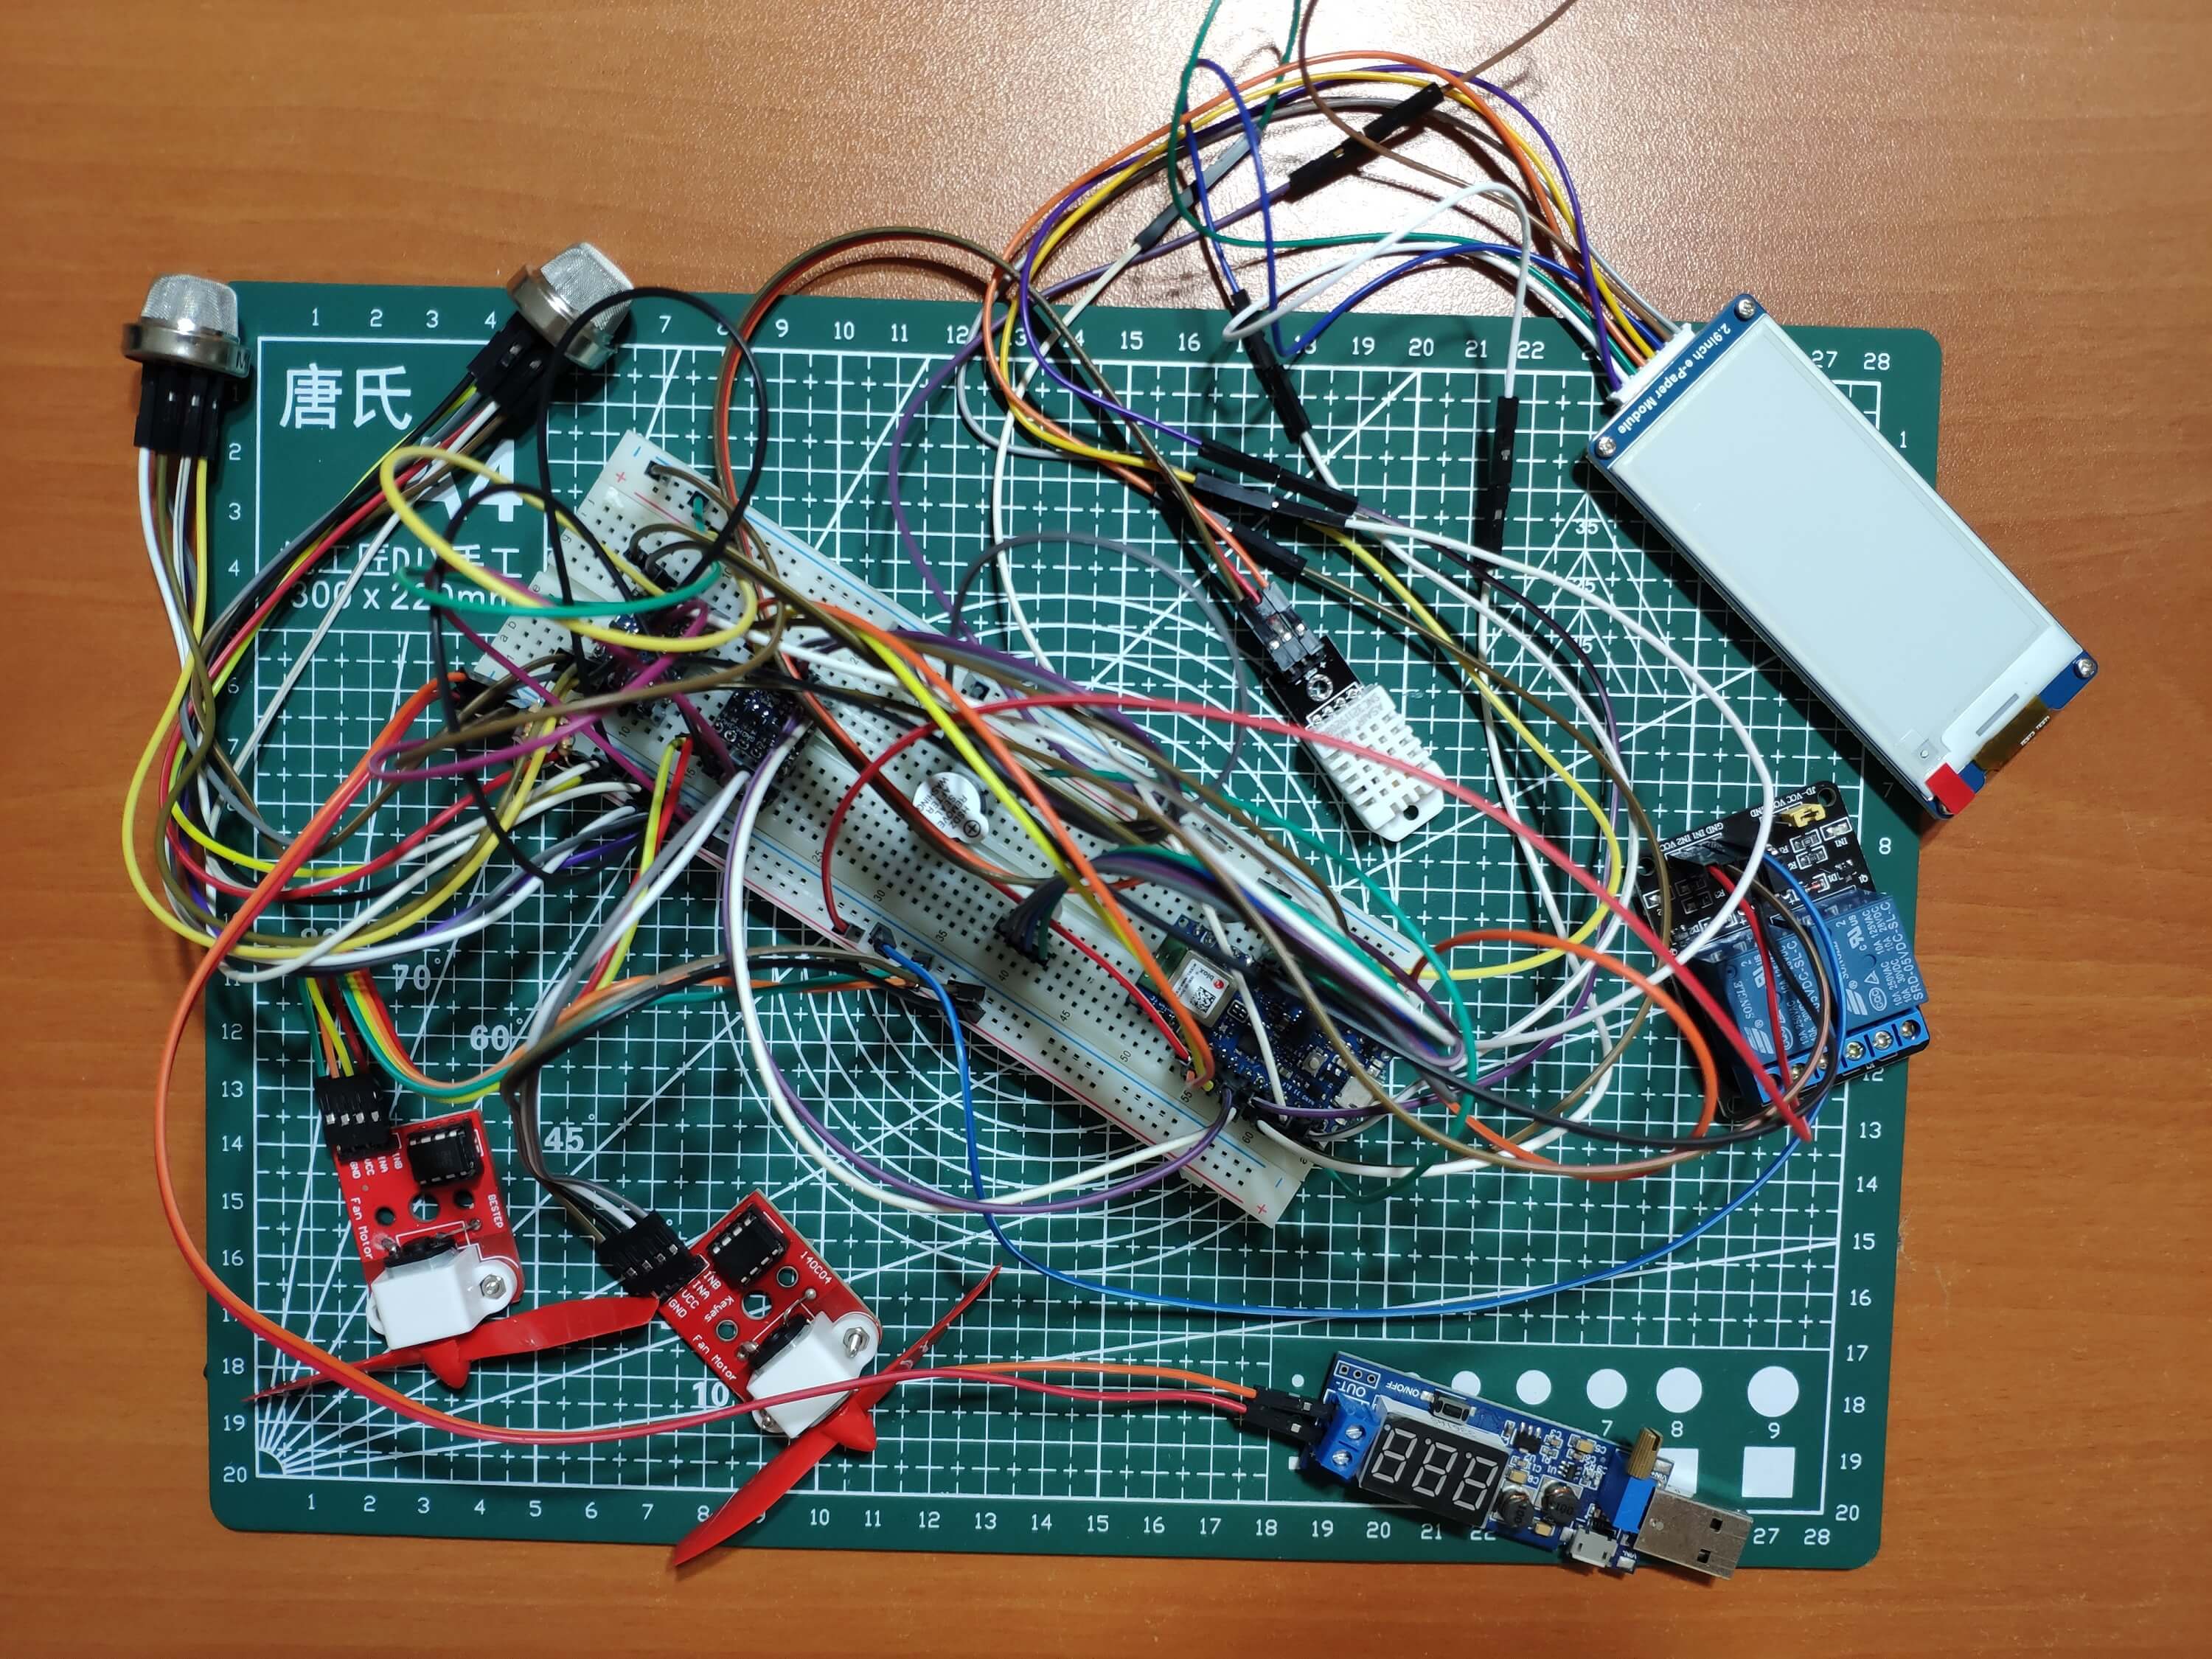
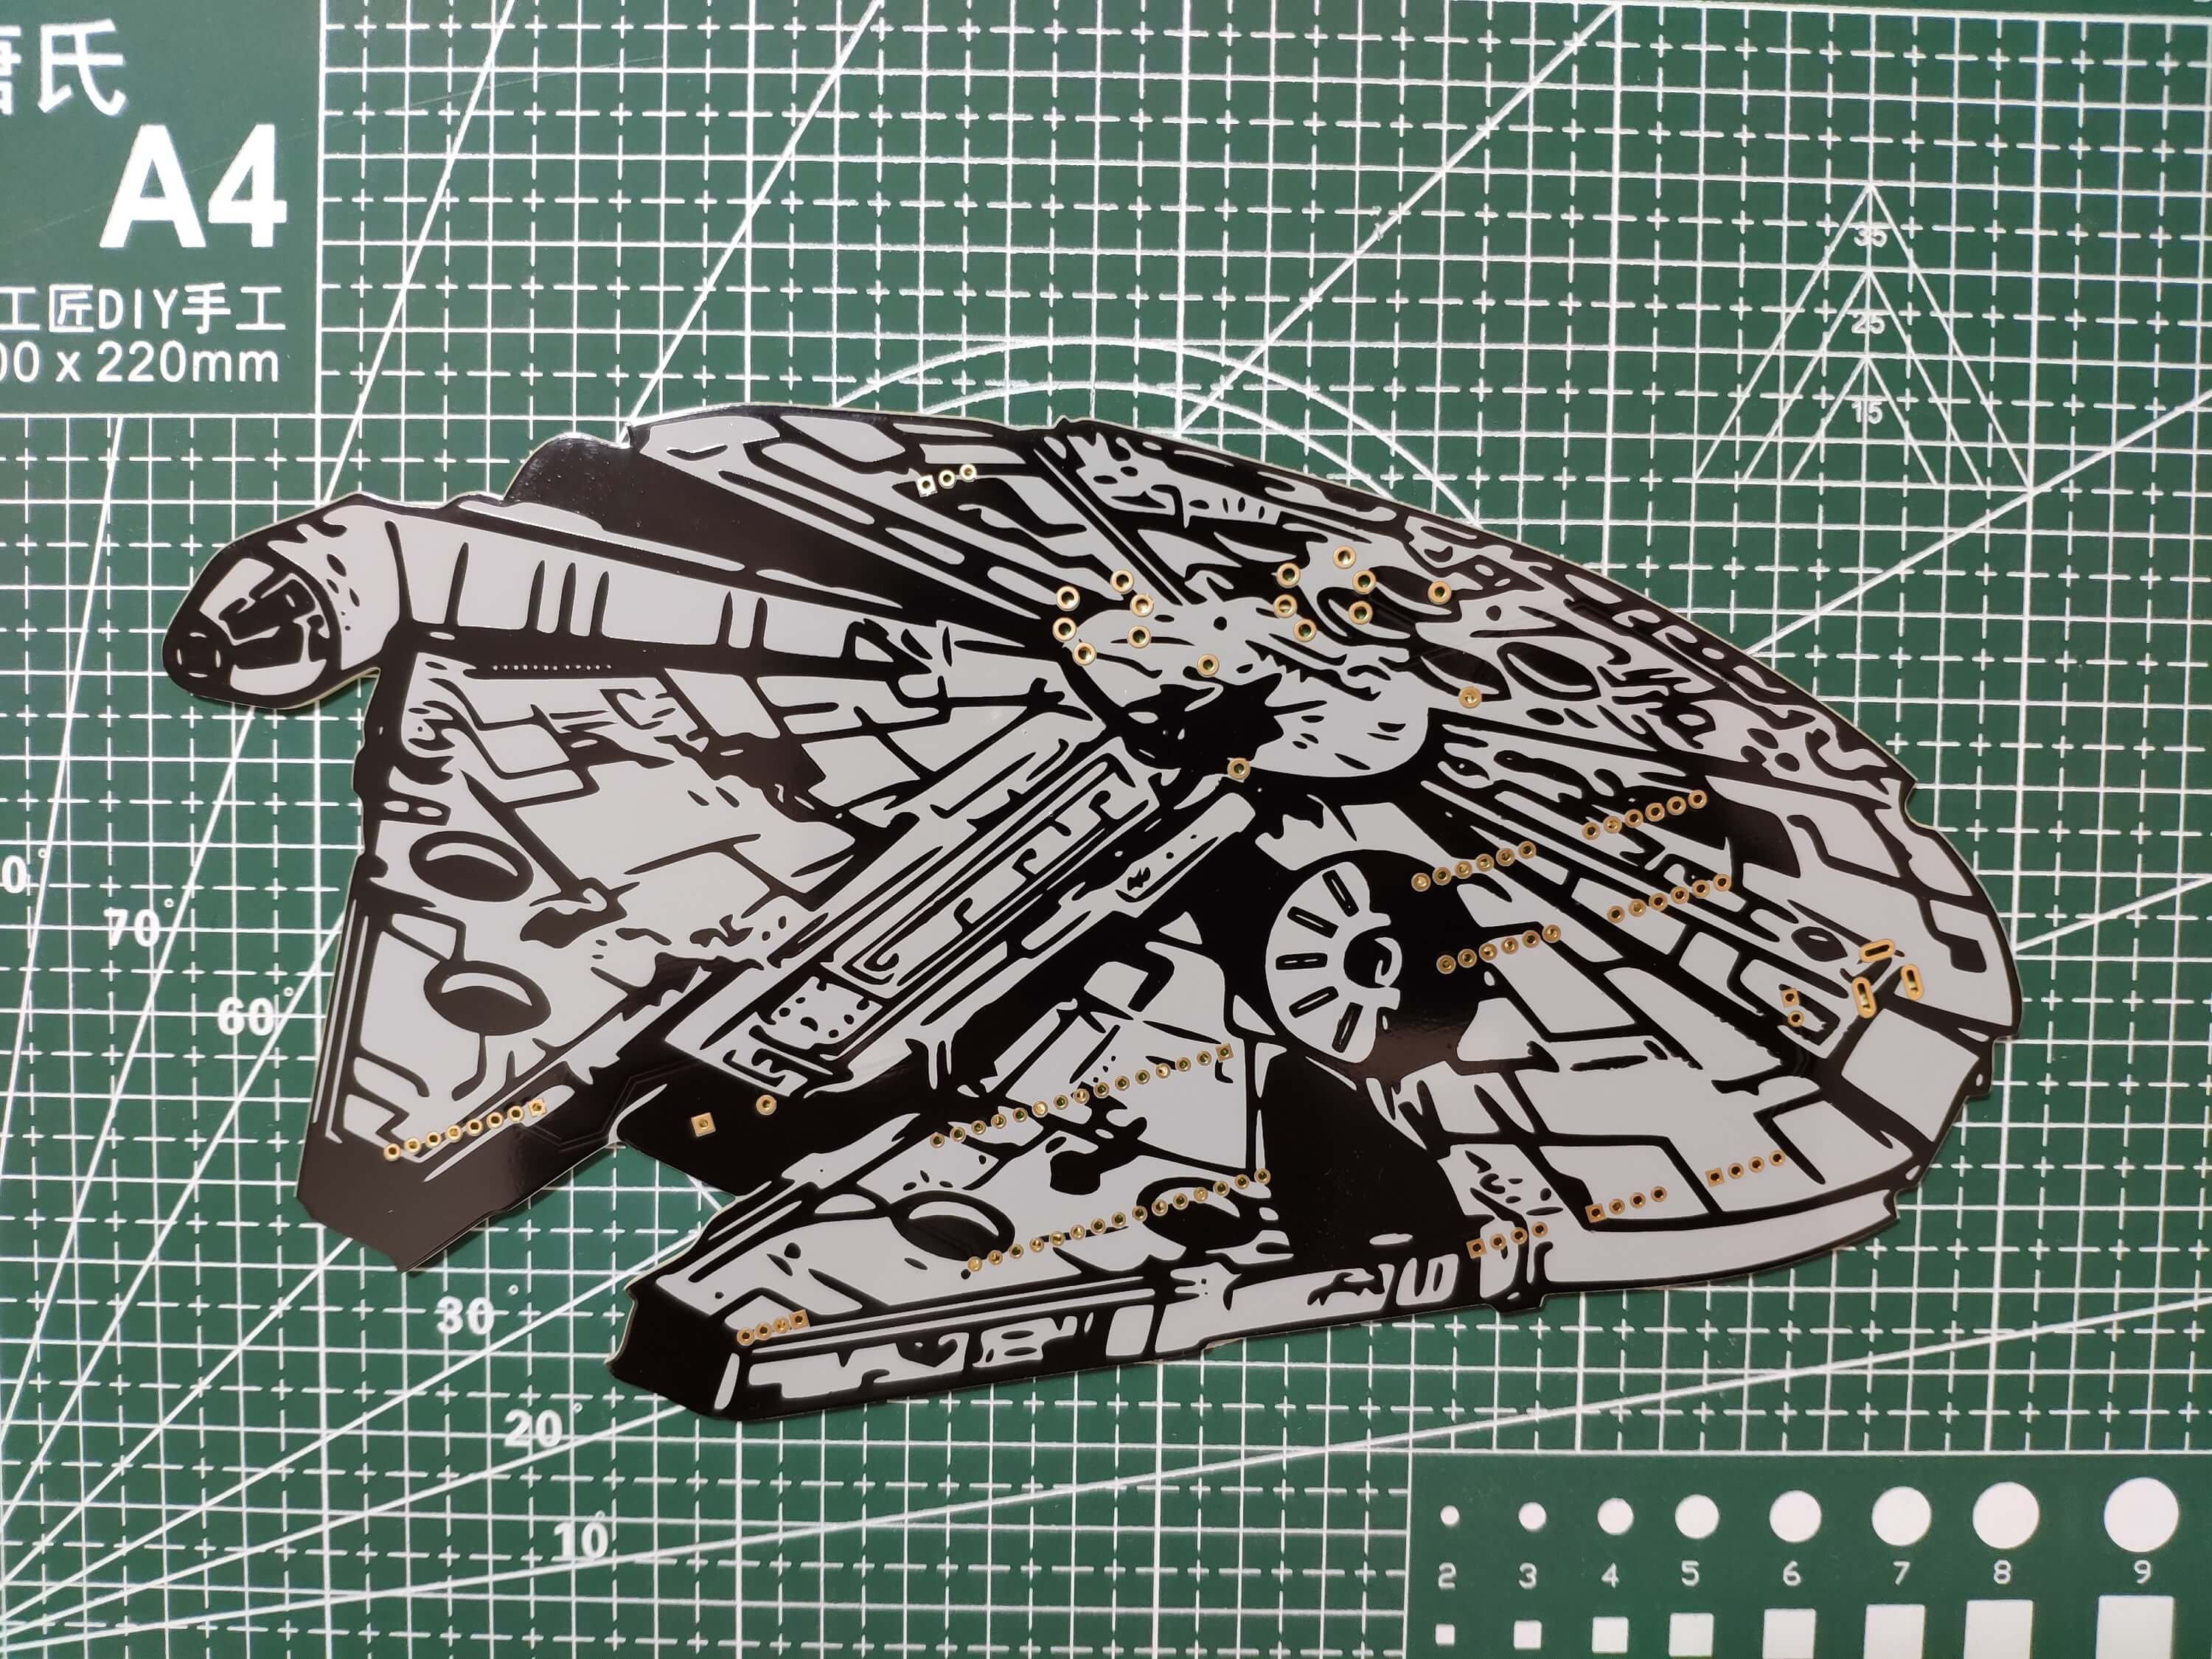
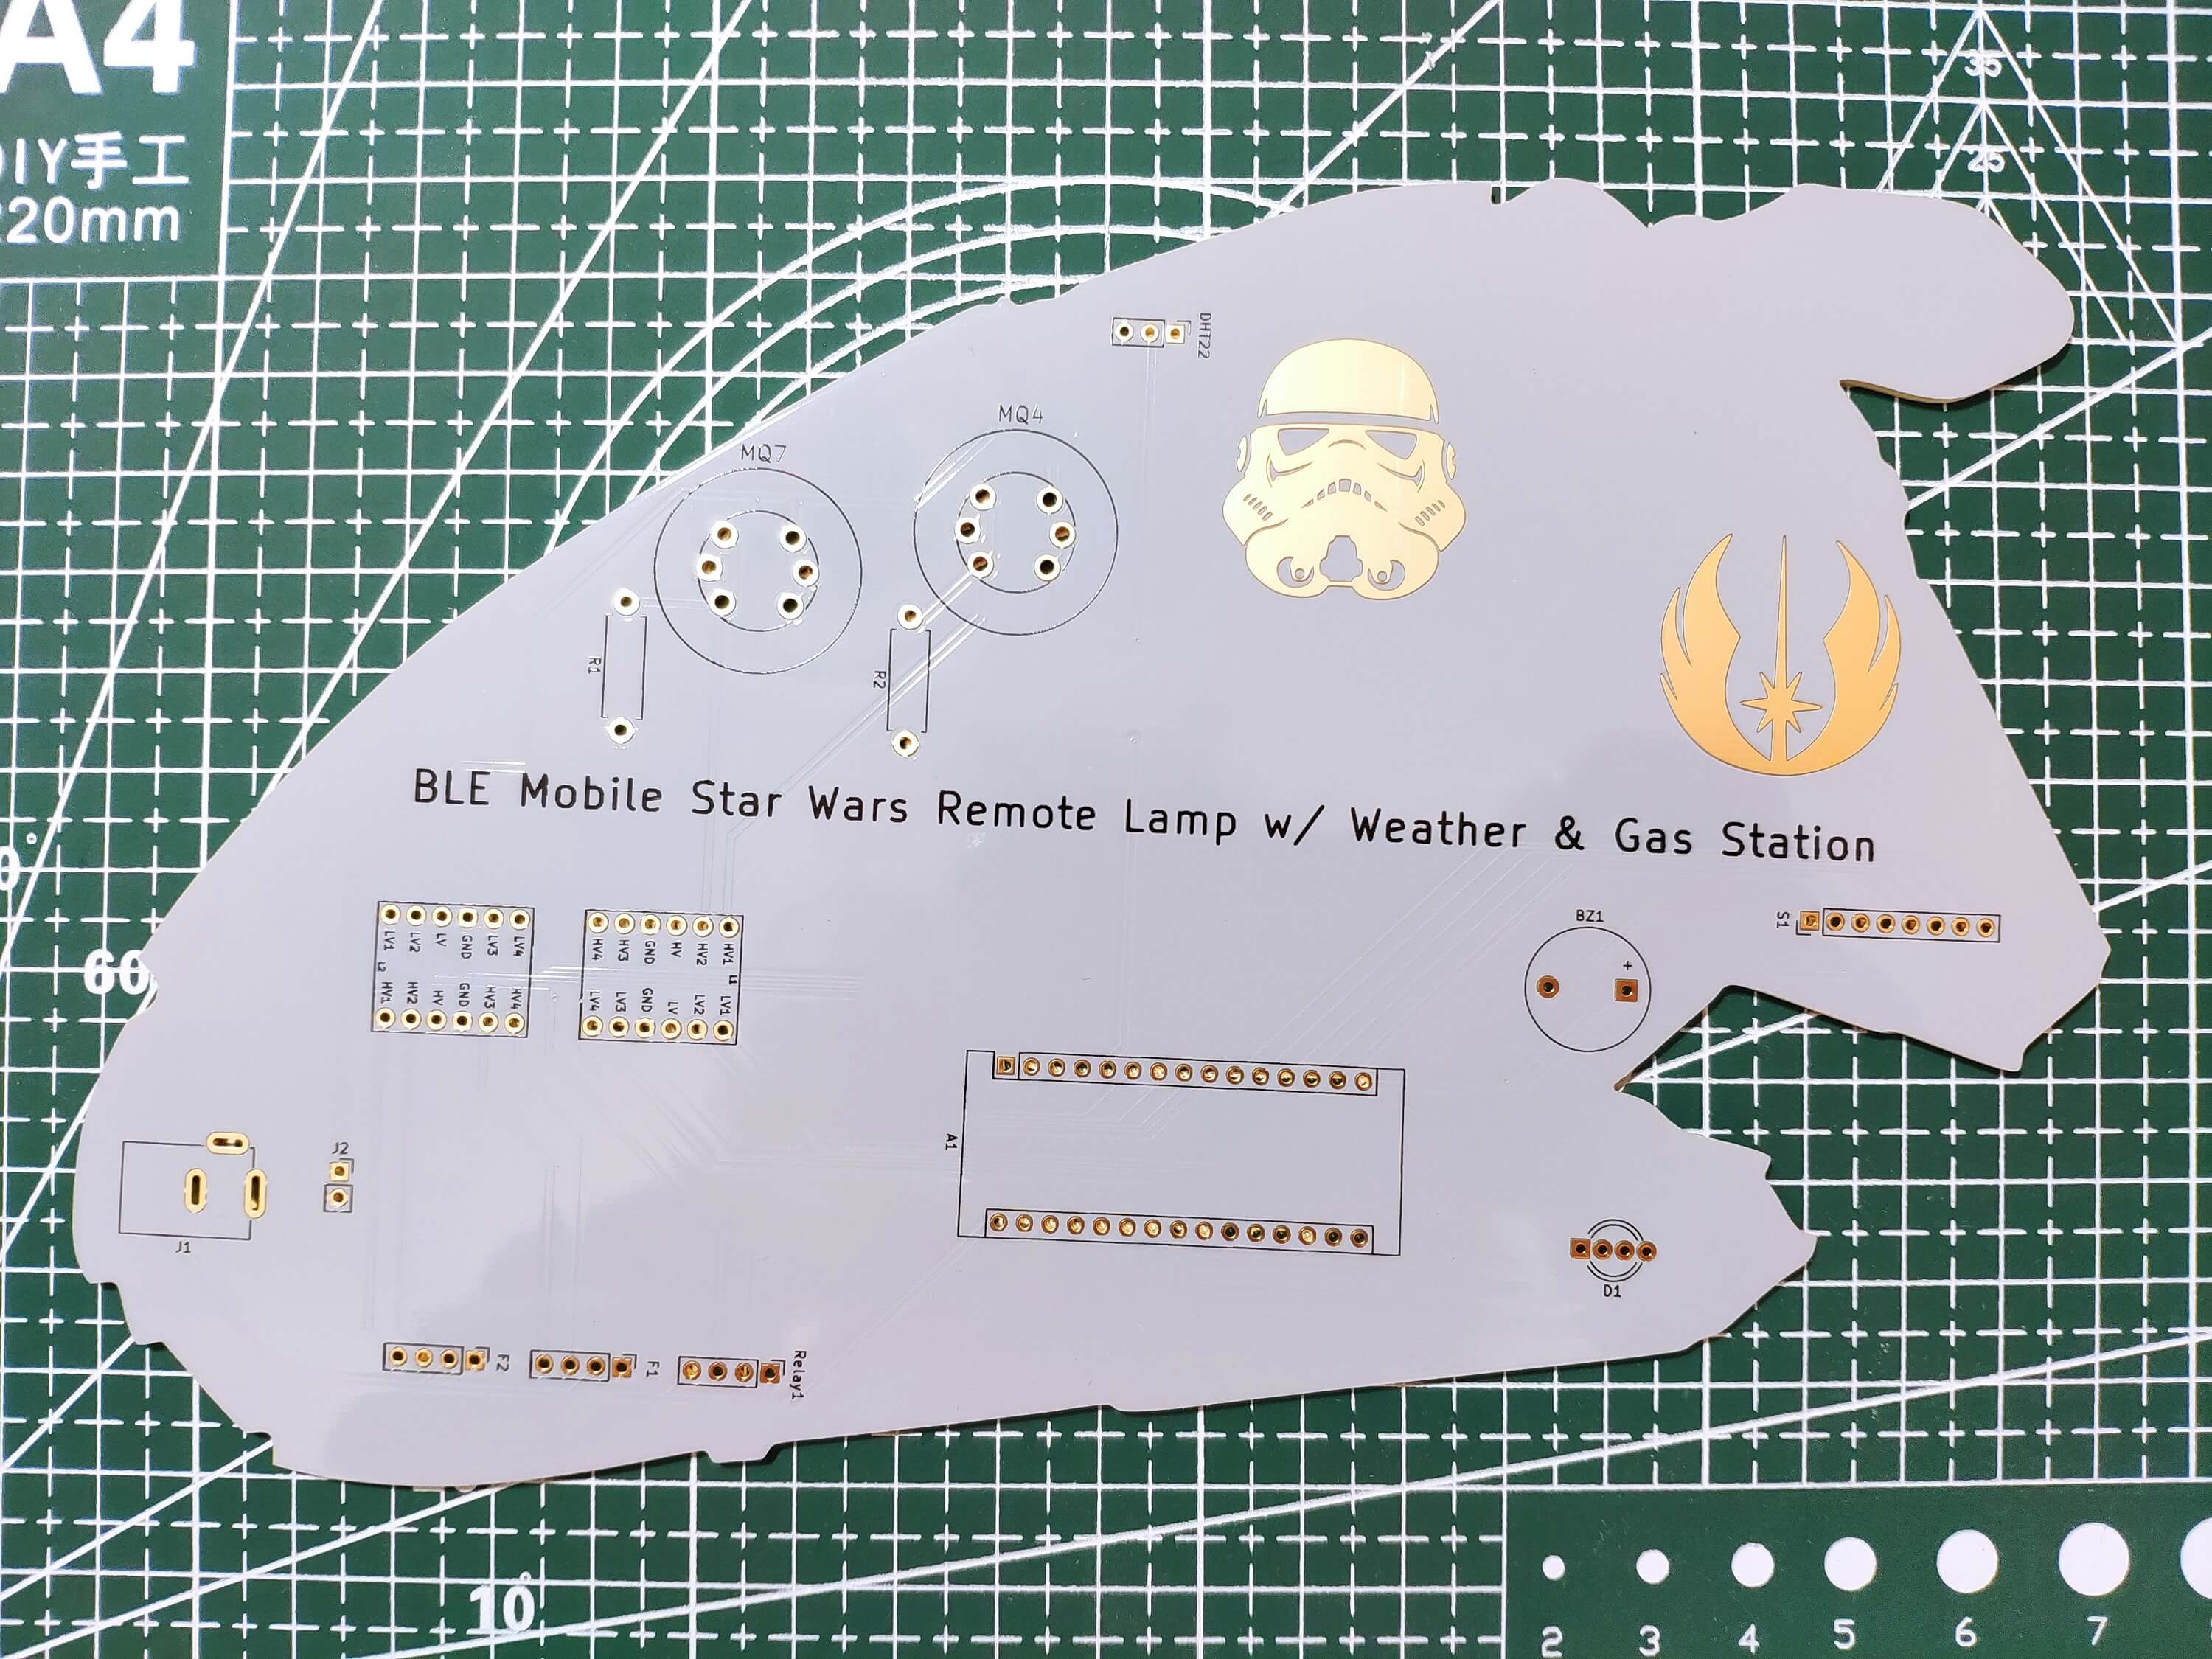
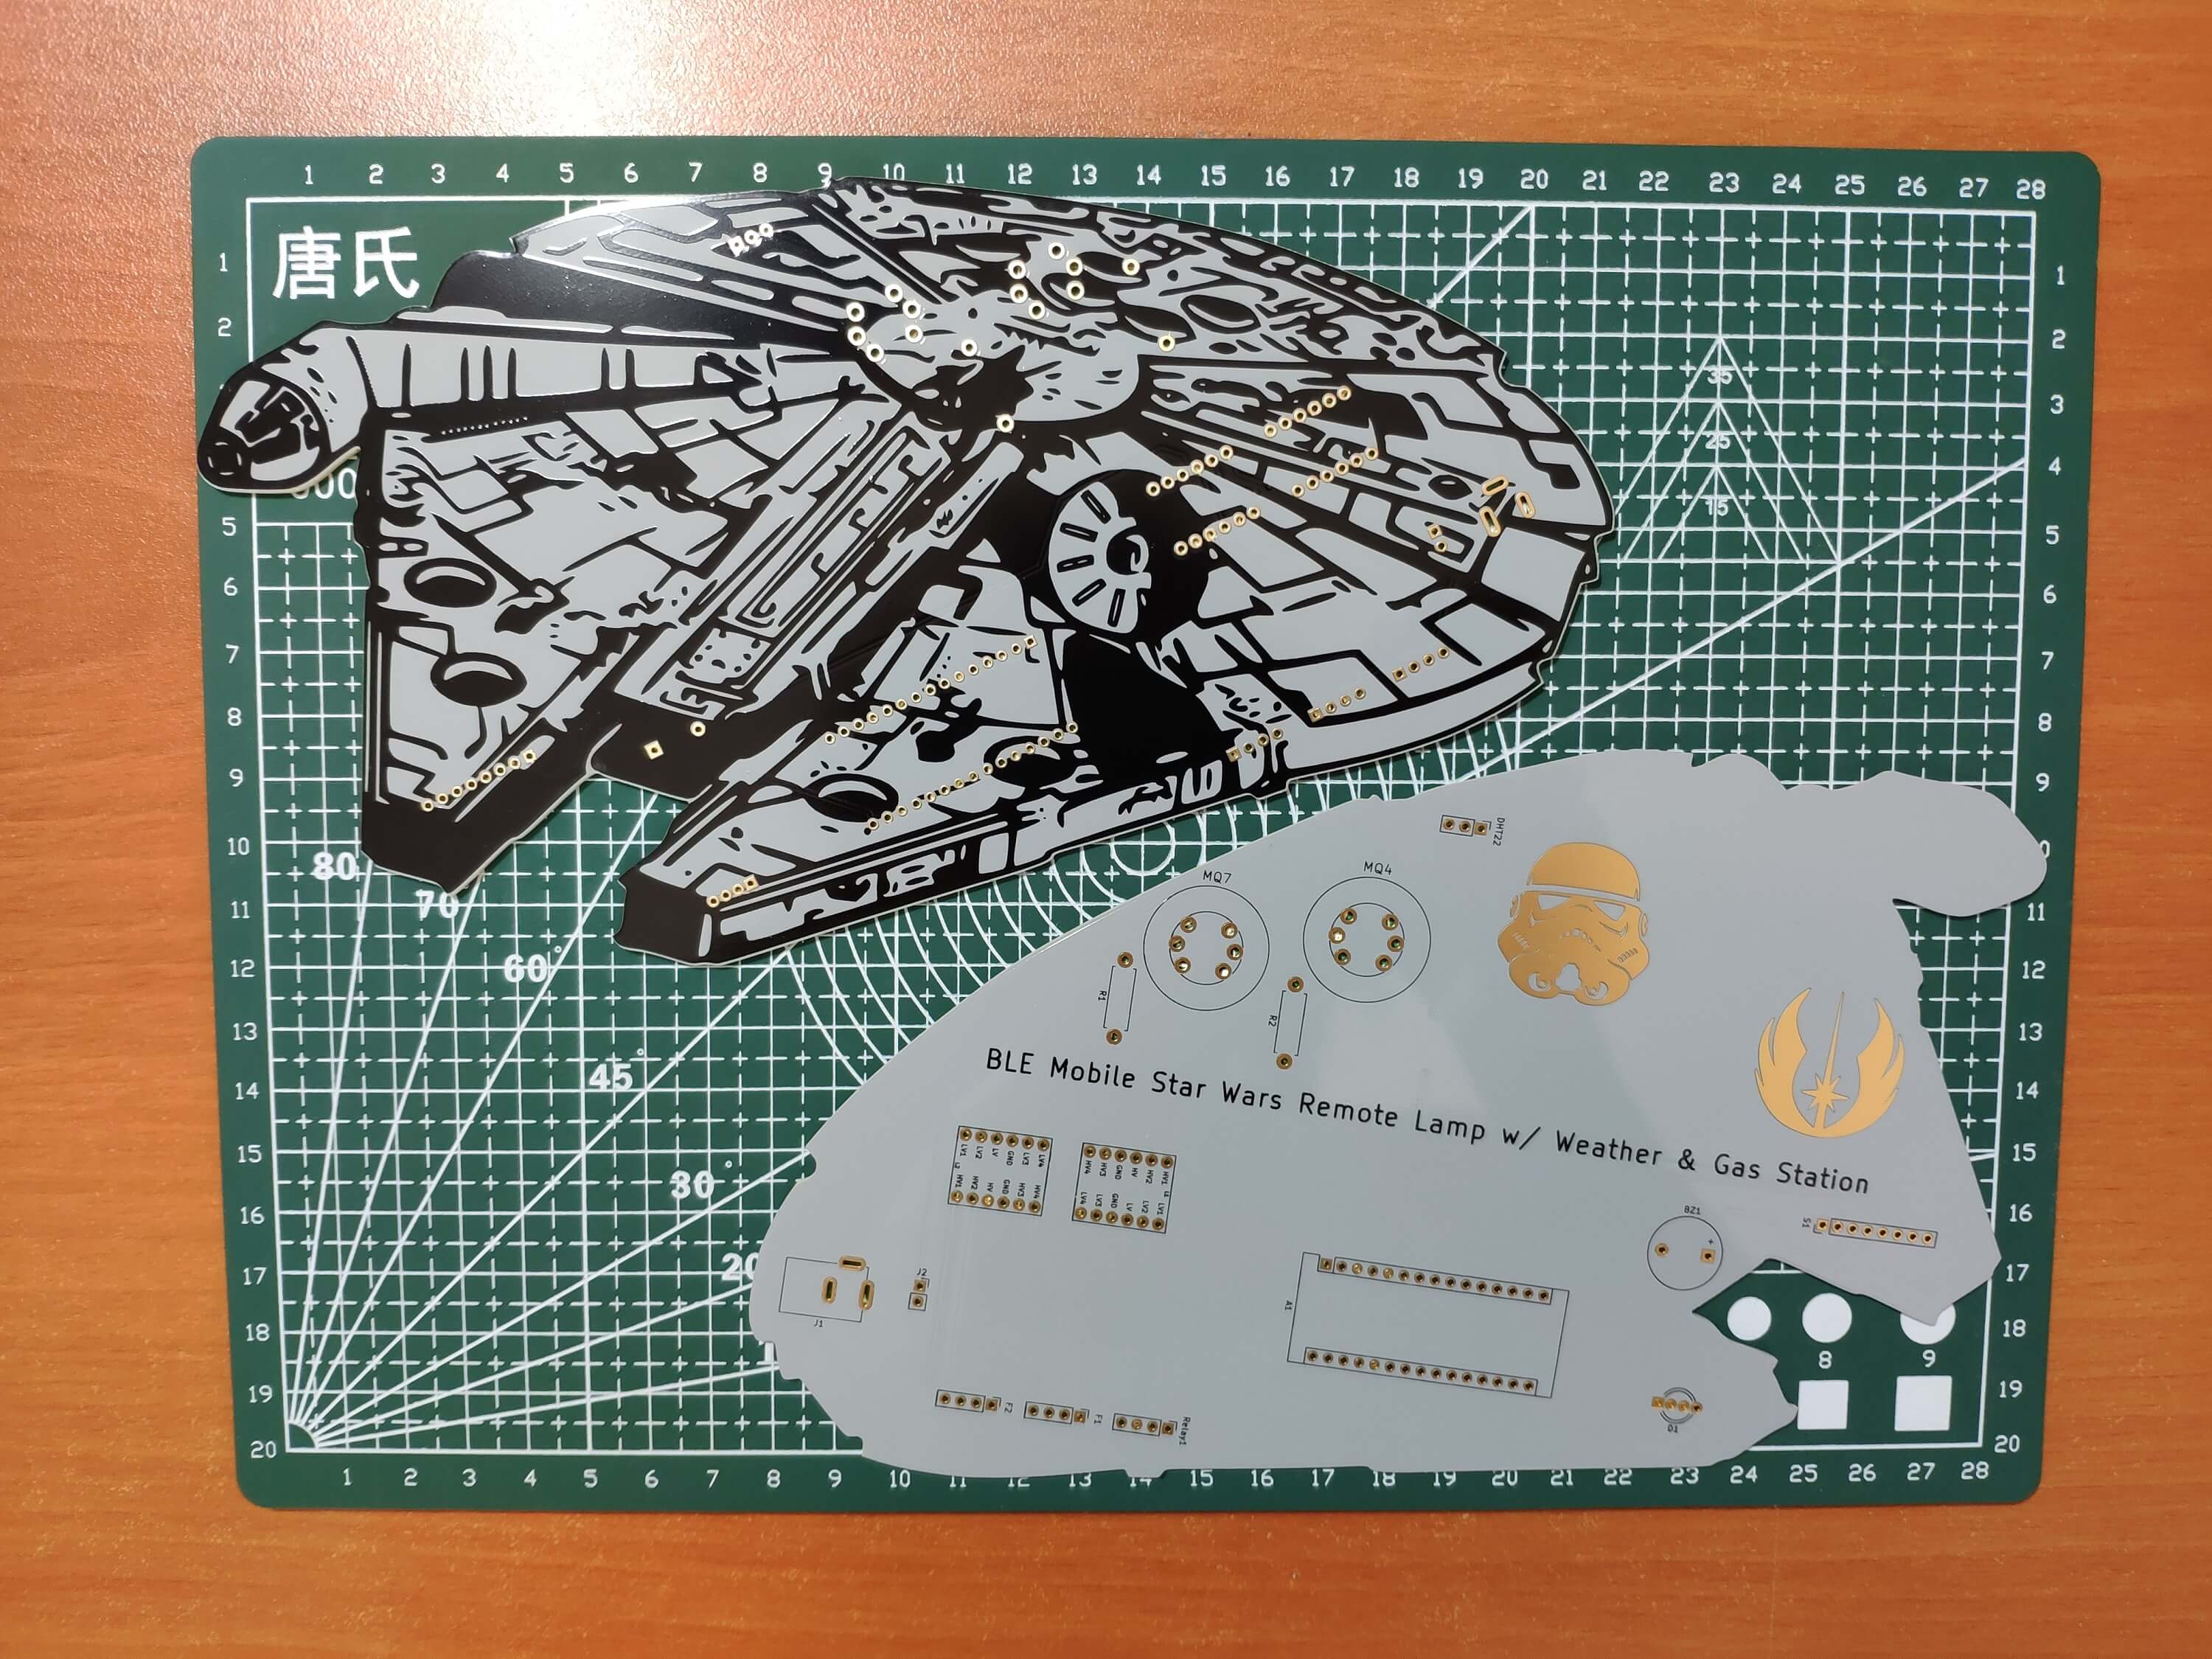
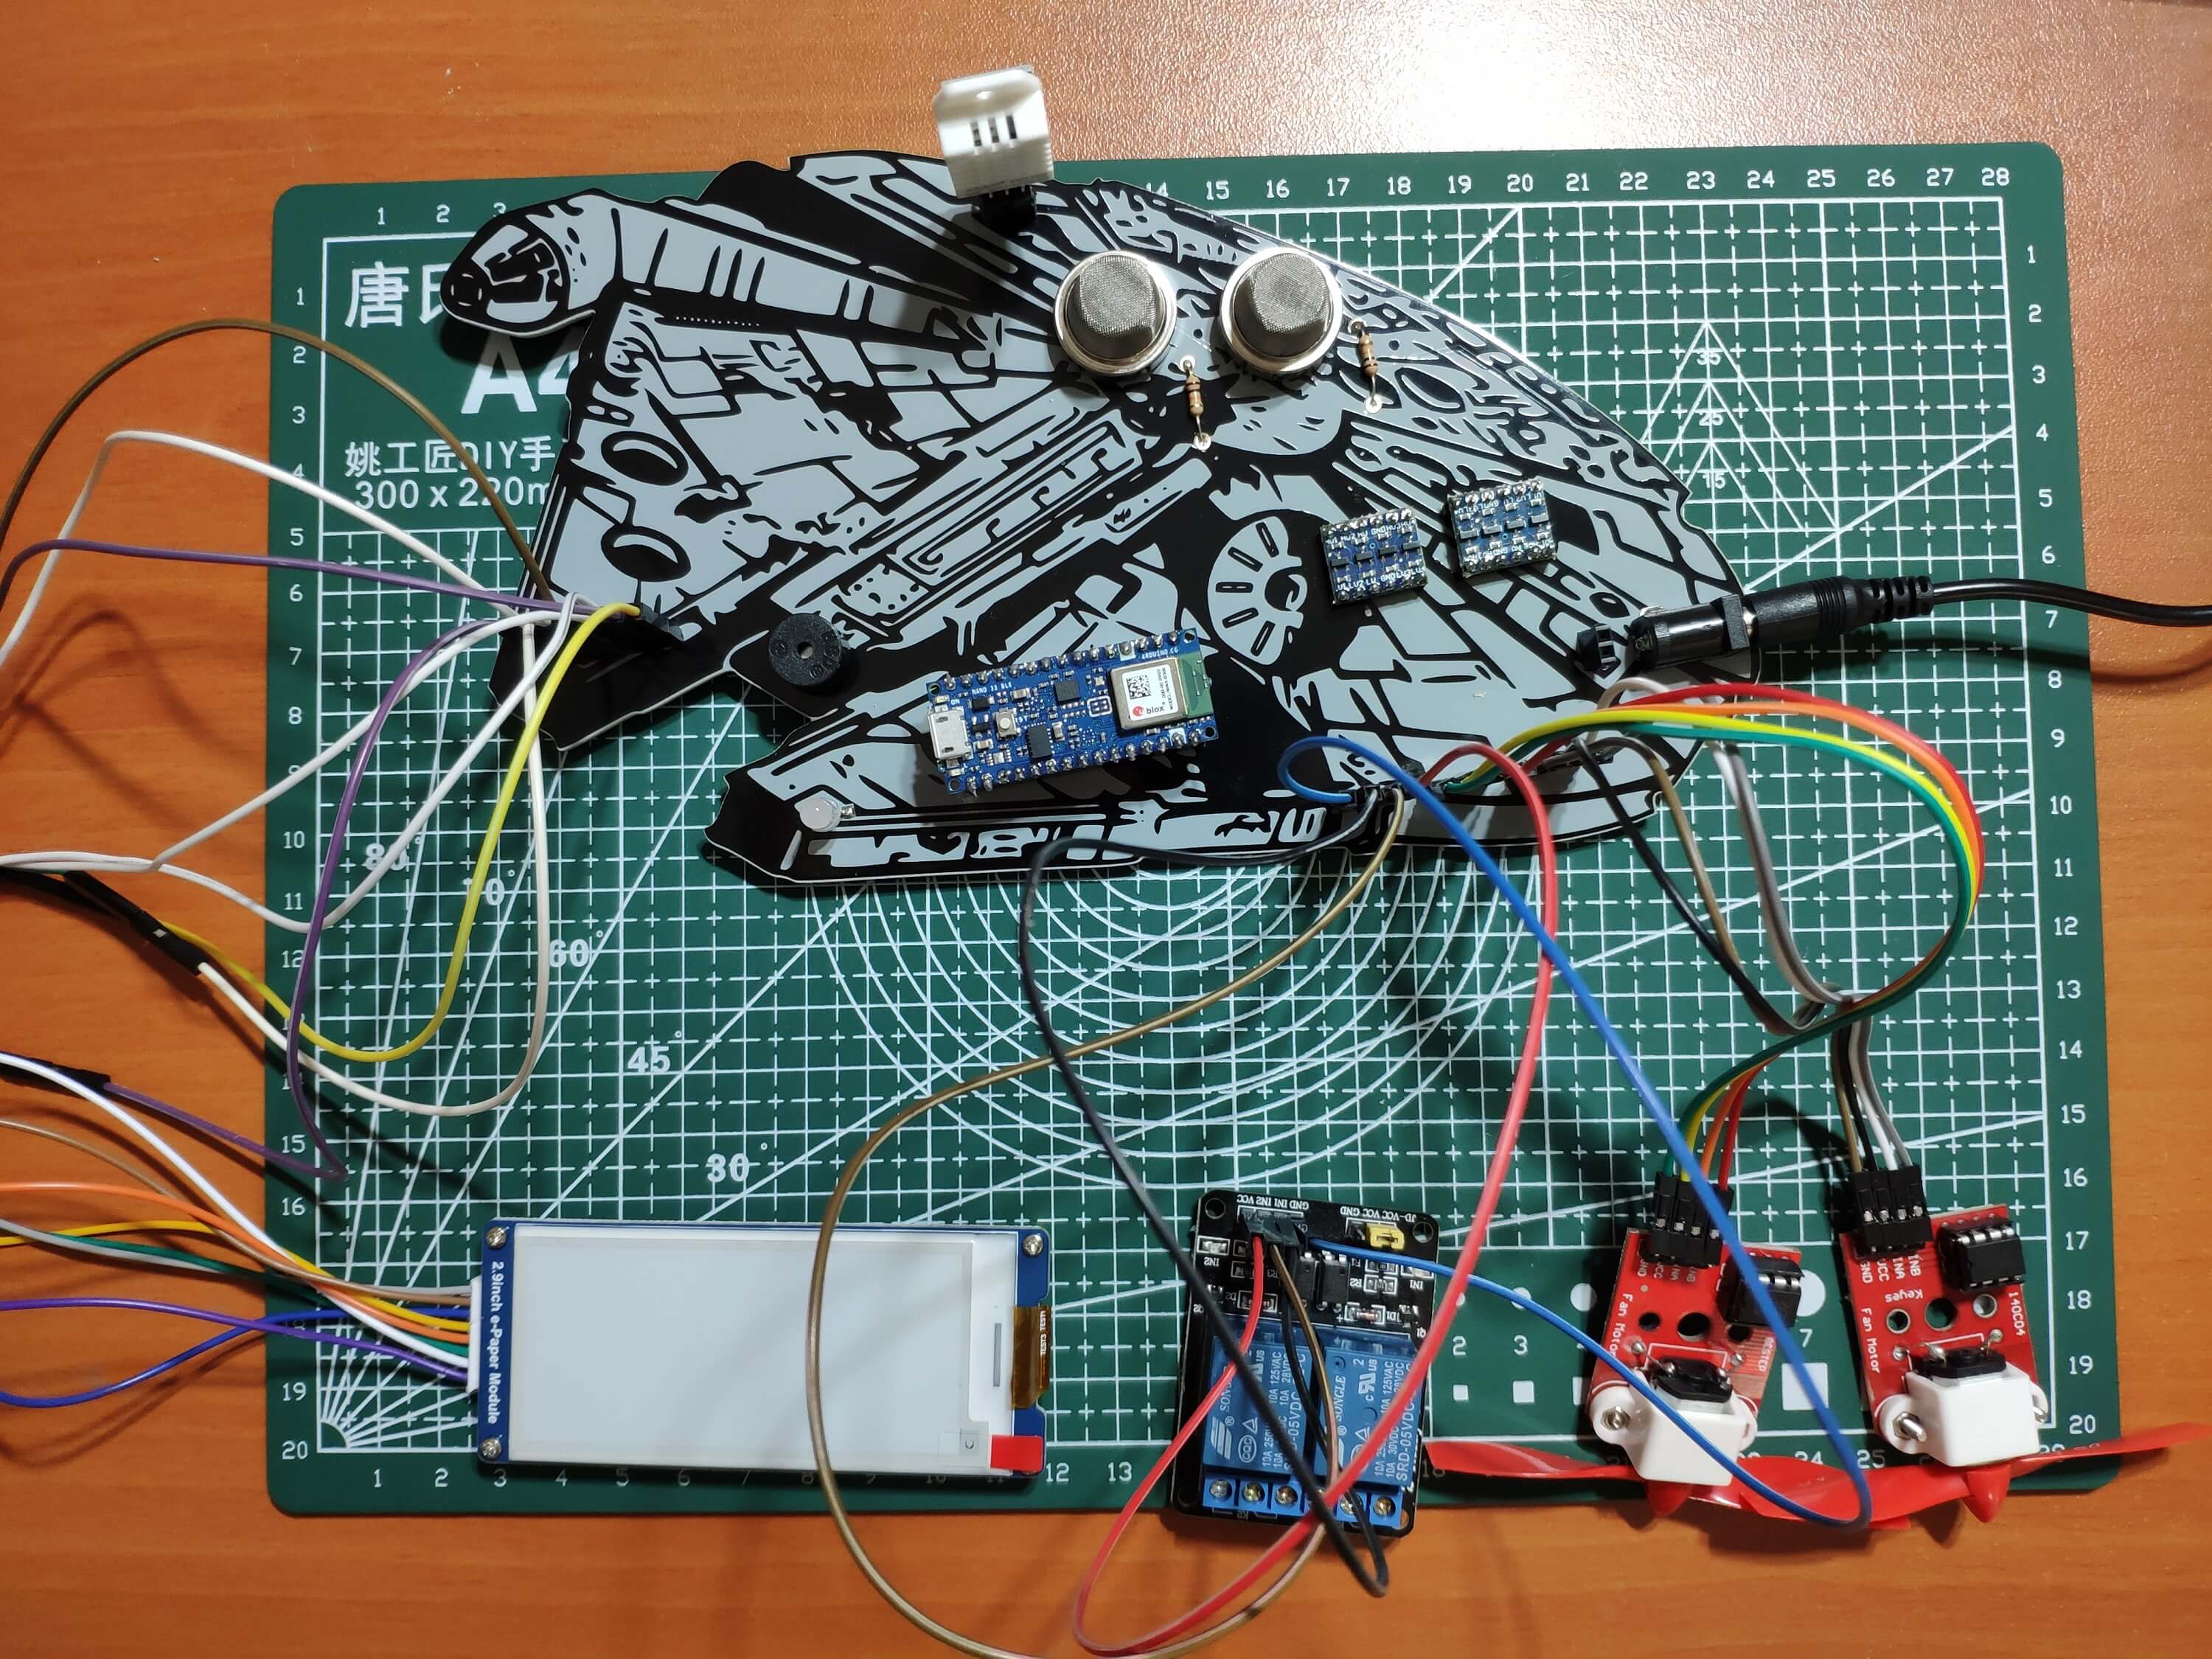
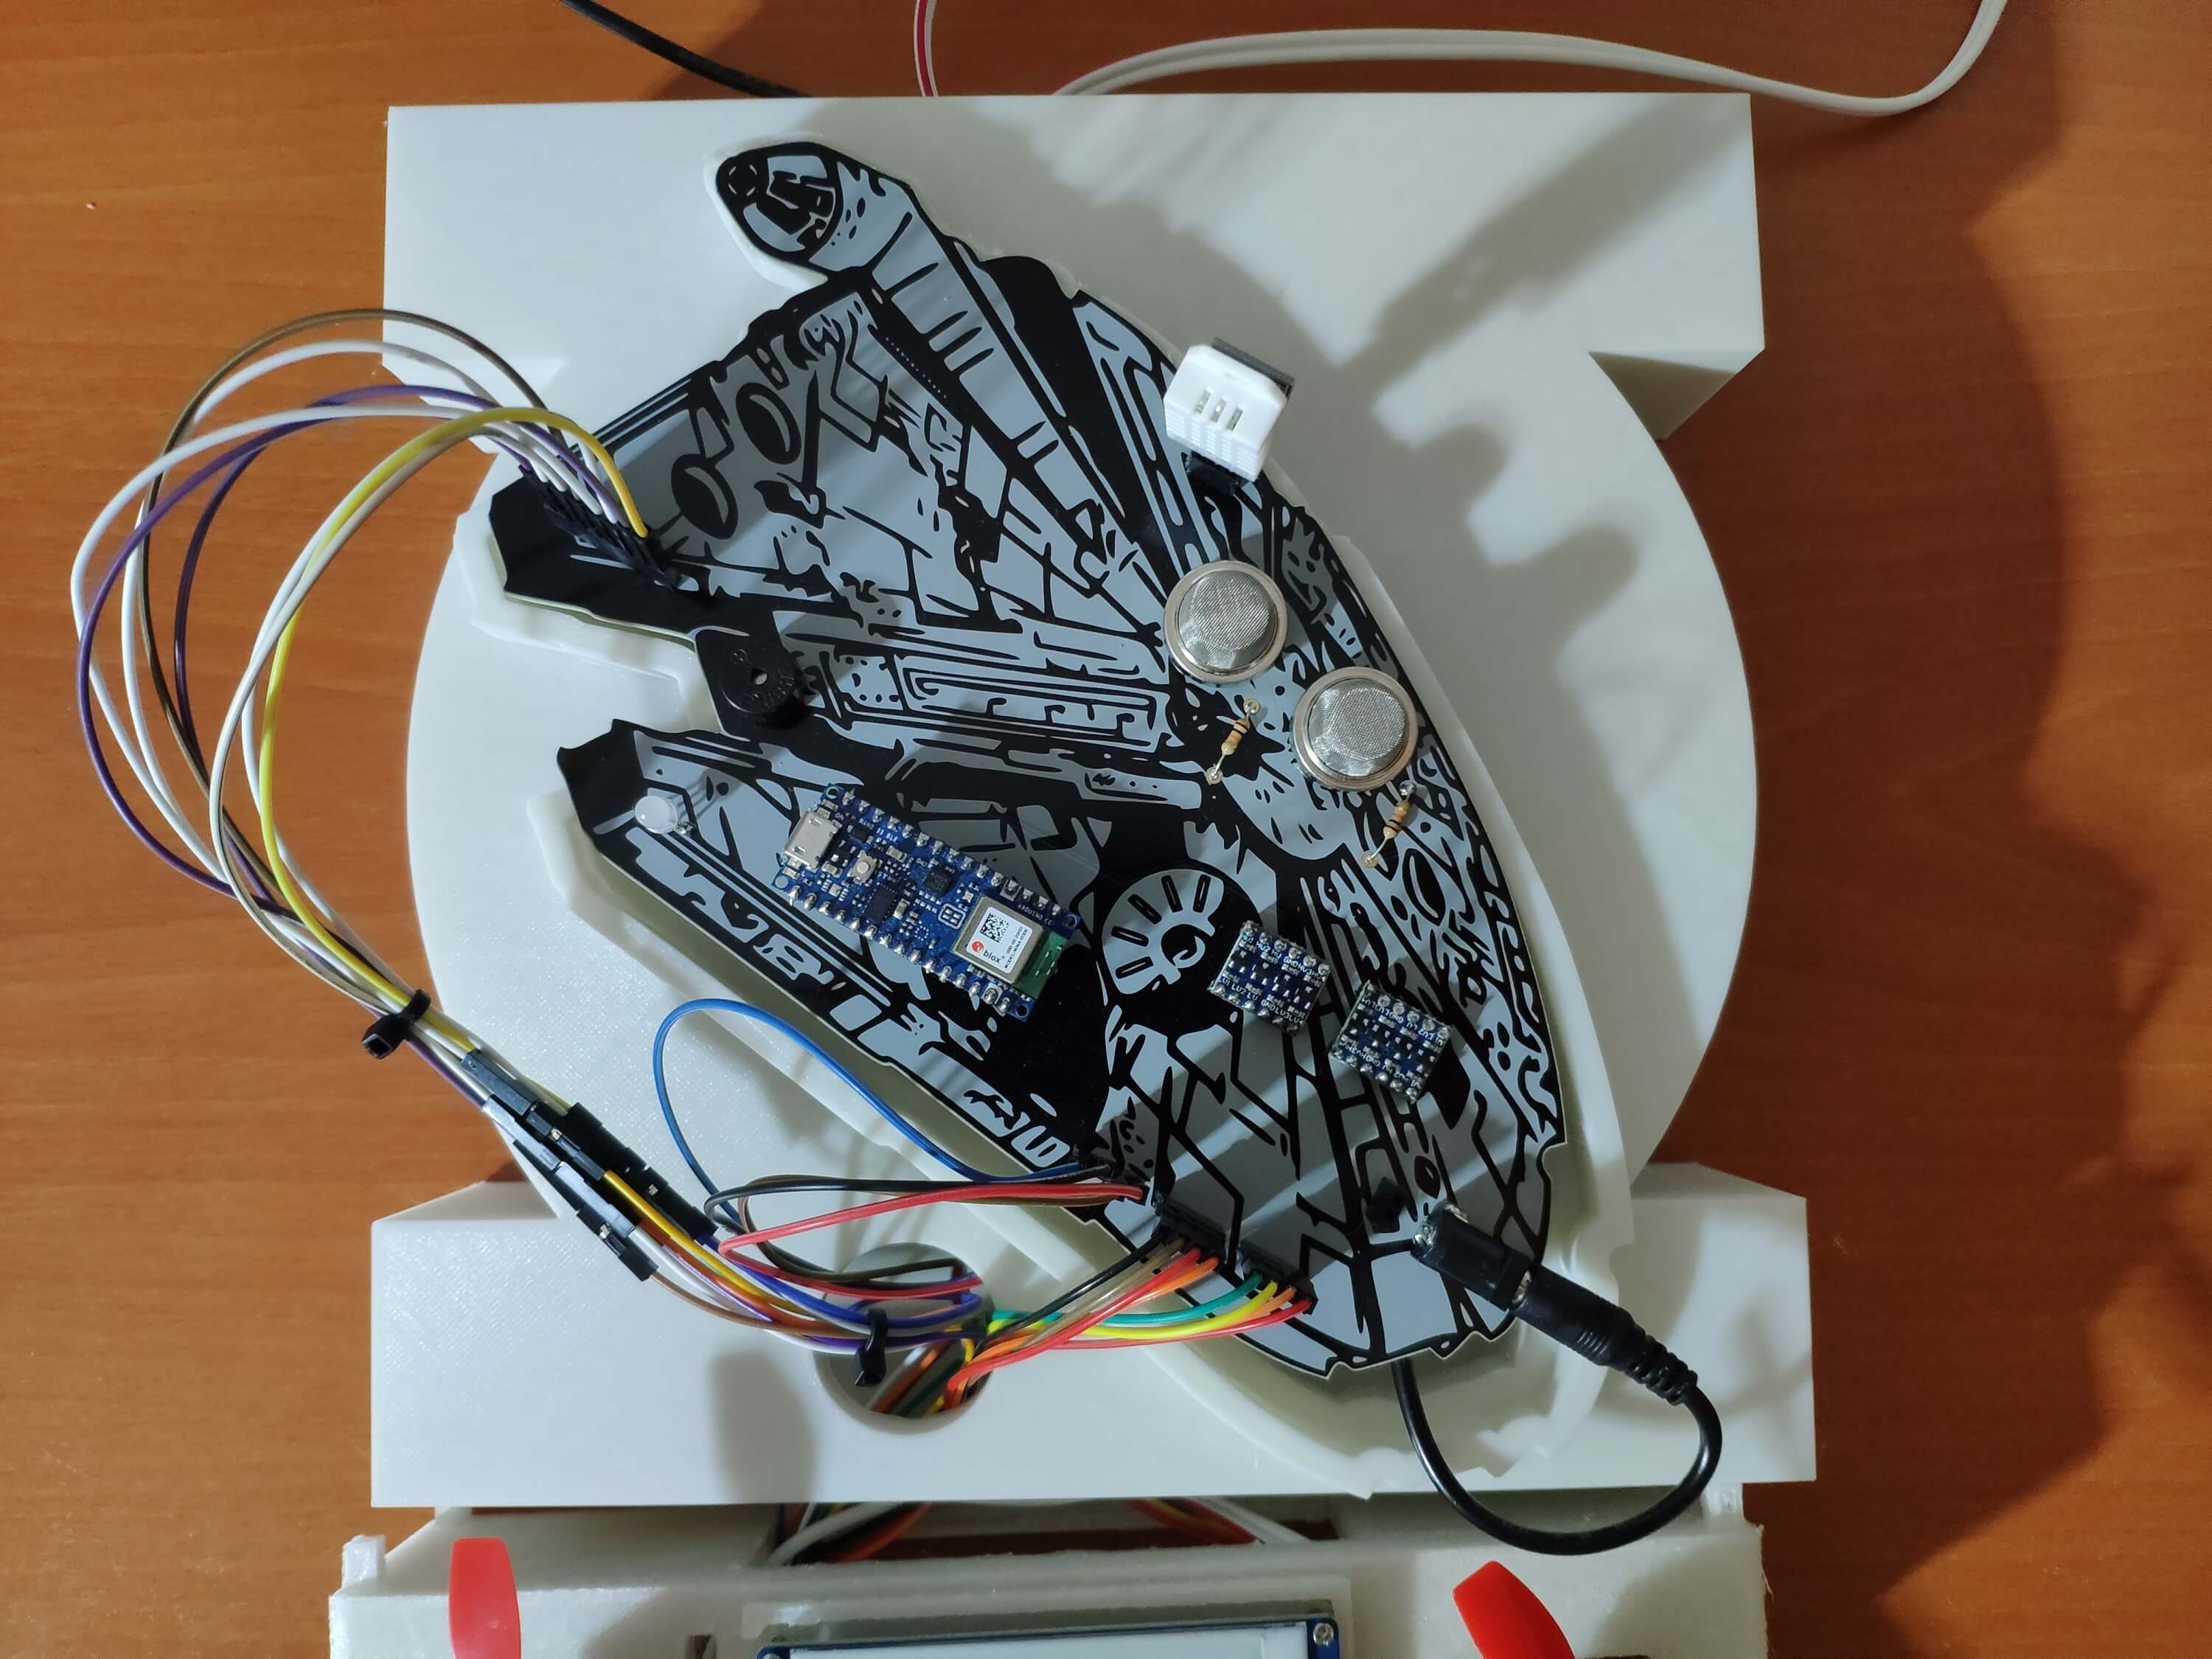
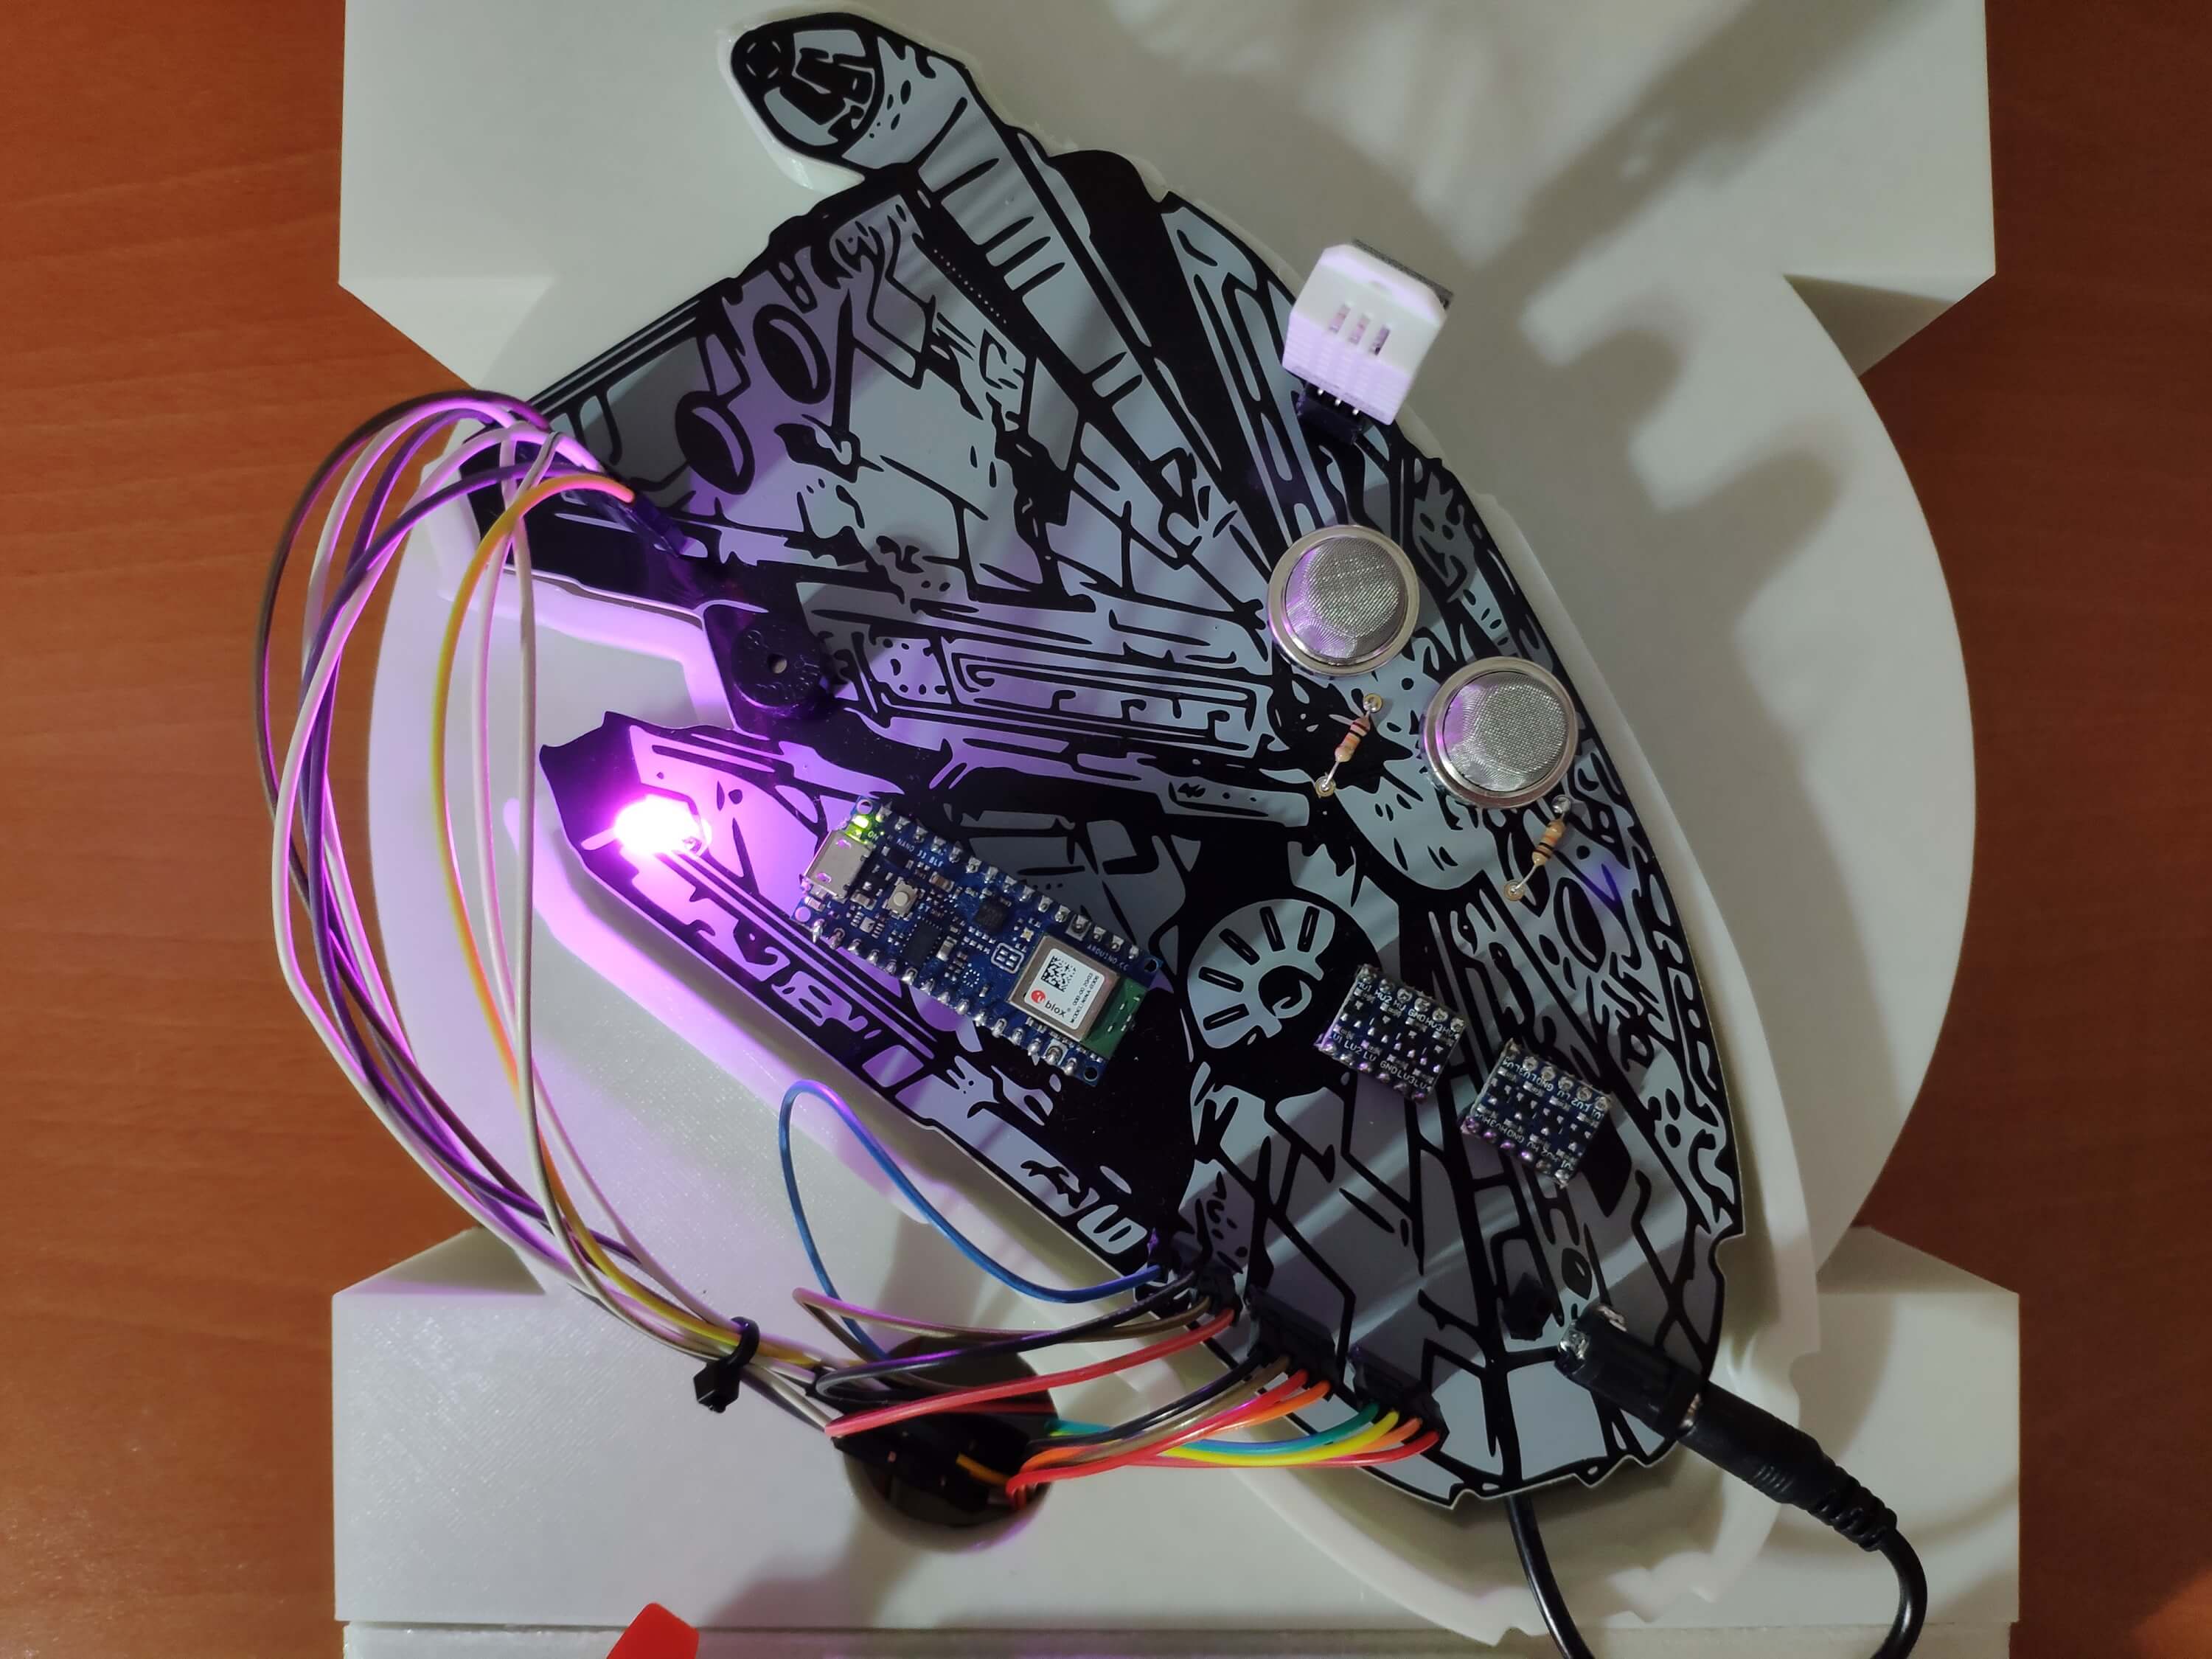
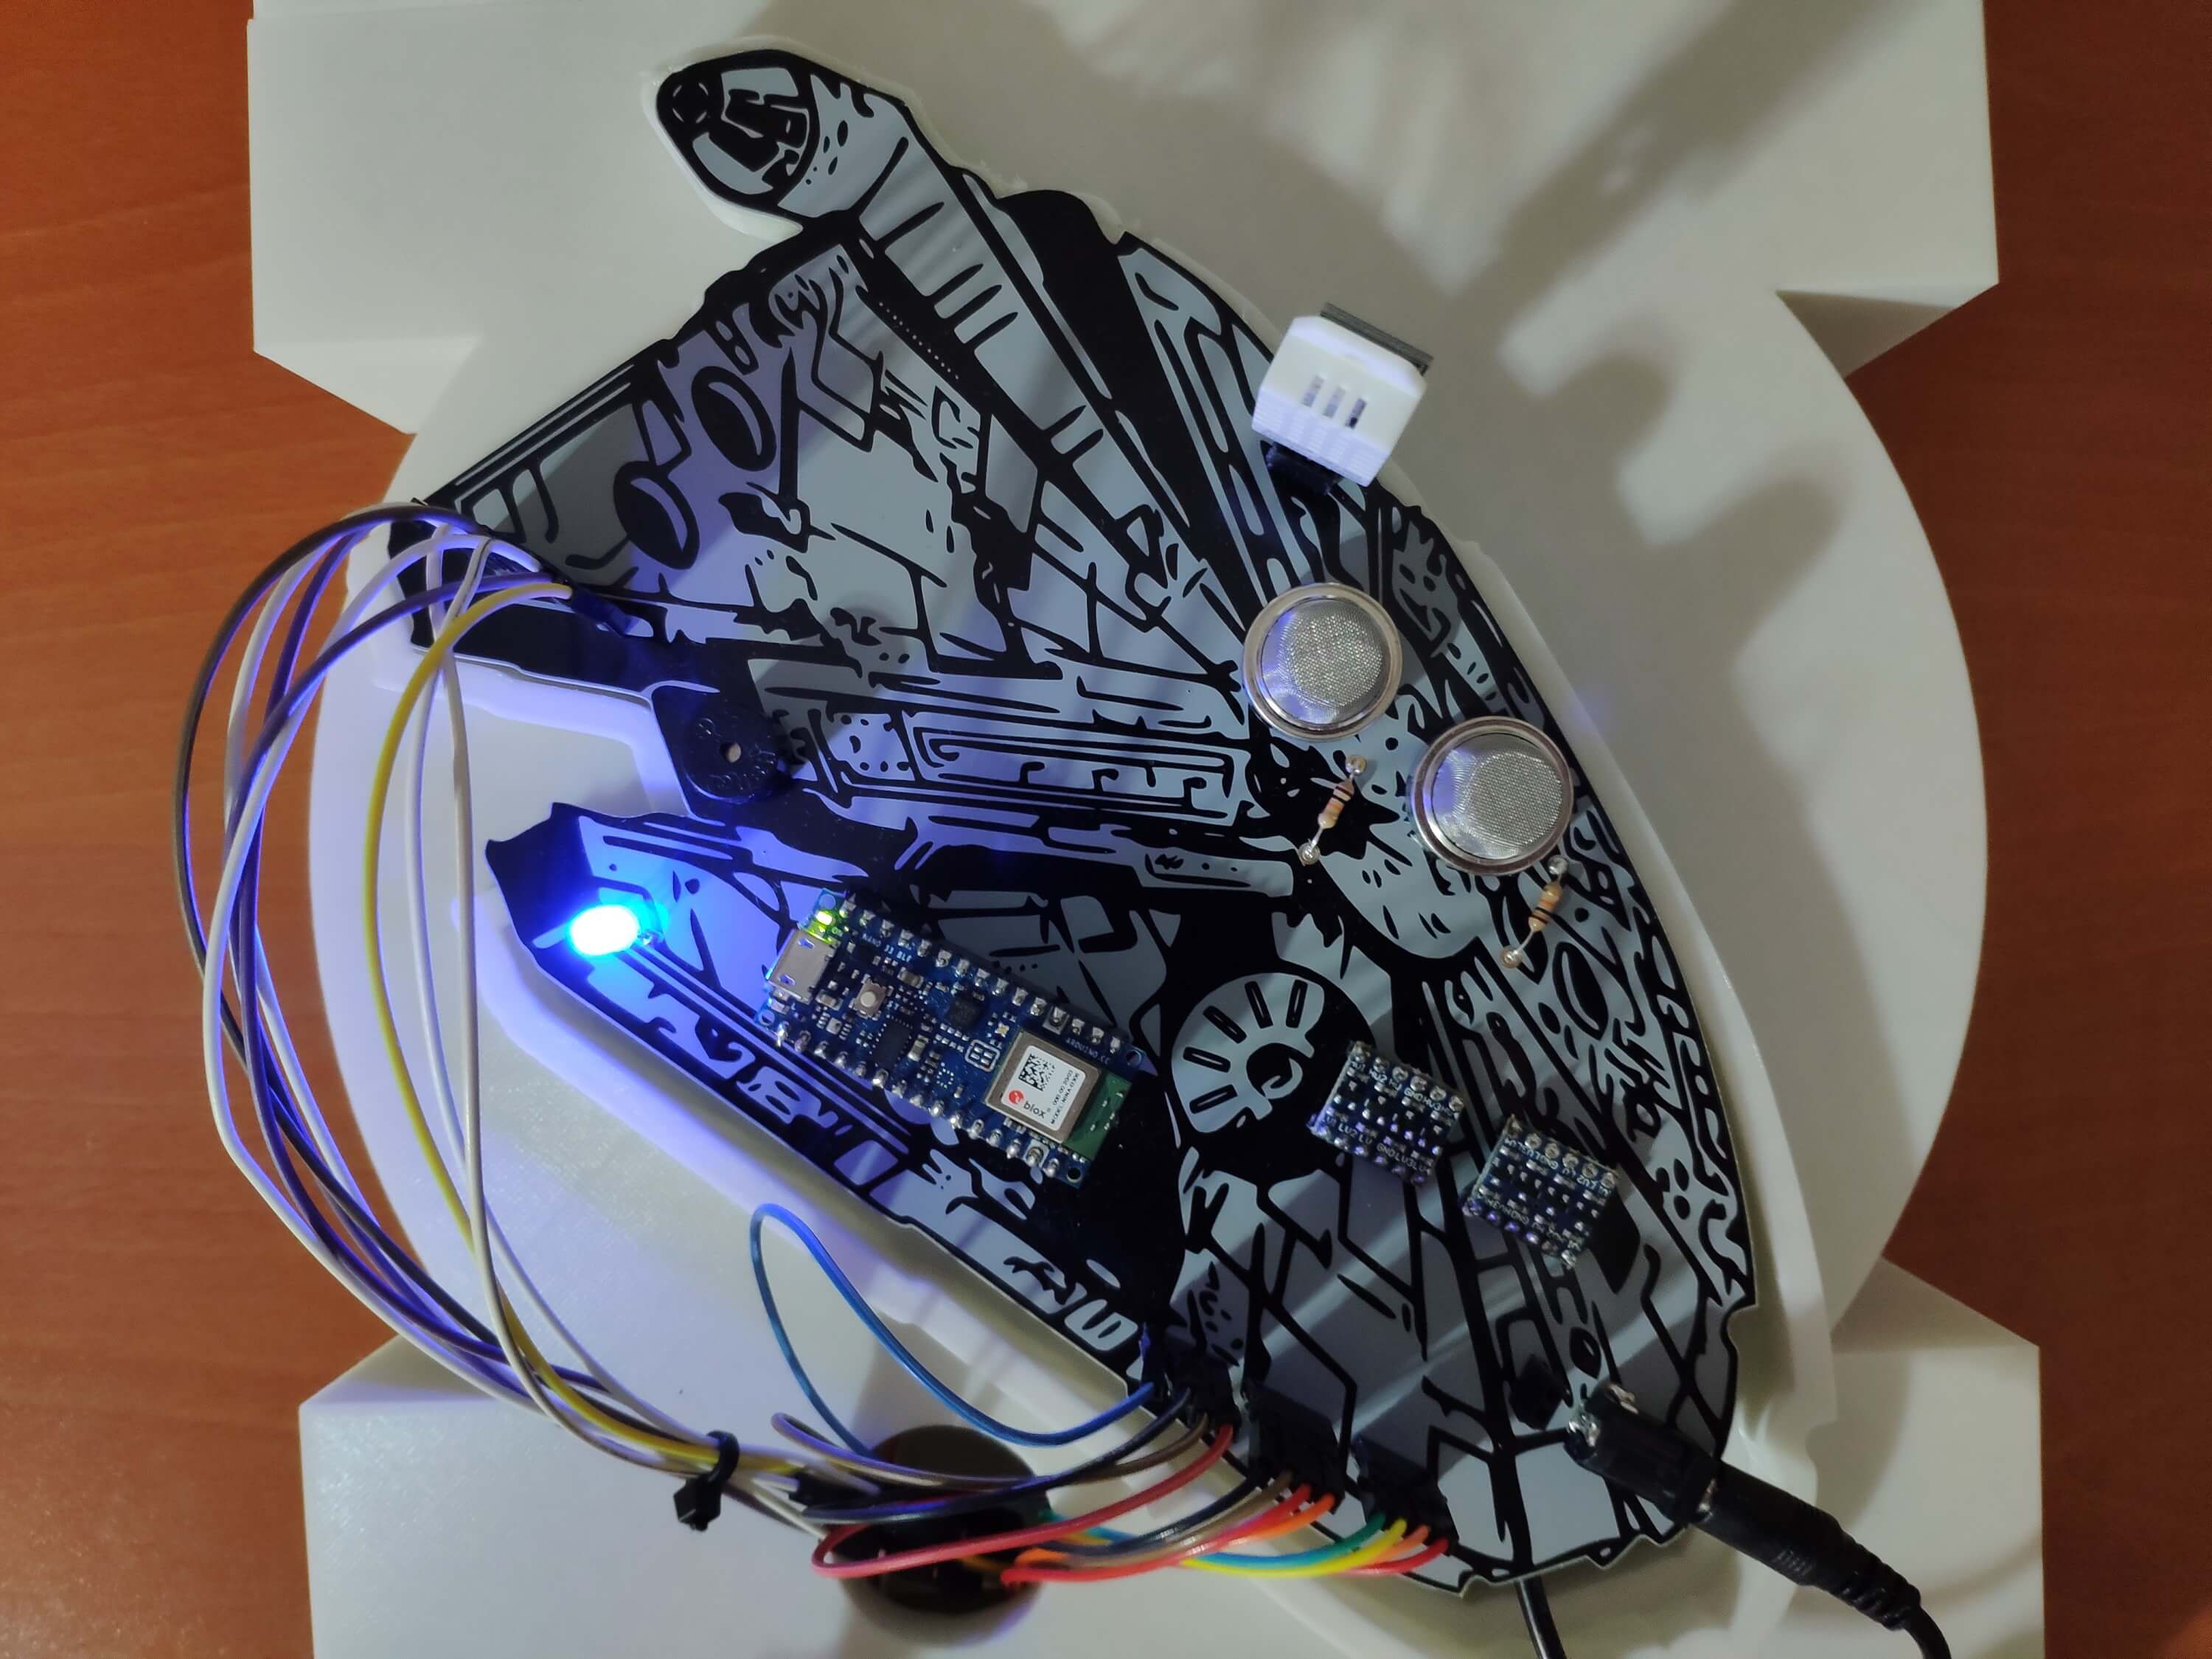
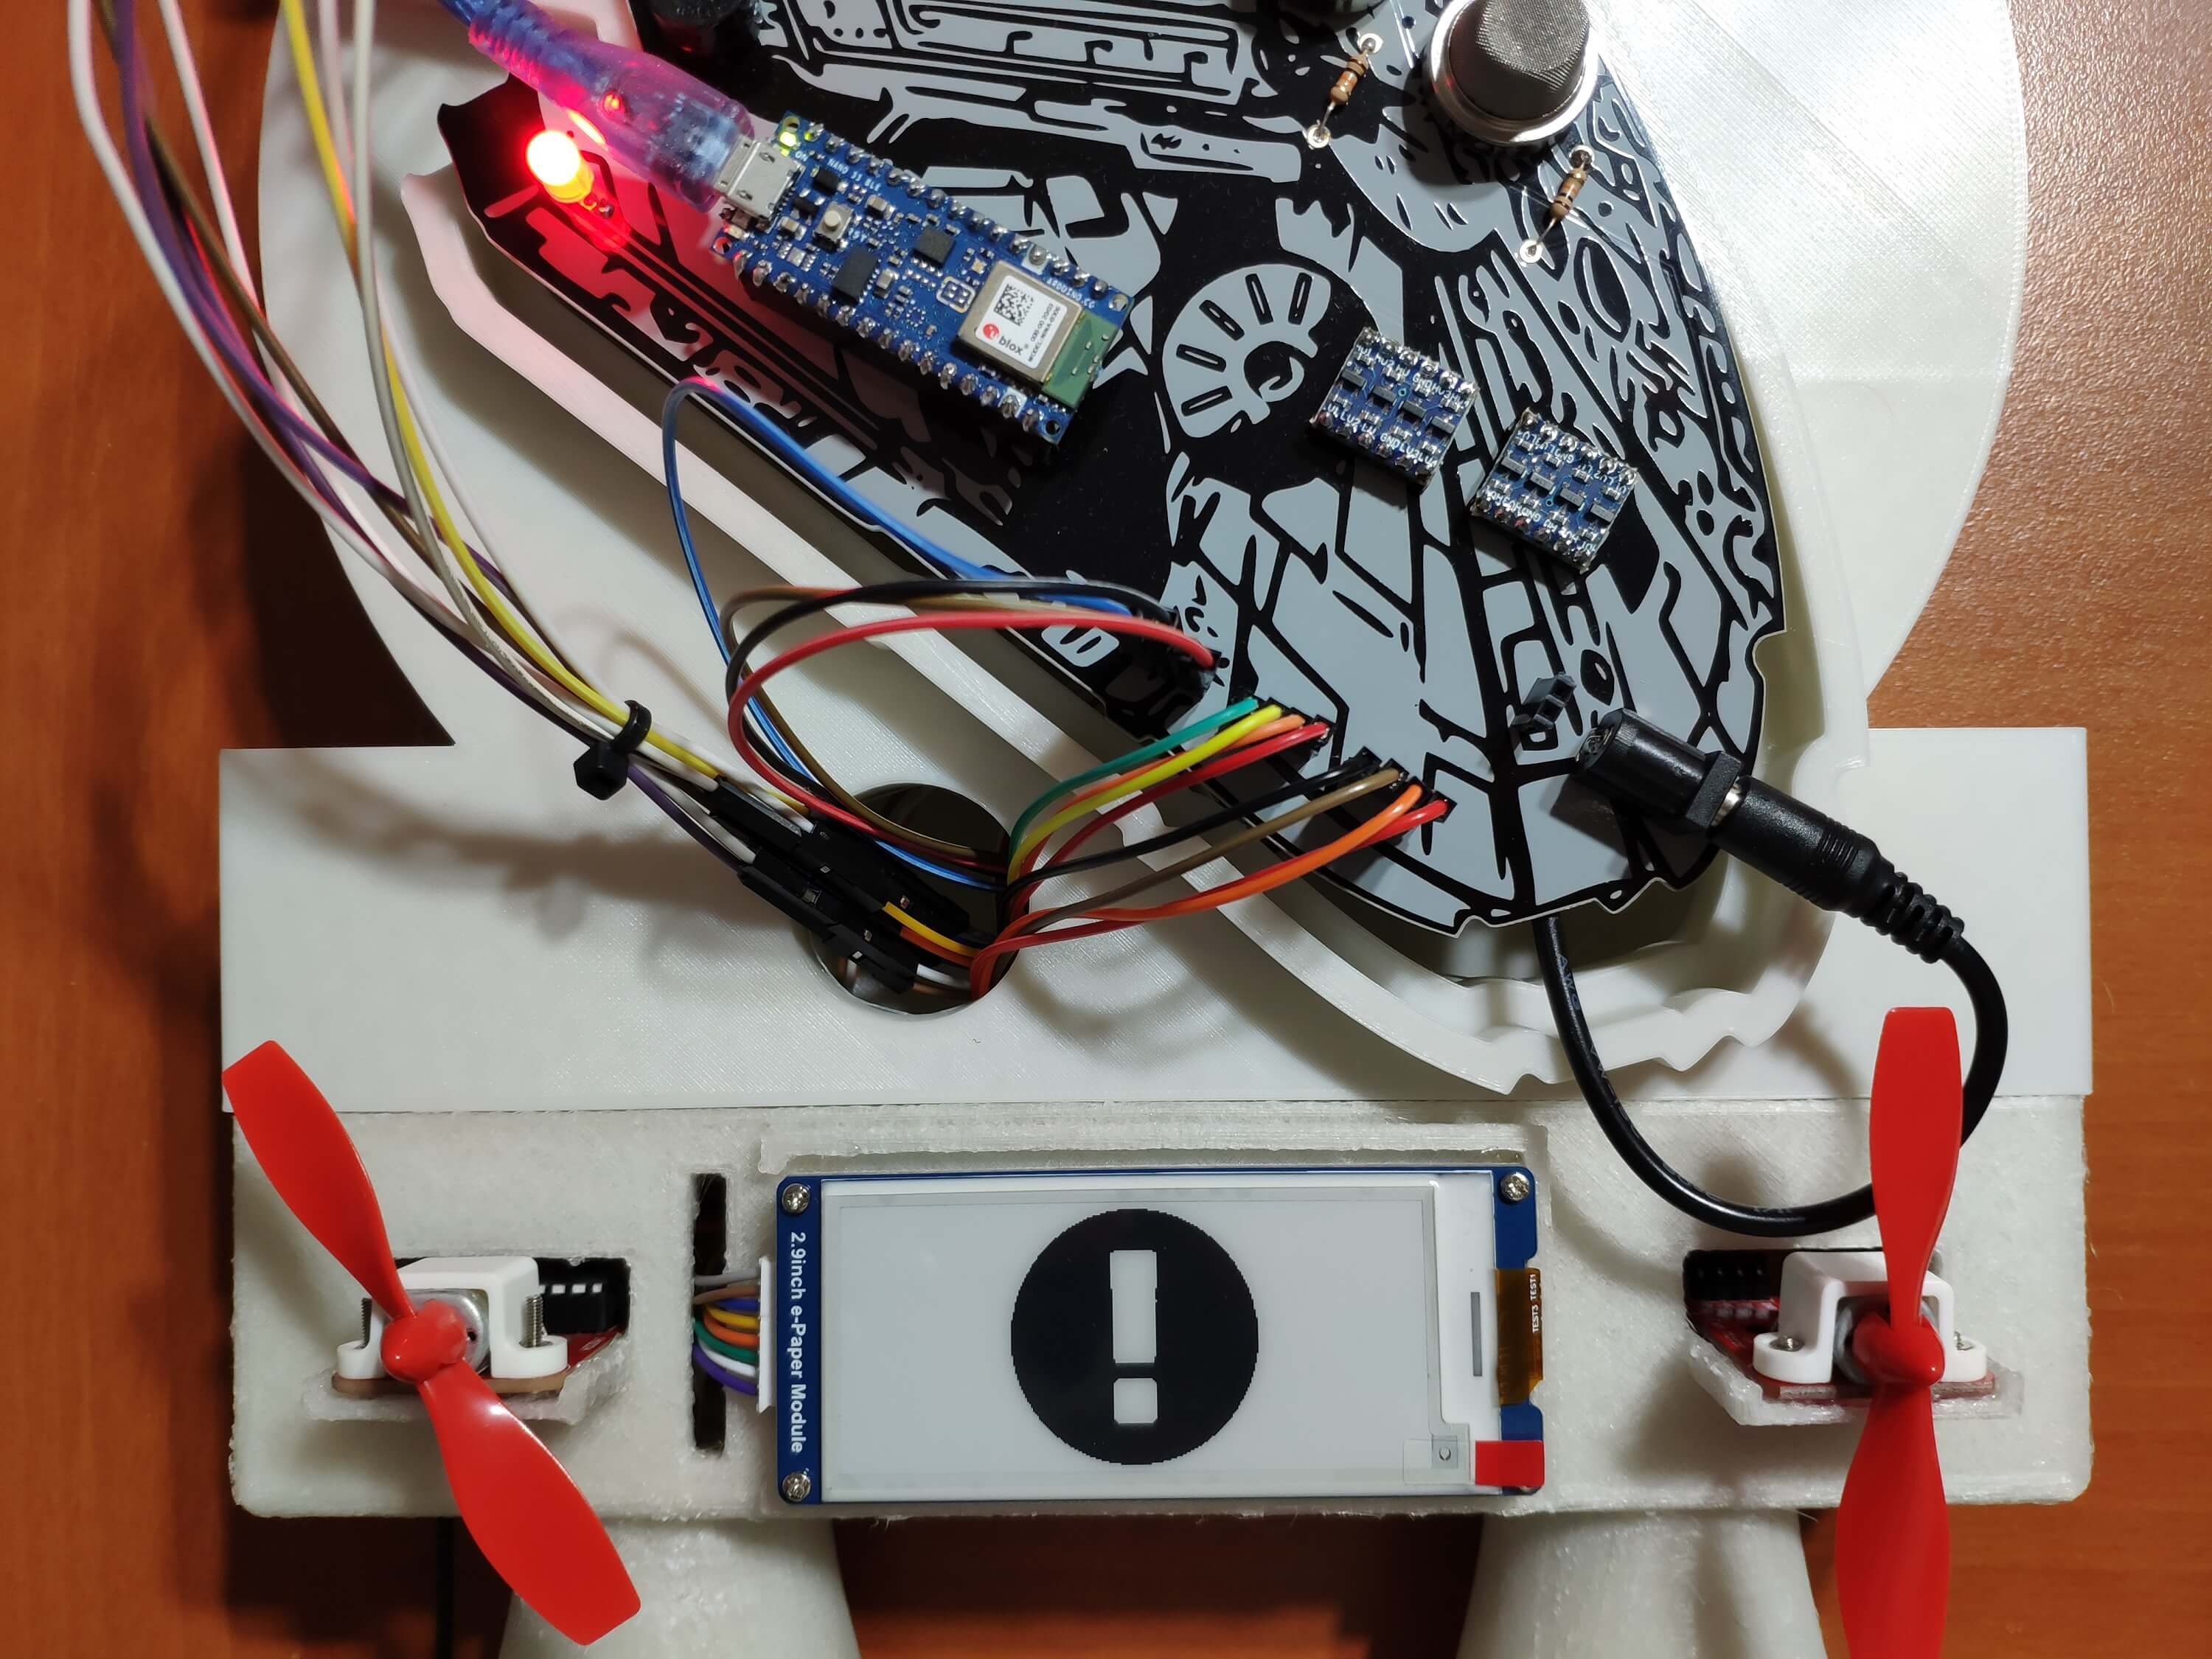
After completing wiring on a breadboard and testing the code for transmitting (writing) and receiving (reading) data packets over BLE, I designed a Millennium Falcon-inspired PCB for this remote lamp project.
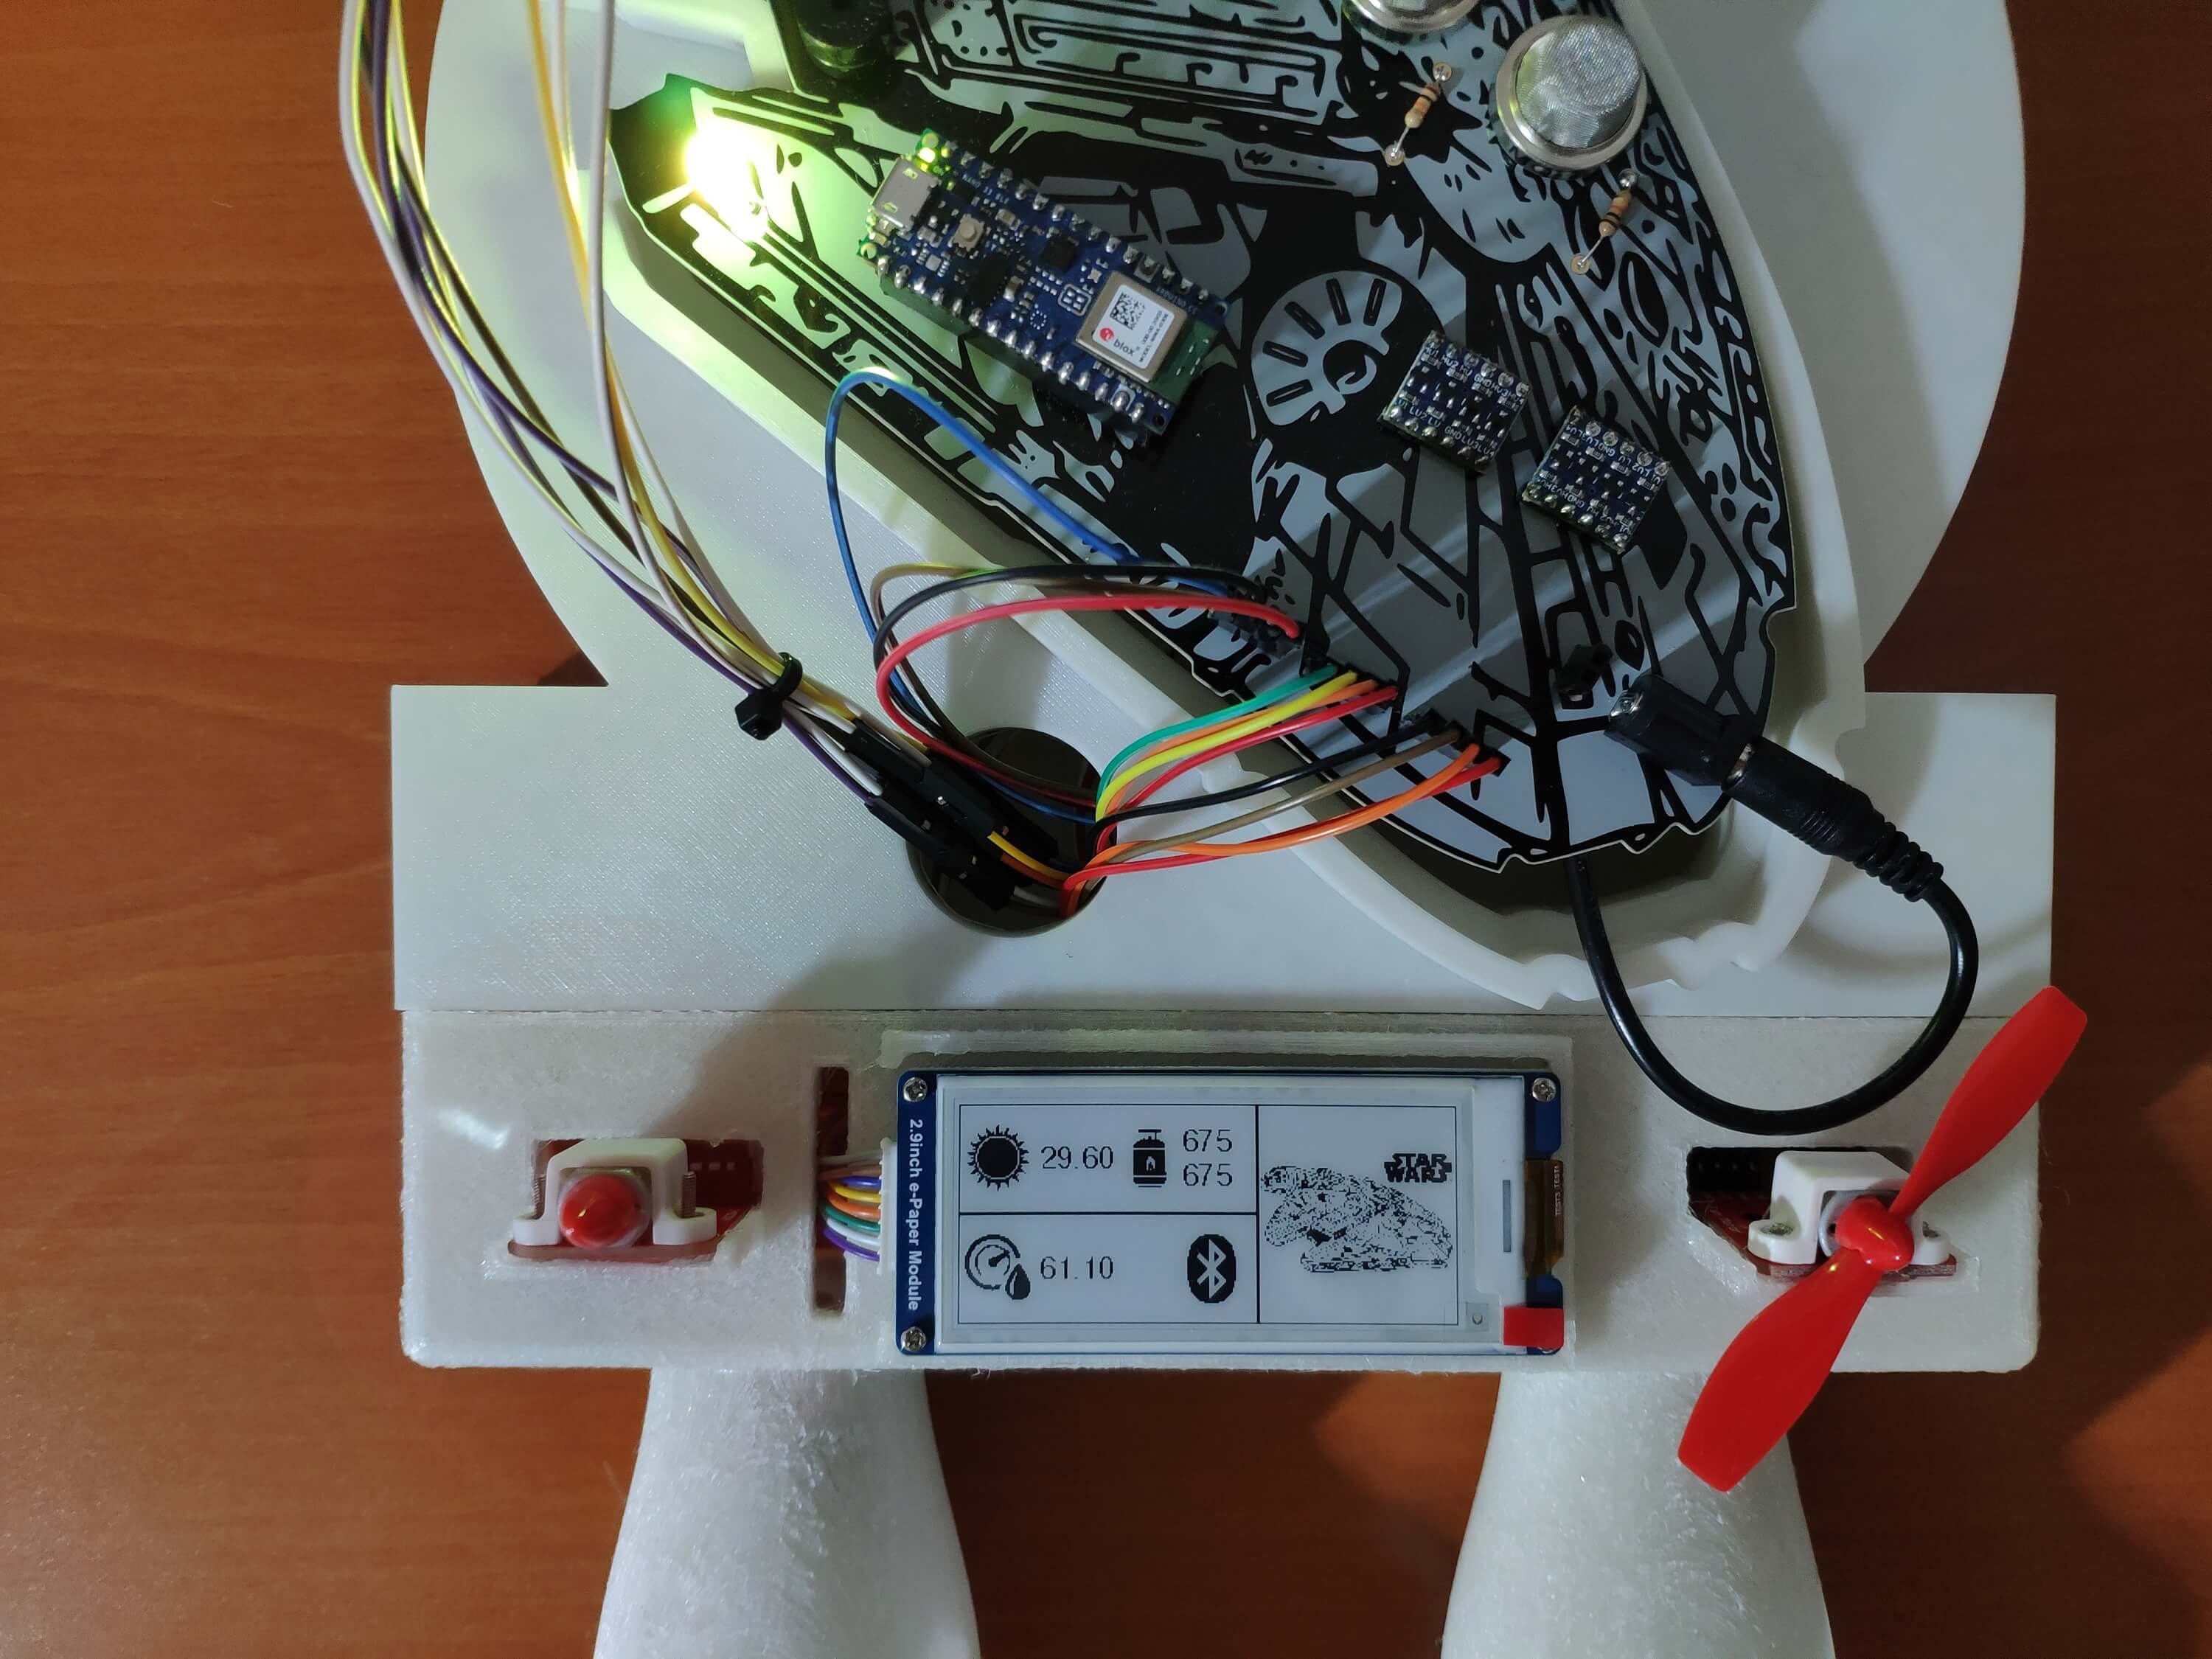
Lastly, I also designed a complementary Star Wars-themed lighting system structure resembling an AT-AT (3D printable) to insert the Millennium Falcon PCB in order to create a robust and stylish apparatus emphasizing the Star Wars theme gloriously. Also, the lighting structure glows in the dark thanks to luminous PLA filaments (green and blue) :)
🎁🎨 Huge thanks to PCBWay for sponsoring this project.
Since Millennium Falcon has a captivating and memorable color scheme, I could not get the result I wanted with the regular solder mask options. Therefore, I decided to design my PCB with the grey solder mask option unique to PCBWay. They provide a fast, reliable, and budget-friendly service for exceptional PCB colors and requirements. You can inspect PCBWay solder mask and silkscreen options from here.
Also, if you are interested in developing an industrial-level product with budget-friendly prices, competitive delivery accuracy, and high product quality, you can check PCBWay's OEM service. The OEM service assists PCBWay customers in turning proof-of-concept projects into products ready for marketing with turnkey contract manufacturing options.
Step 1: Designing and soldering a Millennium Falcon-inspired PCB
Before prototyping my Millennium Falcon-inspired PCB design, I tested all connections and wiring with the Arduino Nano 33 BLE and checked the connection status between the Nano 33 BLE and the Android application.
Figure - 81.6
Then, I designed the Millennium Falcon-inspired PCB by utilizing KiCad - reminiscent of the legendary interstellar adventures in a galaxy far, far away :) I attached the Gerber file of the PCB below. Therefore, if you want, you can order this PCB from PCBWay to build your BLE-enabled Star Wars-themed room lighting system controlled by a specialized Android application.
Click here to inspect and order this PCB directly on PCBWay.
Figure - 81.7
Figure - 81.8
Figure - 81.9
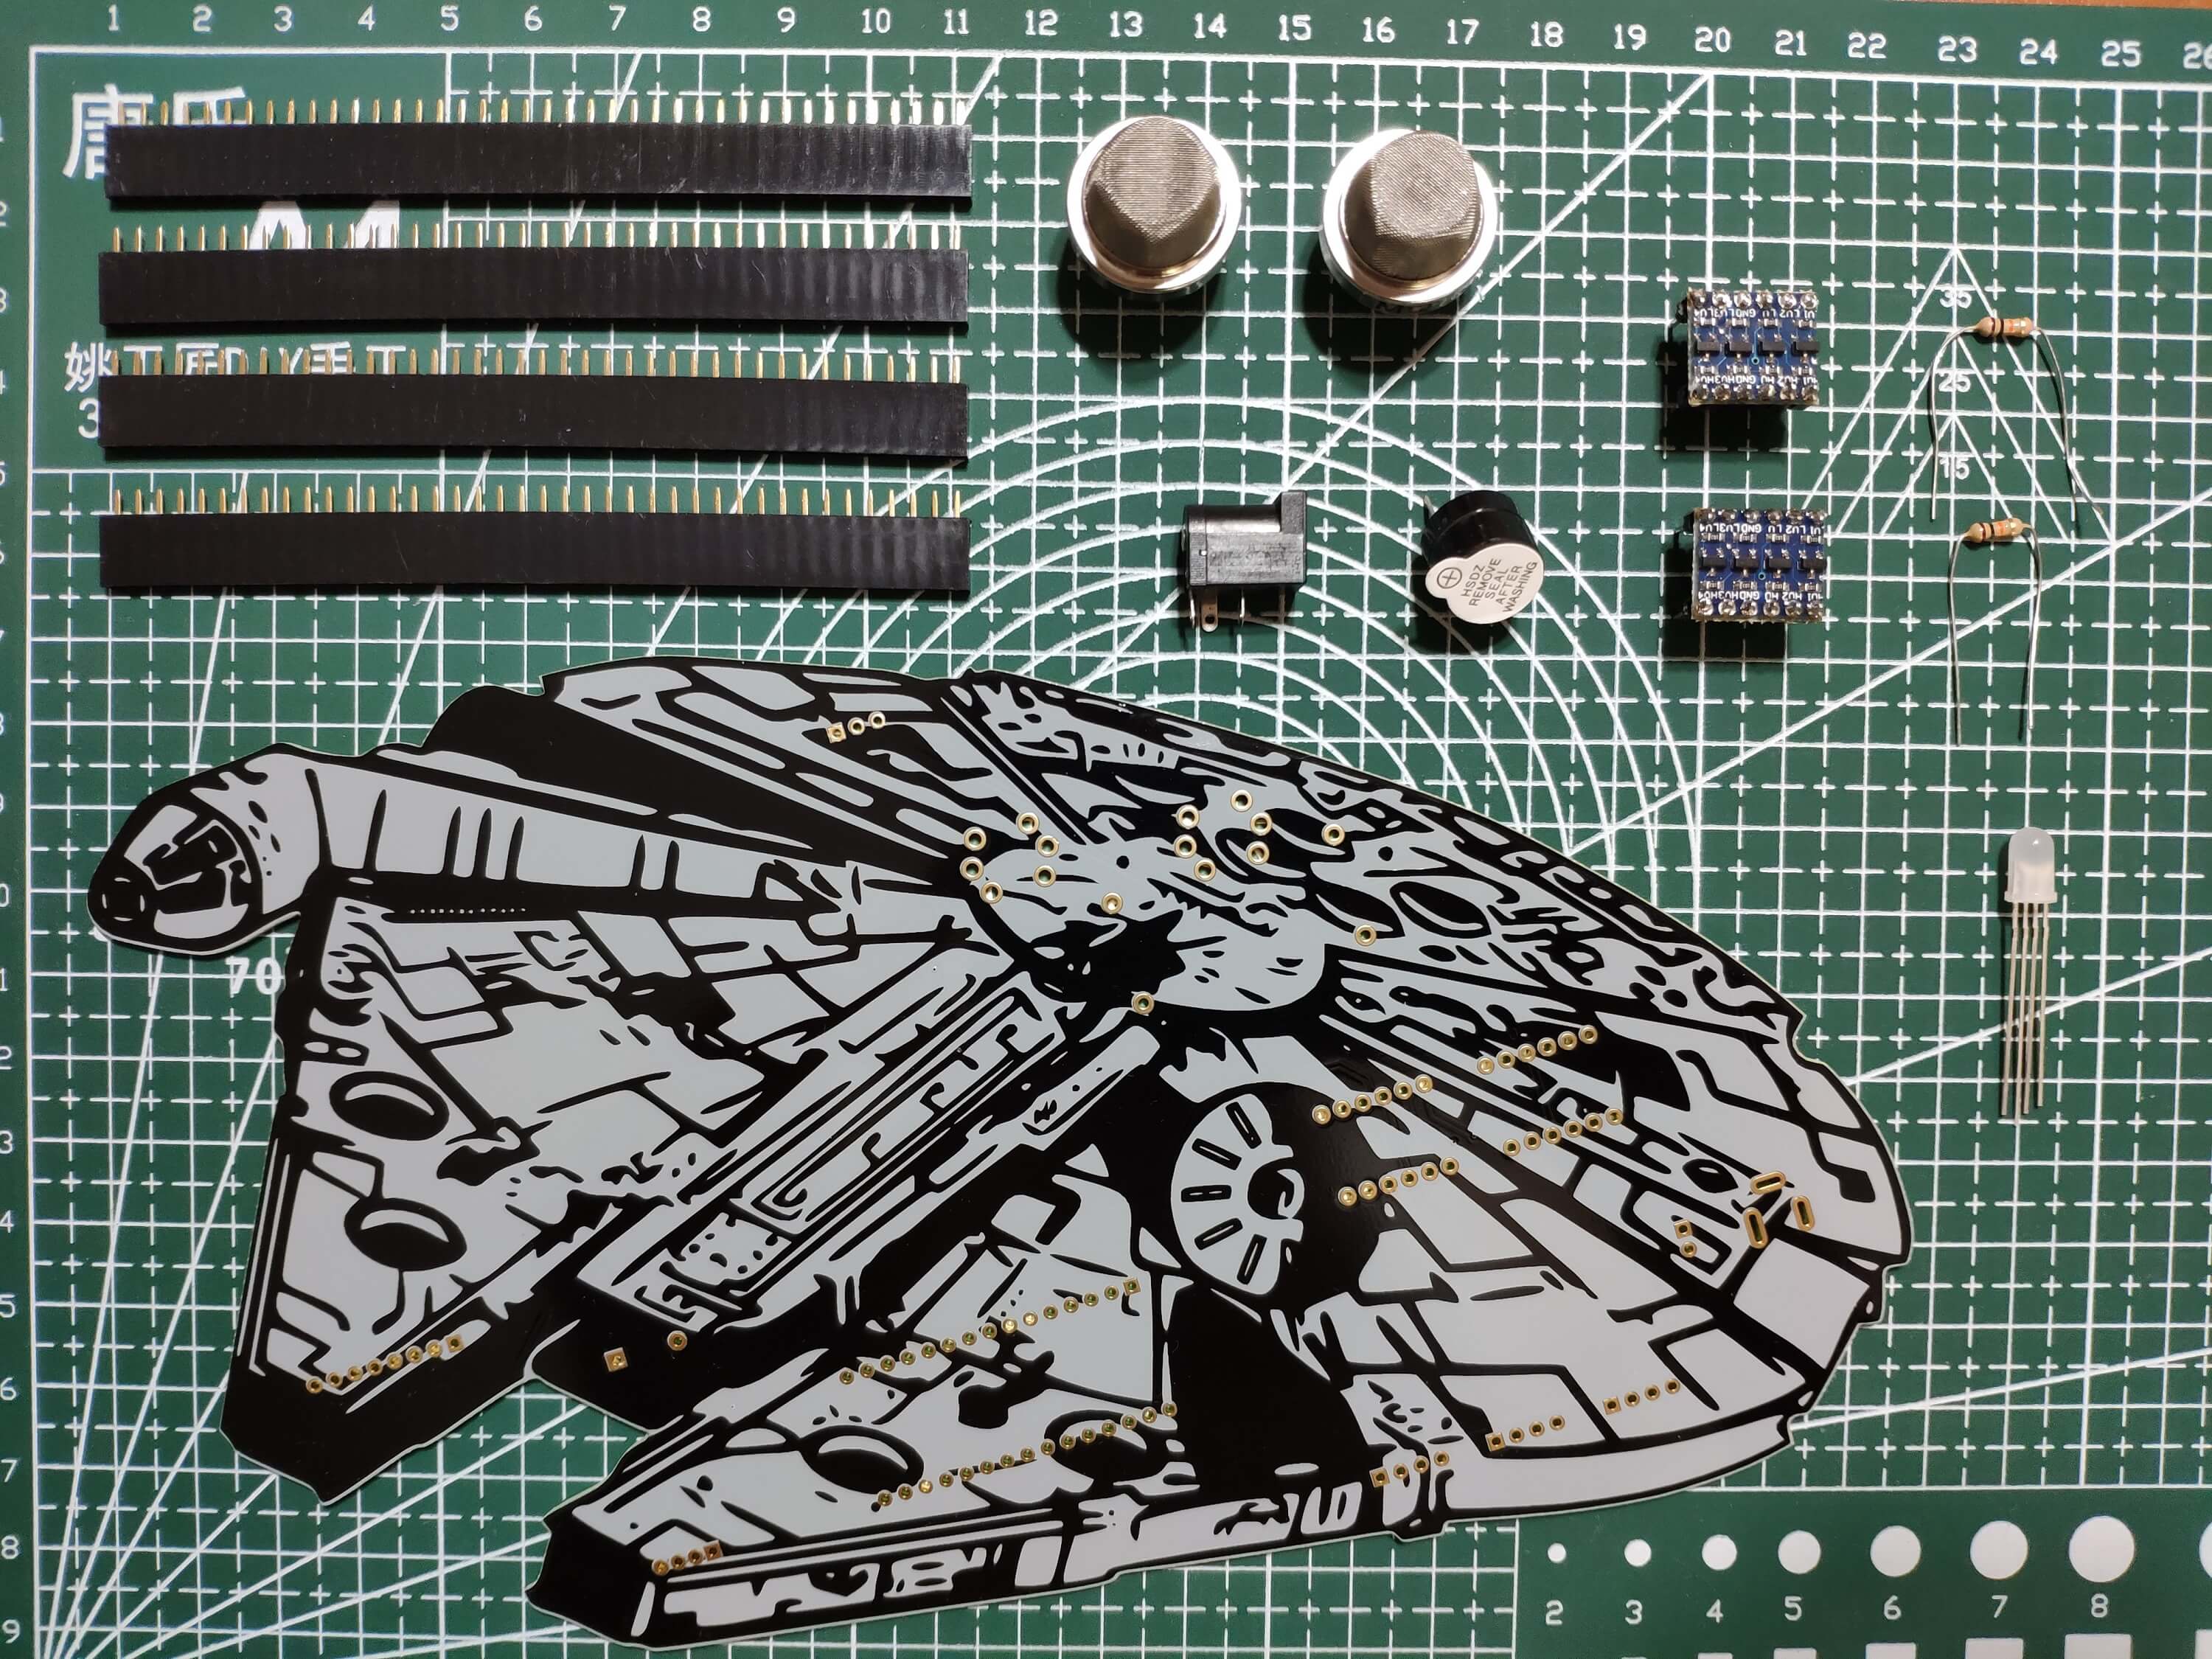
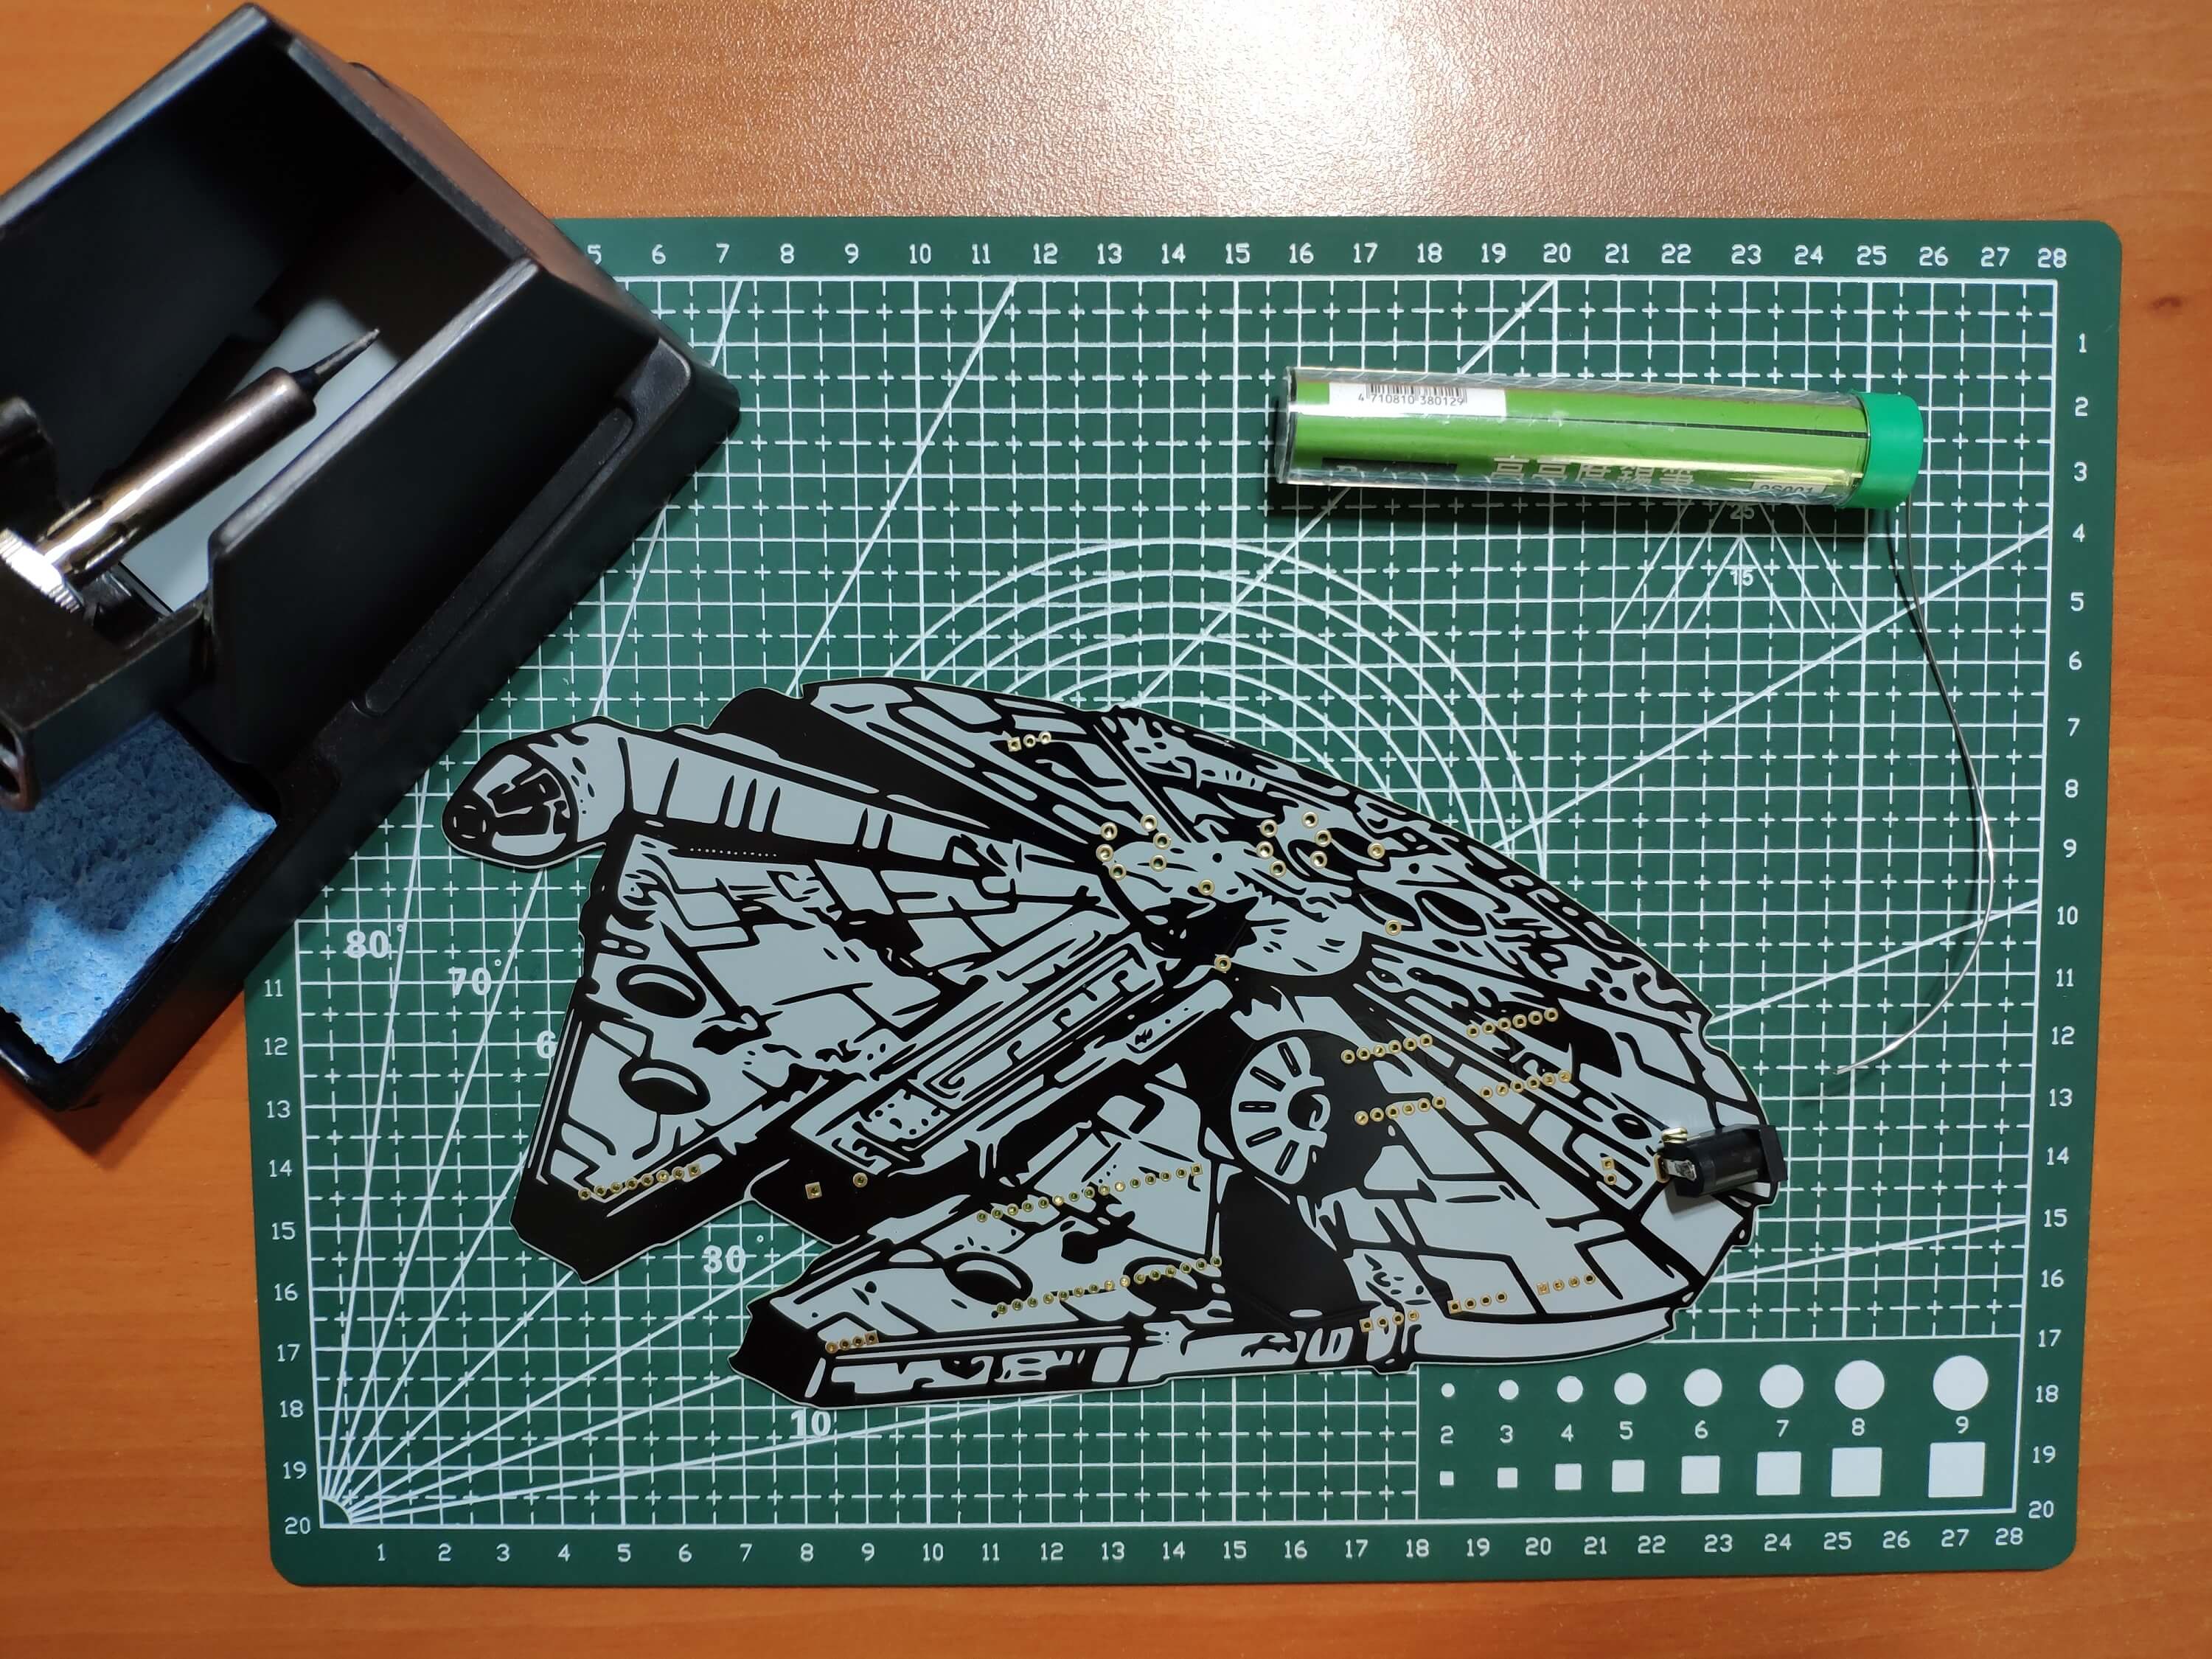
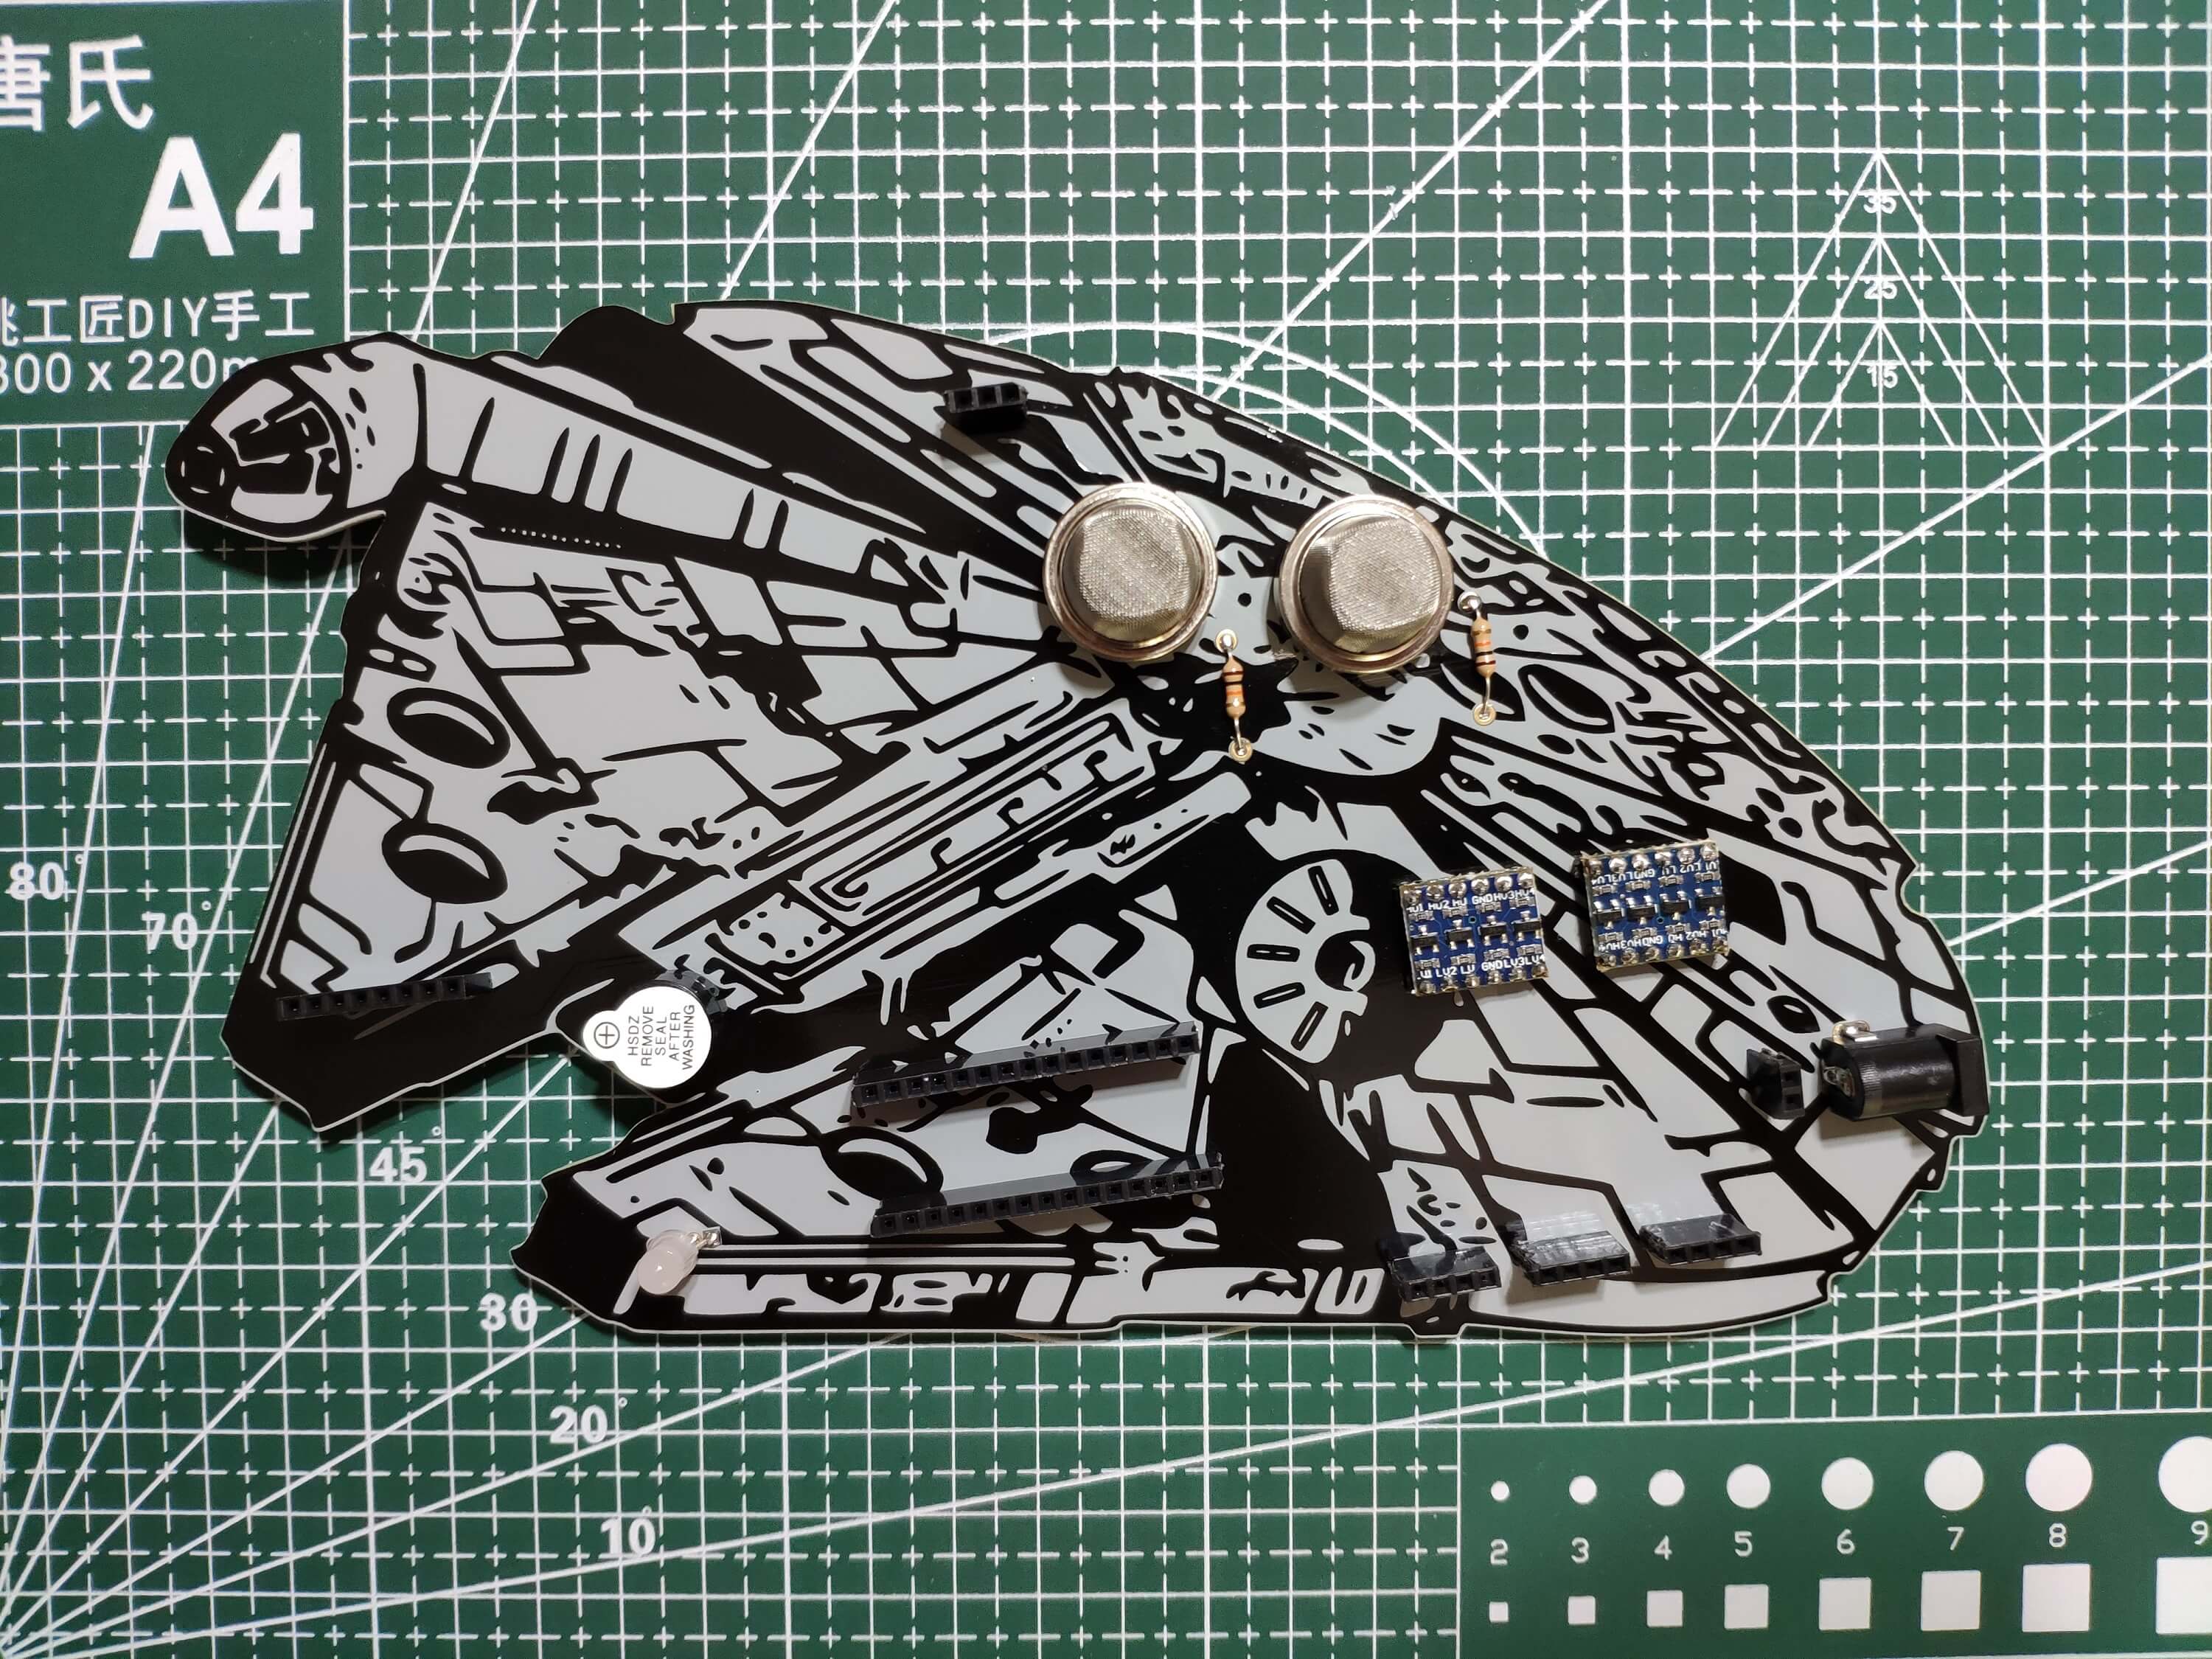
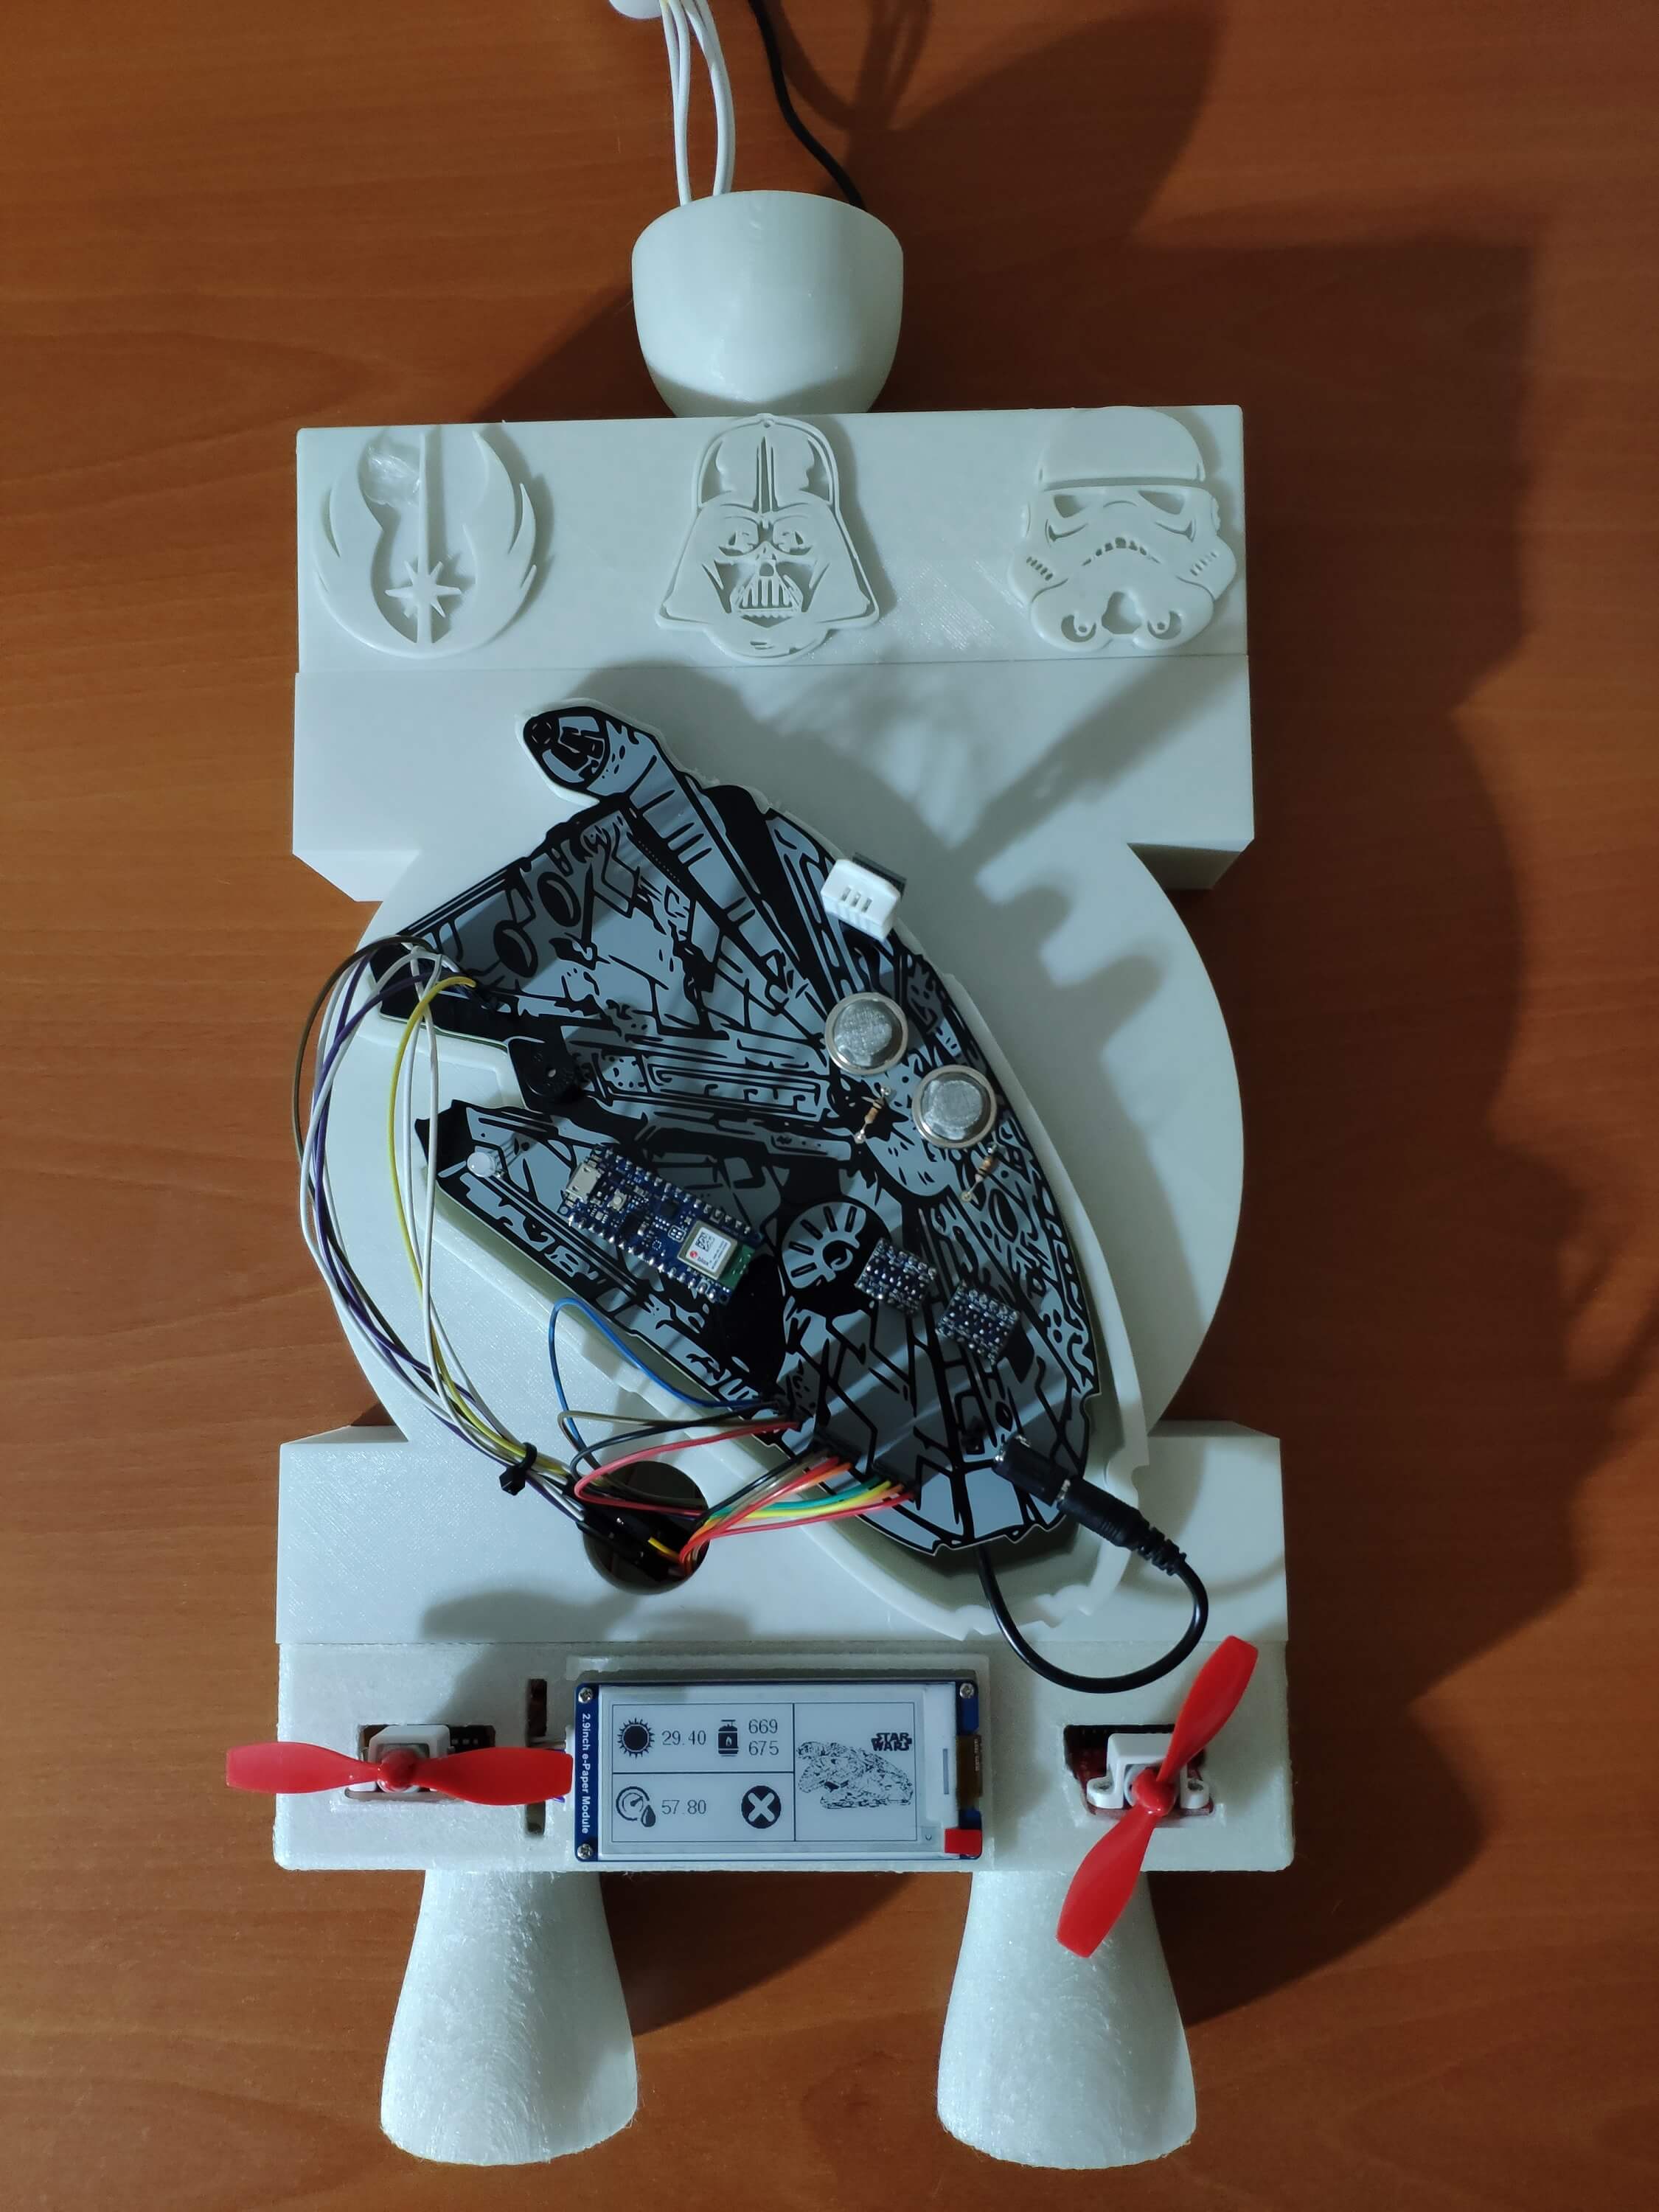
First of all, by utilizing a soldering iron, I attached headers (female), resistors (20K), MQ-4 gas sensor, MQ-7 gas sensor, two bi-directional logic level converters, a buzzer, a 5mm common anode RGB LED, and a power jack to the PCB.
📌 Component list on the PCB:
A1 (Headers for Arduino Nano 33 BLE)
S1 (Headers for Waveshare 2.9'' E-Paper Module)
DHT22 (Headers for DHT22 Temperature and Humidity Sensor)
MQ4 (MQ-4 Gas Sensor)
MQ7 (MQ-7 Gas Sensor)
L1, L2 (Bi-Directional Logic Level Converter)
Relay1 (Headers for 2-Way Relay)
F1, F2 (Headers for L9110 Keyes Fan Motor)
BZ1 (Buzzer)
D1 (5mm Common Anode RGB LED)
R1, R2 (20K Resistor)
J1 (Power Jack)
J2 (Headers for External Battery)
Figure - 81.10
Figure - 81.11
Figure - 81.12
Step 1.1: Making connections and adjustments
// Connections
// Arduino Nano 33 BLE :
//                                Waveshare 2.9'' E-Paper Module
// 3.3V -------------------------- VCC
// GND --------------------------- GND
// D11 --------------------------- DIN
// D13 --------------------------- CLK
// D10 --------------------------- CS
// D9  --------------------------- DC
// D8  --------------------------- RST
// D7  --------------------------- BUSY
//                                DHT22 Temperature and Humidity Sensor
// D2  --------------------------- DATA
// 3.3V -------------------------- VCC
// GND --------------------------- GND
//                                MQ-4 Air Quality Sensor
// A0  --------------------------- S
//                                MQ-7 Air Quality Sensor
// A1  --------------------------- S
//                                2-Way Relay
// A2  --------------------------- IN_1
// A3  --------------------------- IN_2
// 5V  --------------------------- 5V
// GND --------------------------- GND
//                                RGB LEB (RAGB)
// A4  --------------------------- R
// A5  --------------------------- G
// A6  --------------------------- B
//                                Keyes Fan Motor - L9110 (Left)
// GND --------------------------- GND
// 5V  --------------------------- VCC
// D3  --------------------------- INA
// D4  --------------------------- INB
//                                Keyes Fan Motor - L9110 (Right)
// GND --------------------------- GND
// 5V  --------------------------- VCC
// D5  --------------------------- INA
// D6  --------------------------- INB
//                                Buzzer
// D12 --------------------------- +
After completing soldering, I attached all remaining components to the Millennium Falcon PCB via headers - Arduino Nano 33 BLE, Waveshare e-Paper module, DHT22 sensor, 2-Way relay, and L9110 fan motors.
Since the Nano 33 BLE operates at 3.3V, it cannot power the 2-Way relay and L9110 fan motors sufficiently, which requires 5V logic level voltage. Therefore, I added two bi-directional logic level converters to the PCB to shift the voltage for the connections between the mentioned components and the Nano 33 BLE.
Figure - 81.13
Step 2: Designing and printing a Star Wars-themed room lighting system
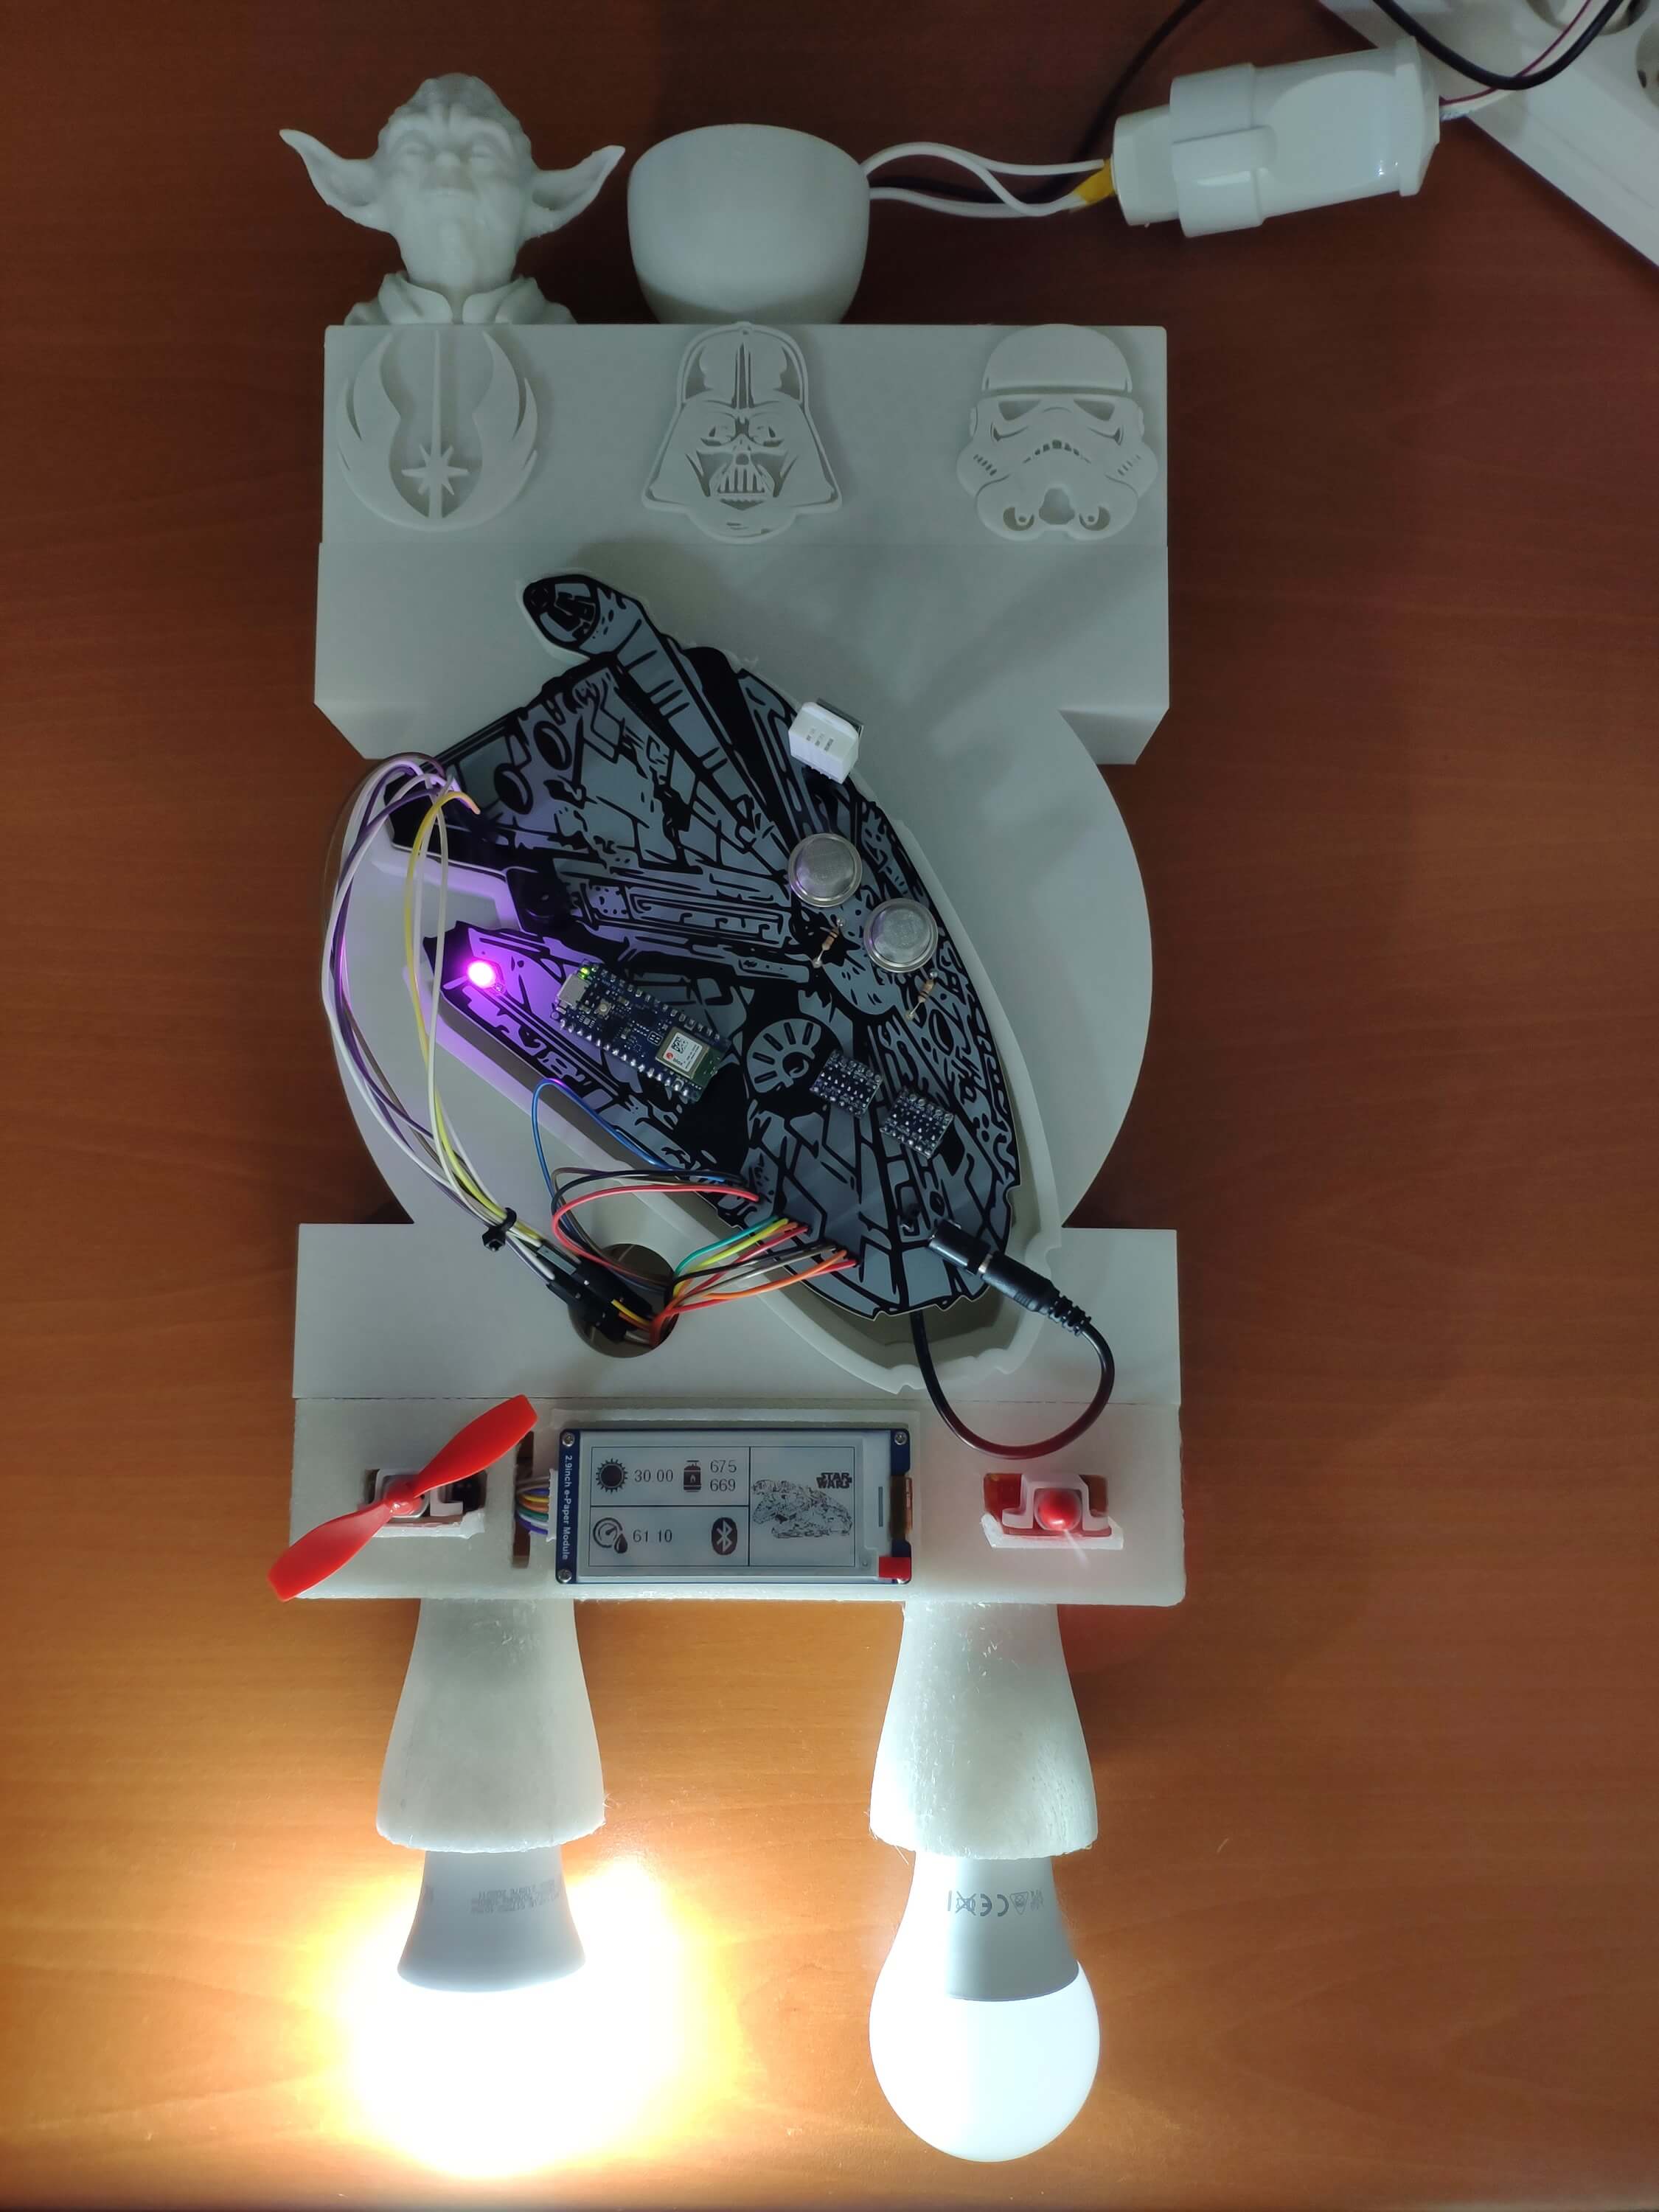
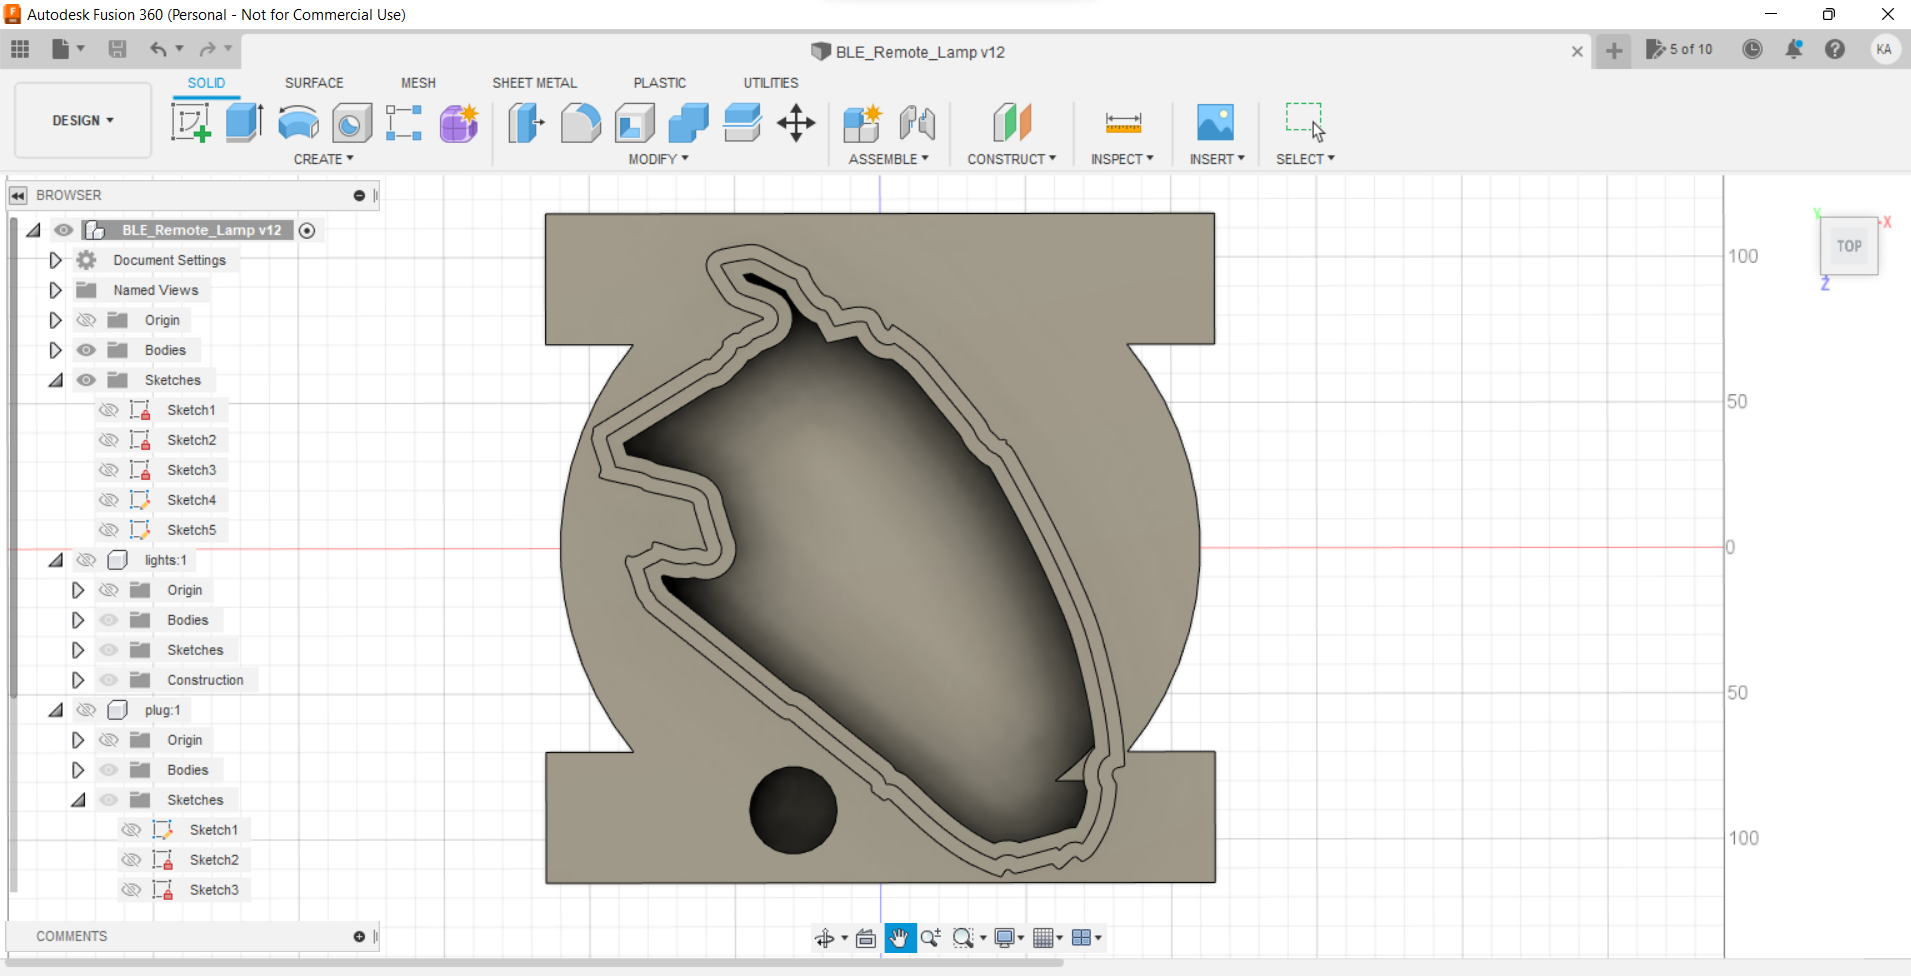
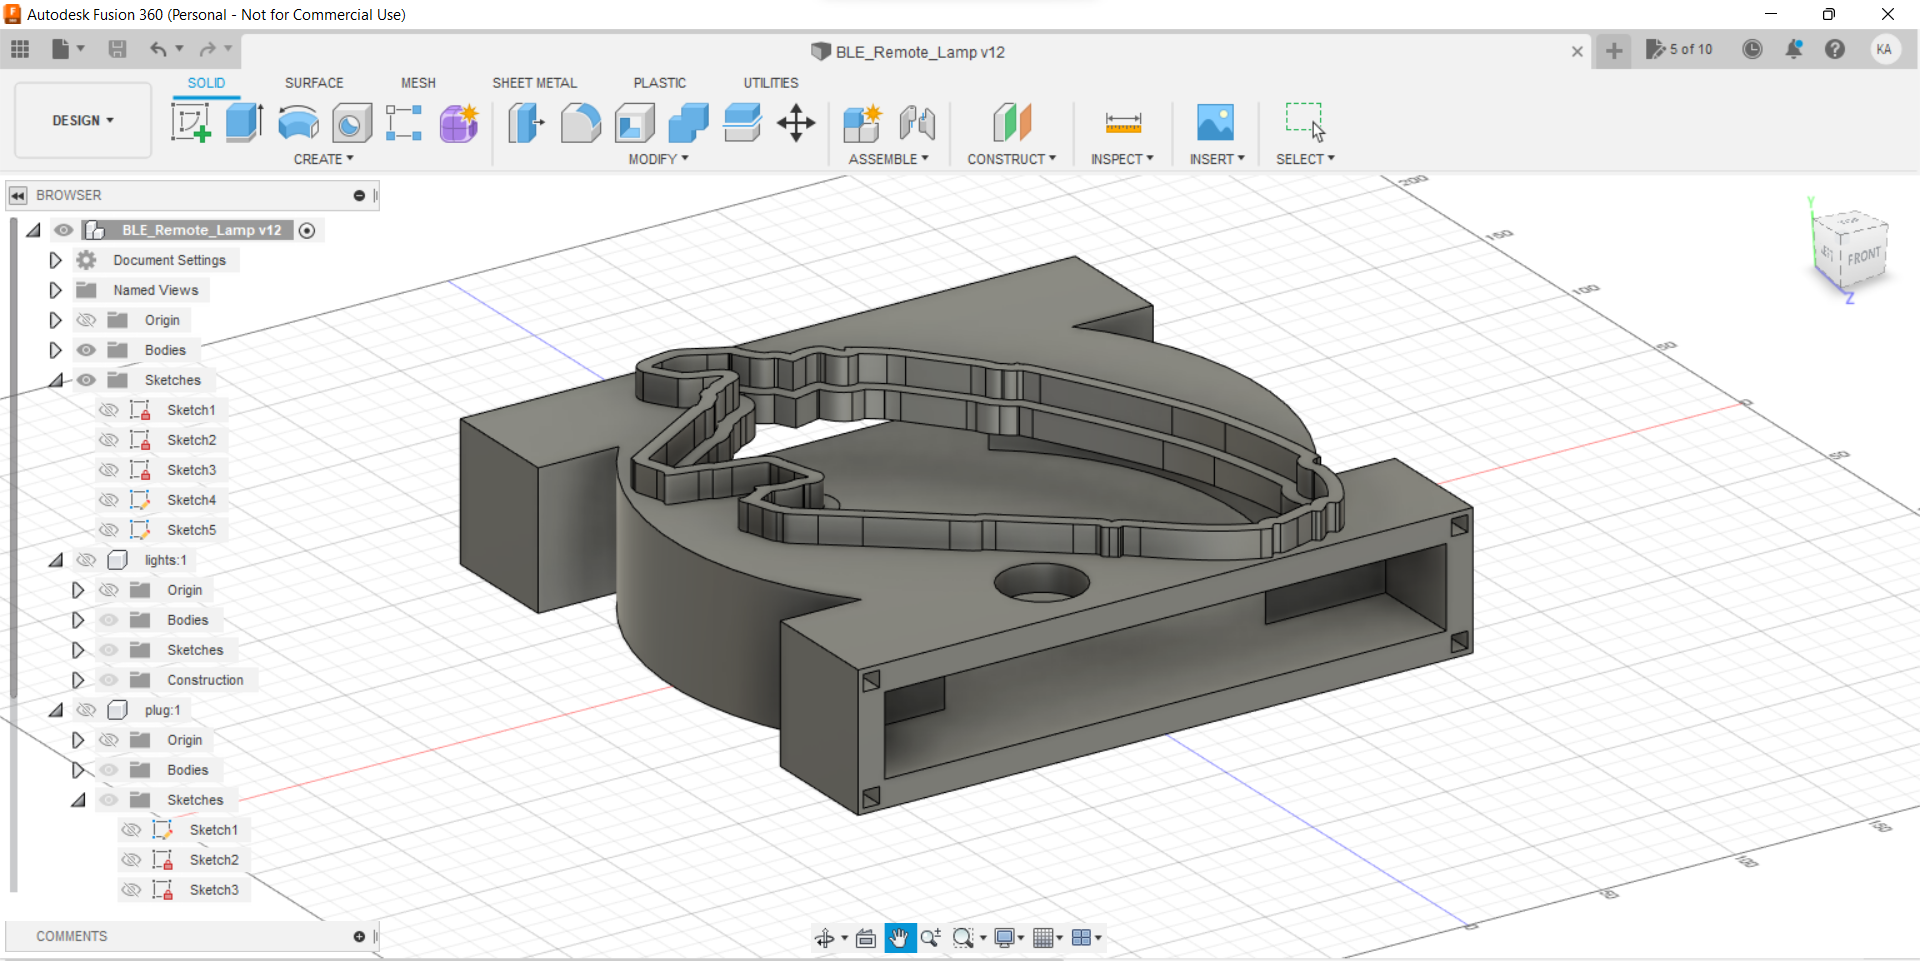
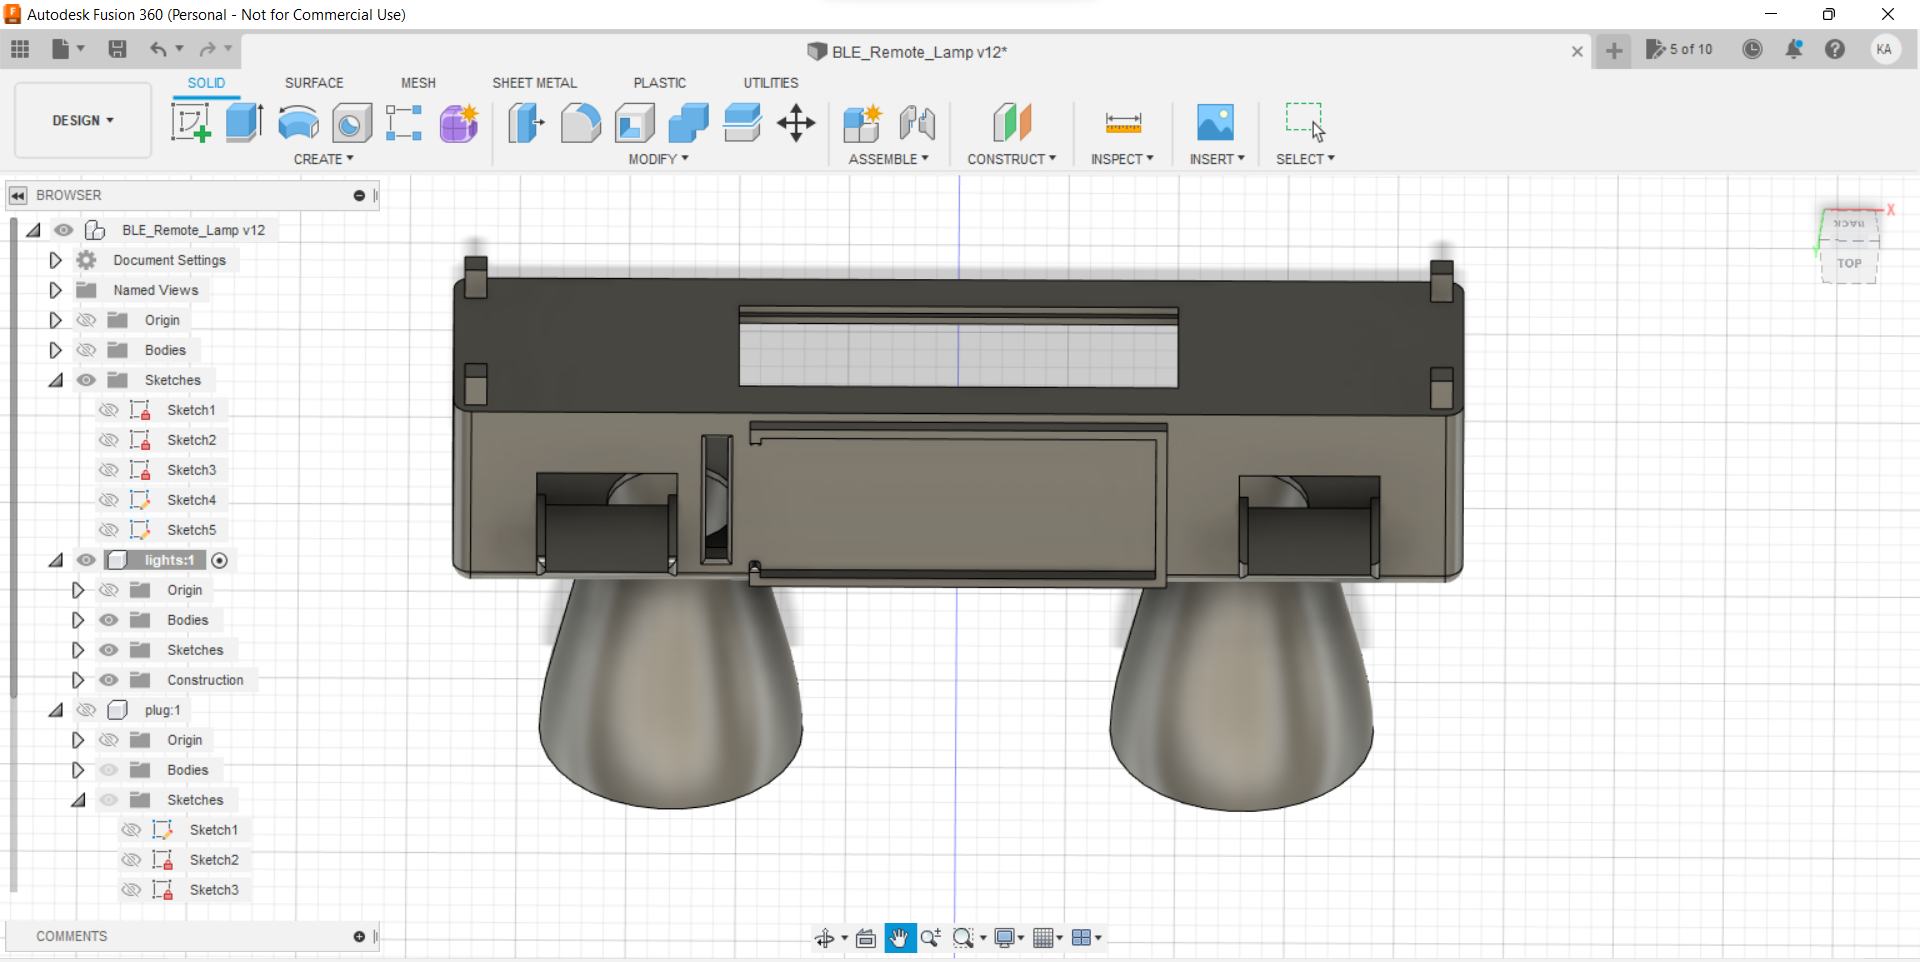
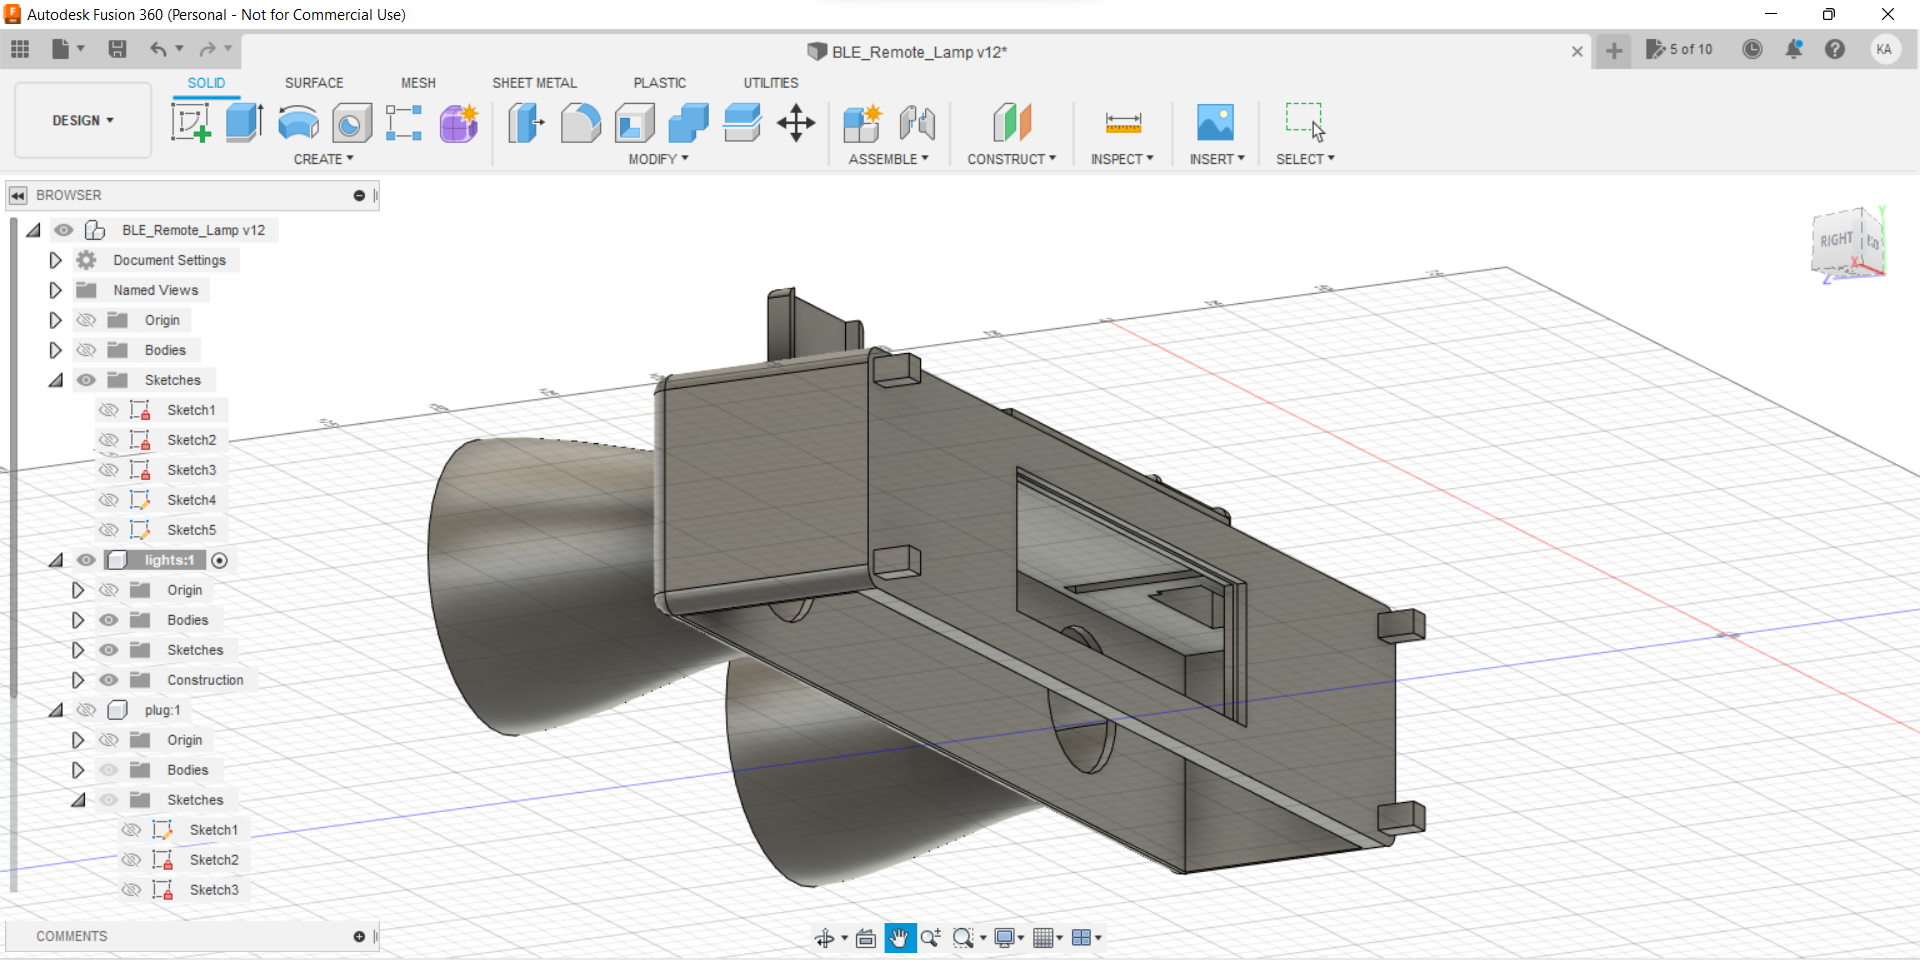
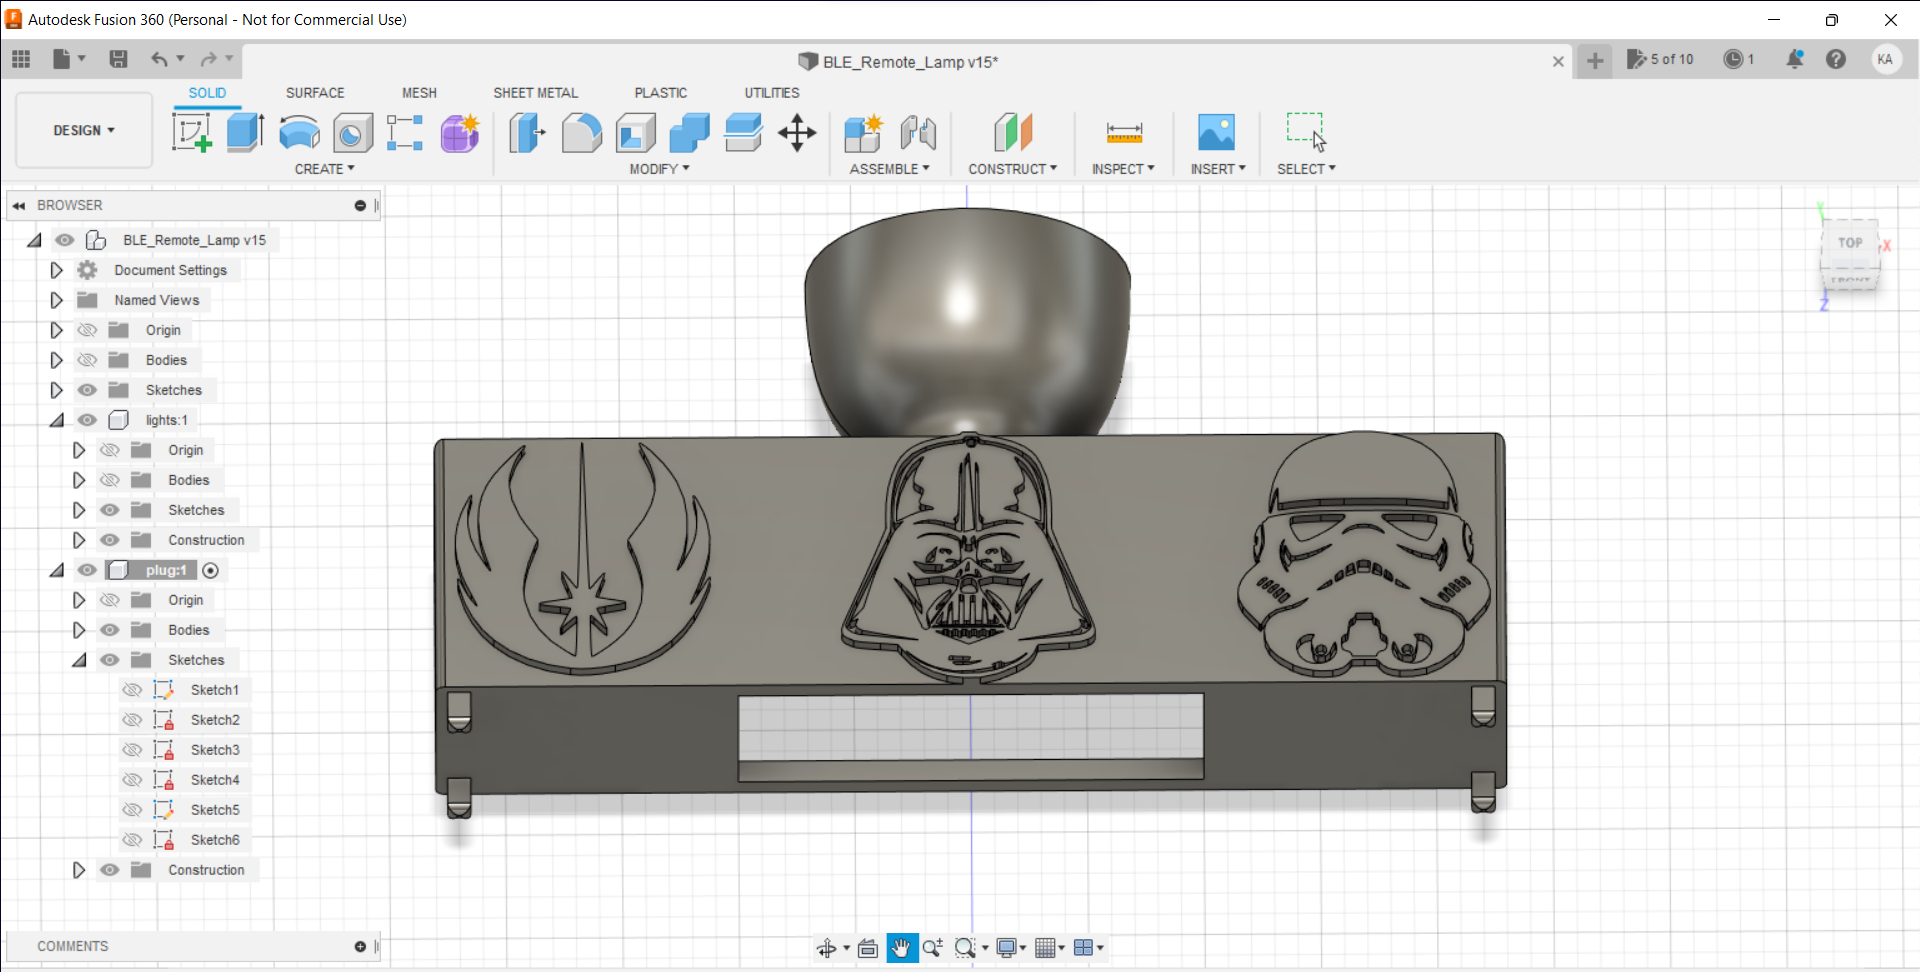
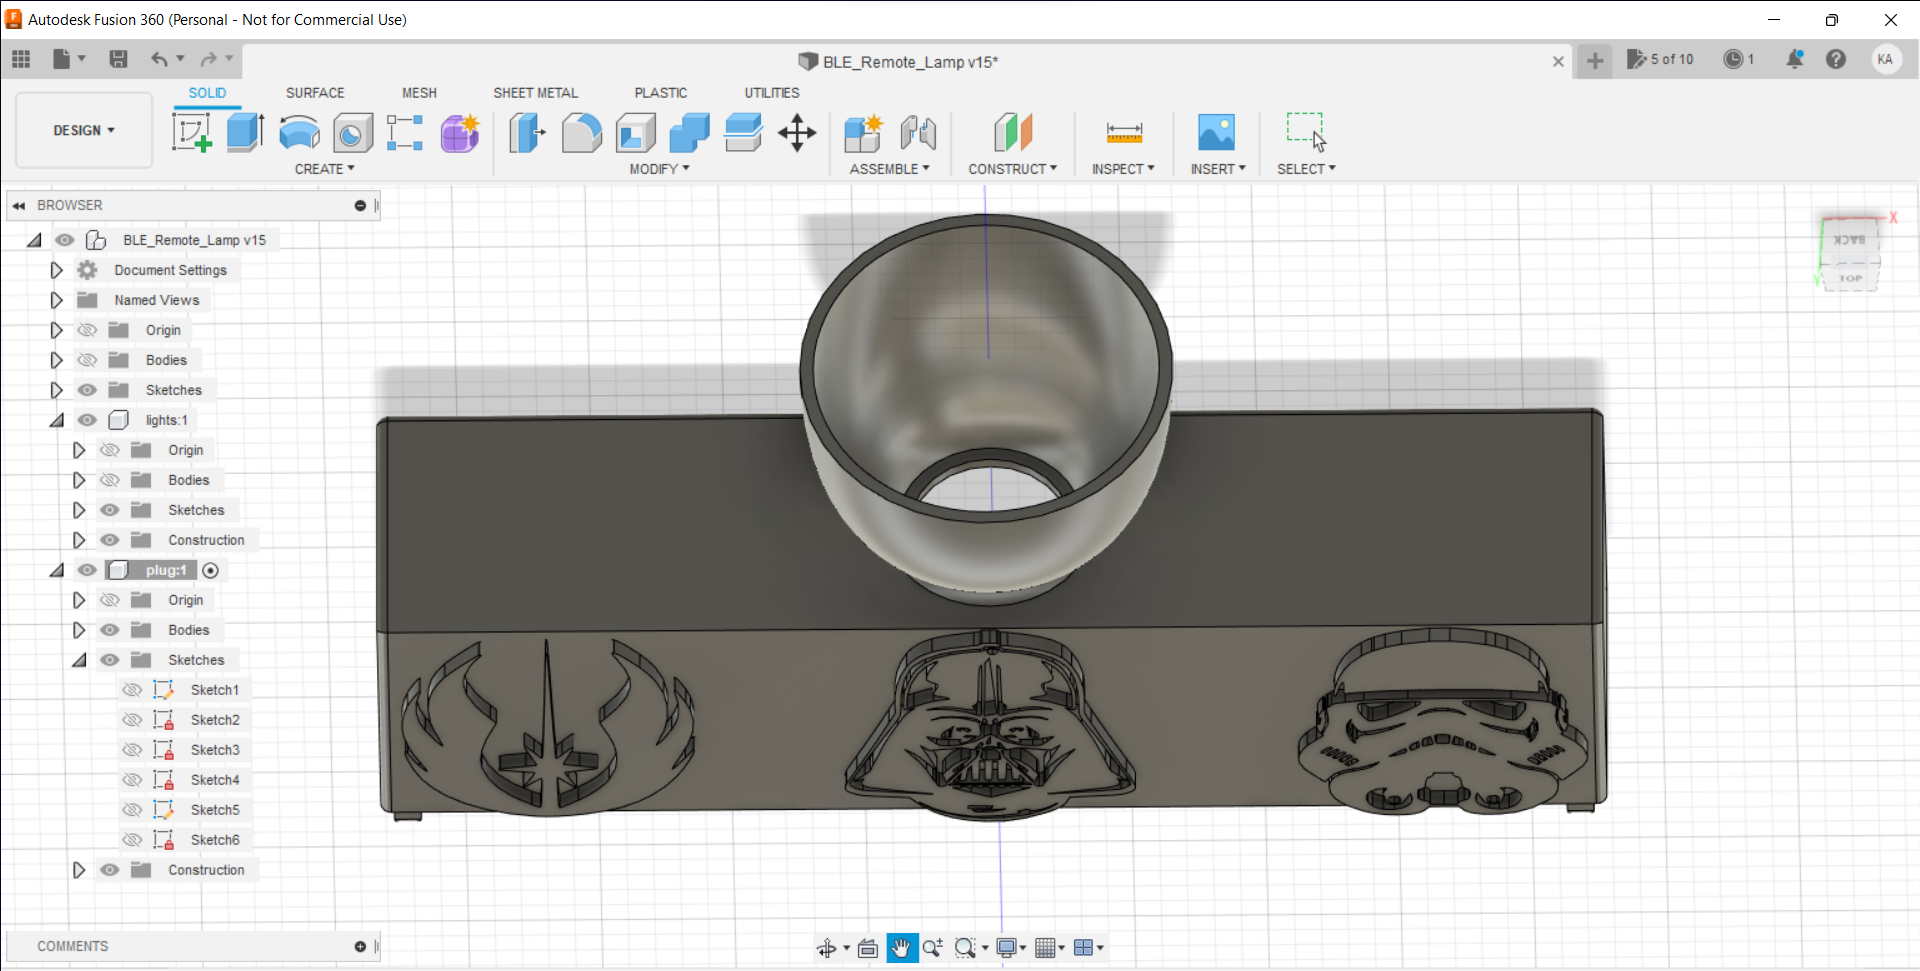
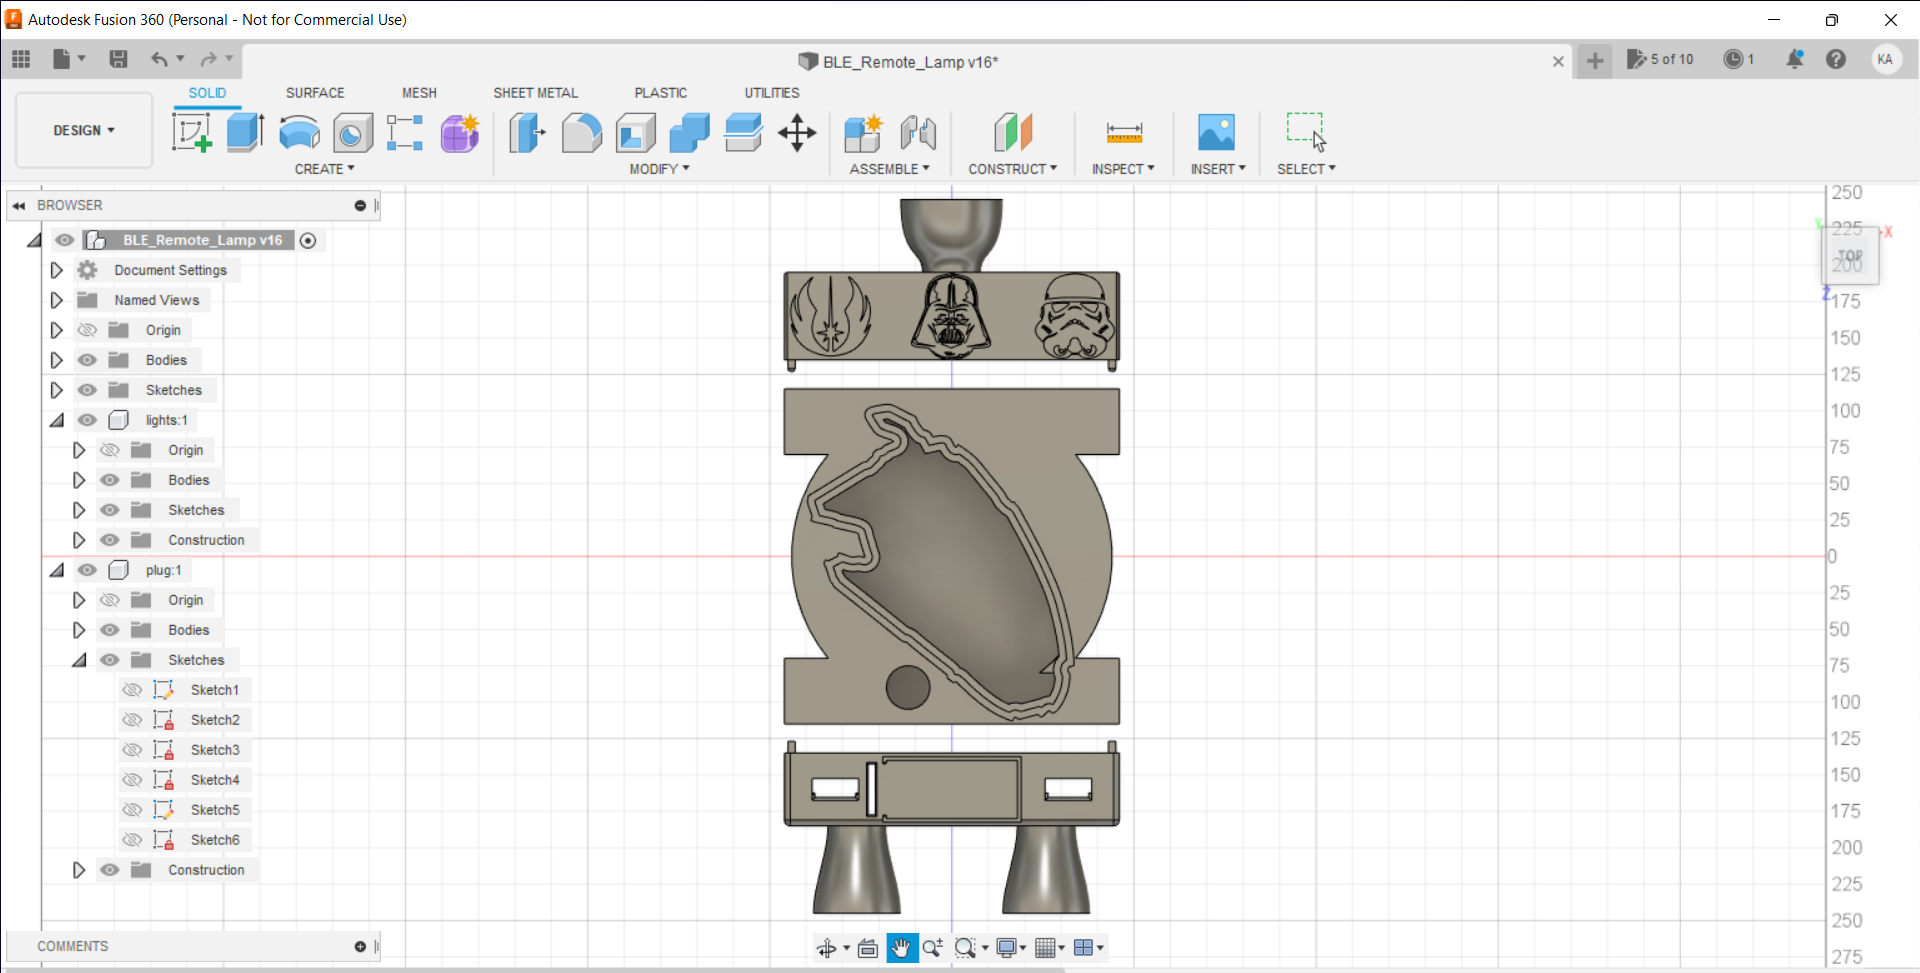
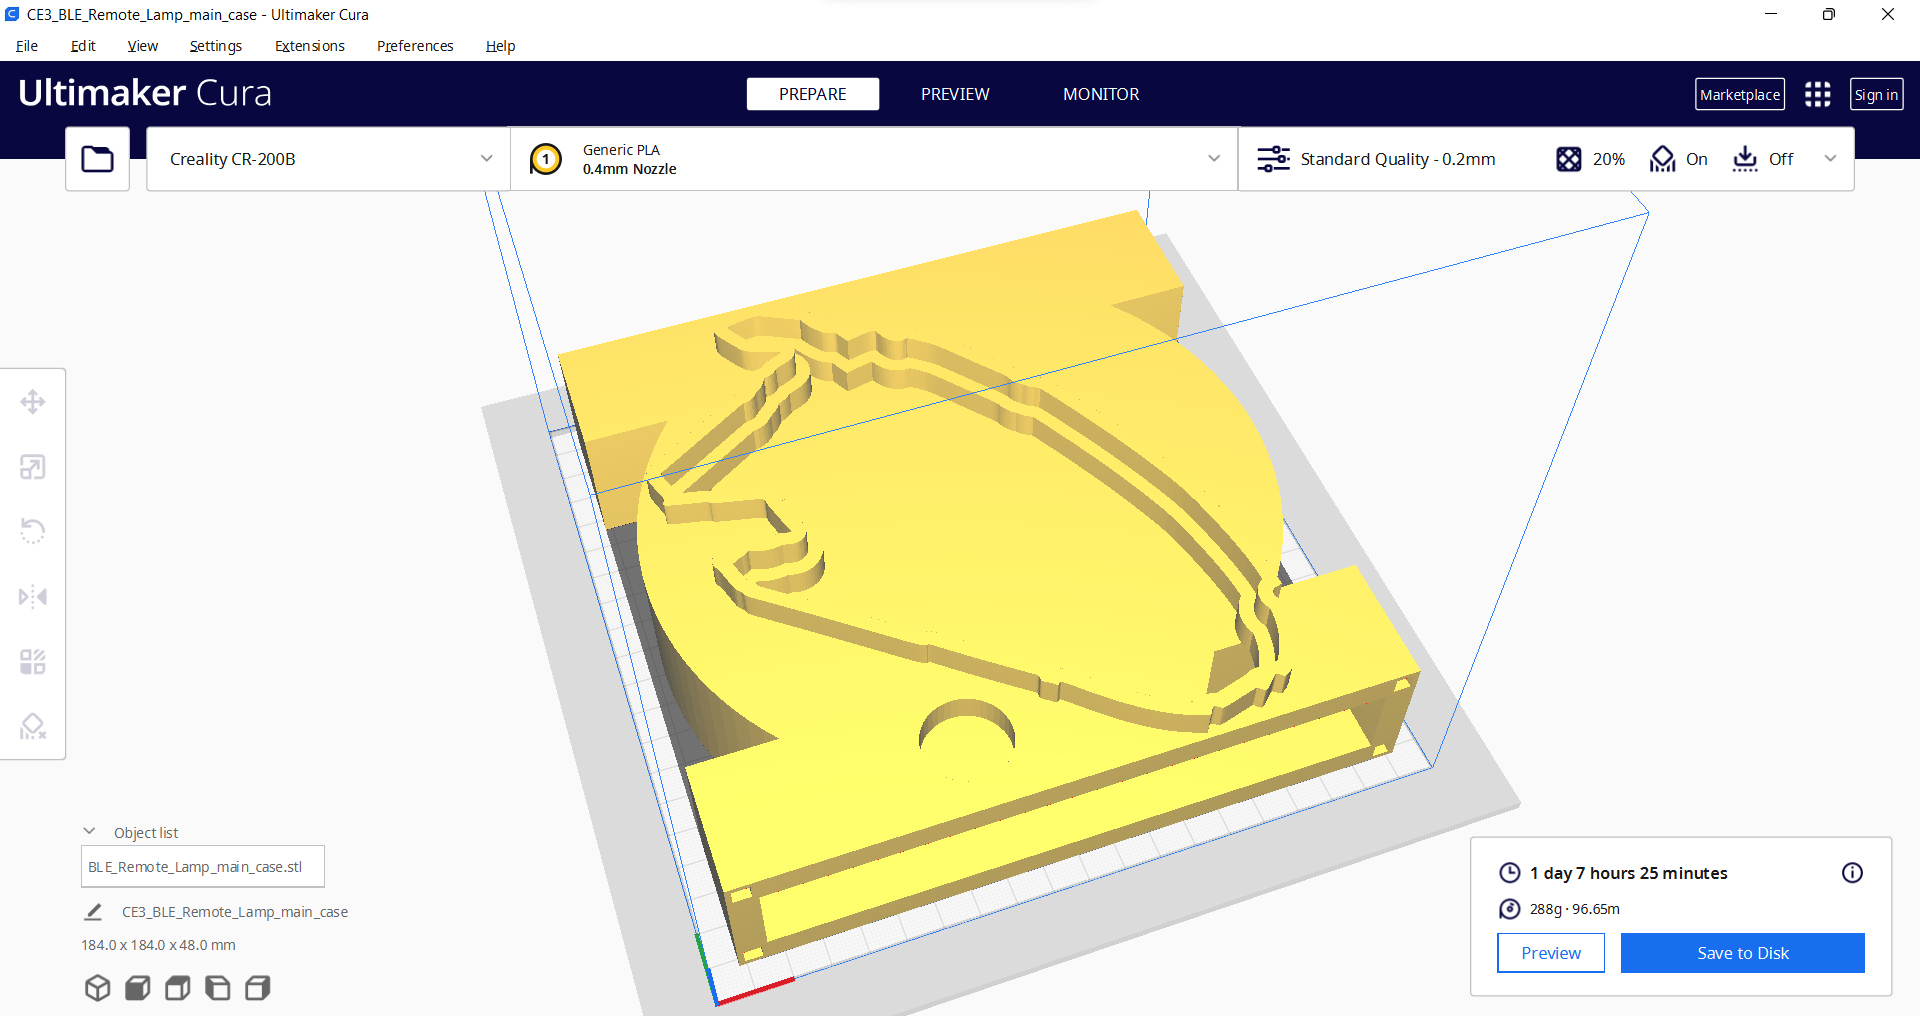
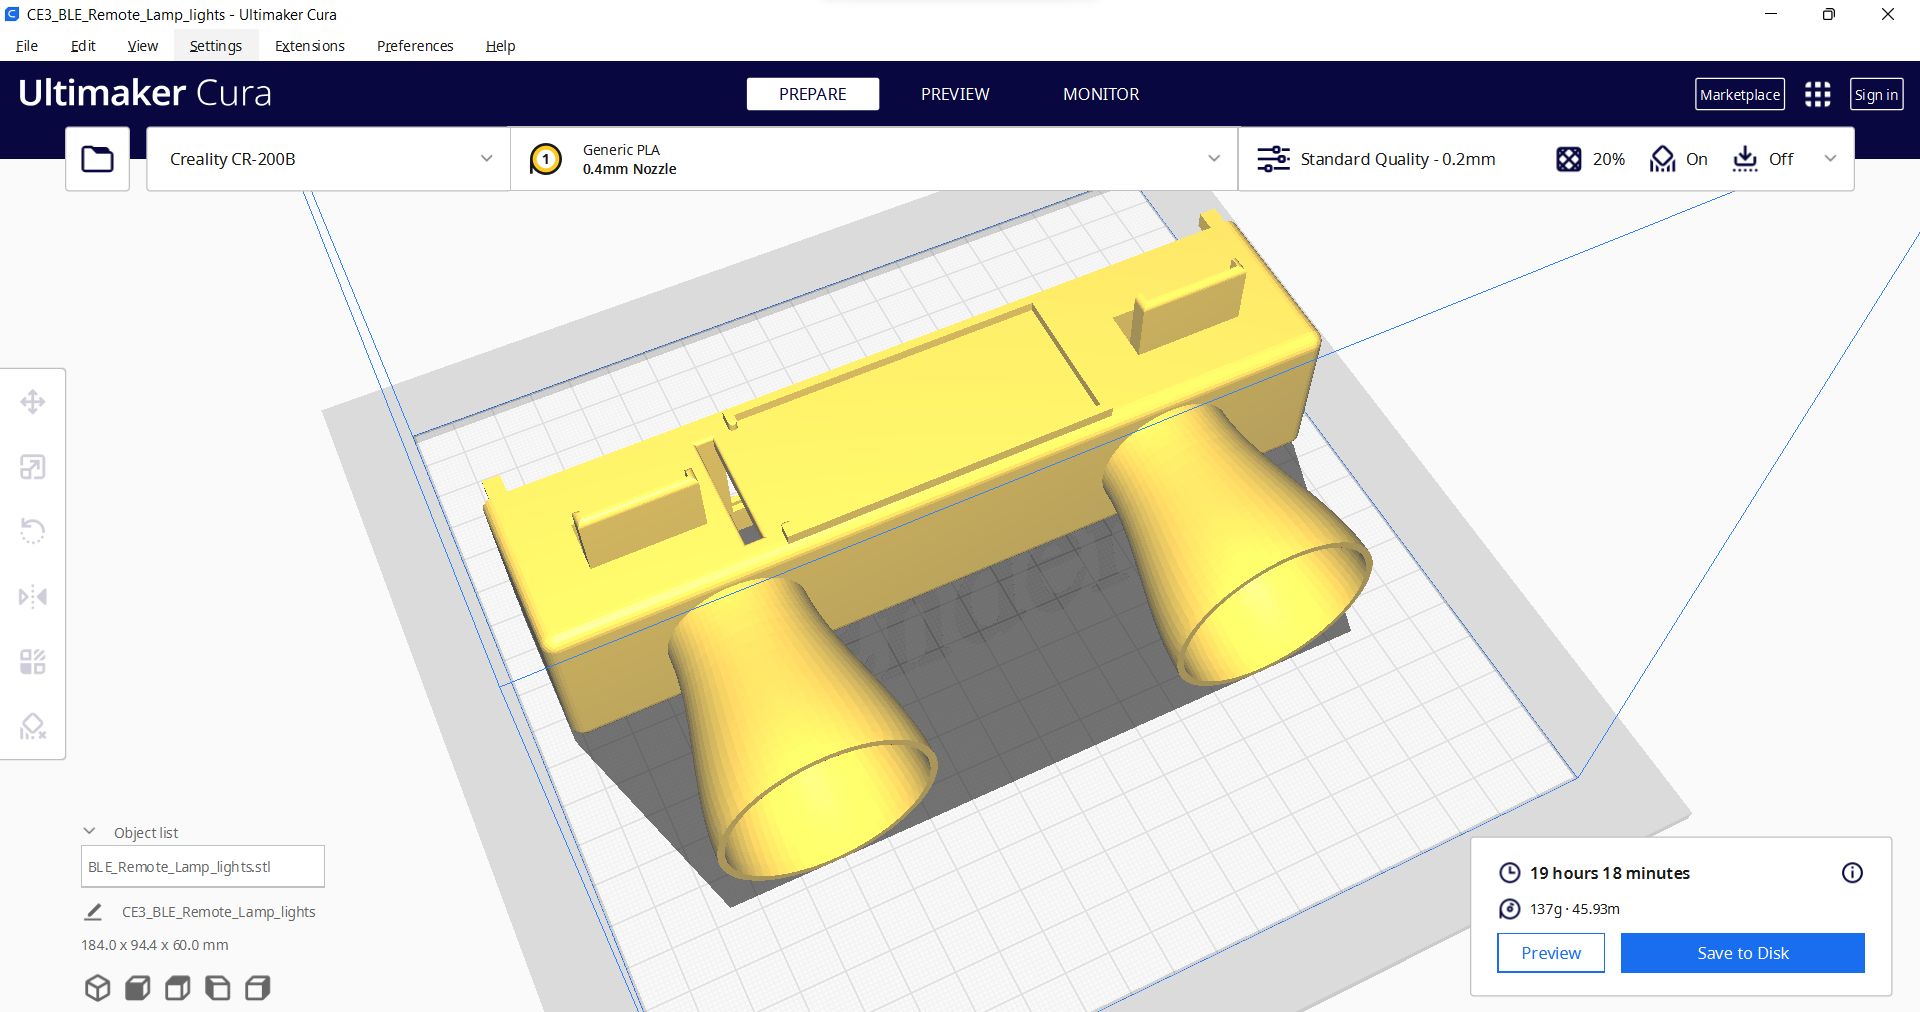
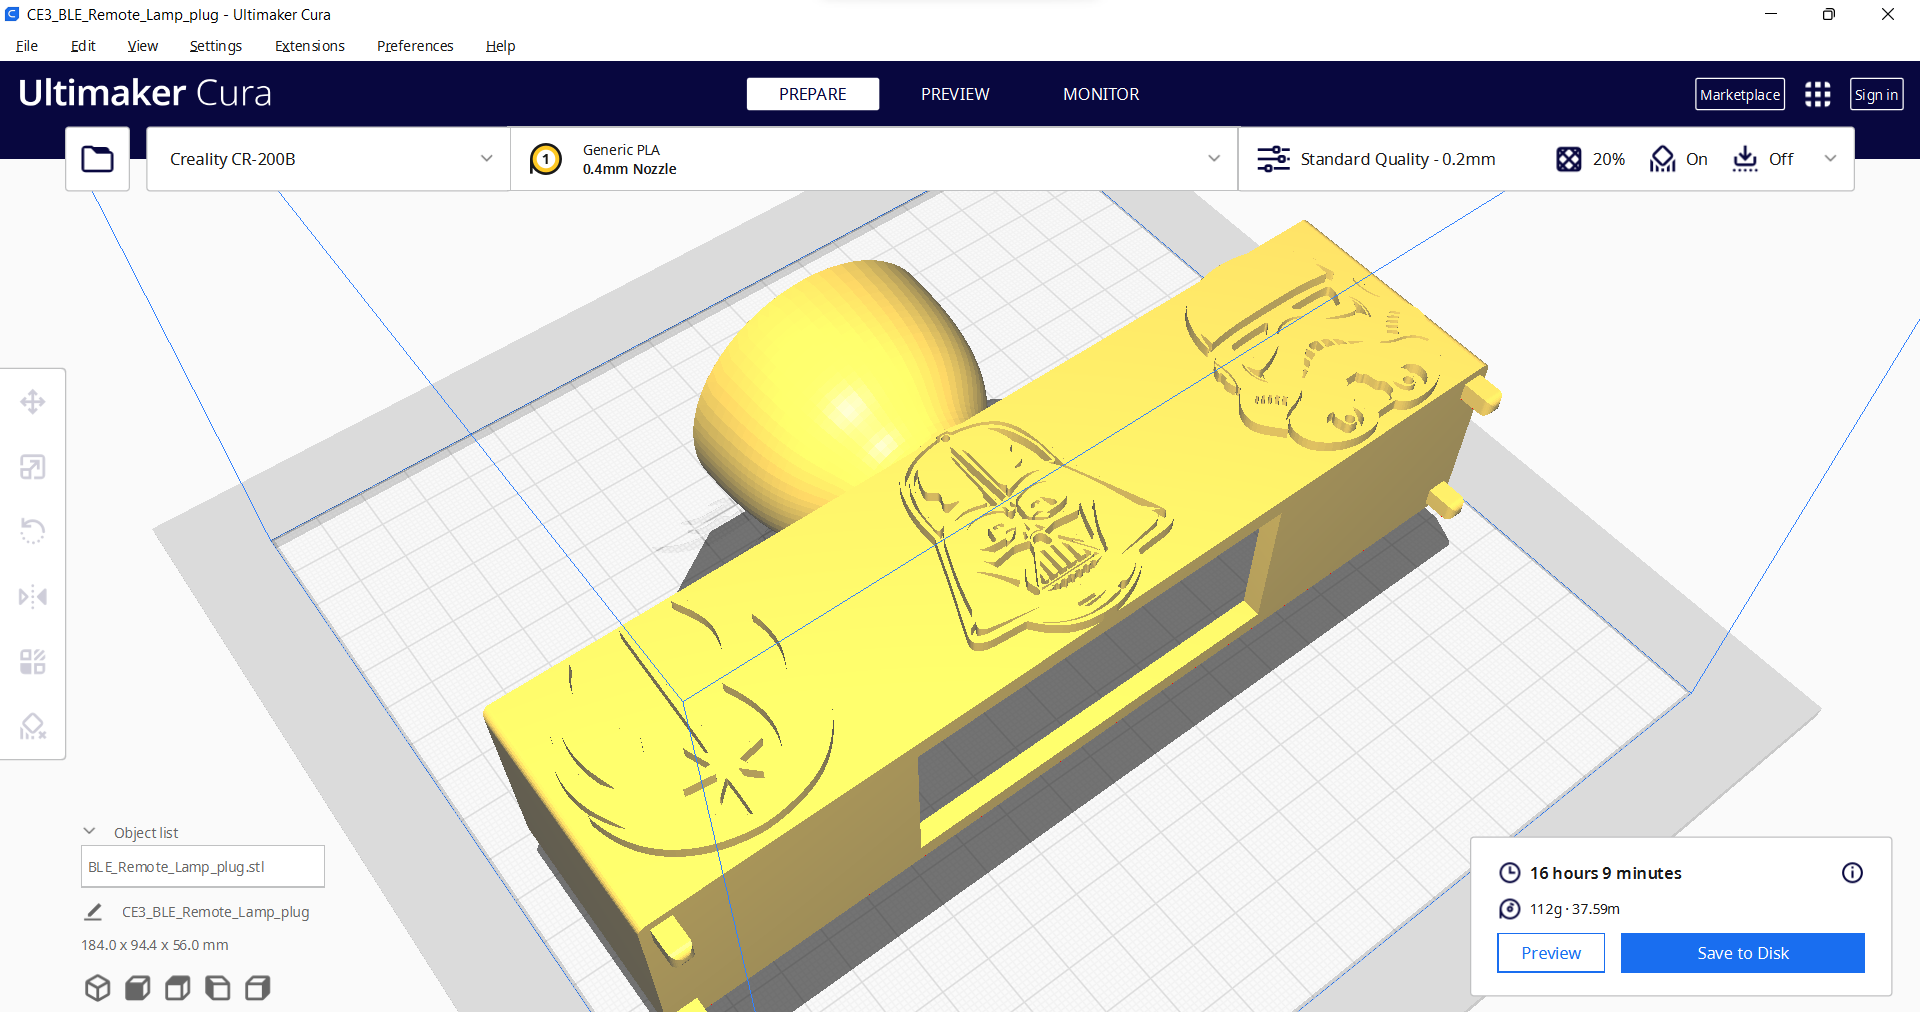
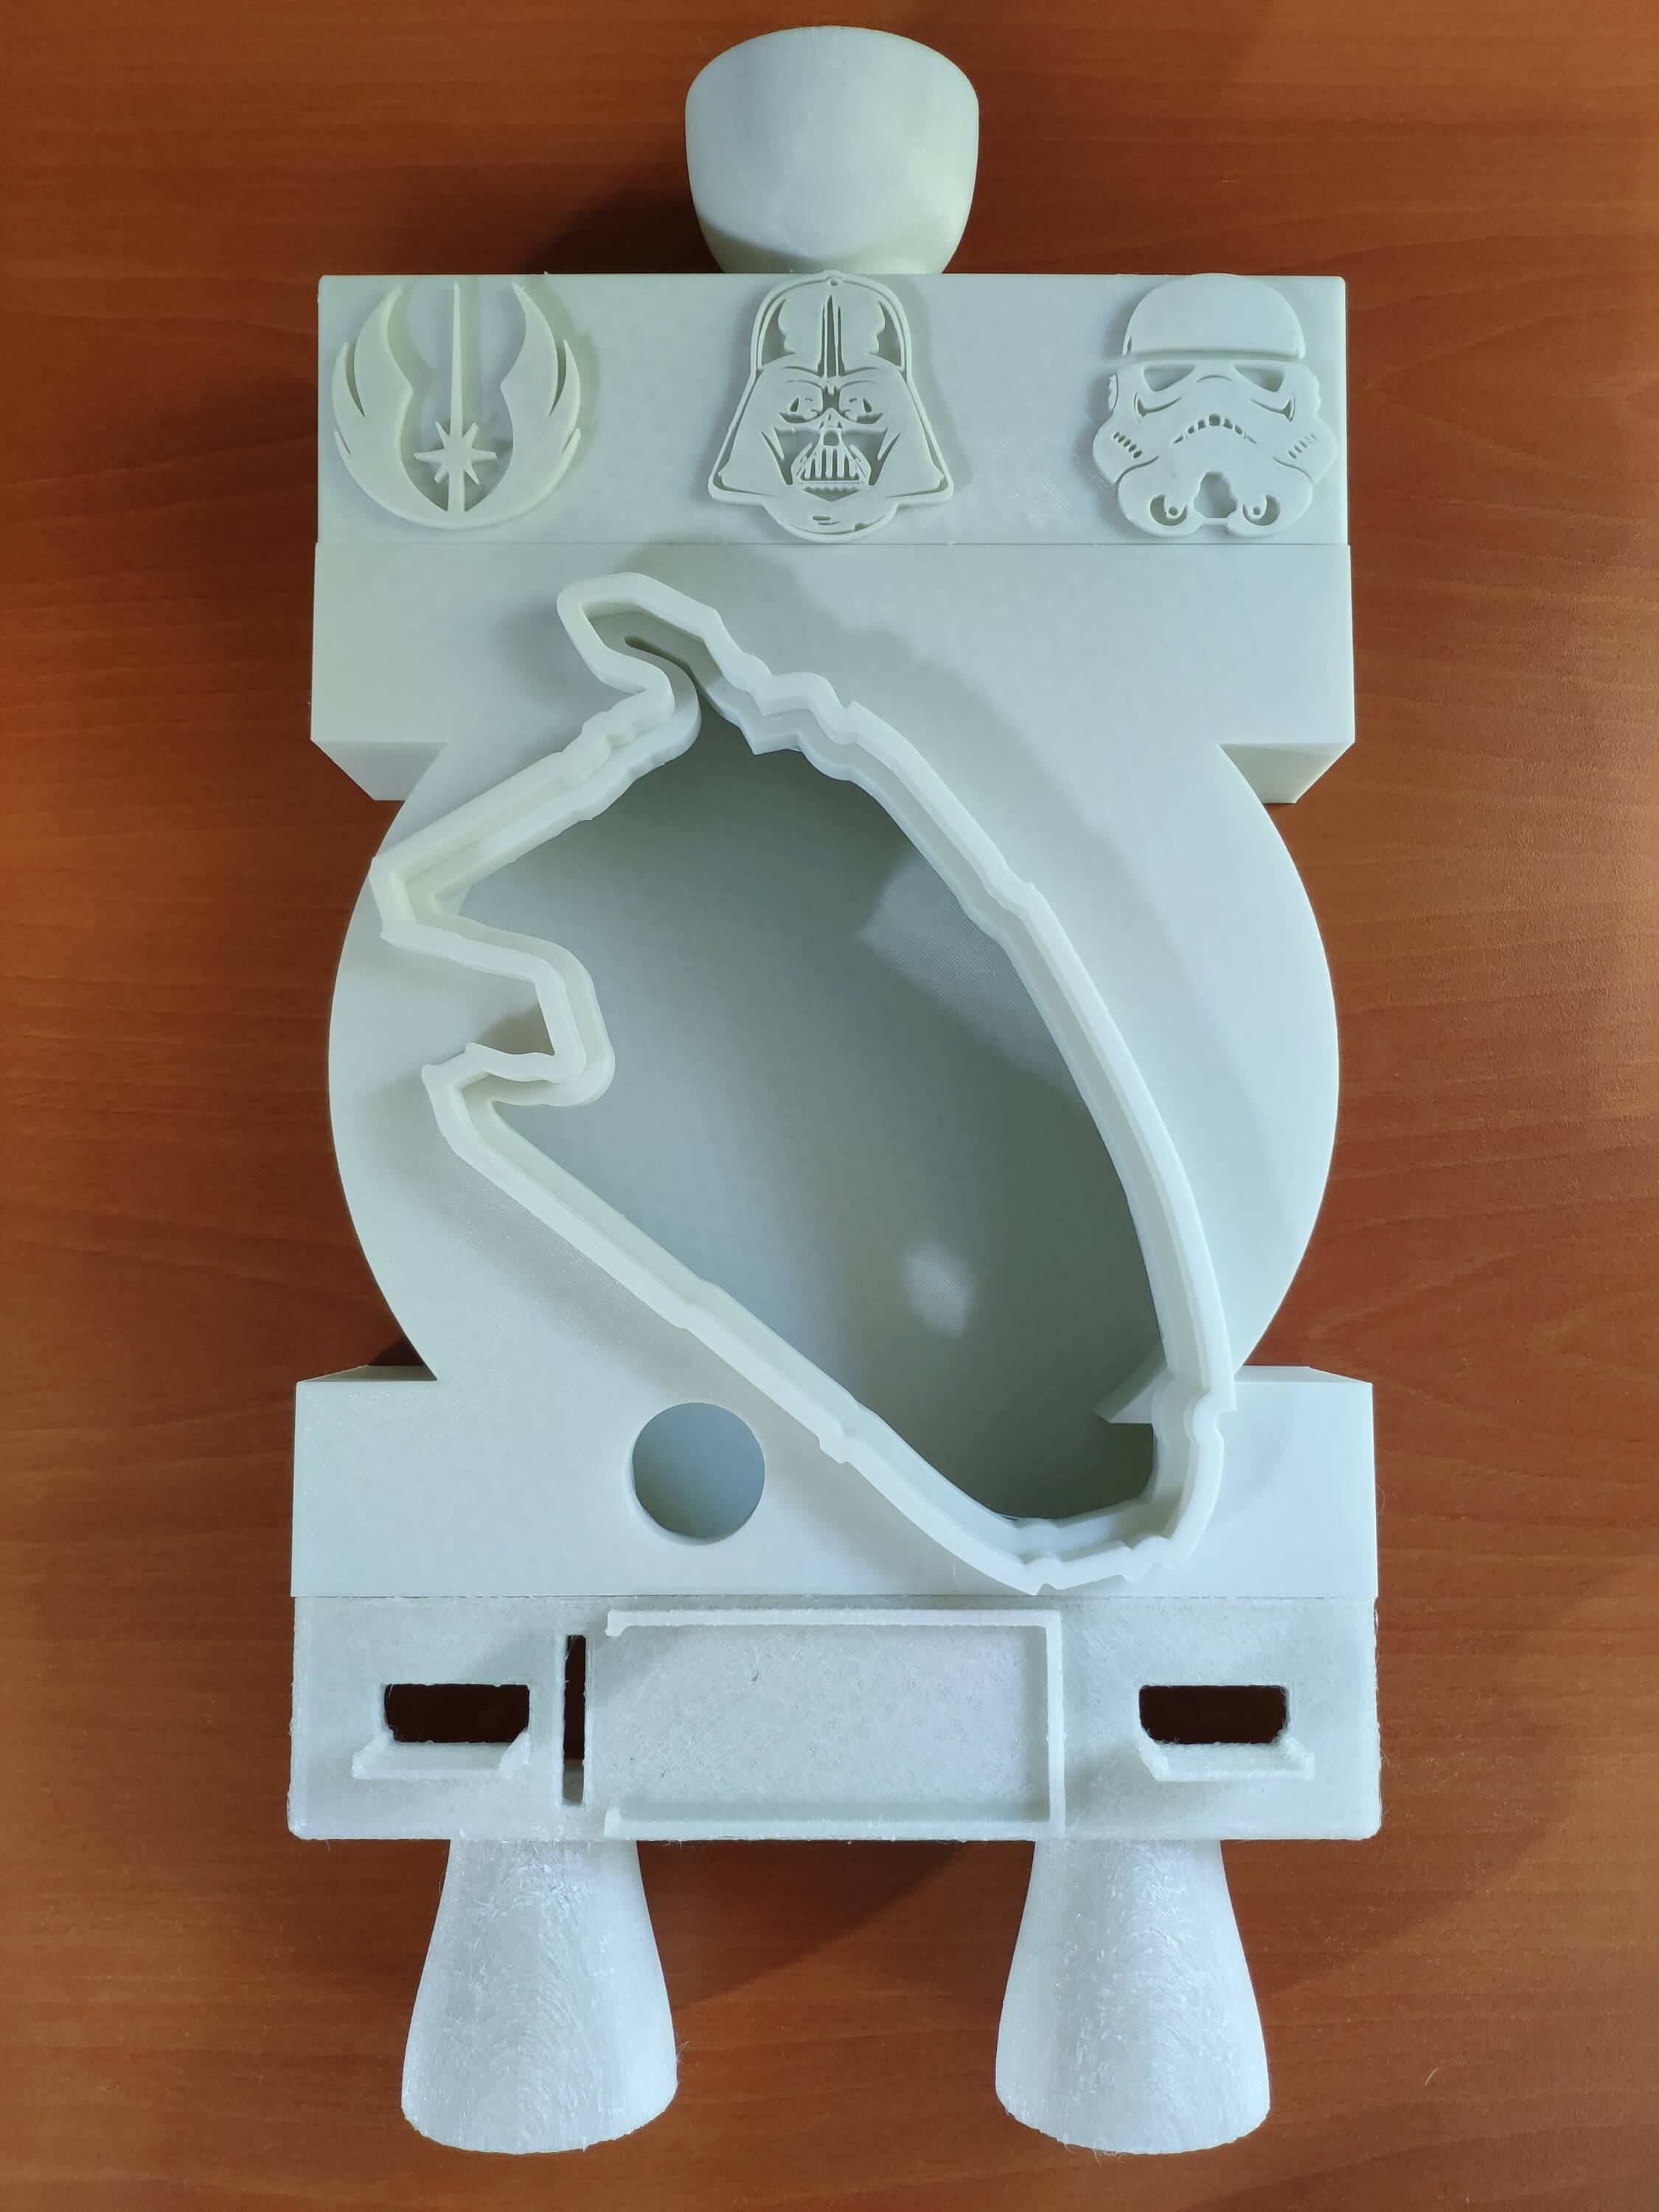
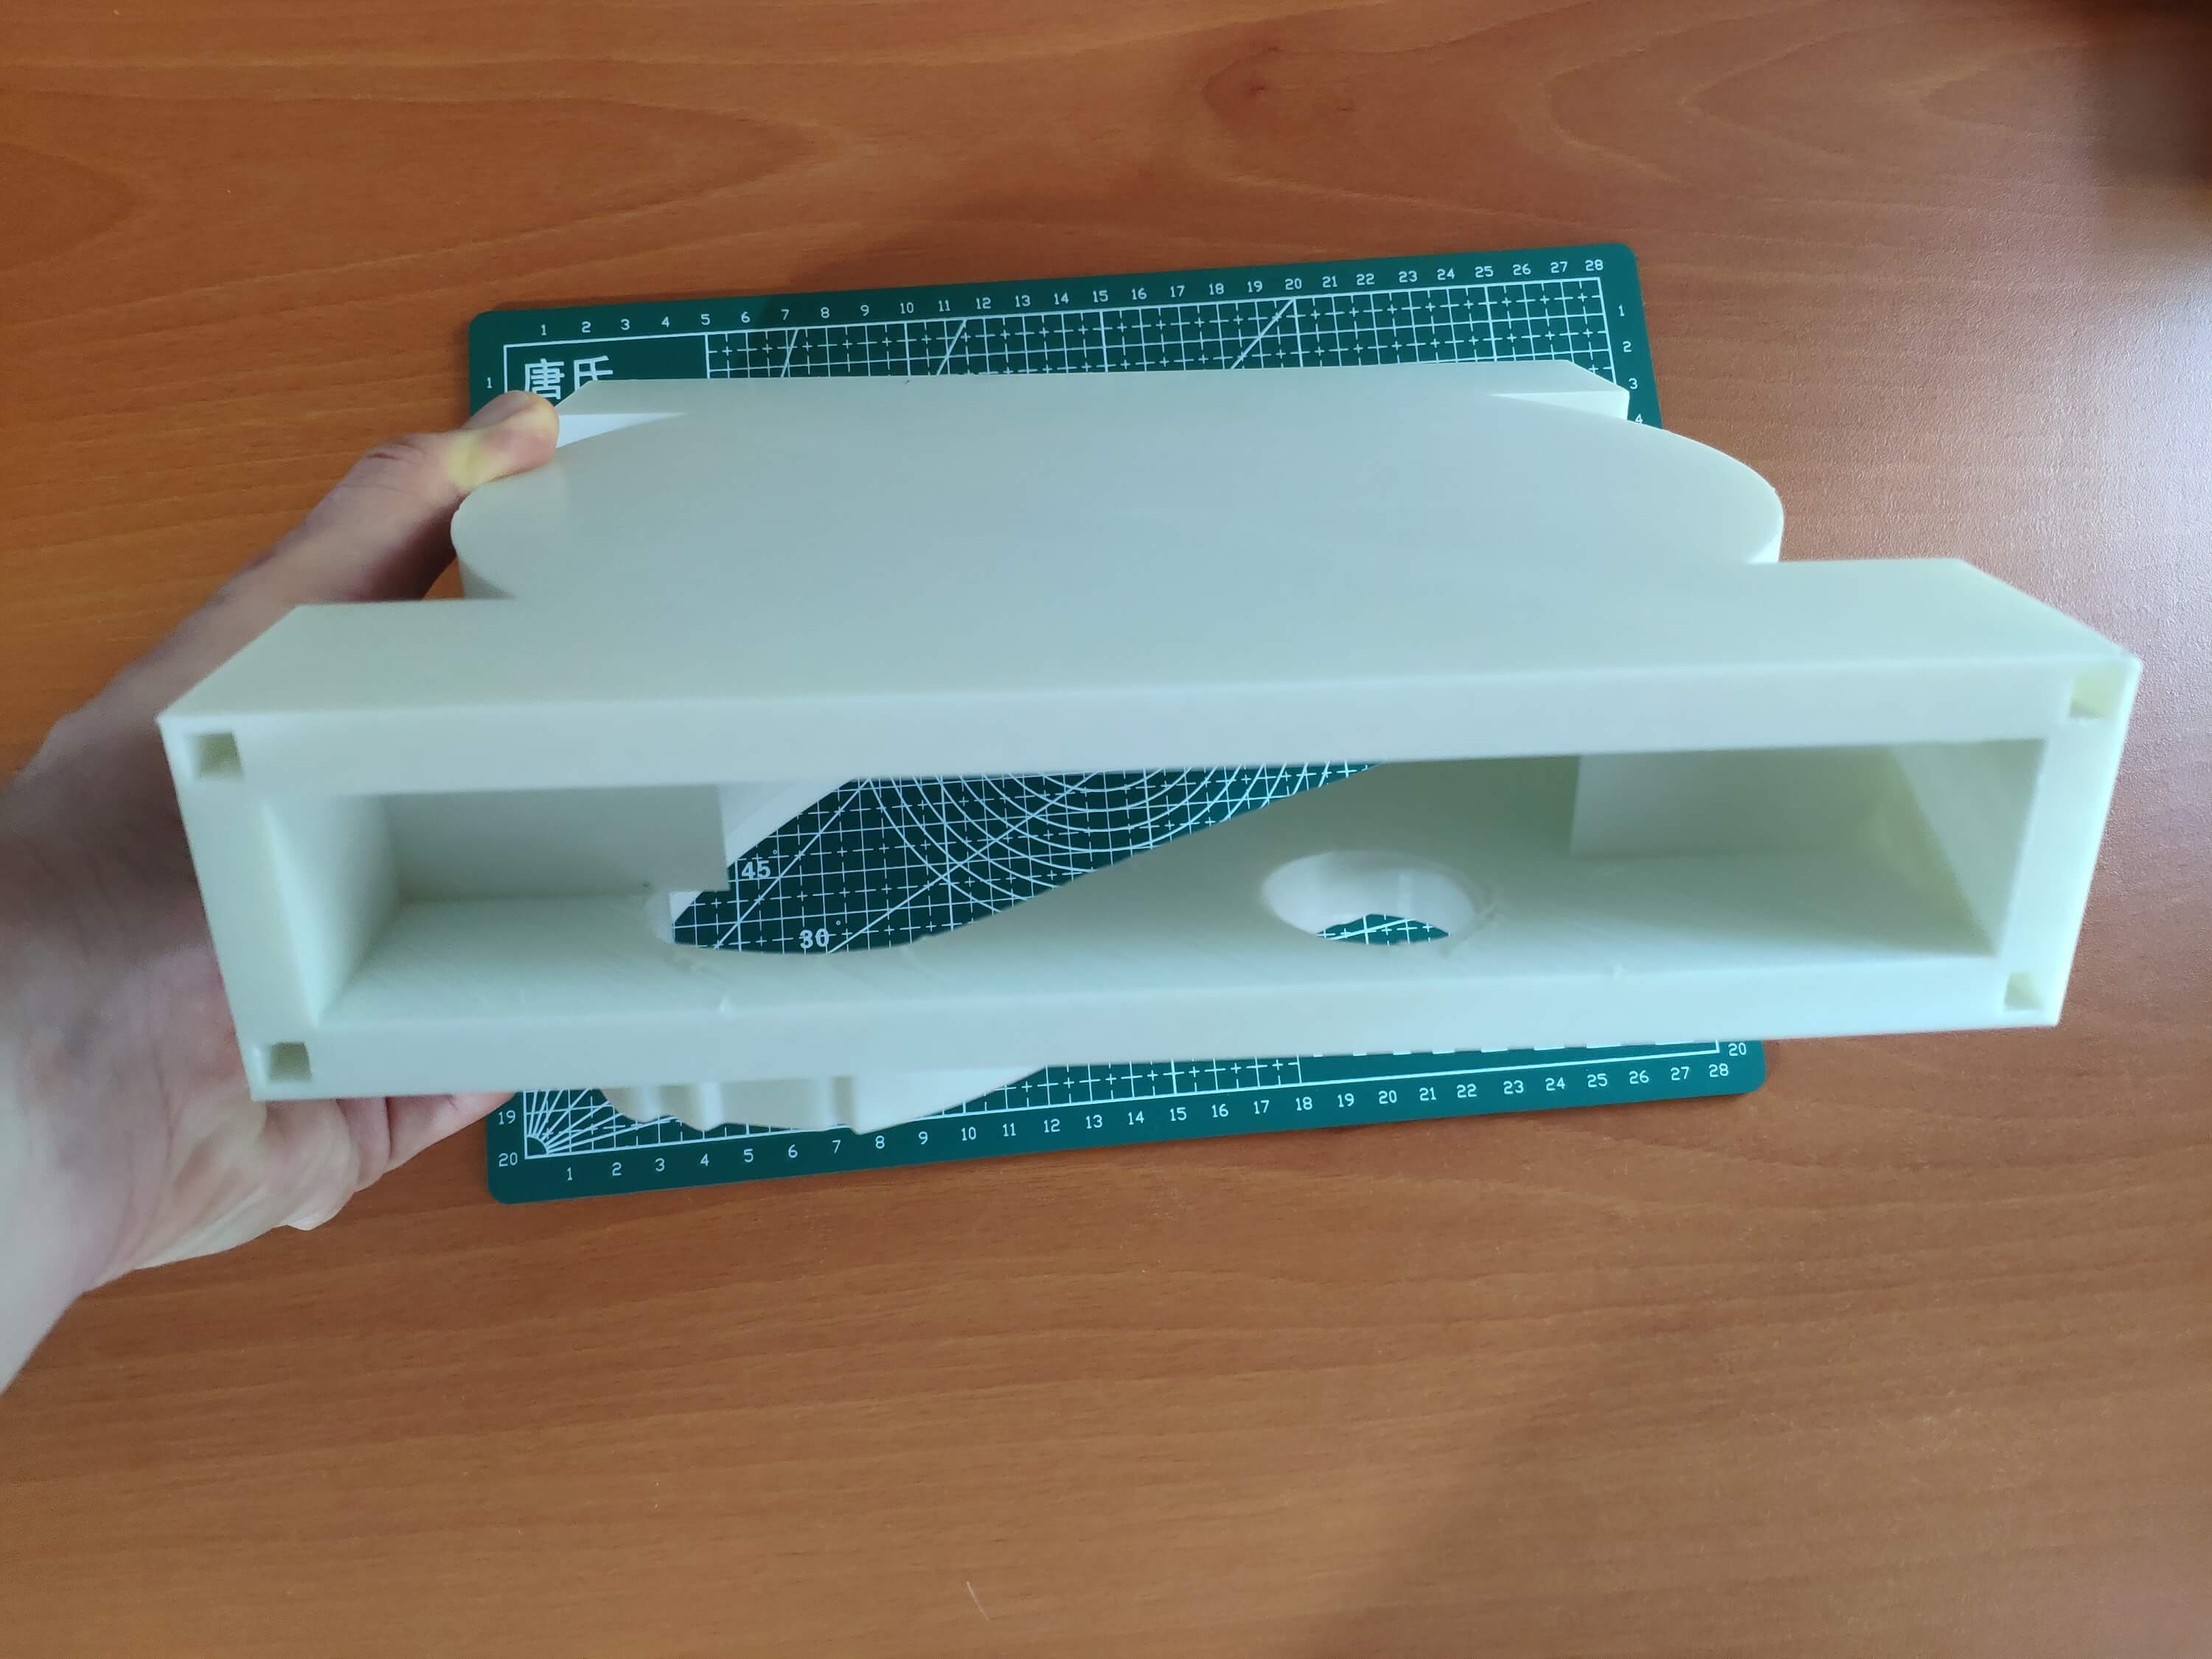
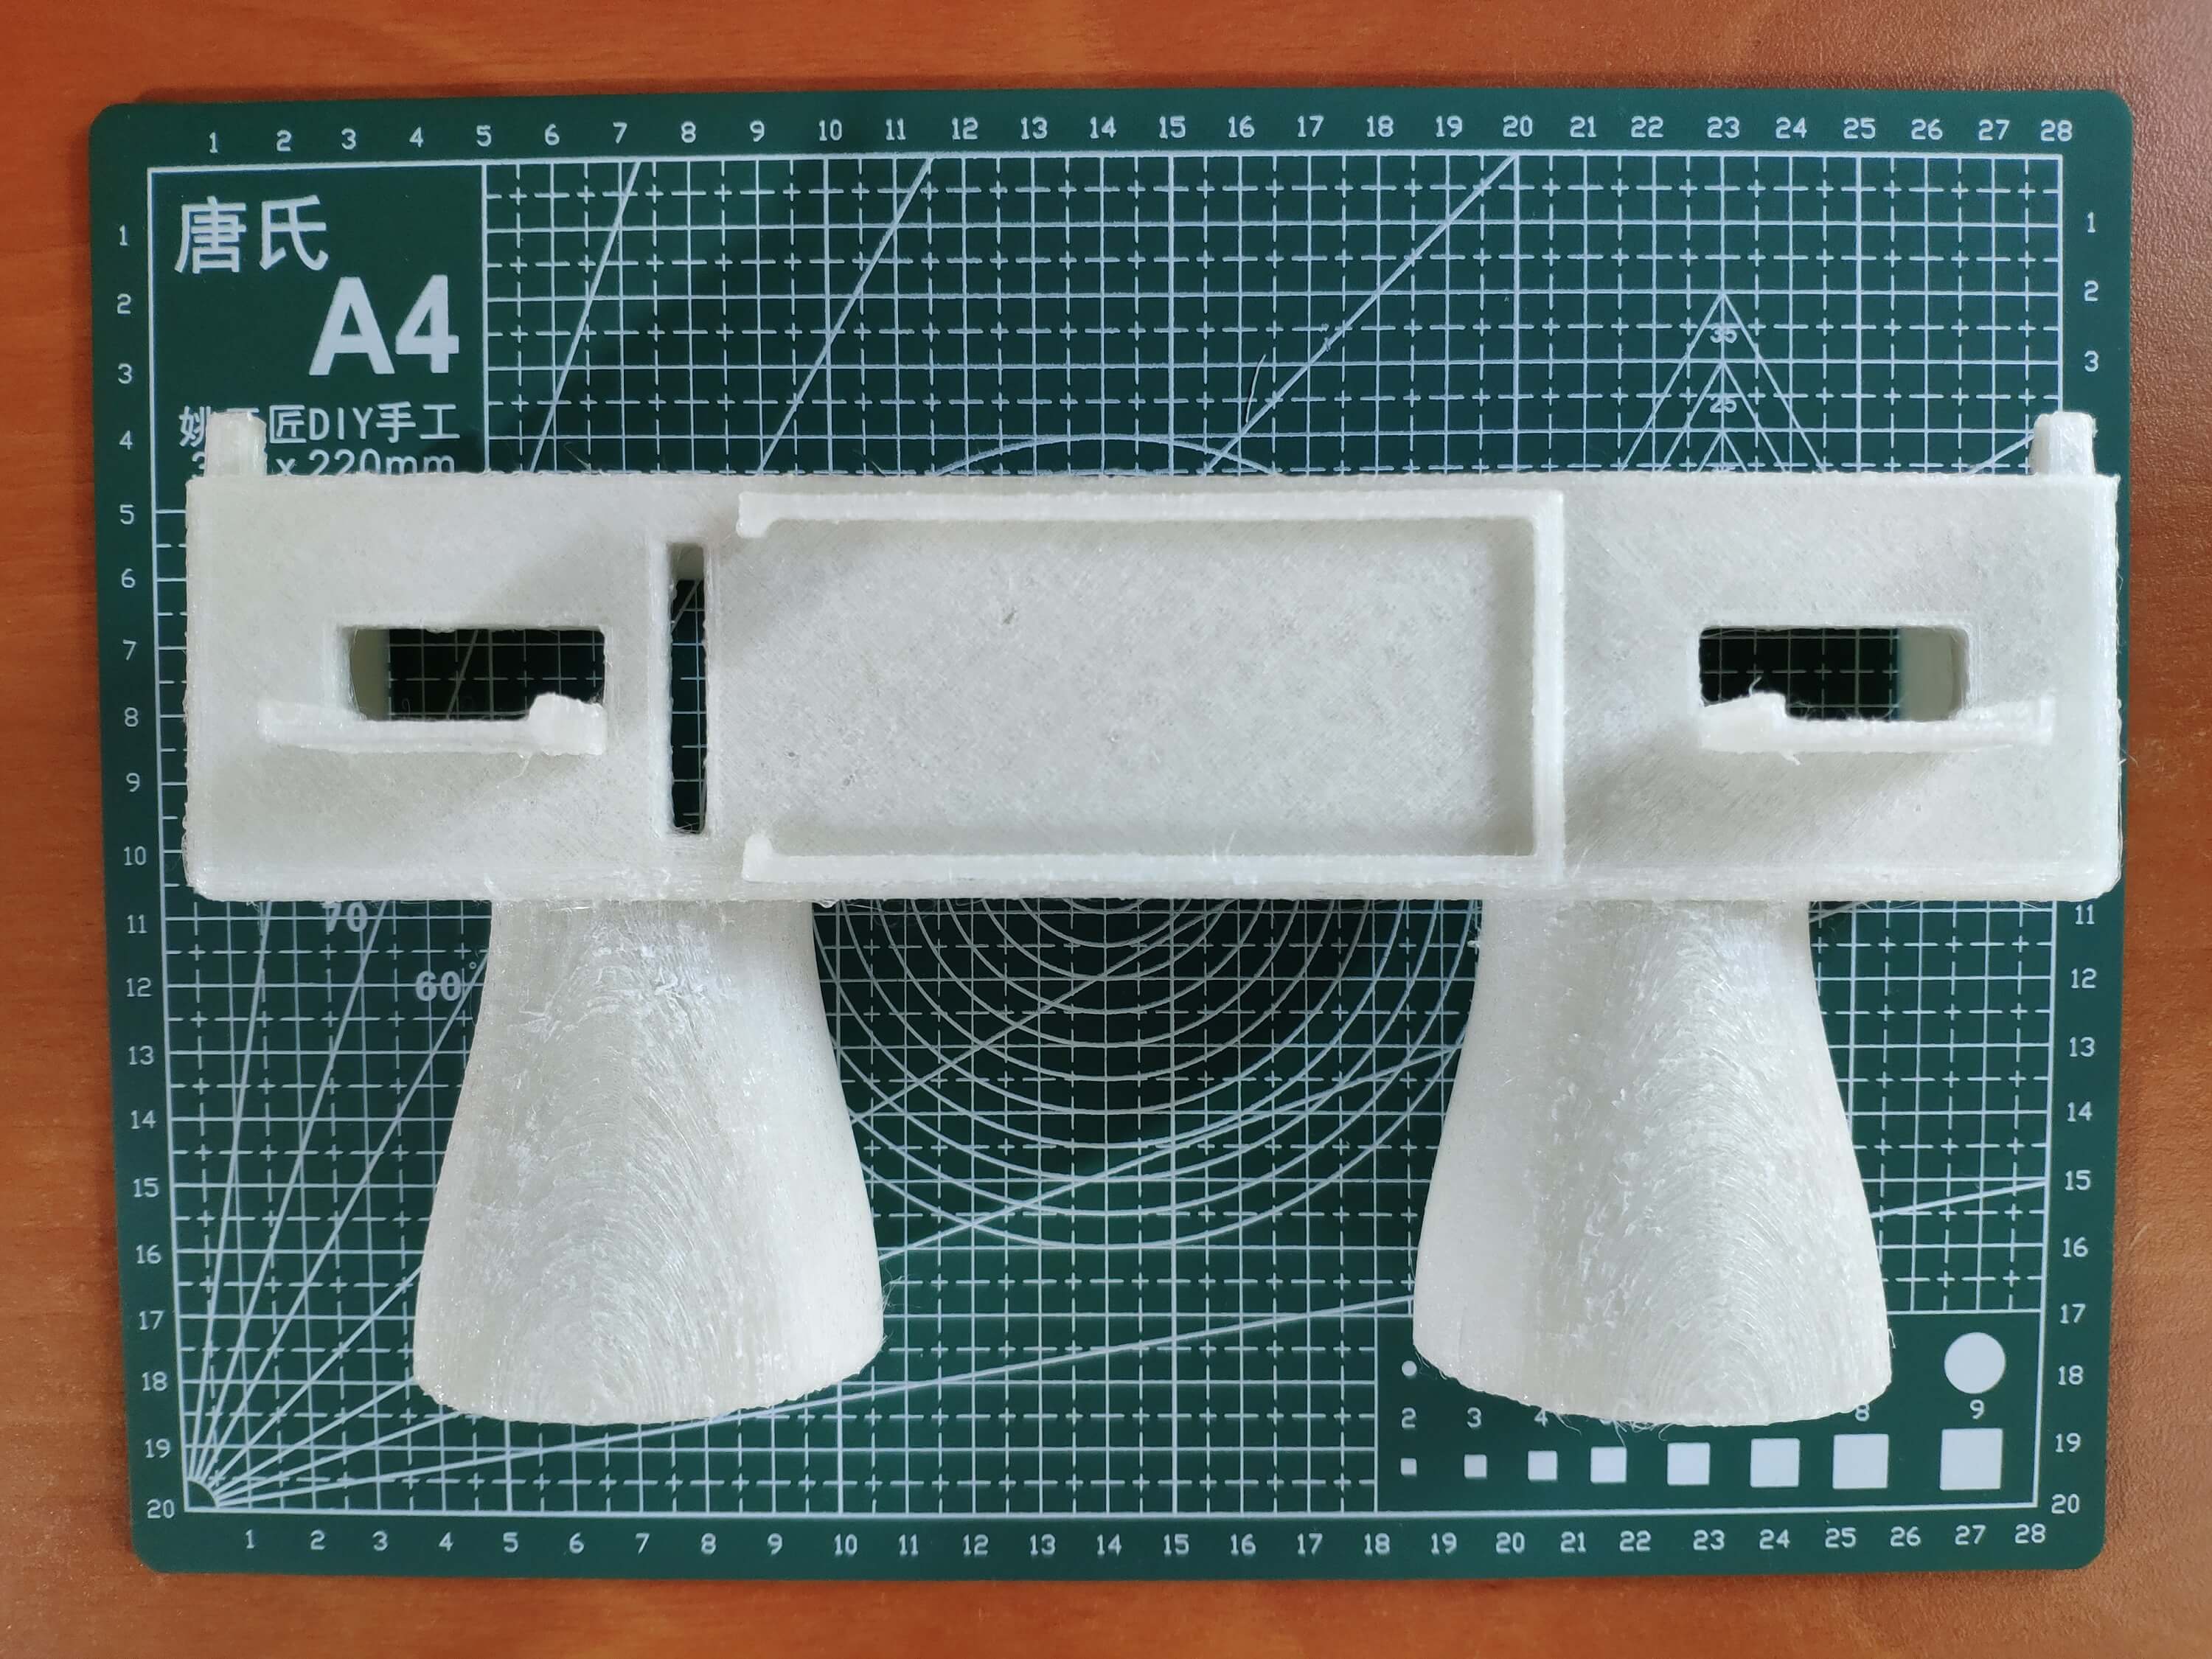
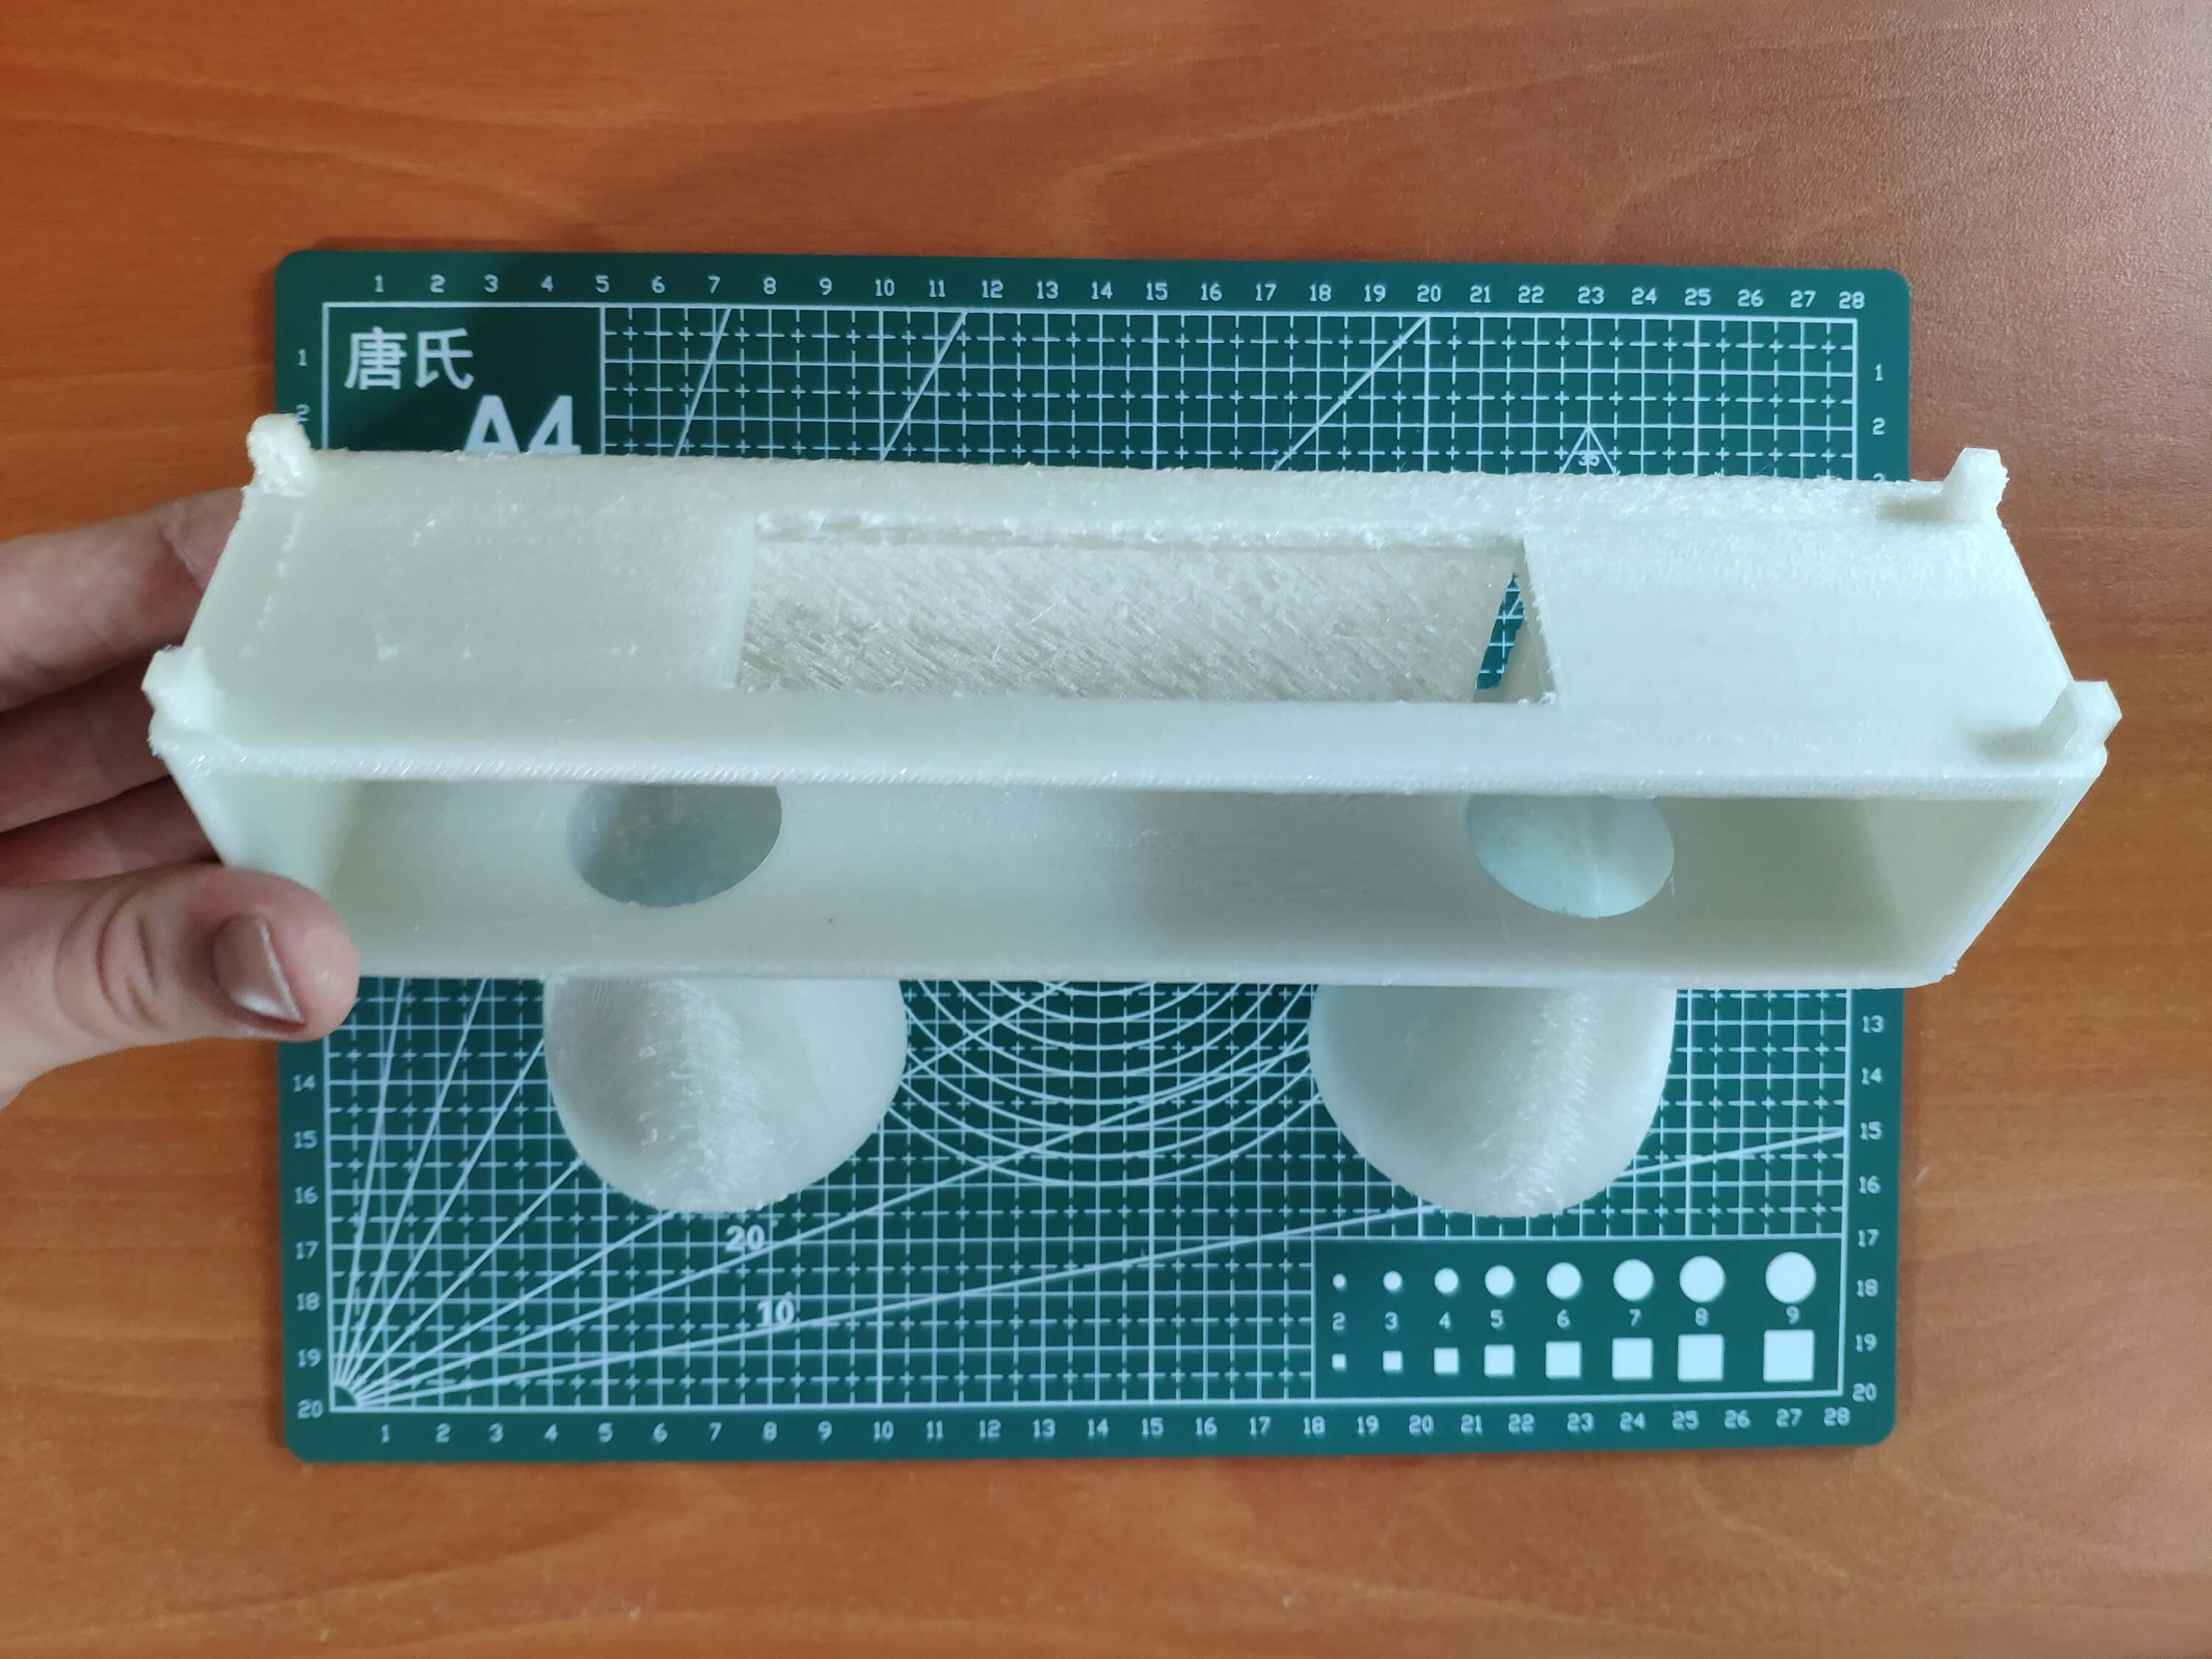
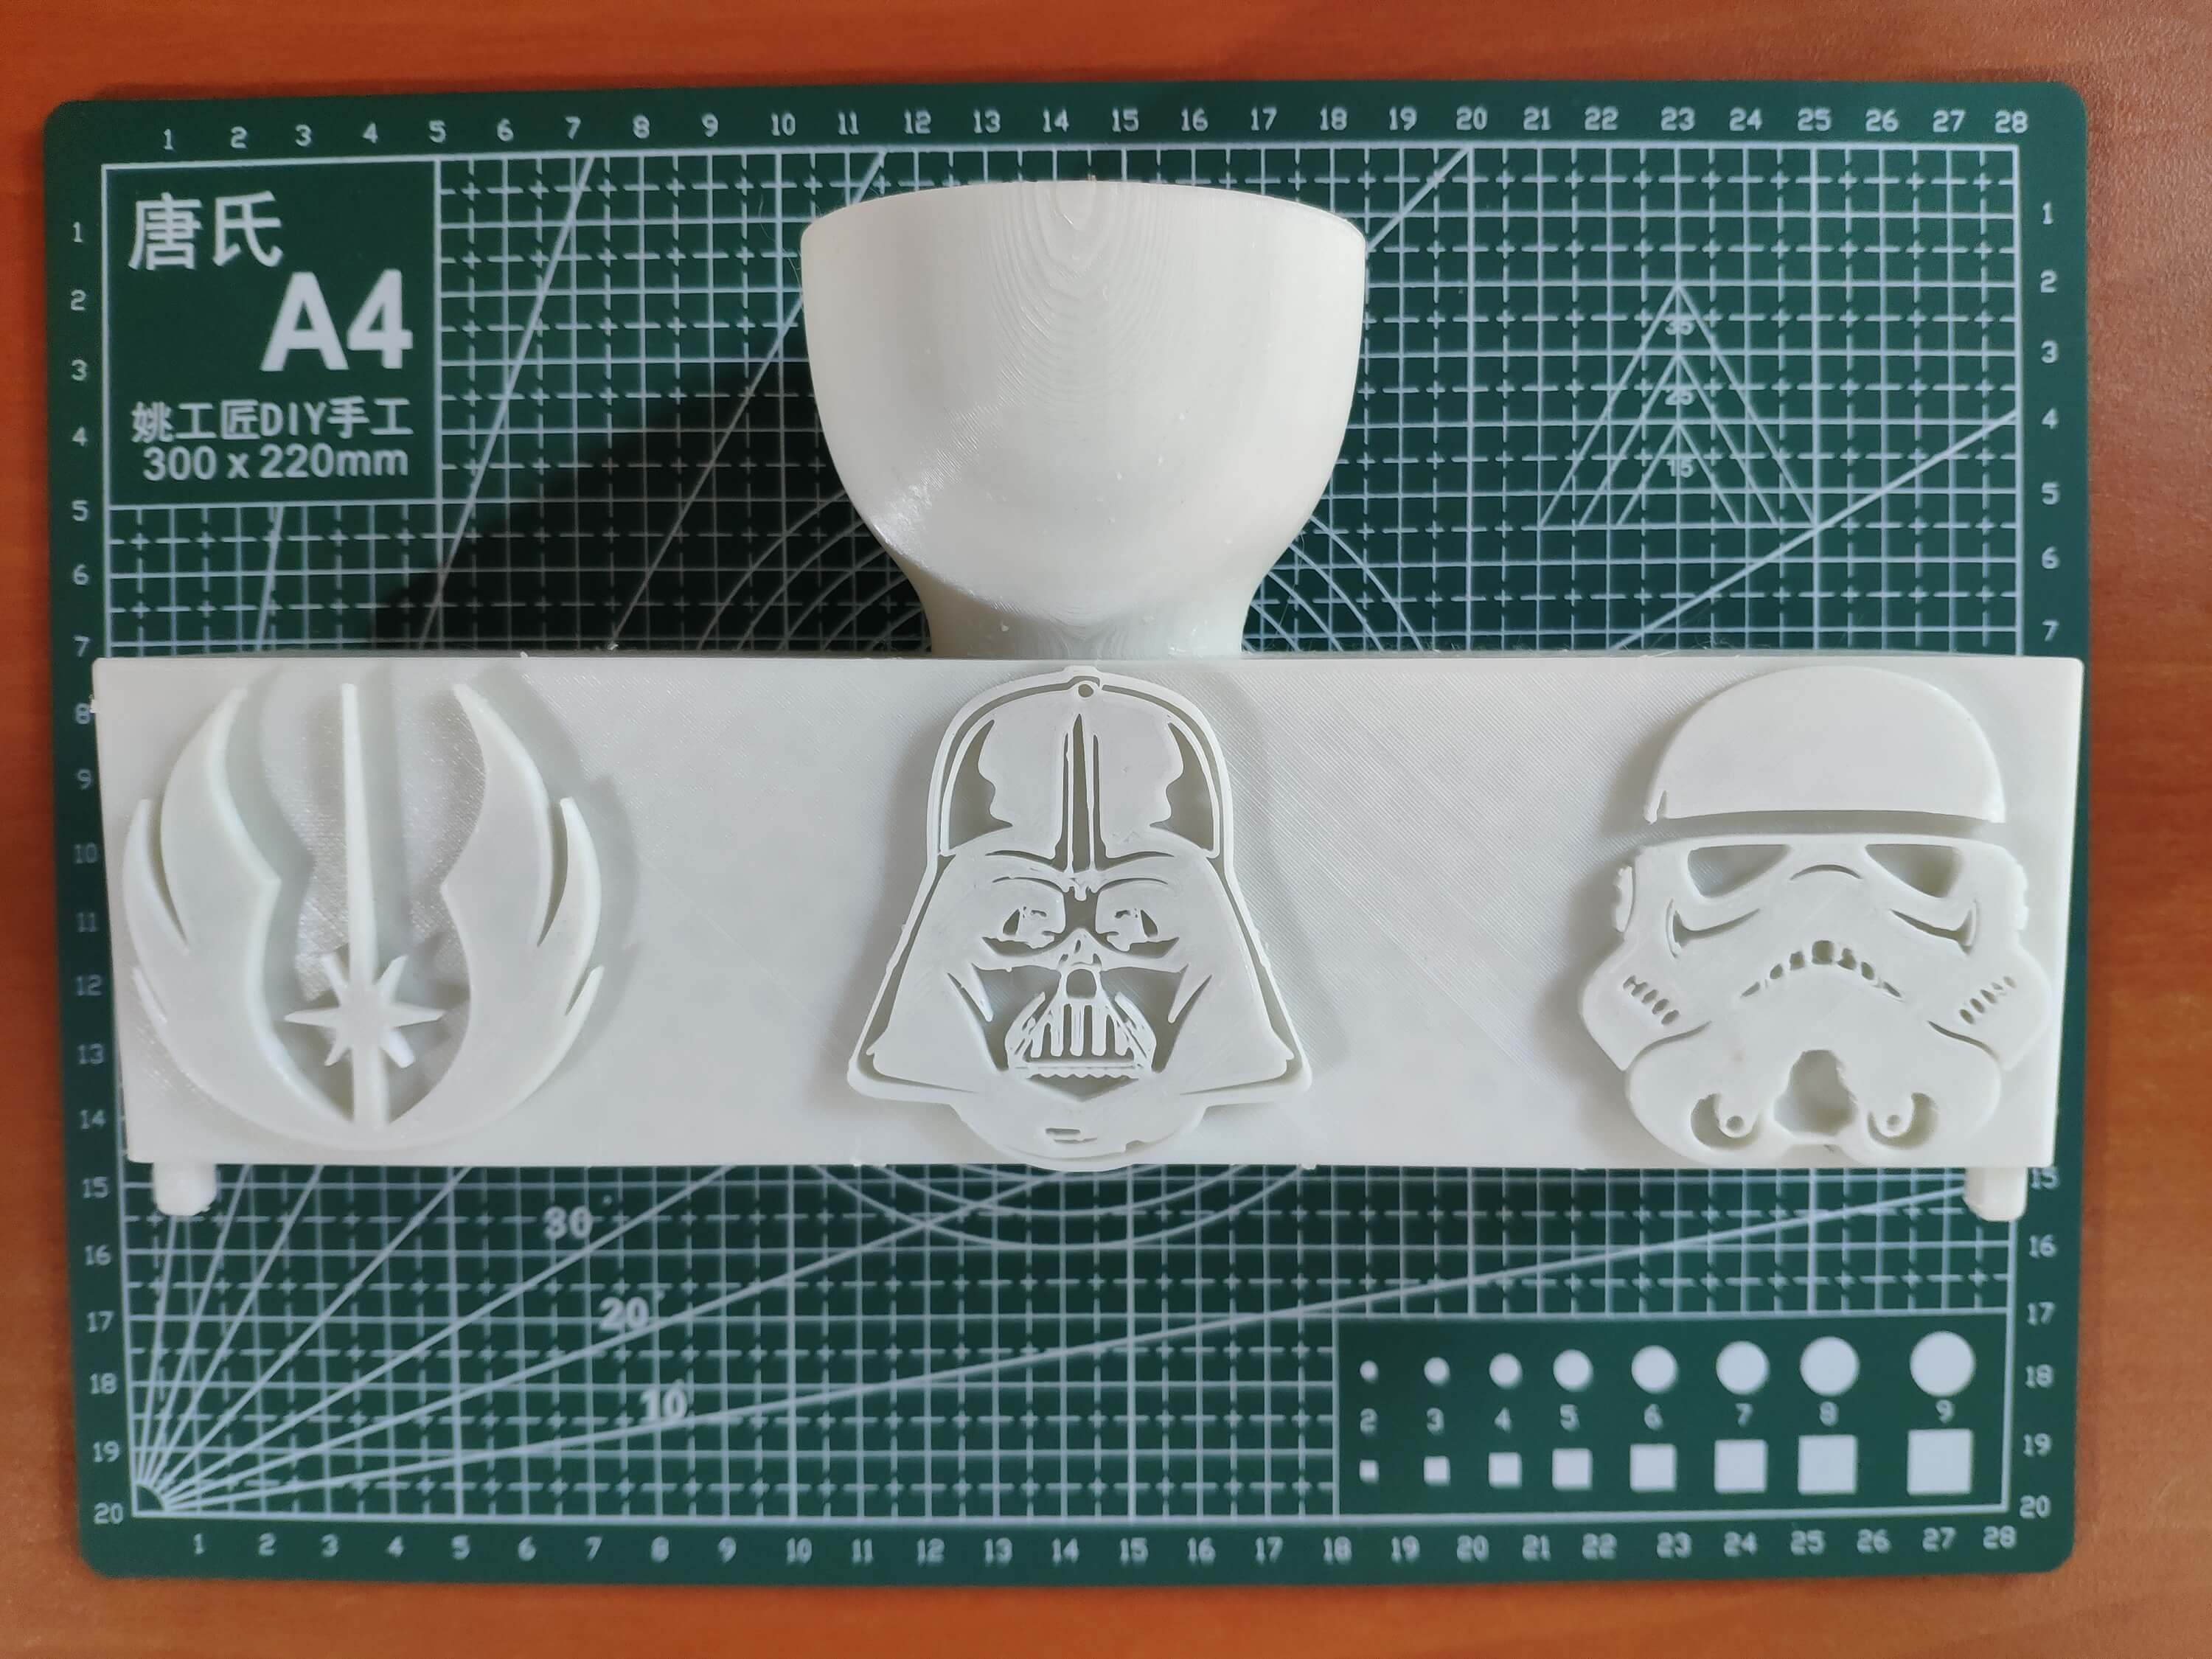
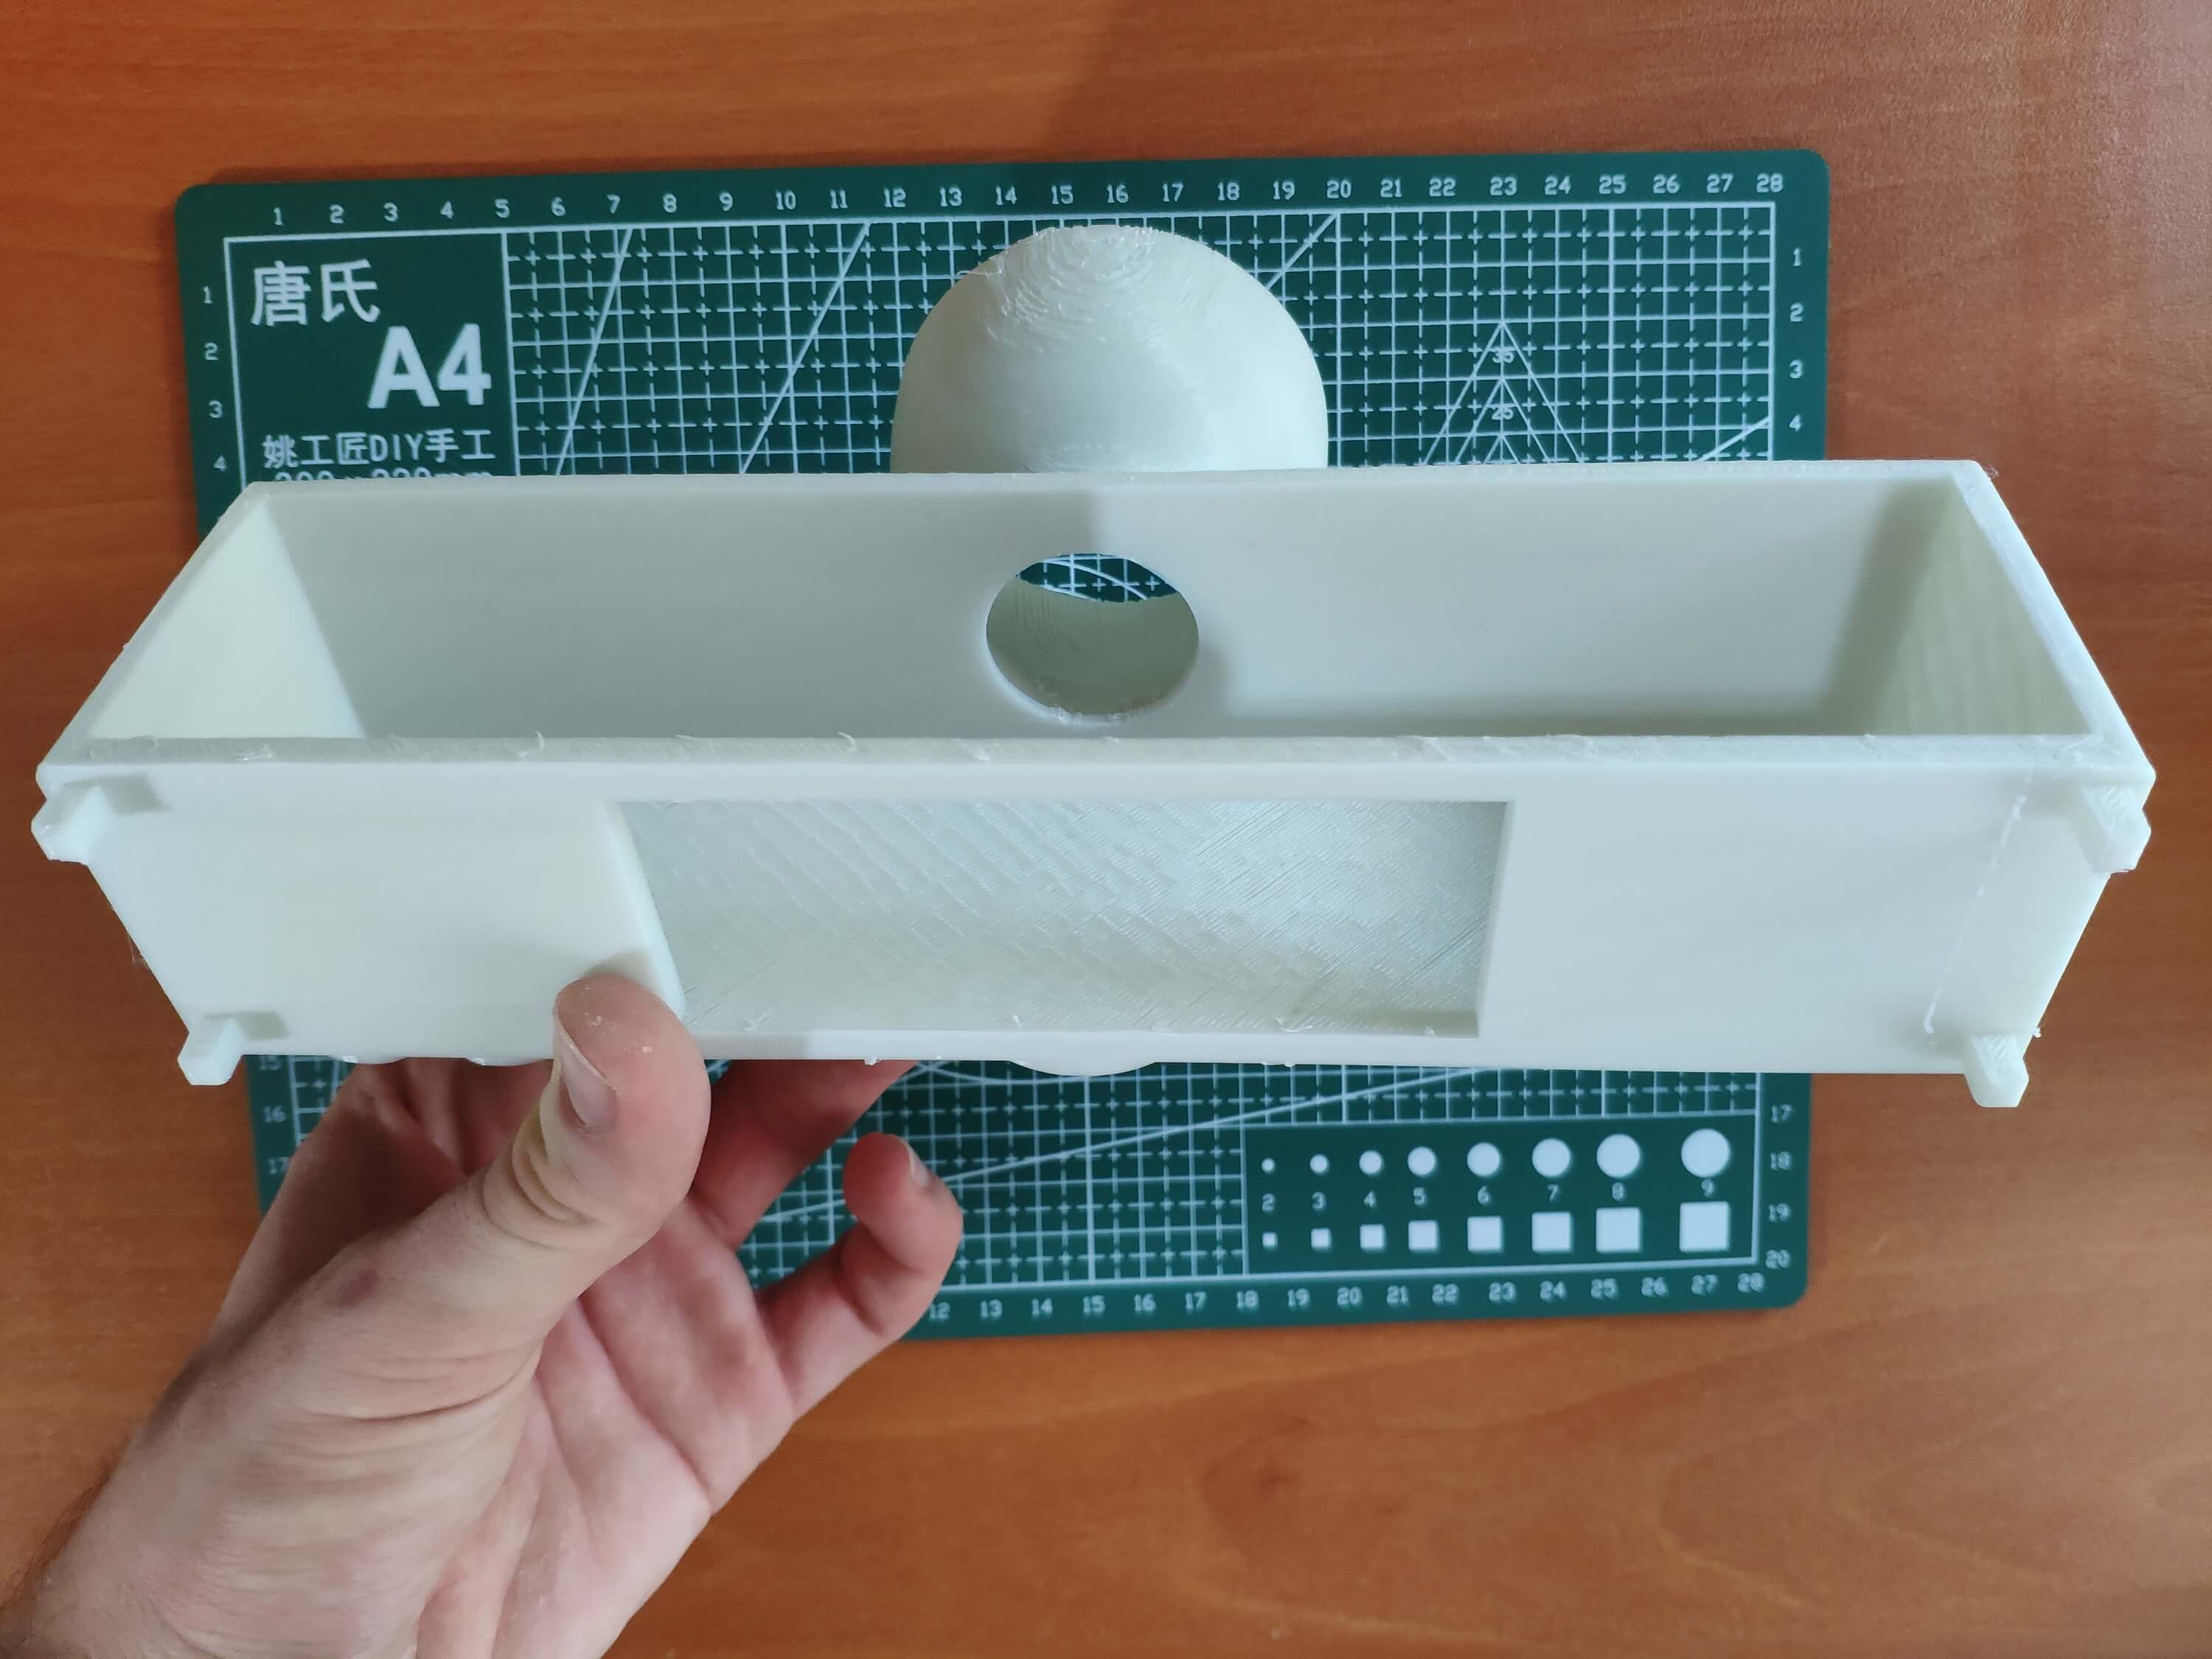
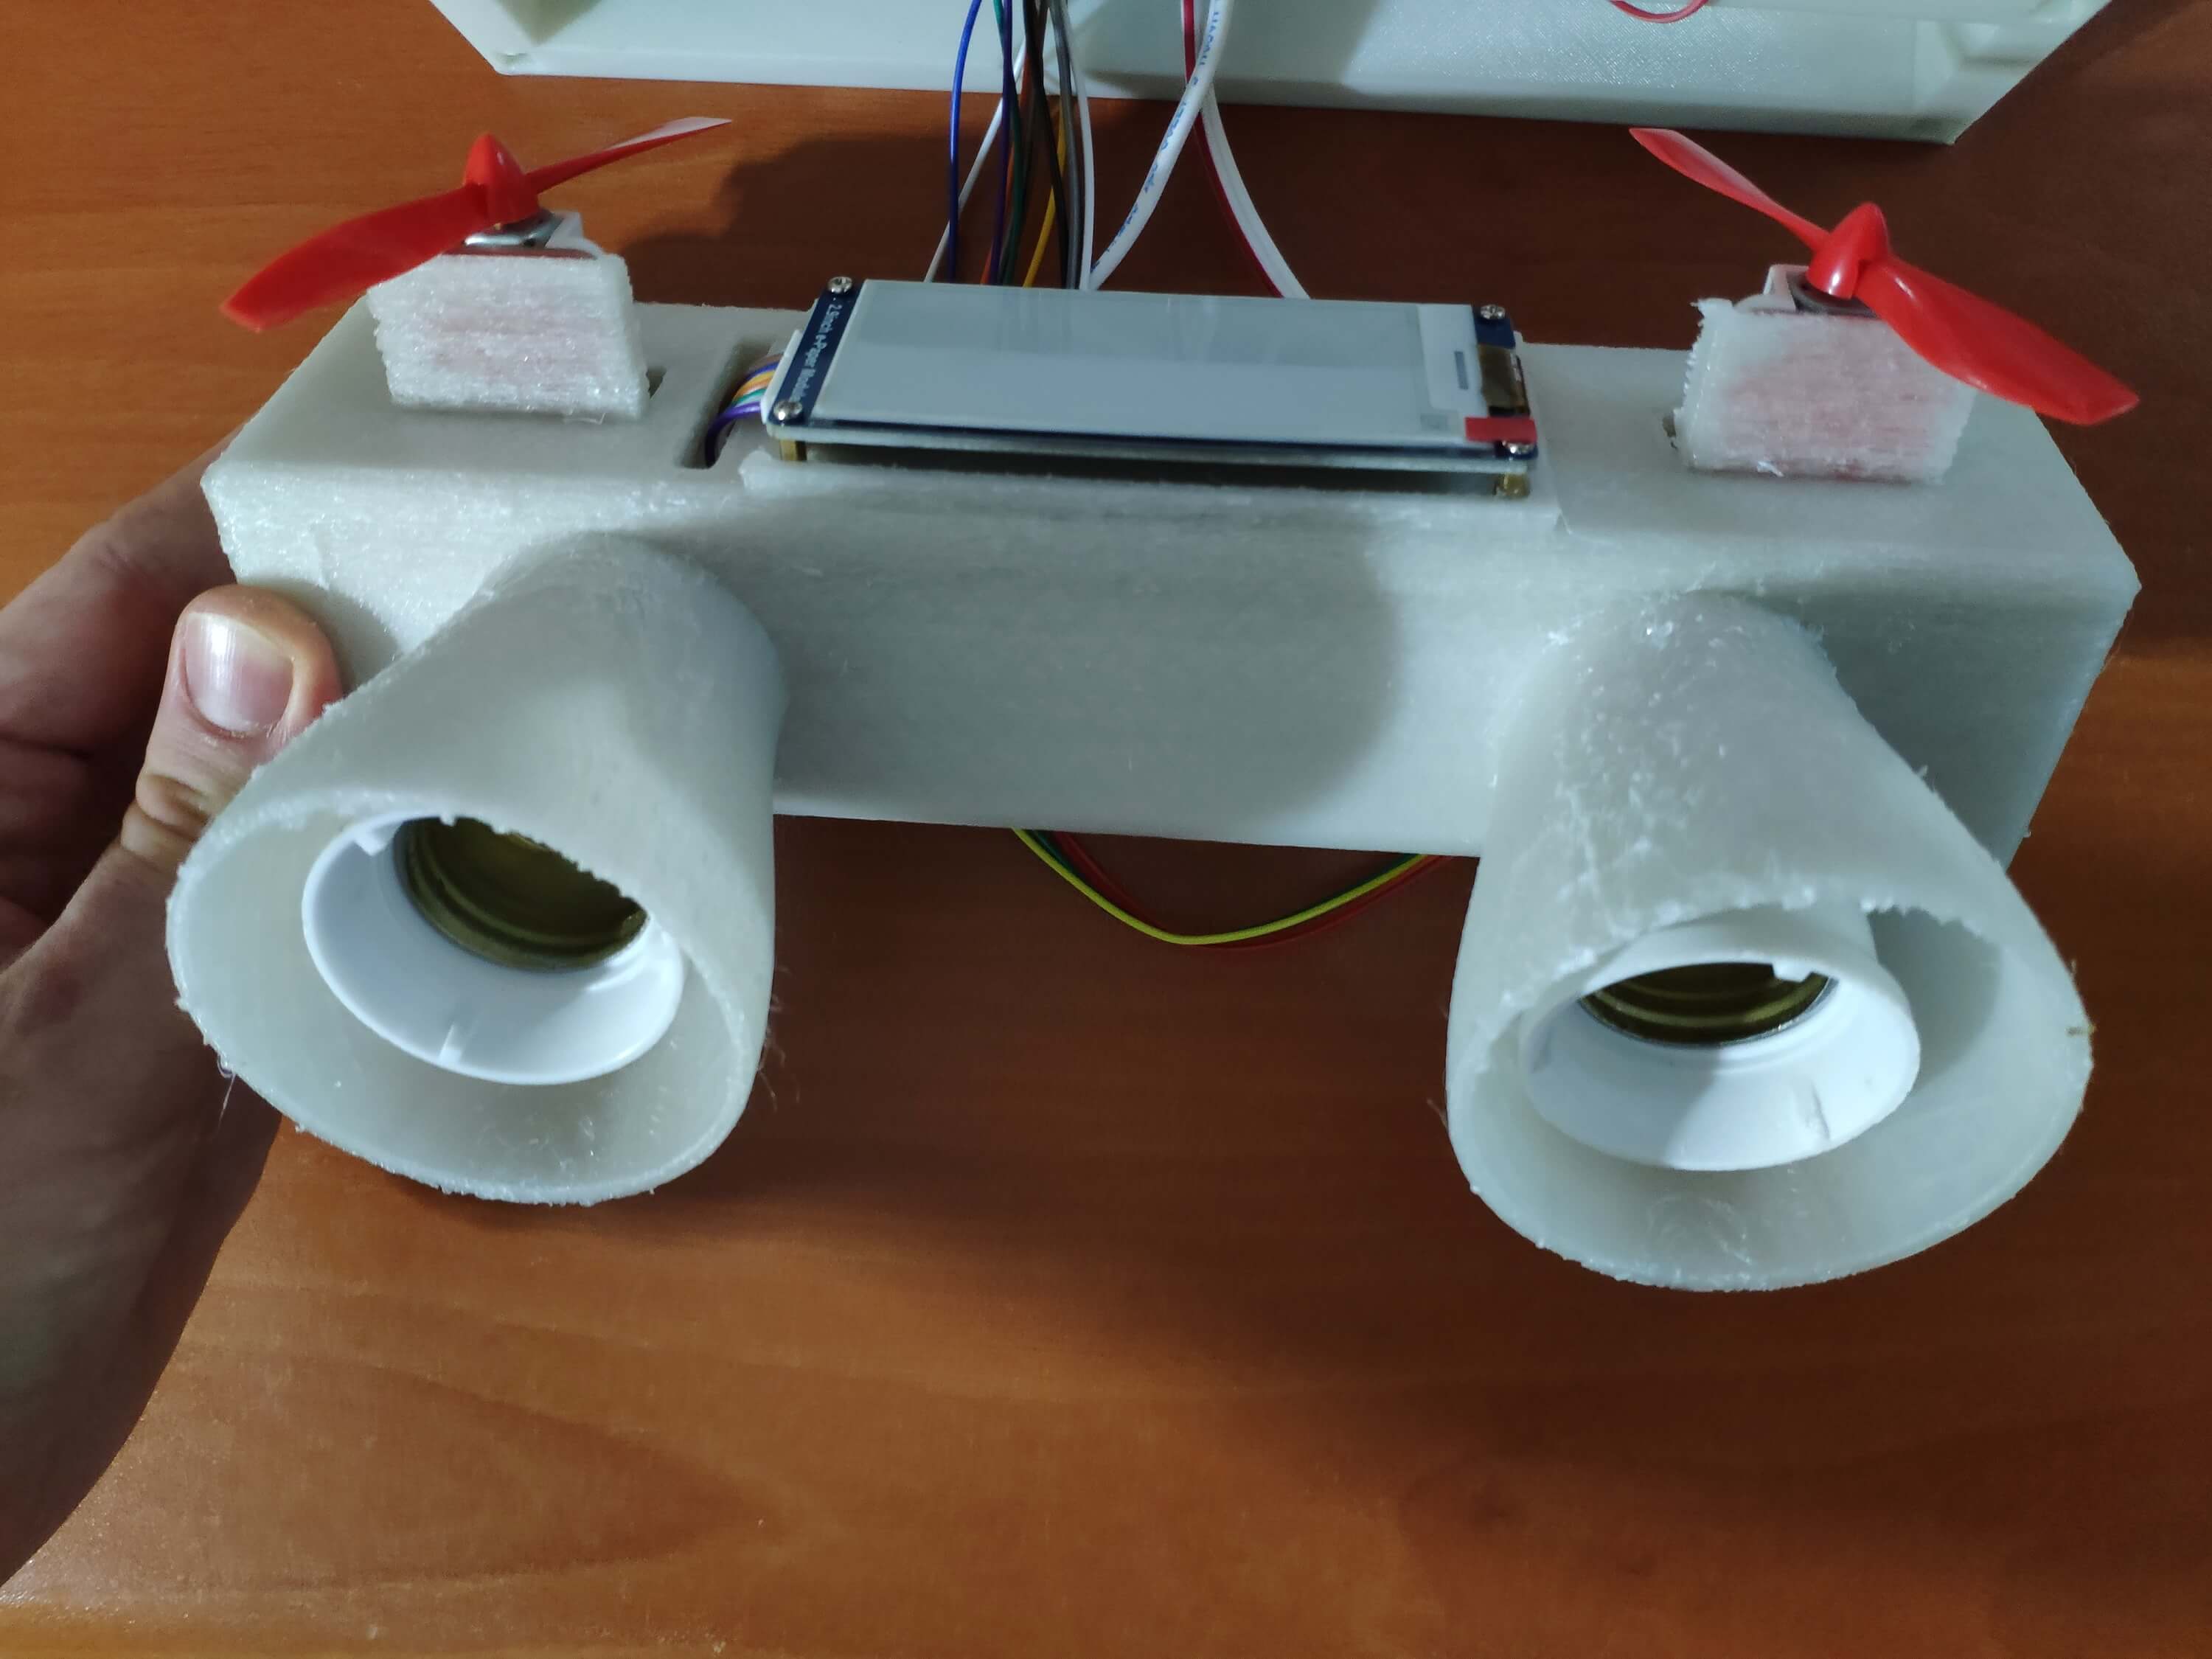
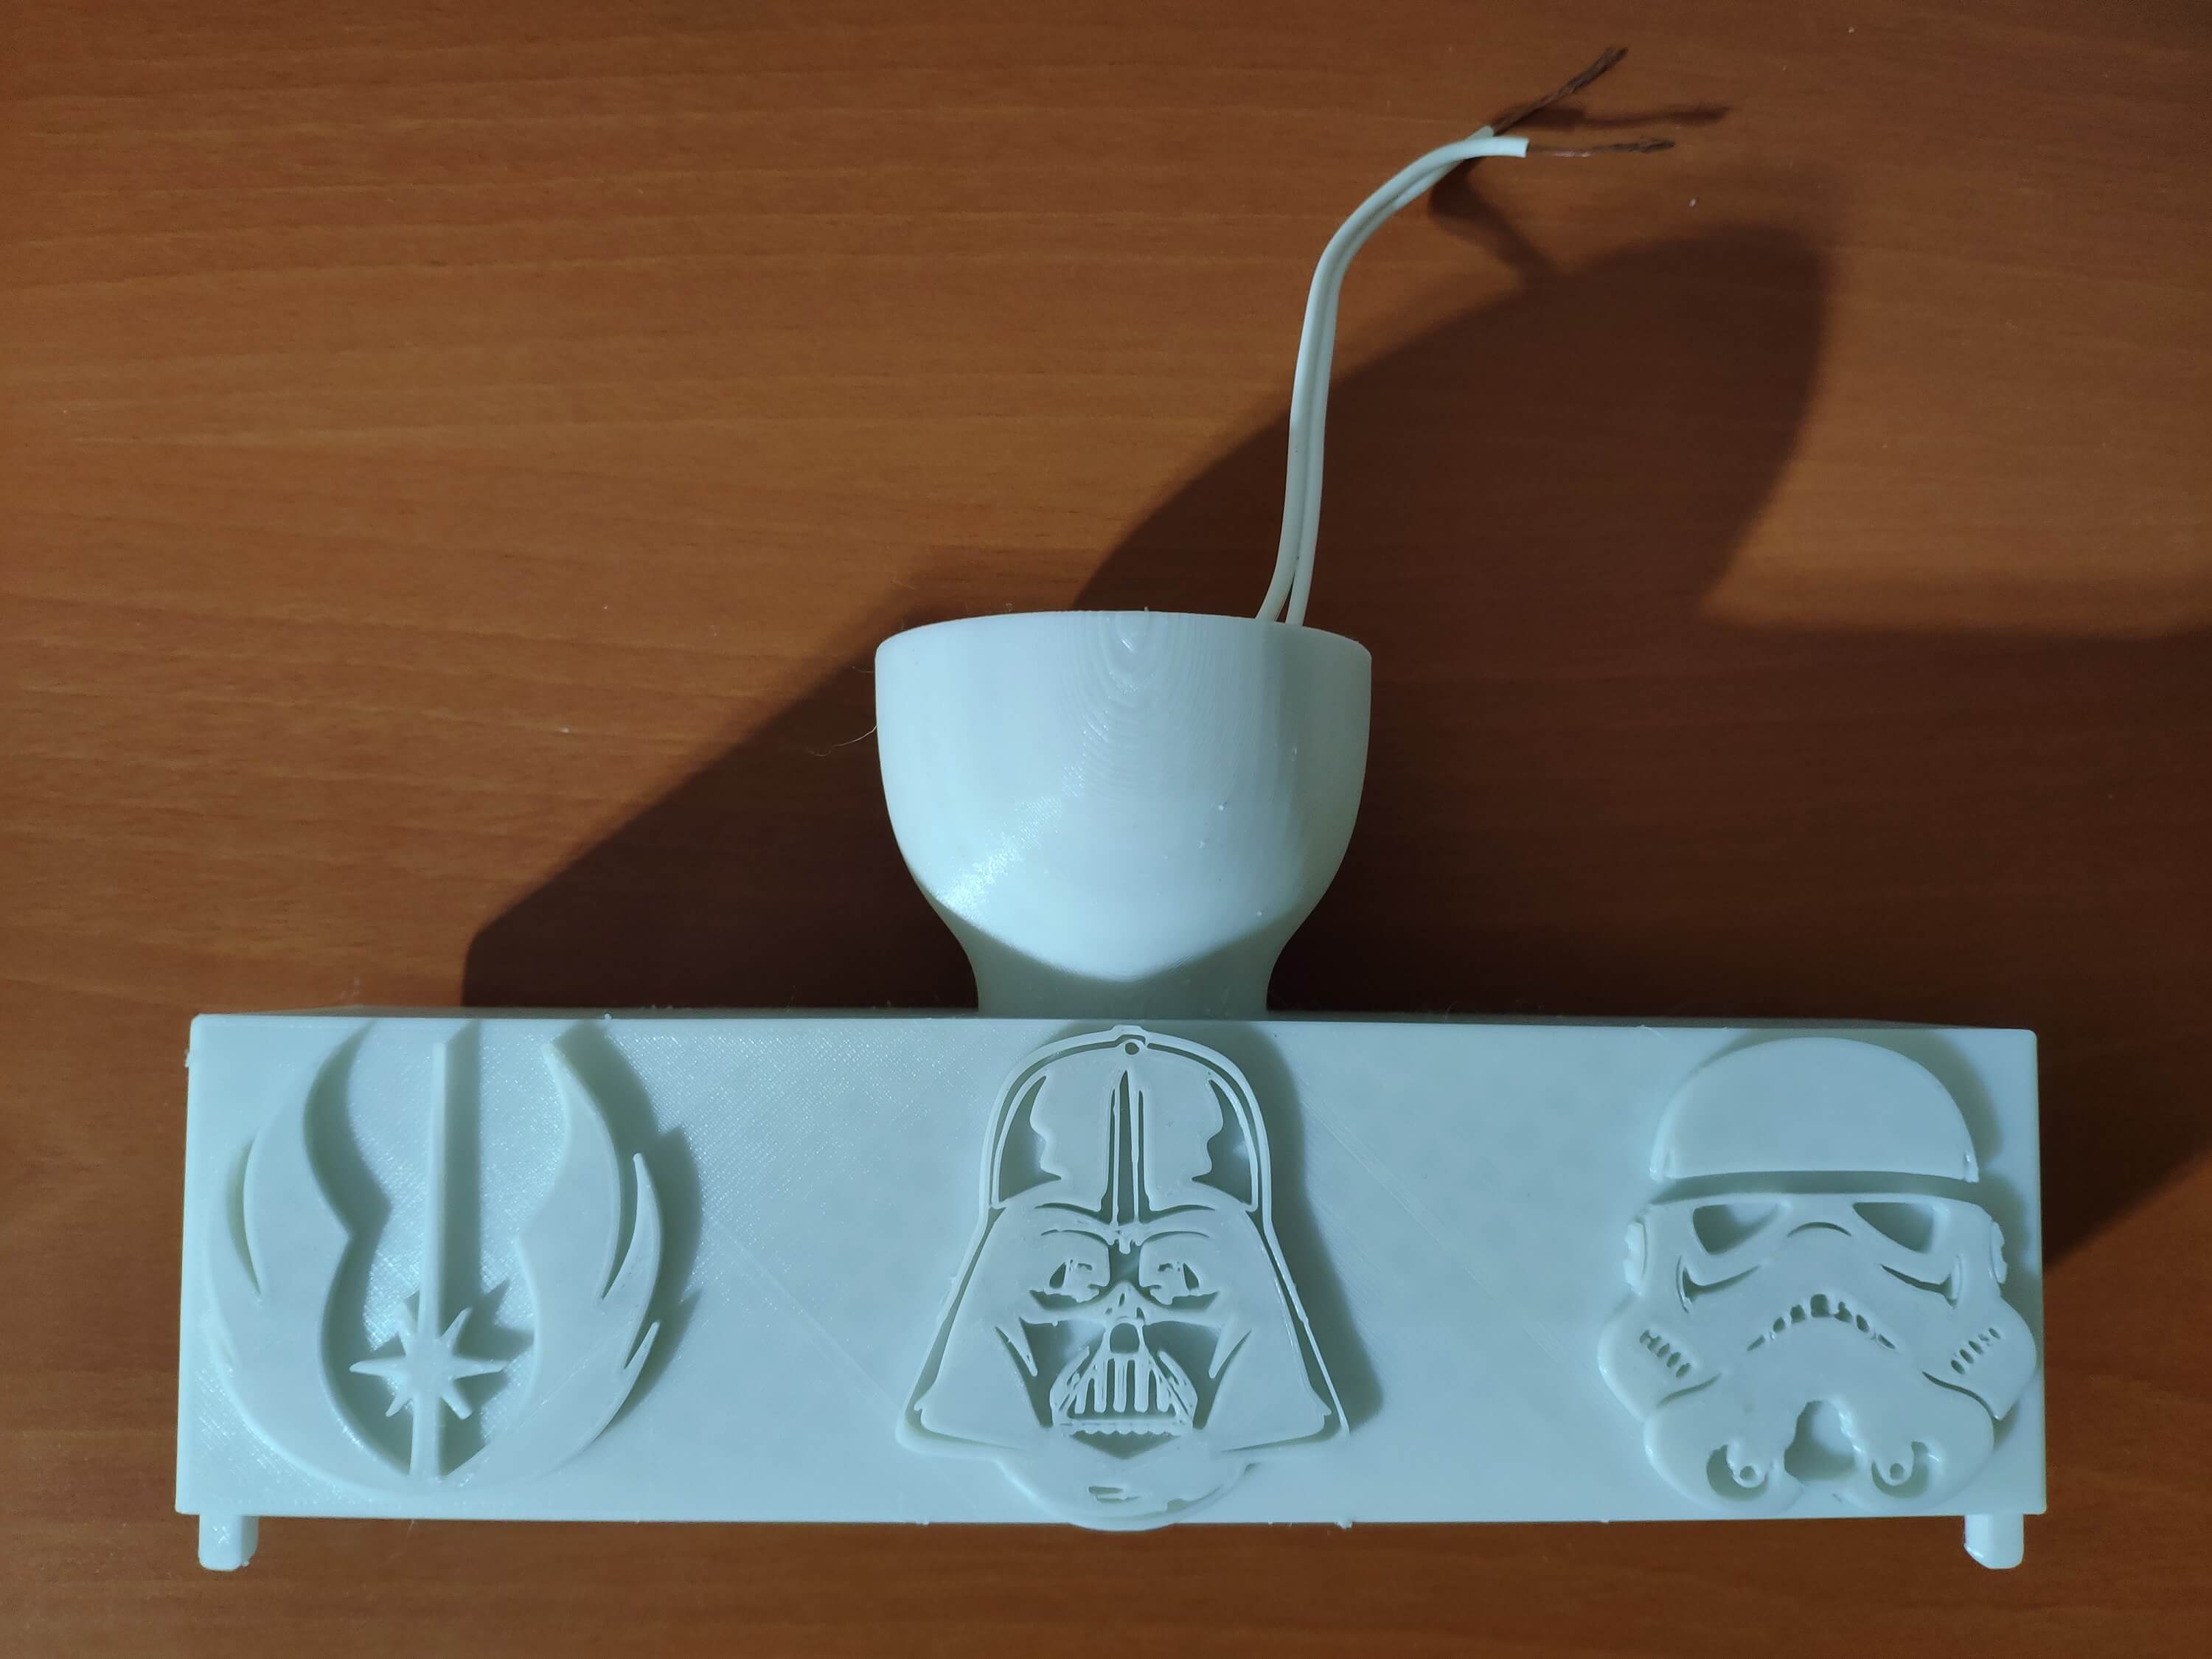
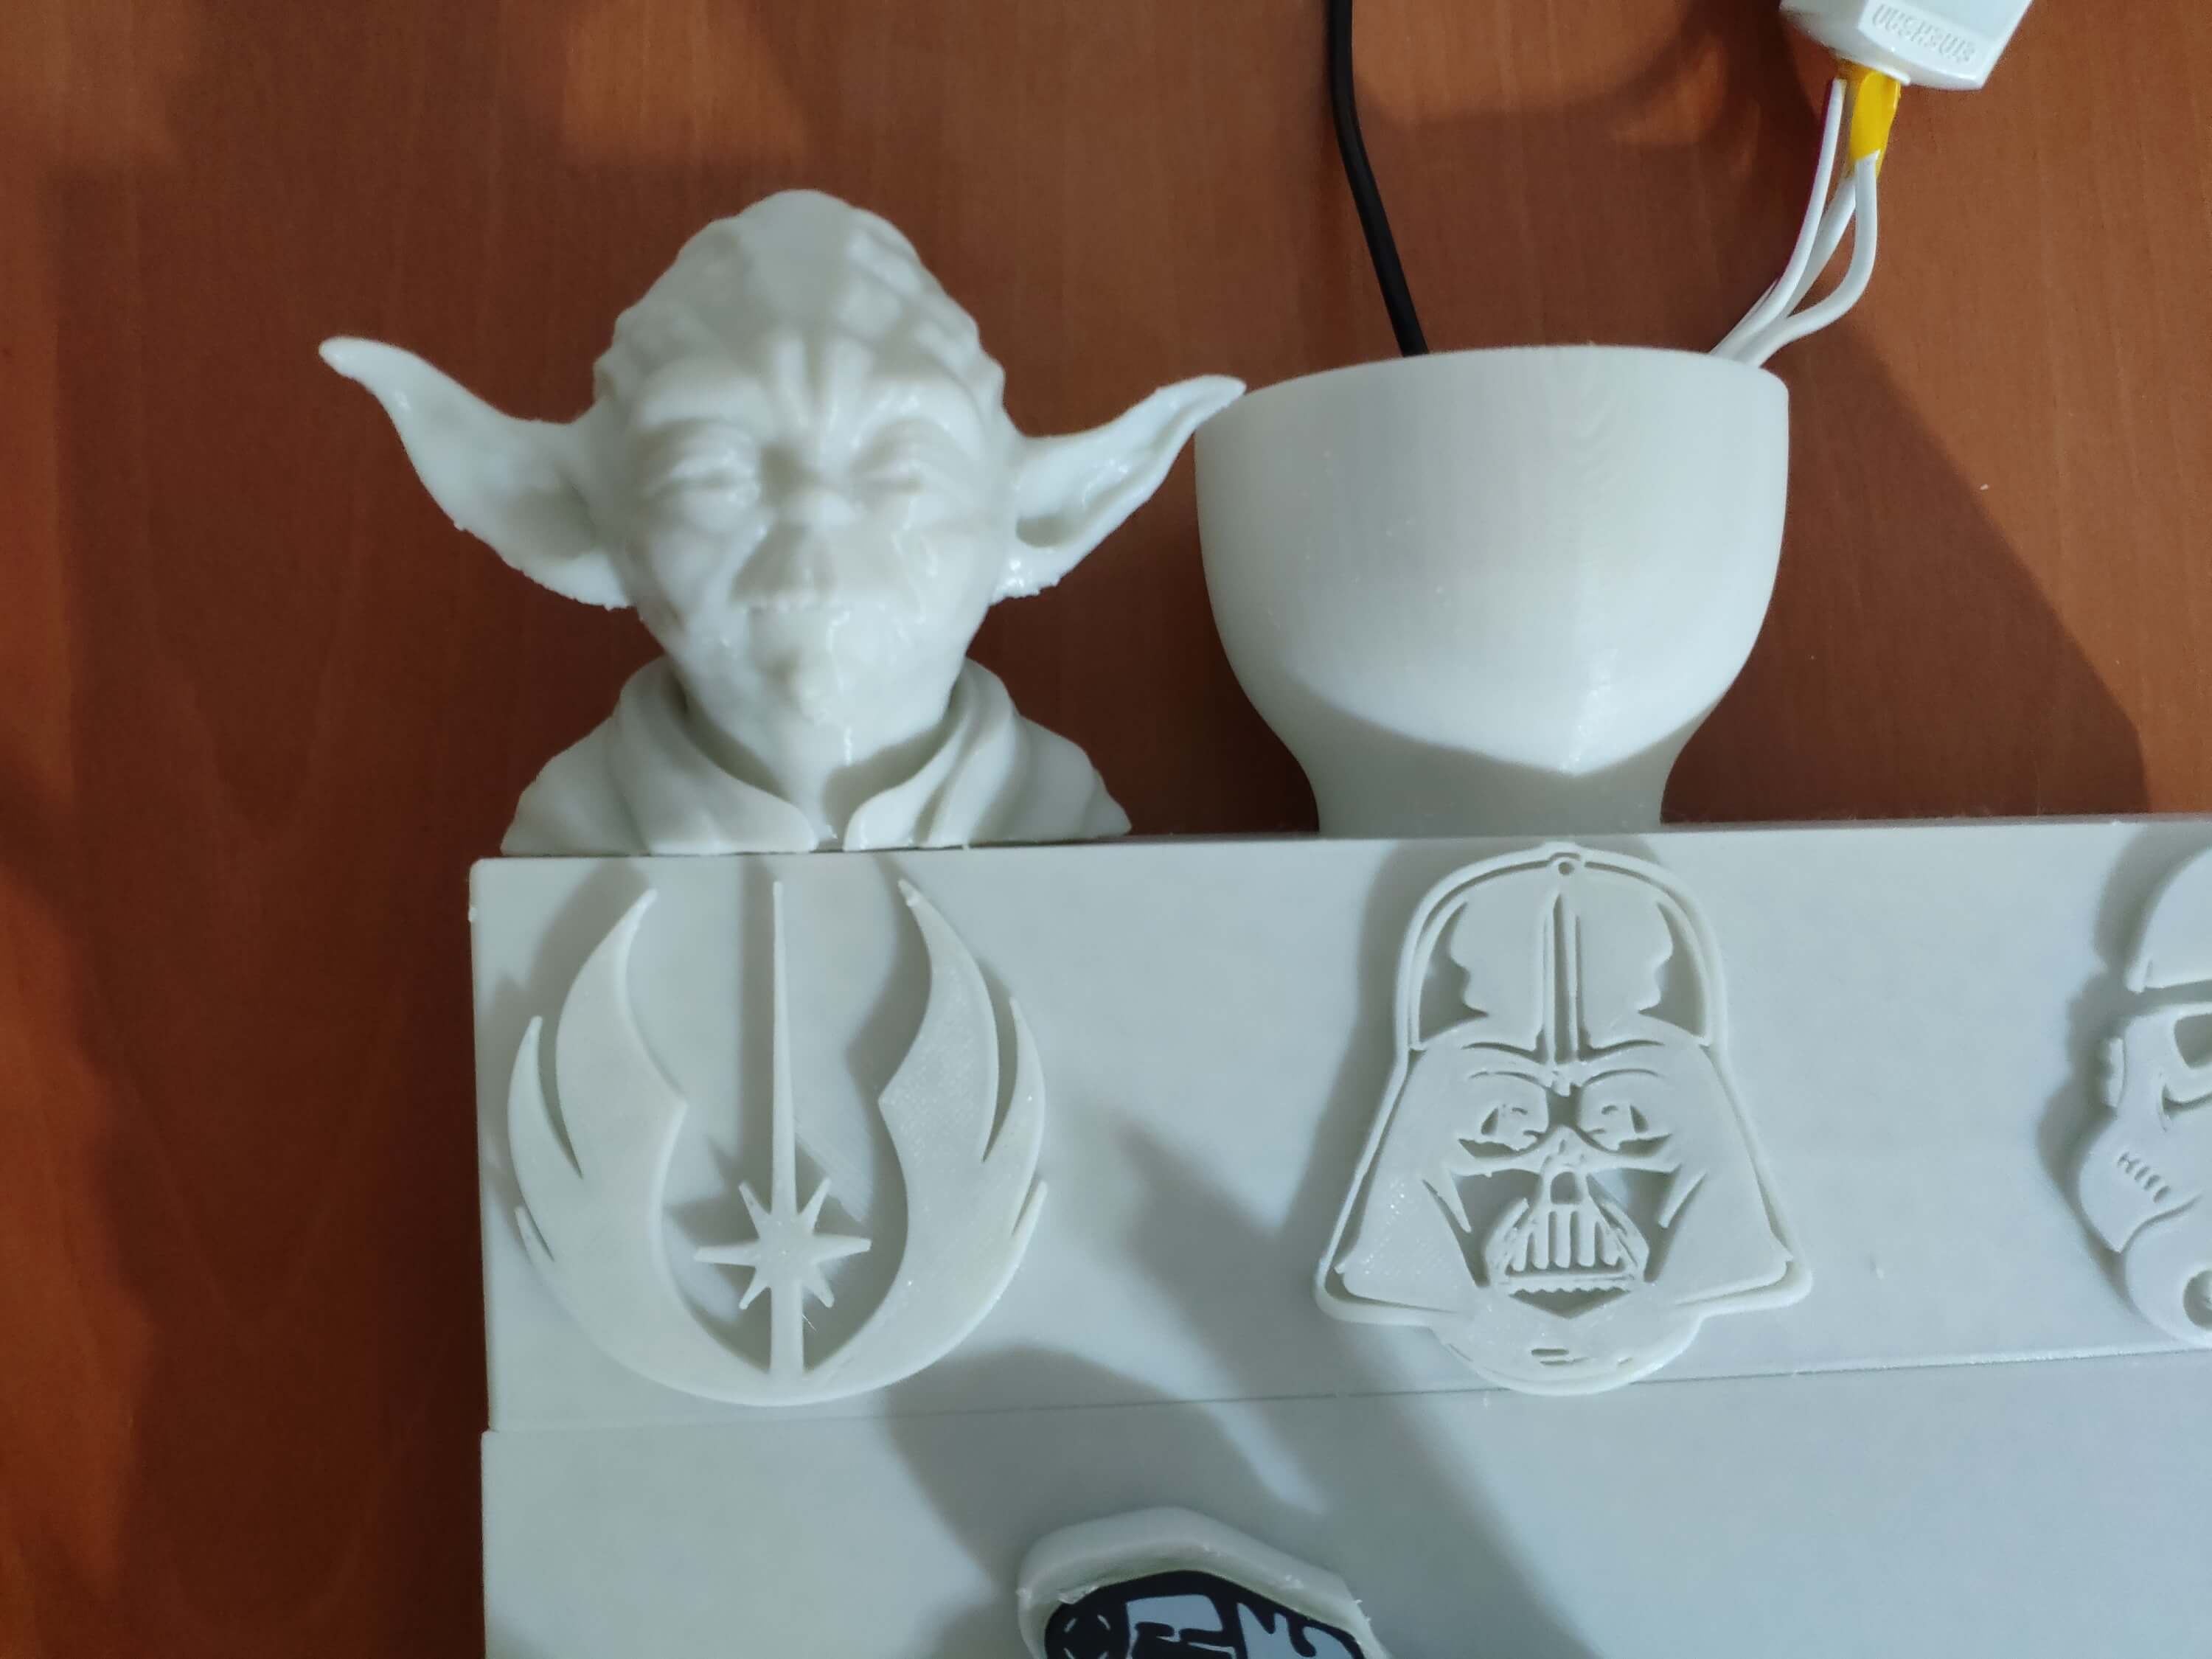
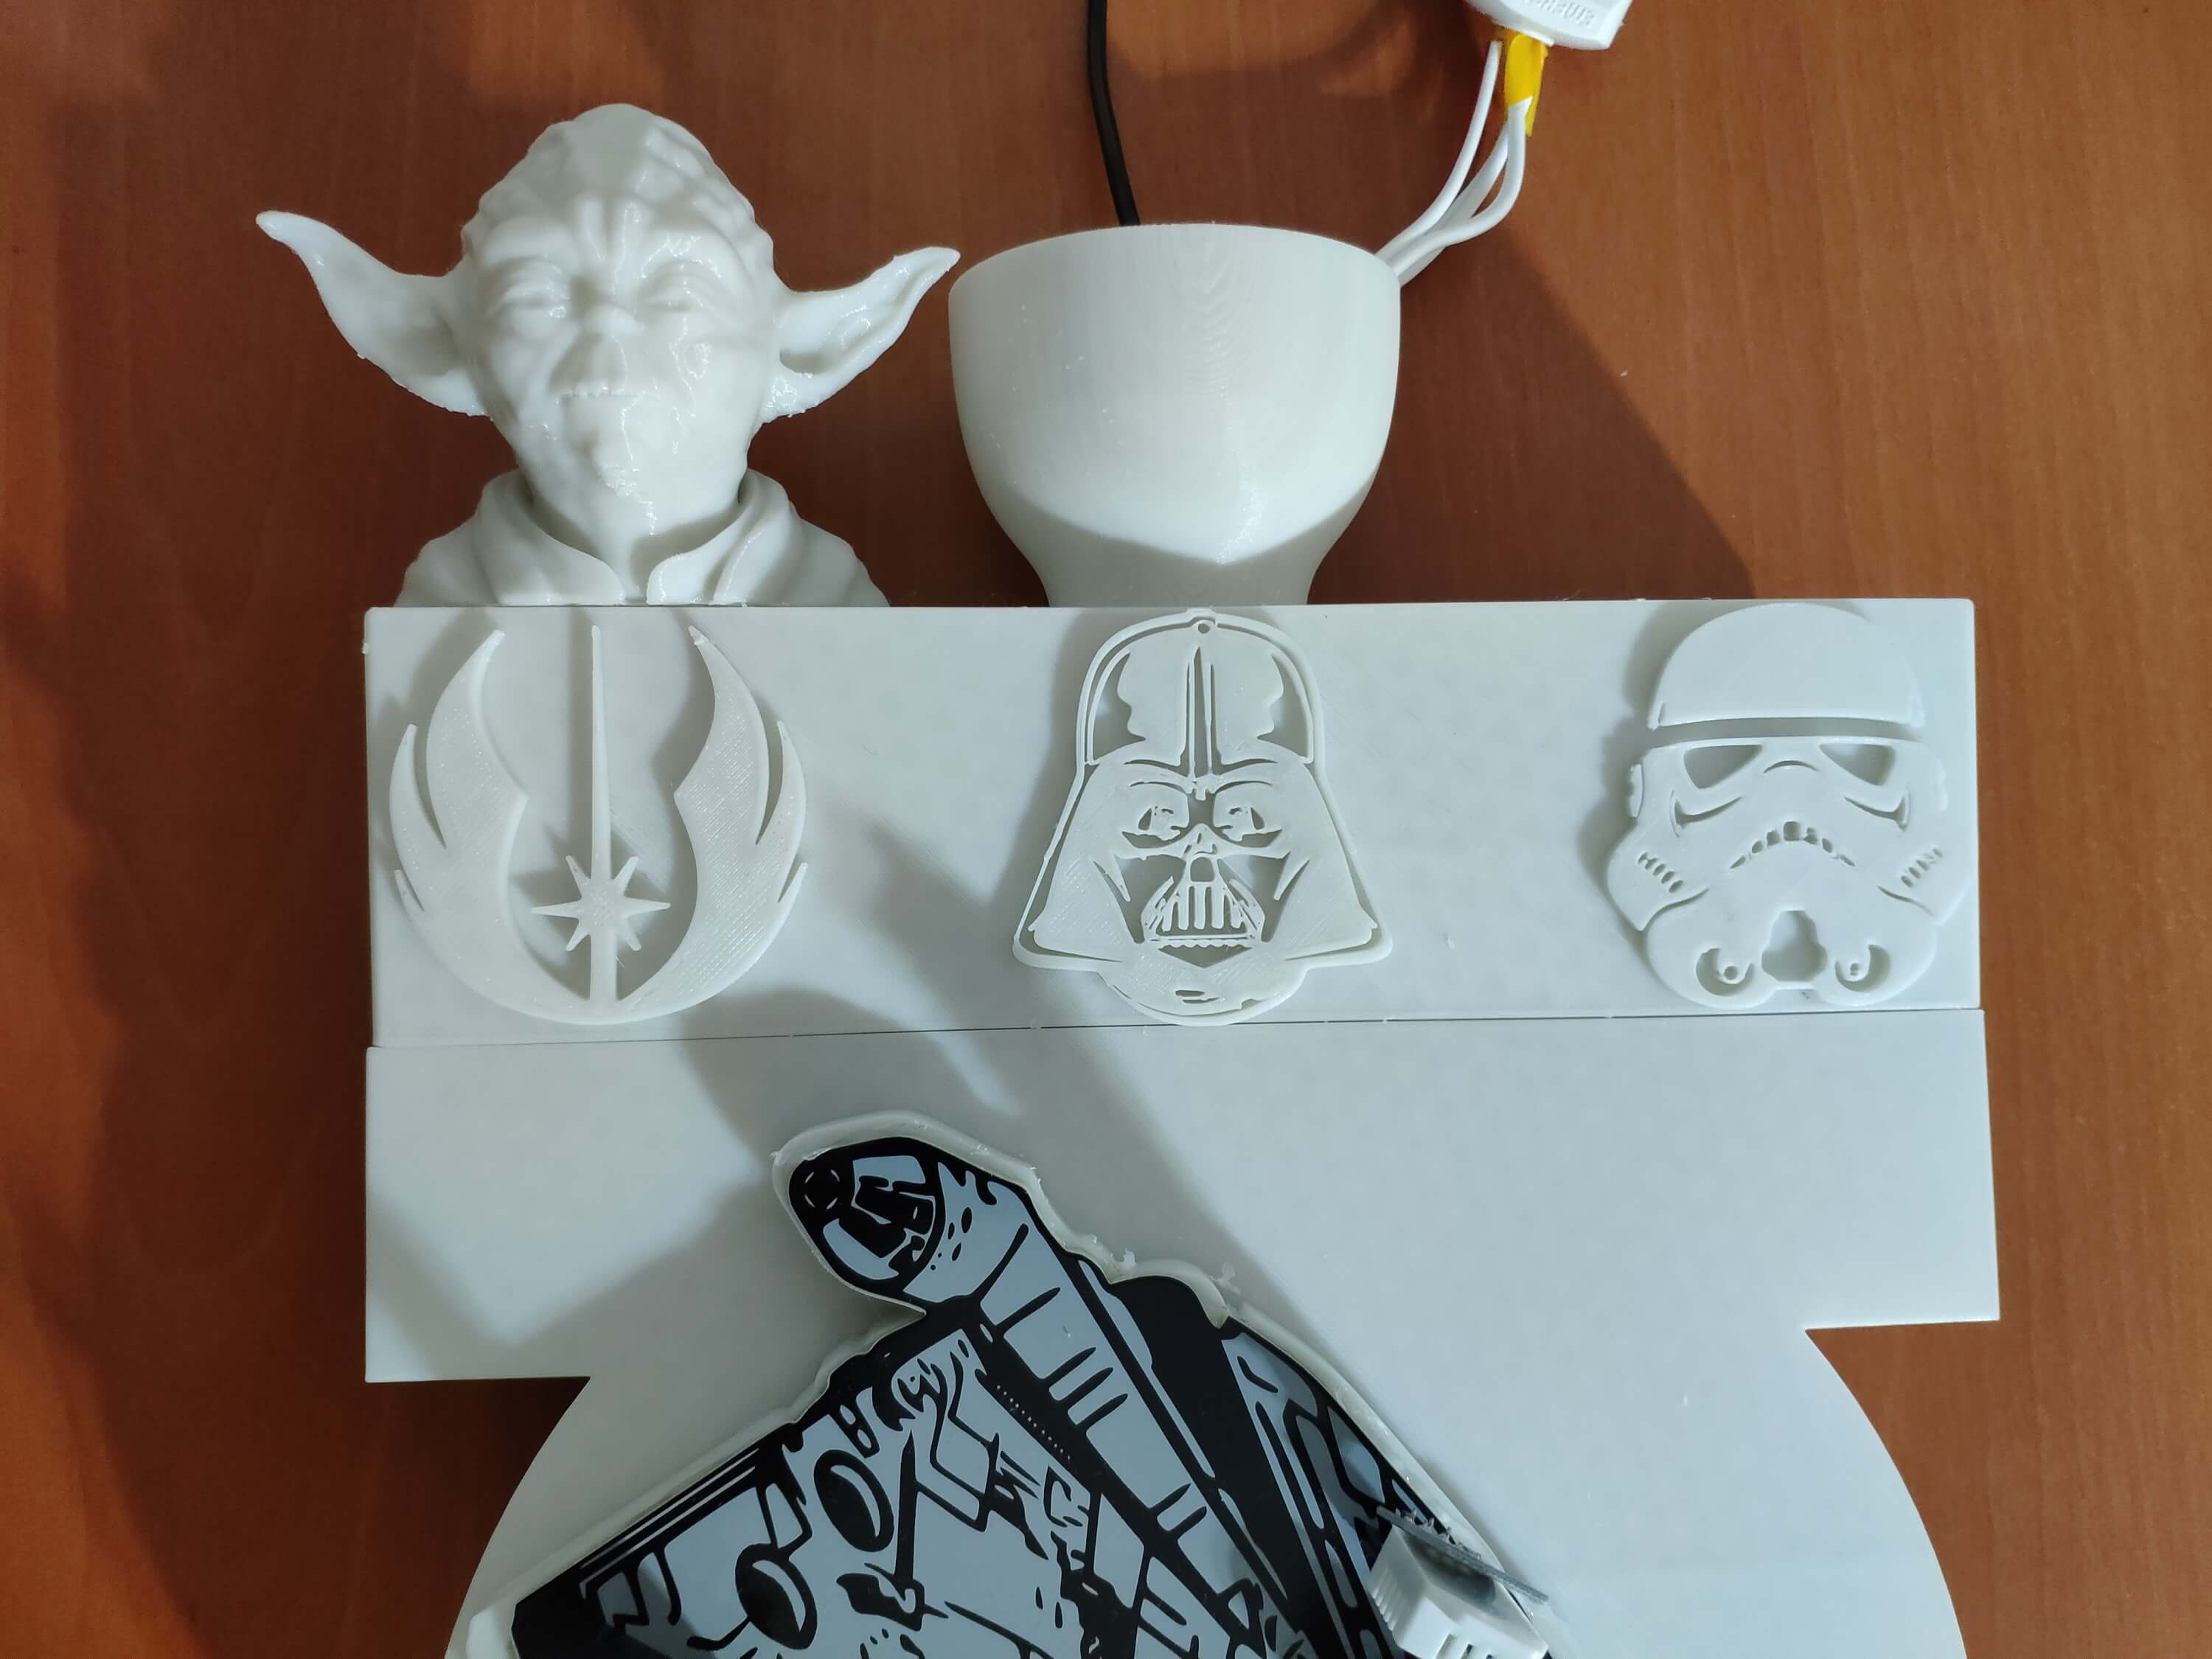
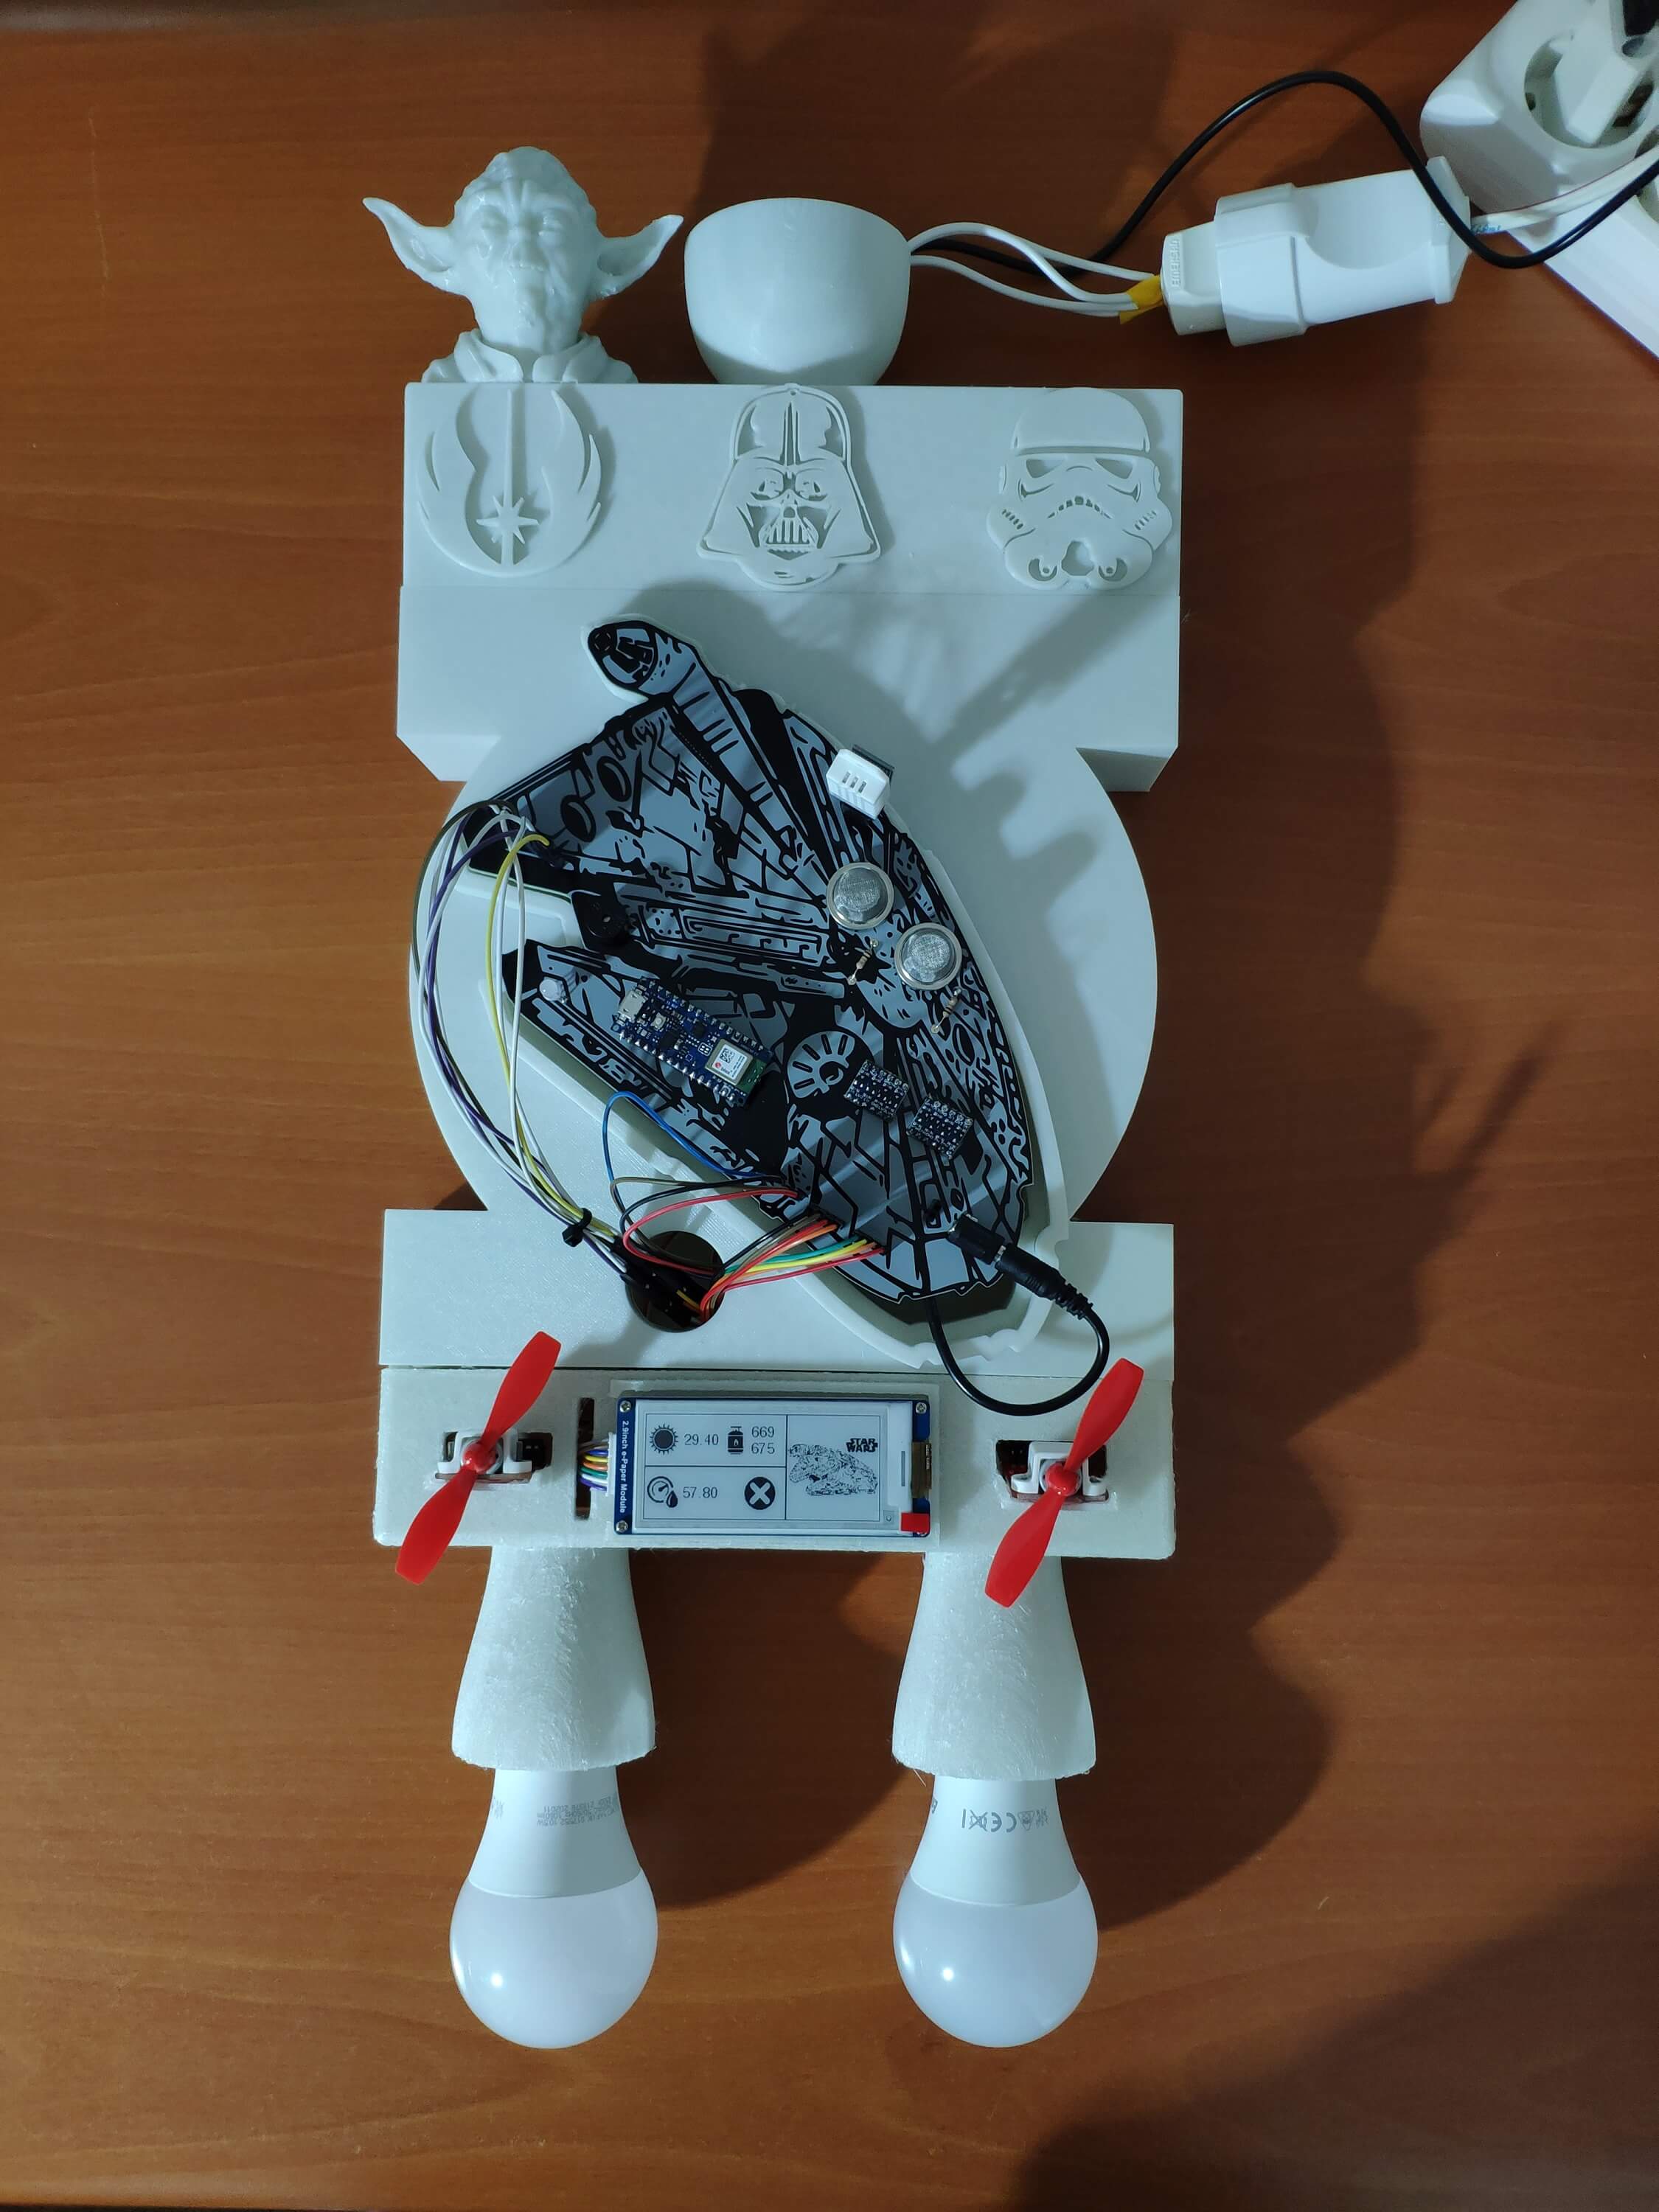
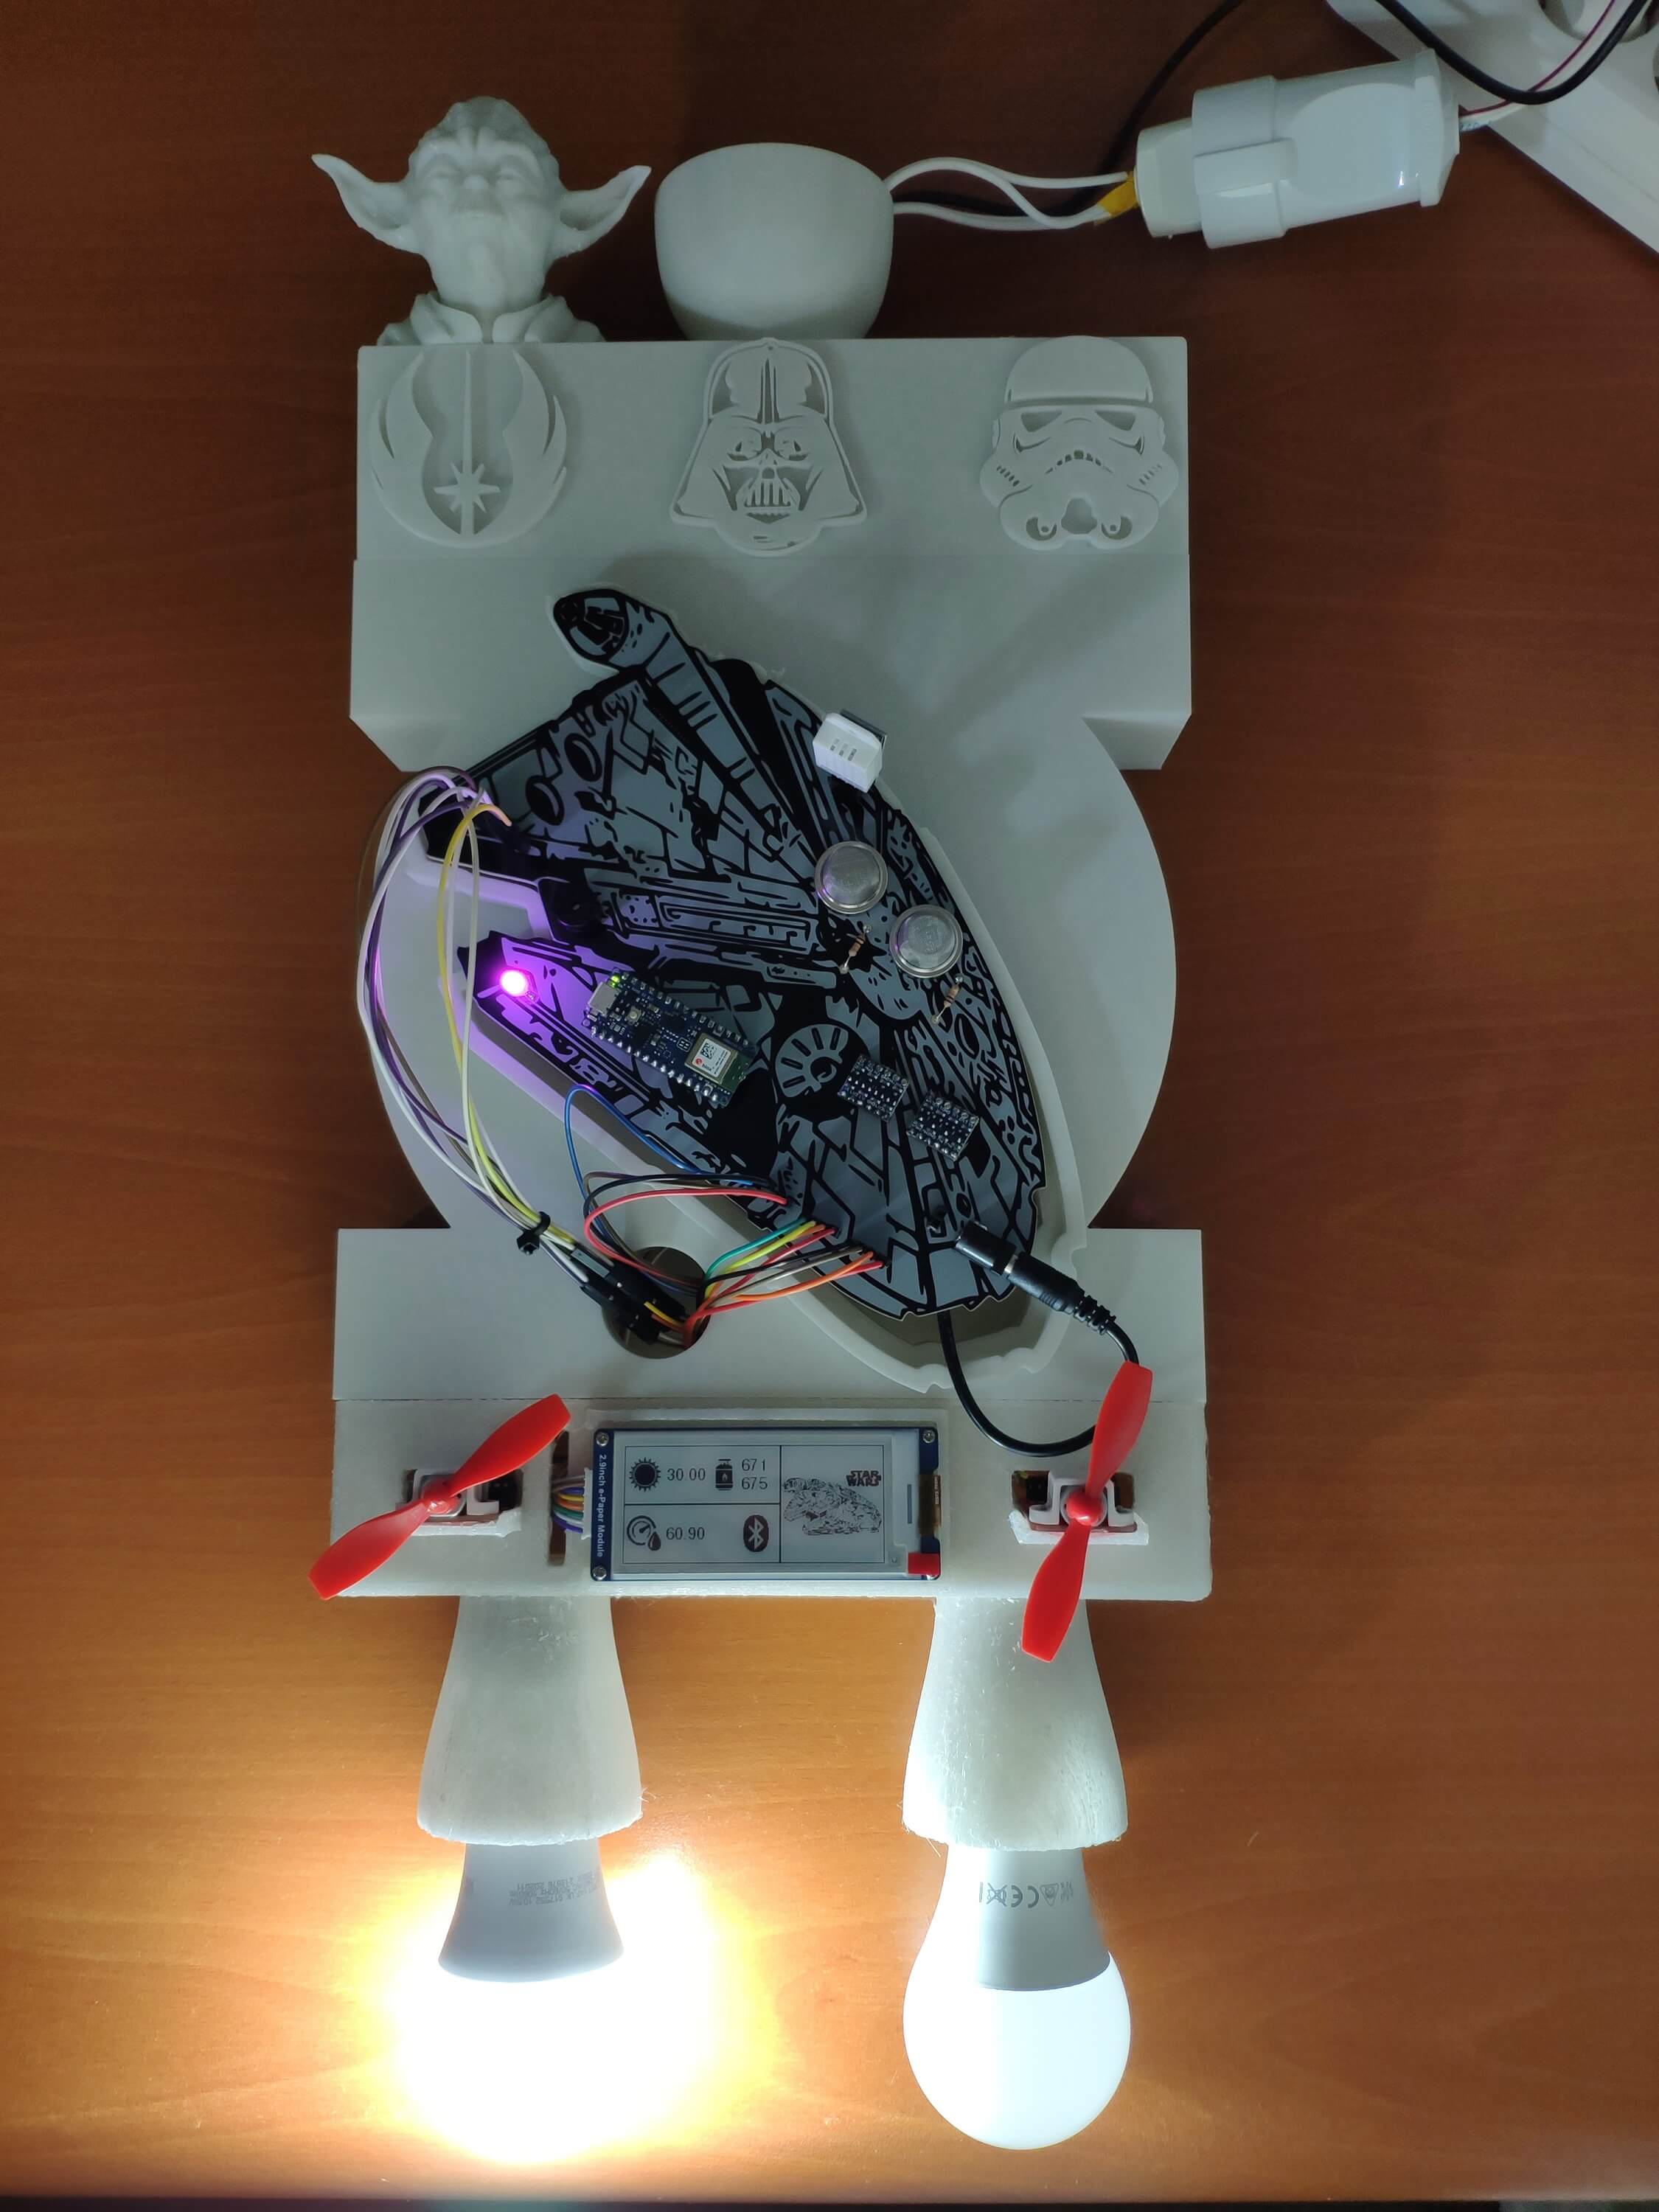
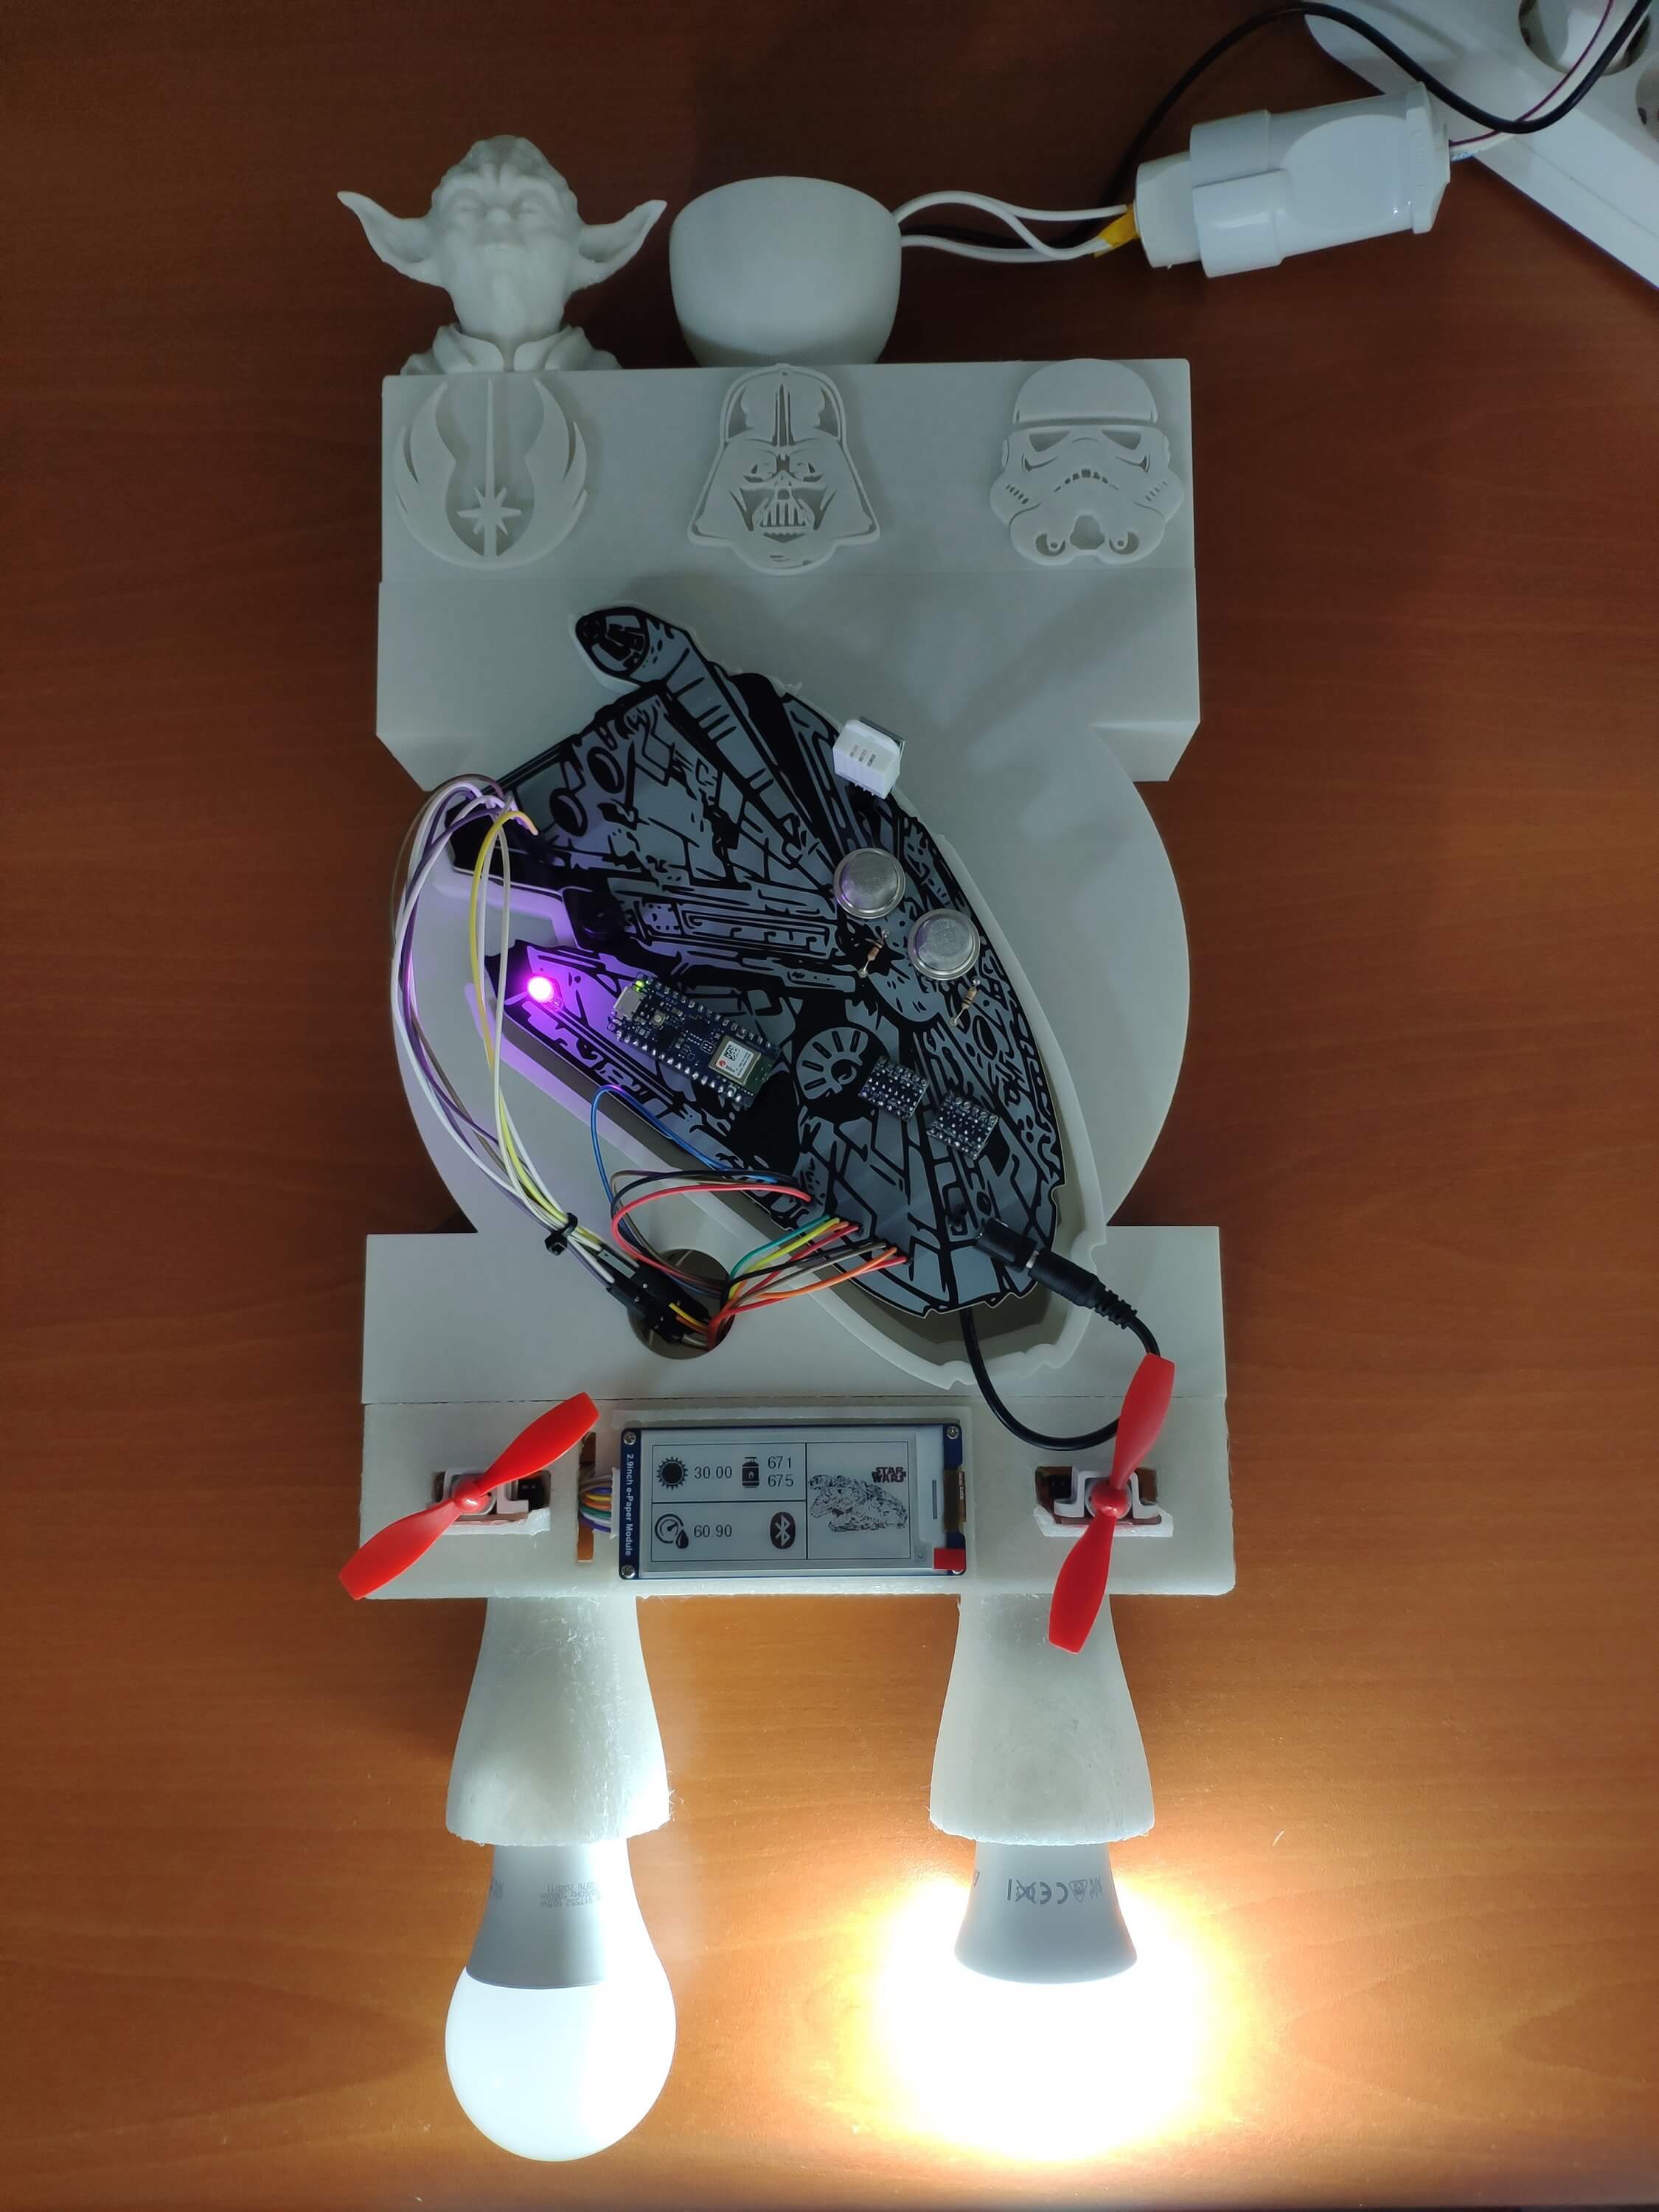
Since I focused on building a Star Wars-themed room lighting system, I decided to design a robust and compact lighting structure resembling an AT-AT walker. To be able to utilize different materials and avert loose wire connections, I designed the lighting structure in three parts: main case, lights, and plug. Then, to insert and attach the Millennium Falcon-inspired PCB to the main case effortlessly, I added a capacious slot. Also, I decided to fasten a Master Yoda bust to the structure and emboss well-known Star Wars icons on the plug part so as to adorn the lighting system gloriously :)
I designed the main case, lights, and plug parts of the lighting structure in Autodesk Fusion 360. You can download their STL files below.
Figure - 81.14
Figure - 81.15
Figure - 81.16
Figure - 81.17
Figure - 81.18
Figure - 81.19
Figure - 81.20
For the Master Yoda bust (replica) affixed to the top of the plug part, I utilized this model from Thingiverse:
Then, I sliced all 3D models (STL files) in Ultimaker Cura.
Figure - 81.21
Figure - 81.22
Figure - 81.23
Figure - 81.24
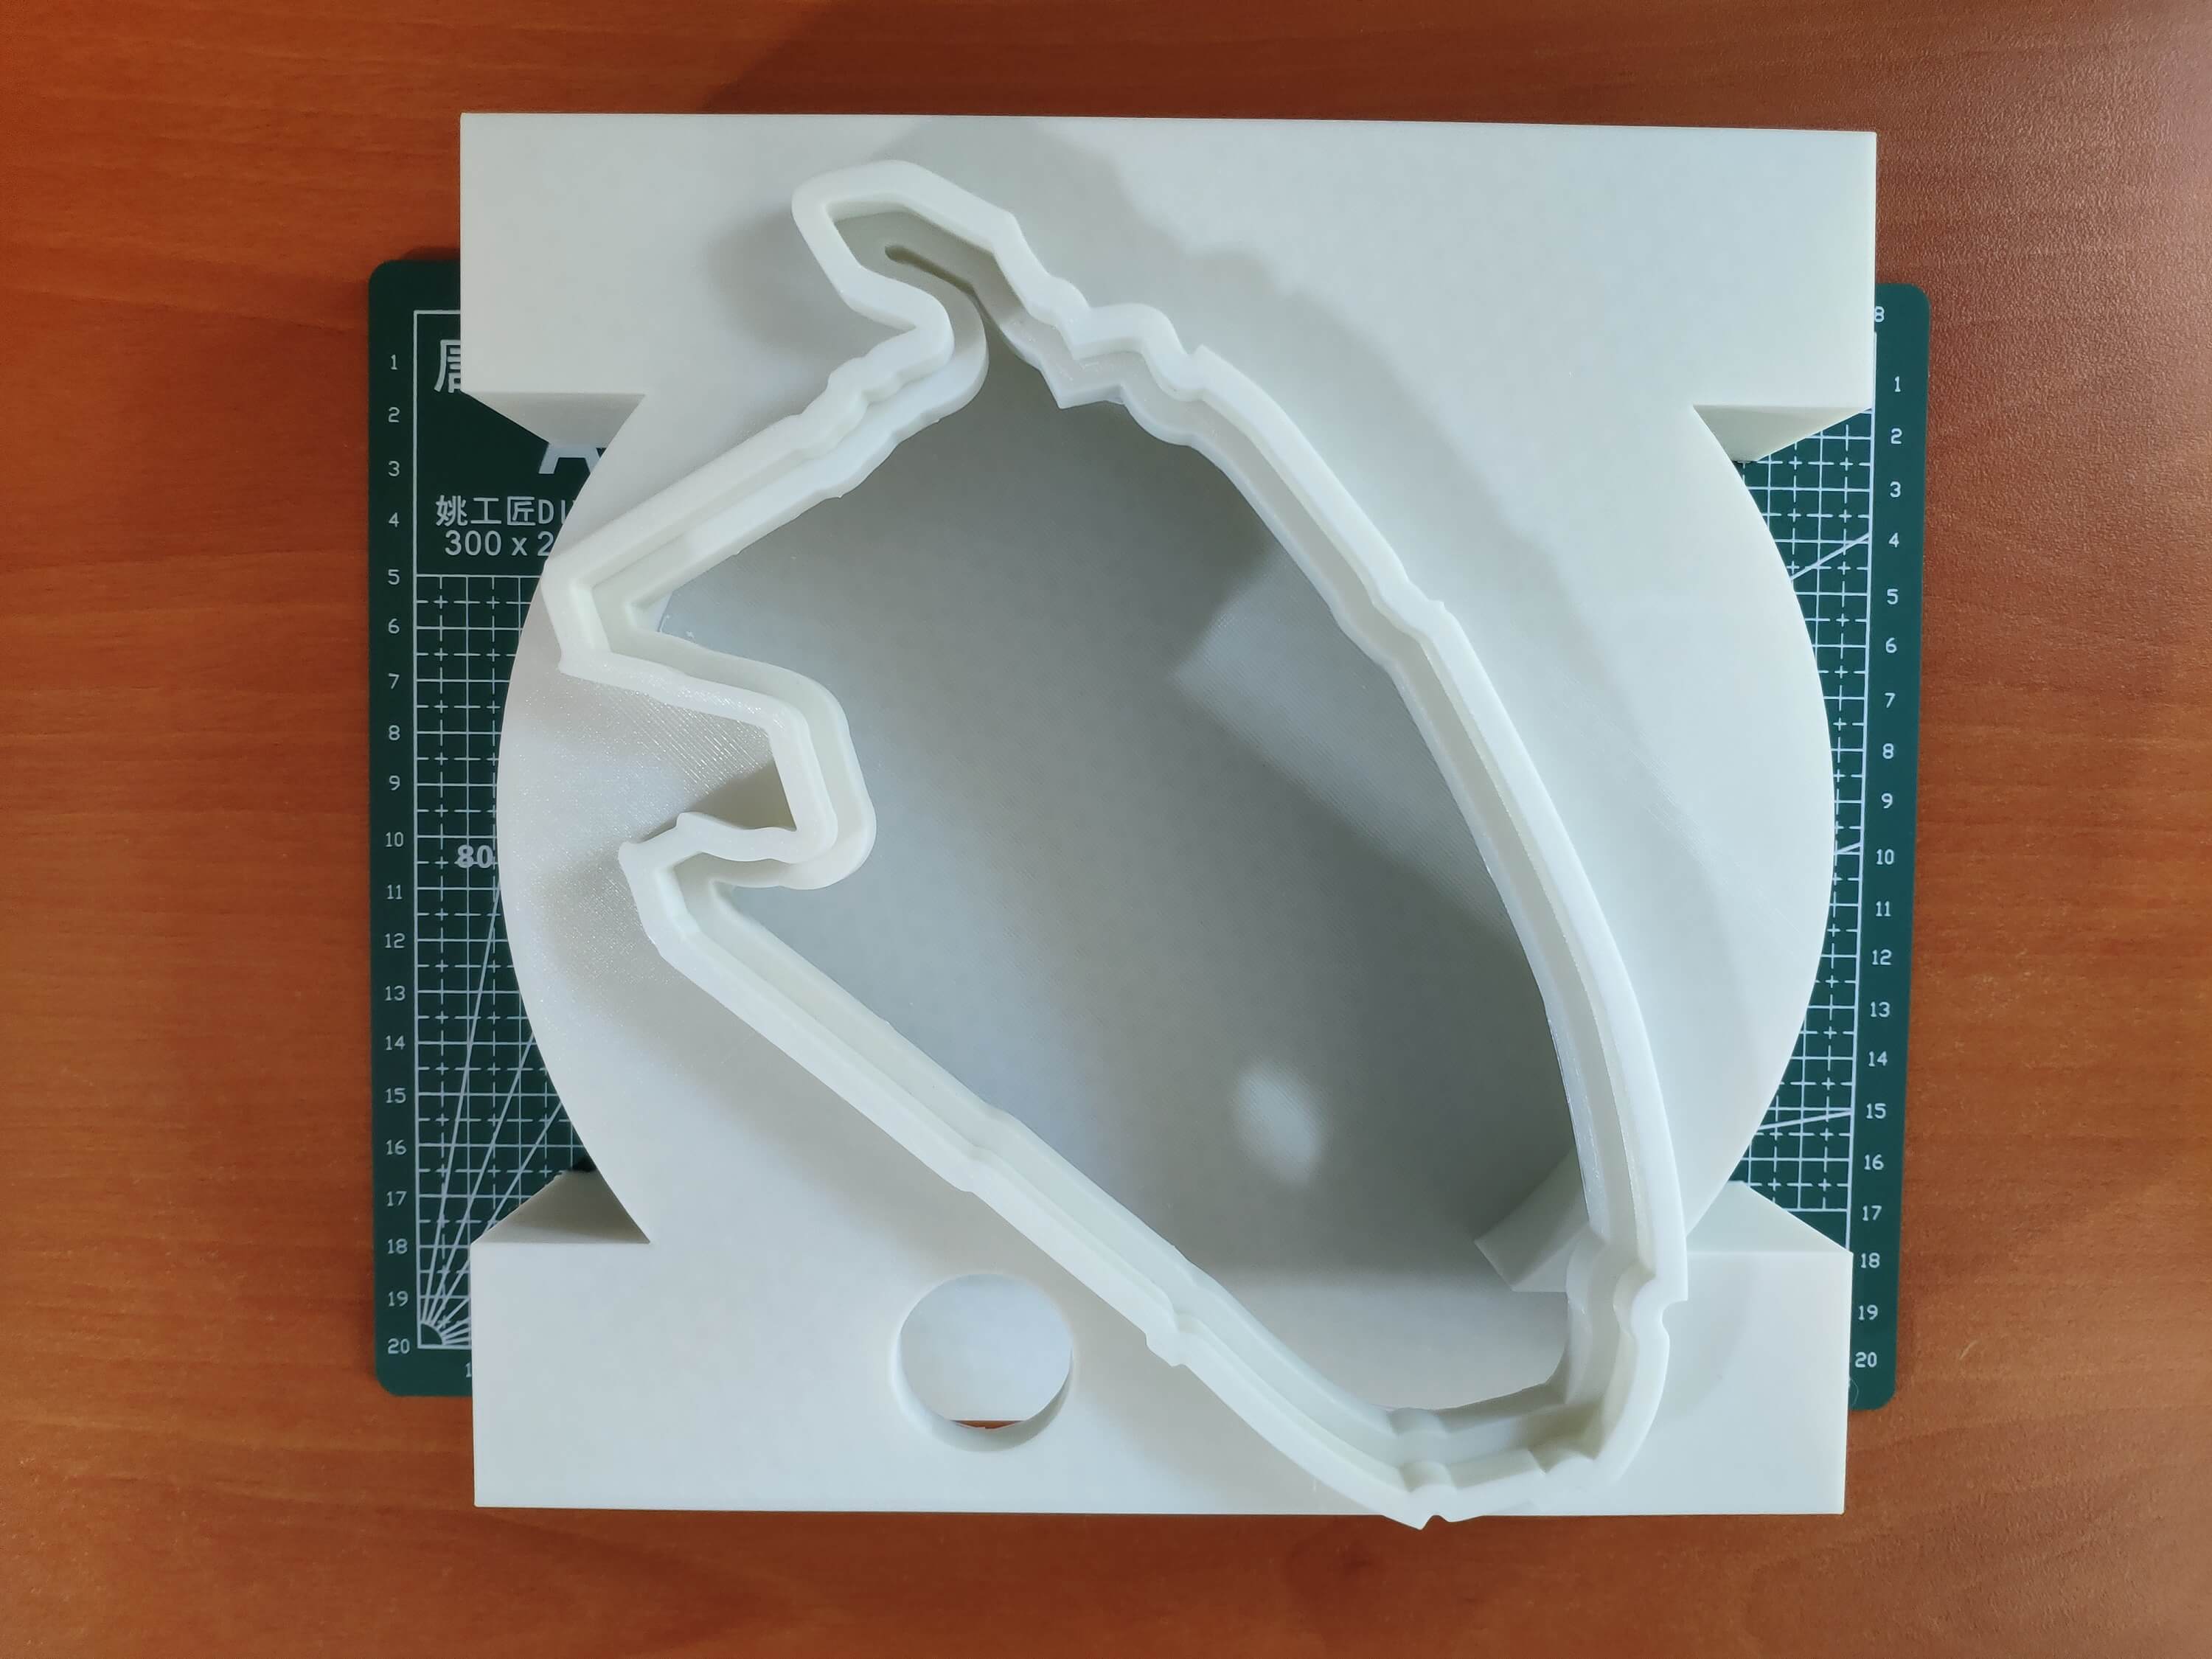
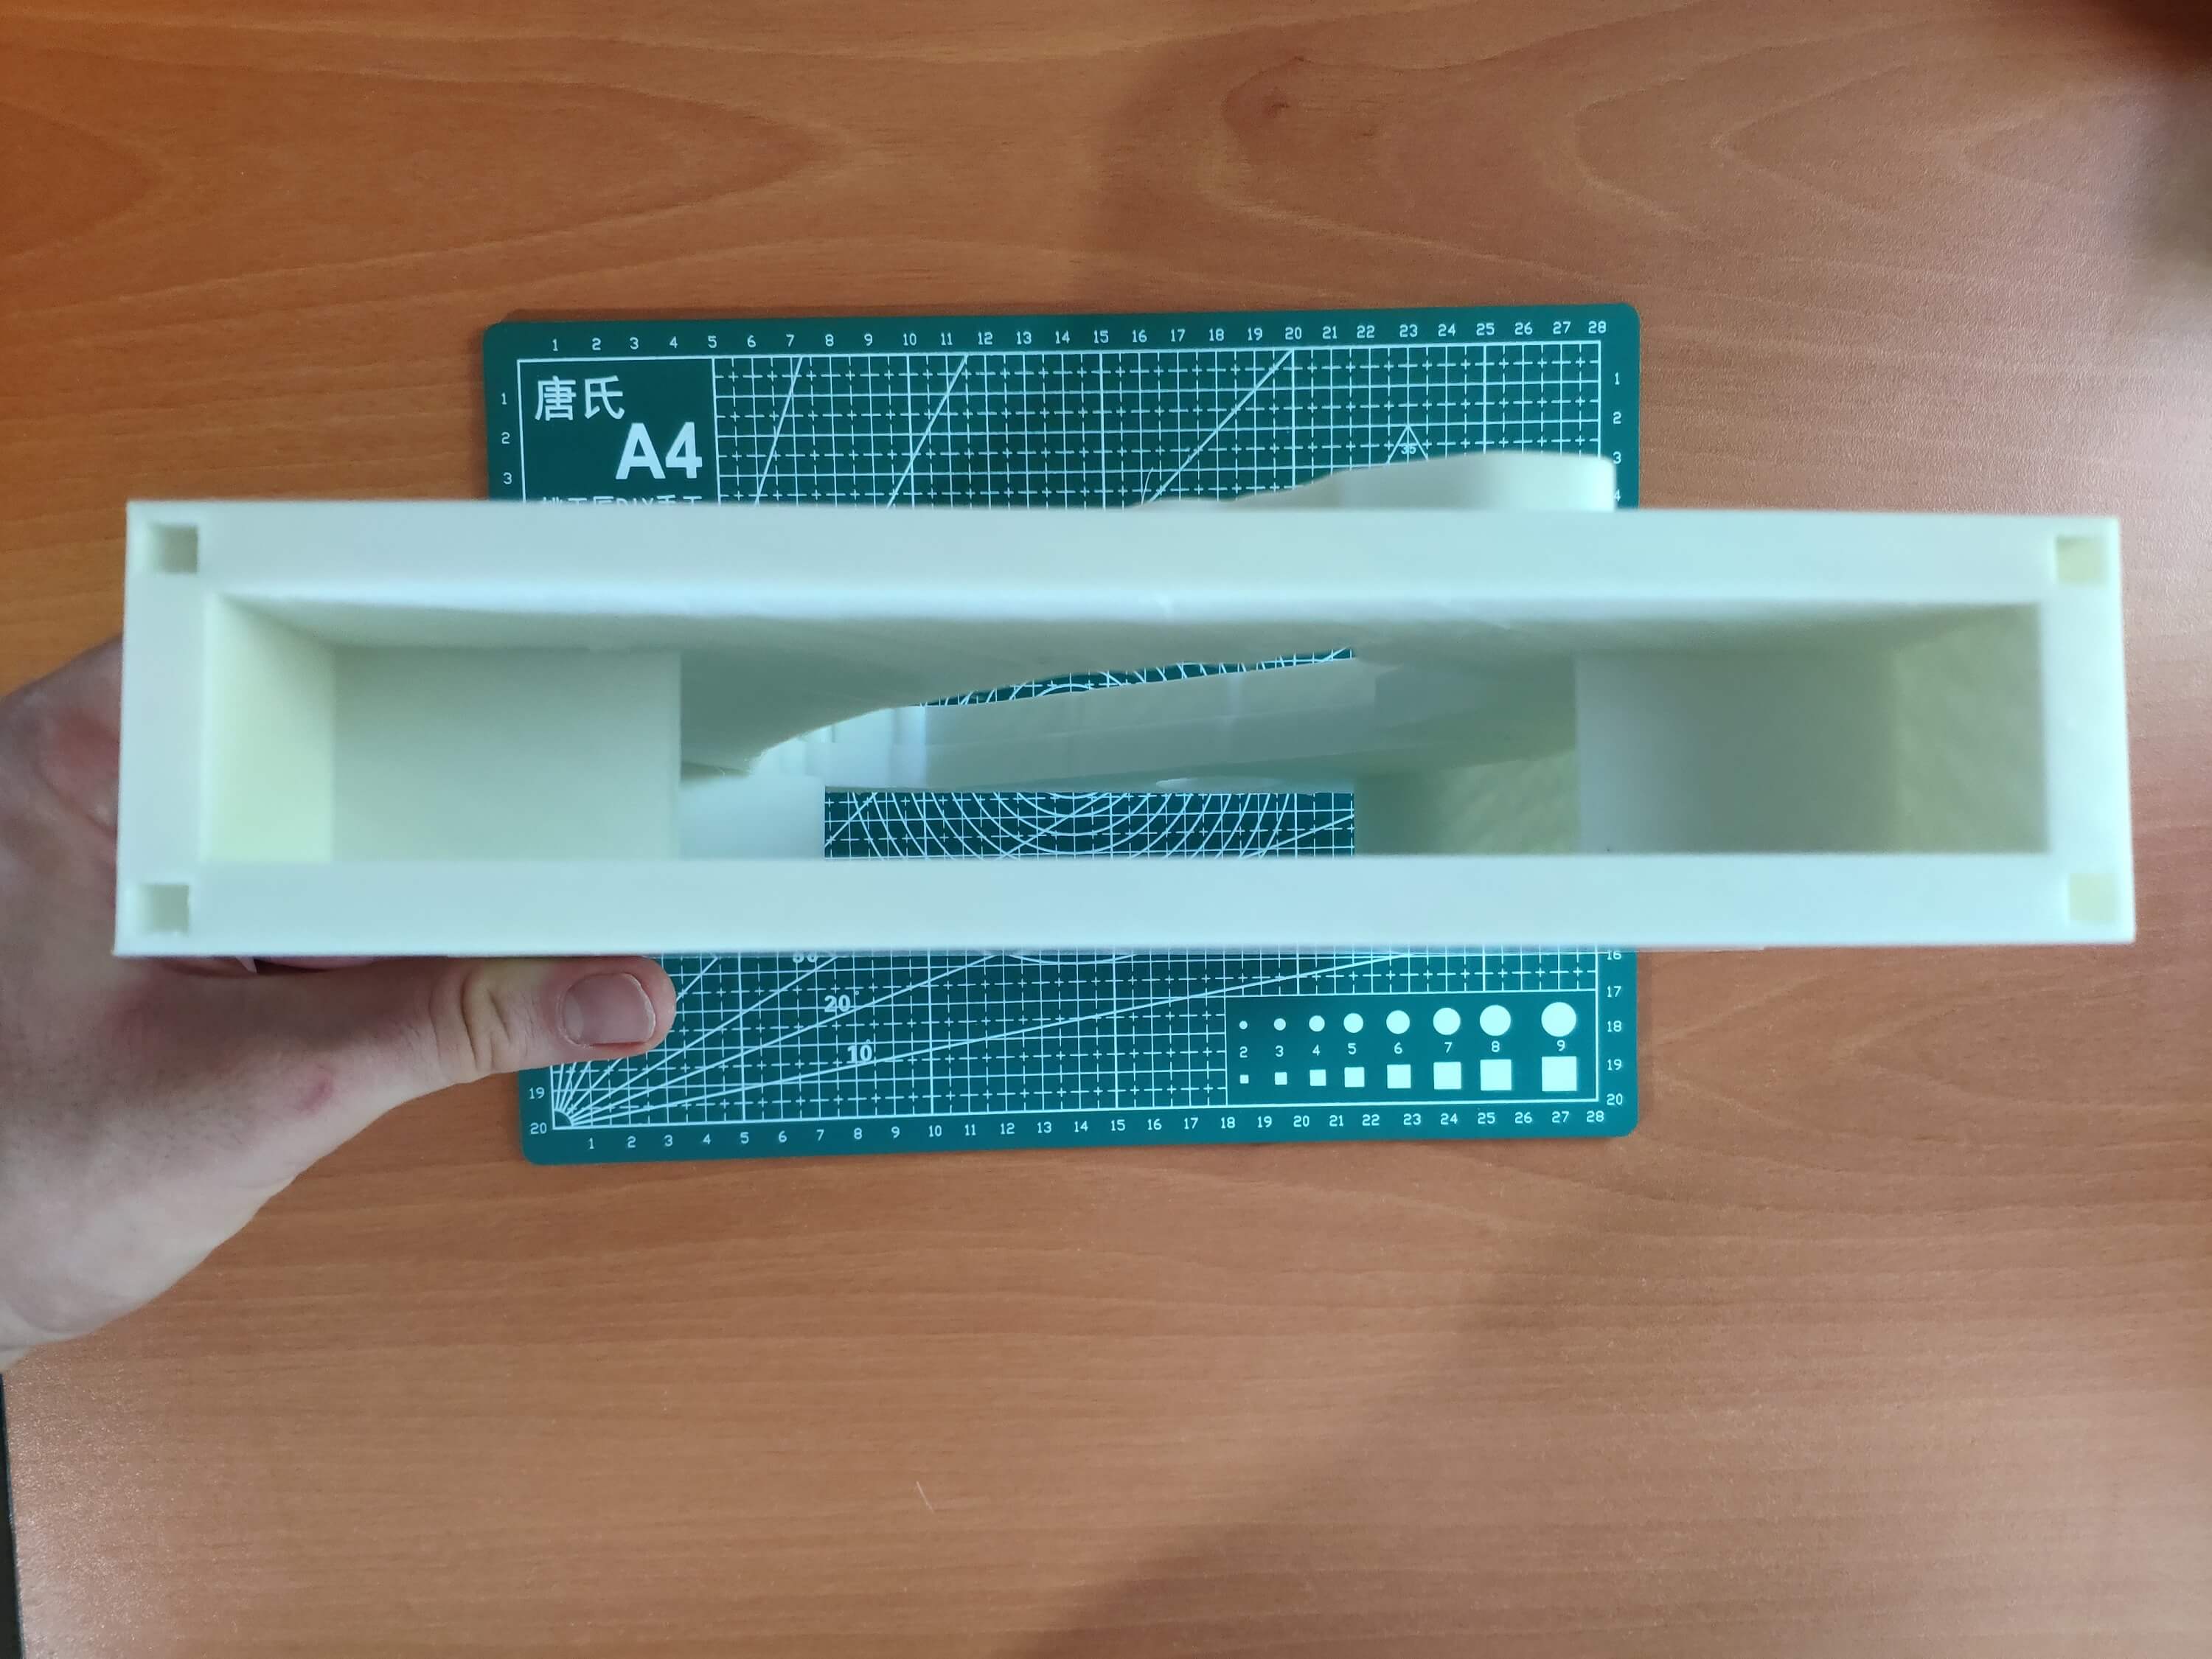
Note: The pictures above are for demonstrating the sliced models: I needed to split some models to make them compatible with the CR-200B build size (200 x 200 x 200 mm).
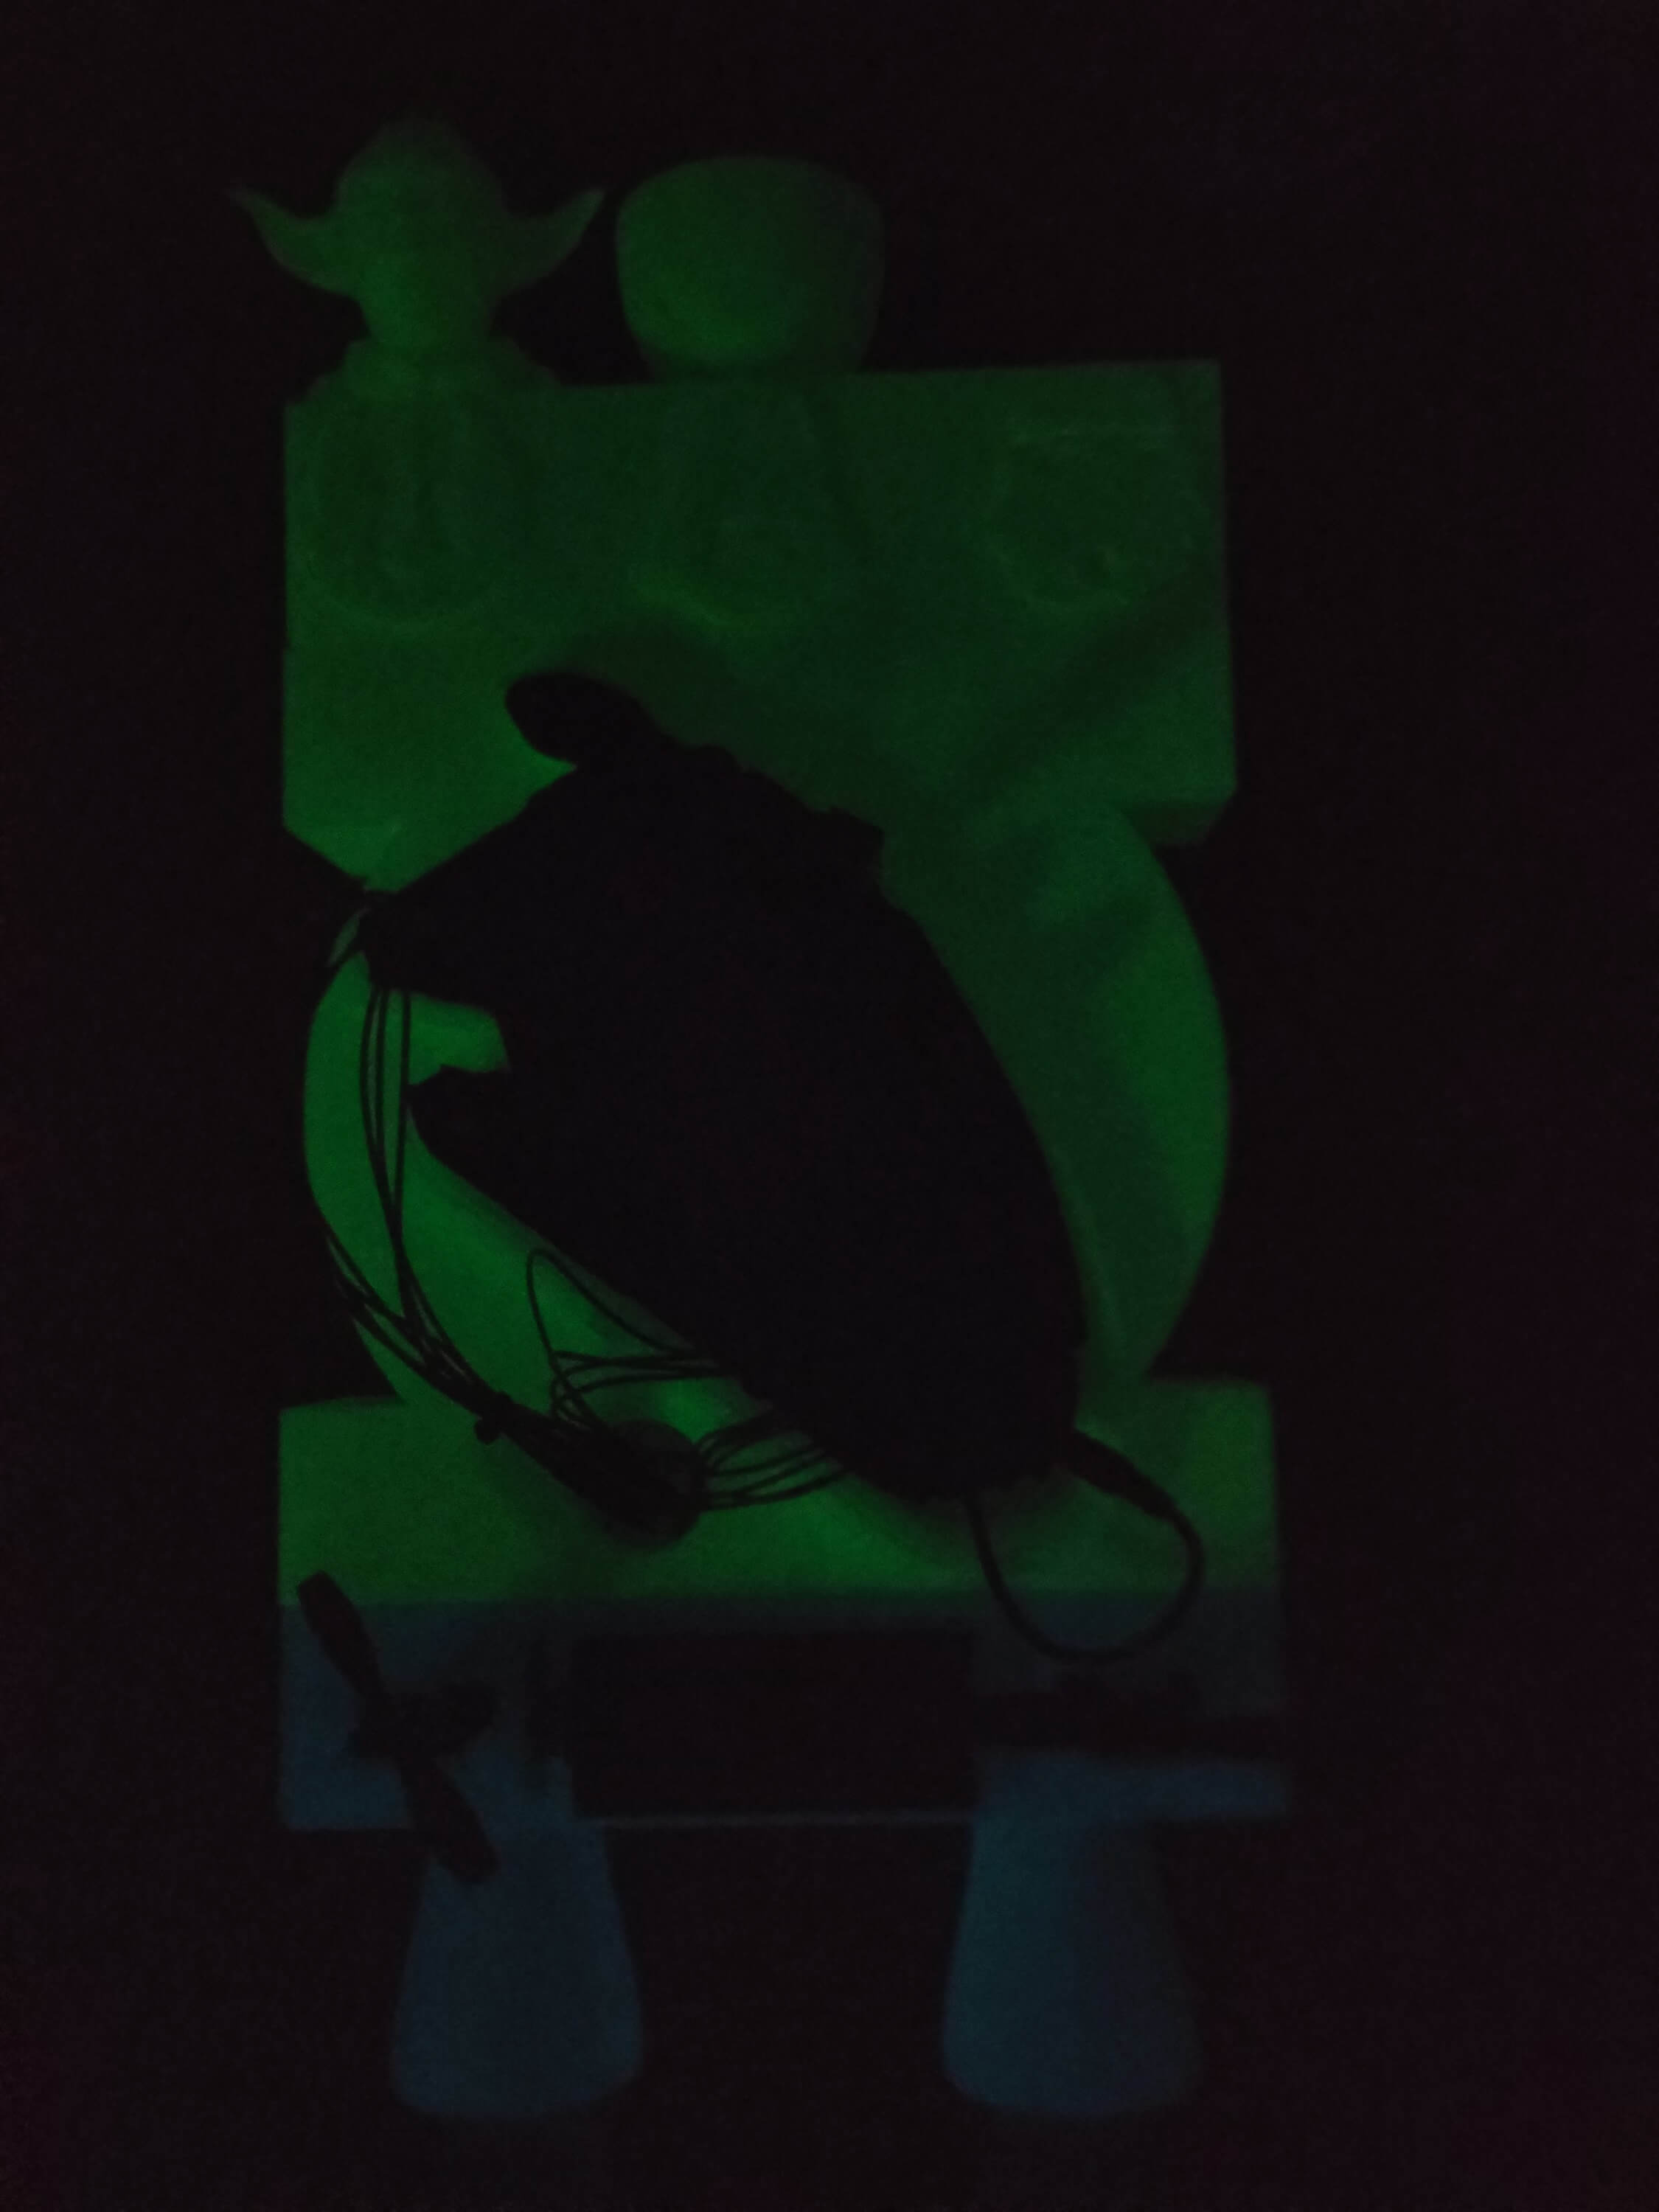
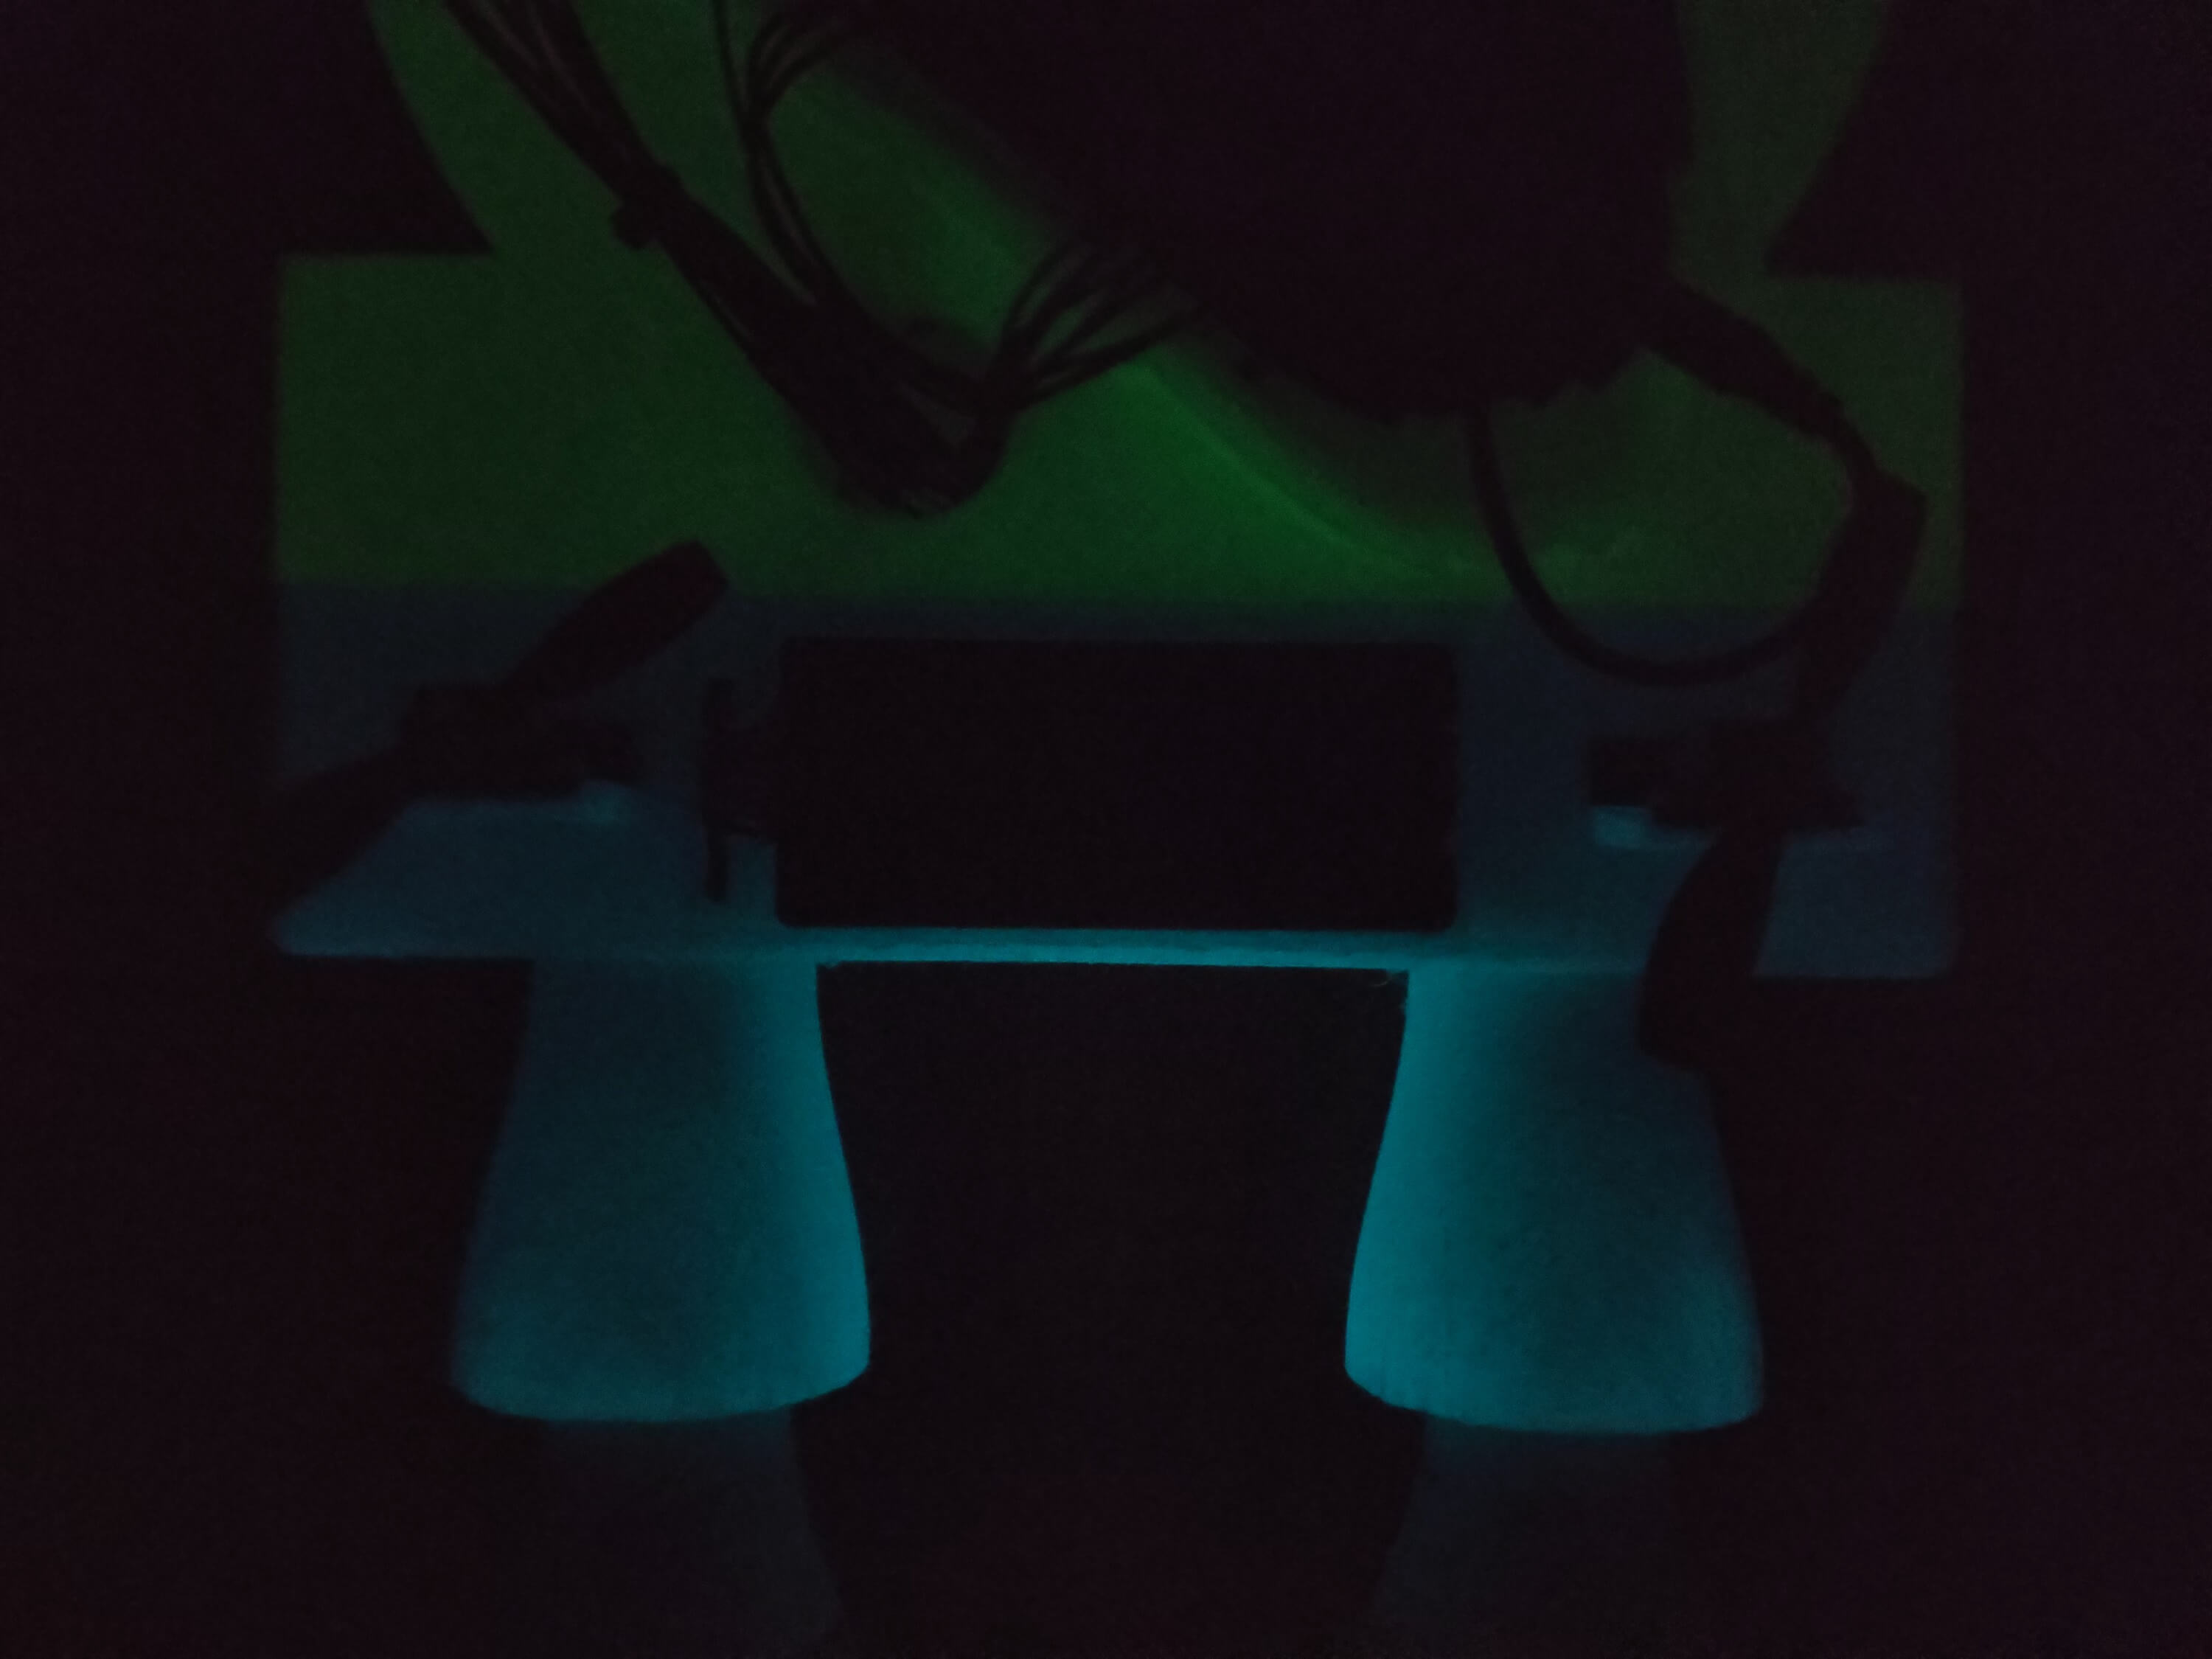
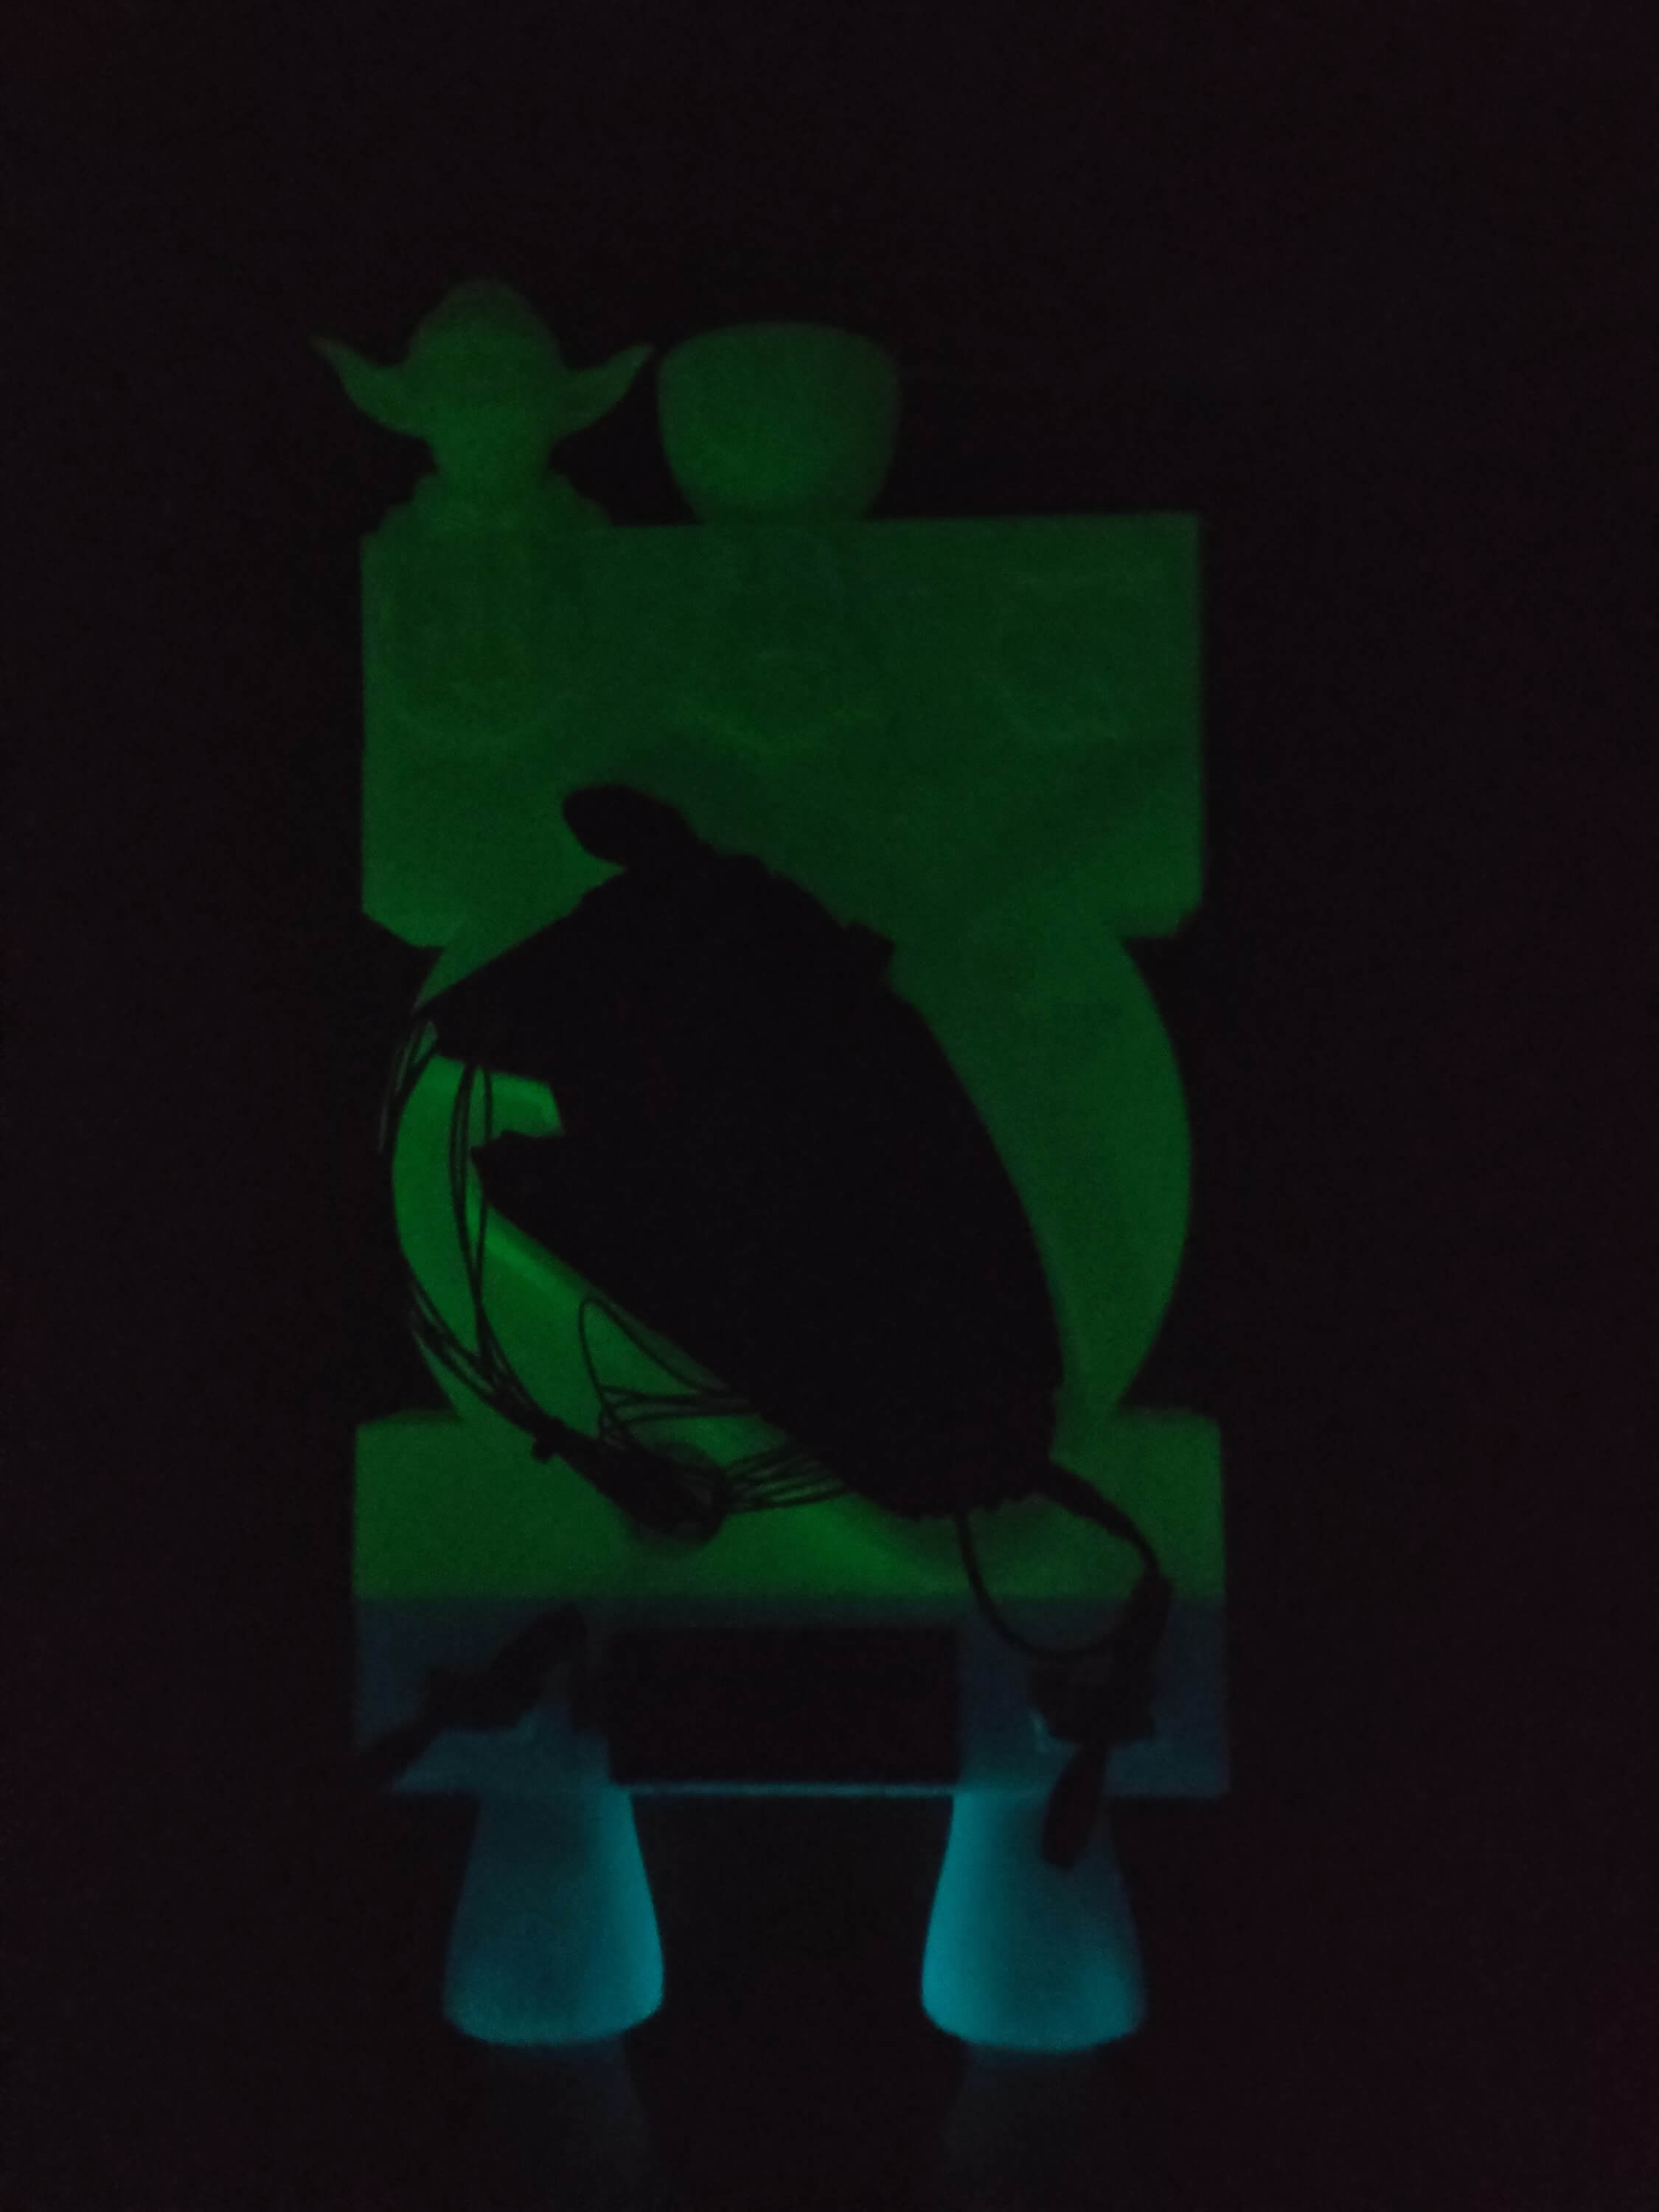
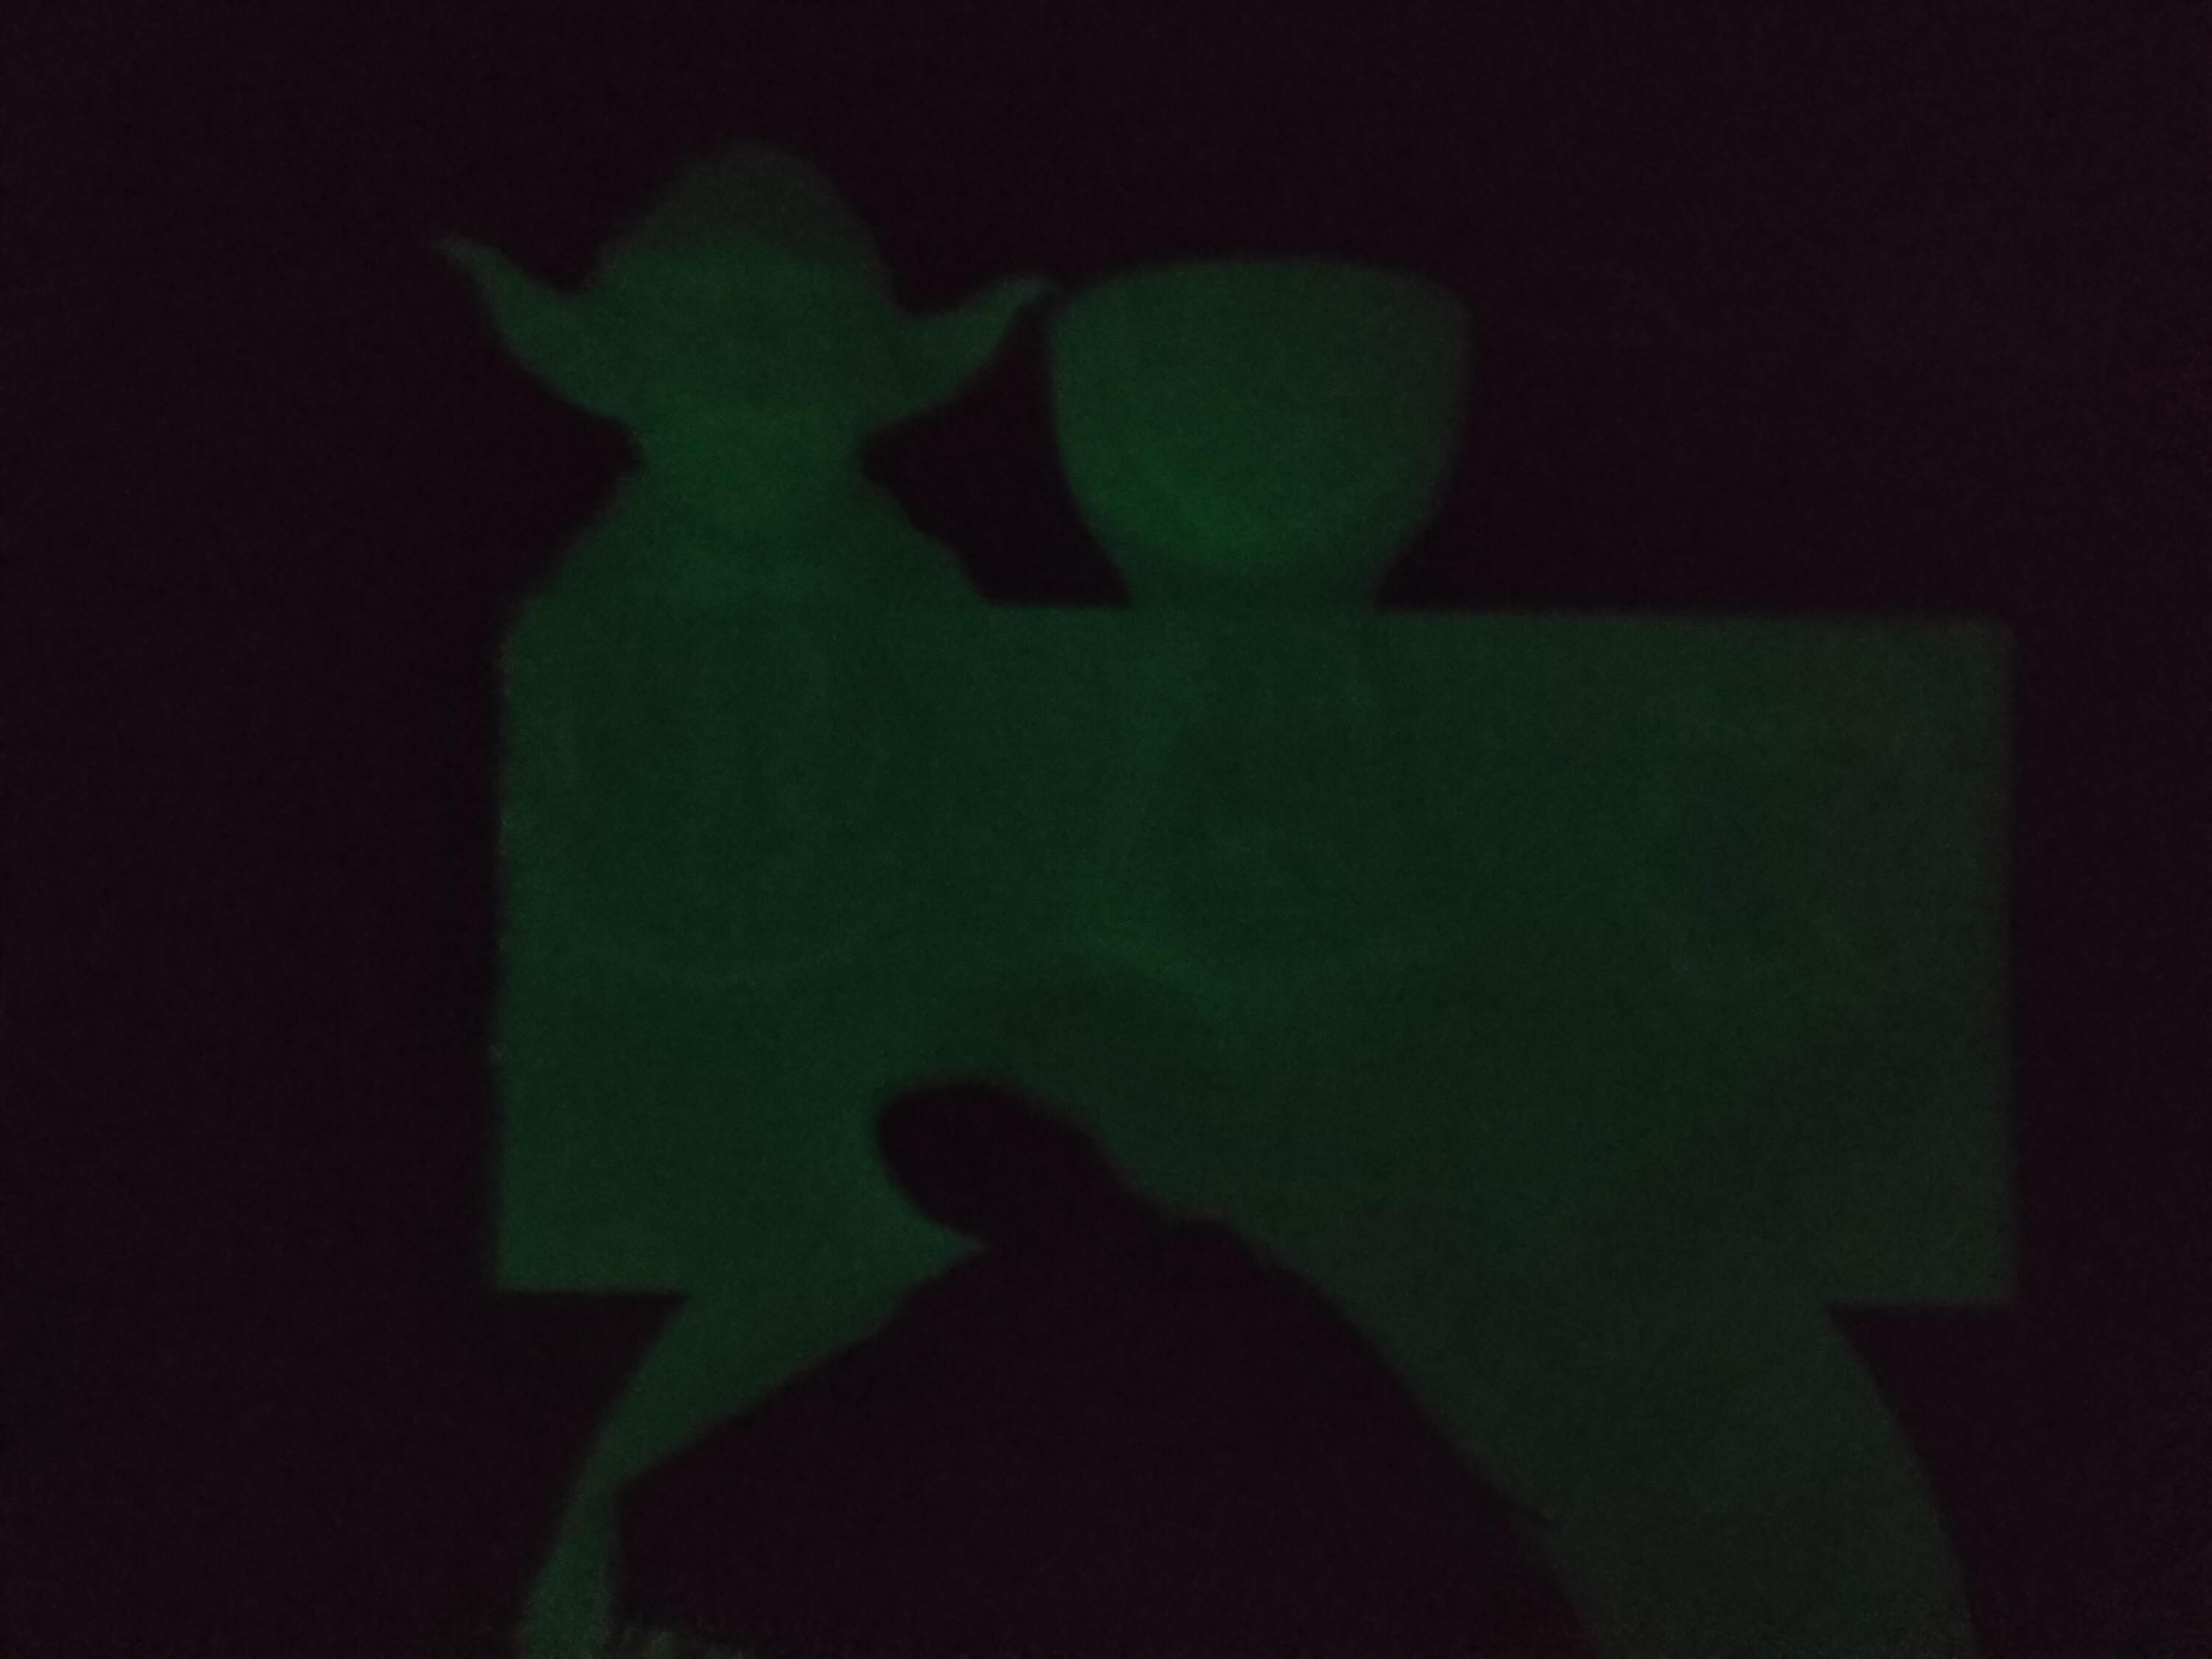
Since I wanted to create a solid and perplexing appearance conforming with The Force for the lighting structure and emphasize the metaphysical aspect of Star Wars, I utilized these PLA filaments glowing in the dark:
Luminous Green
Luminous Blue
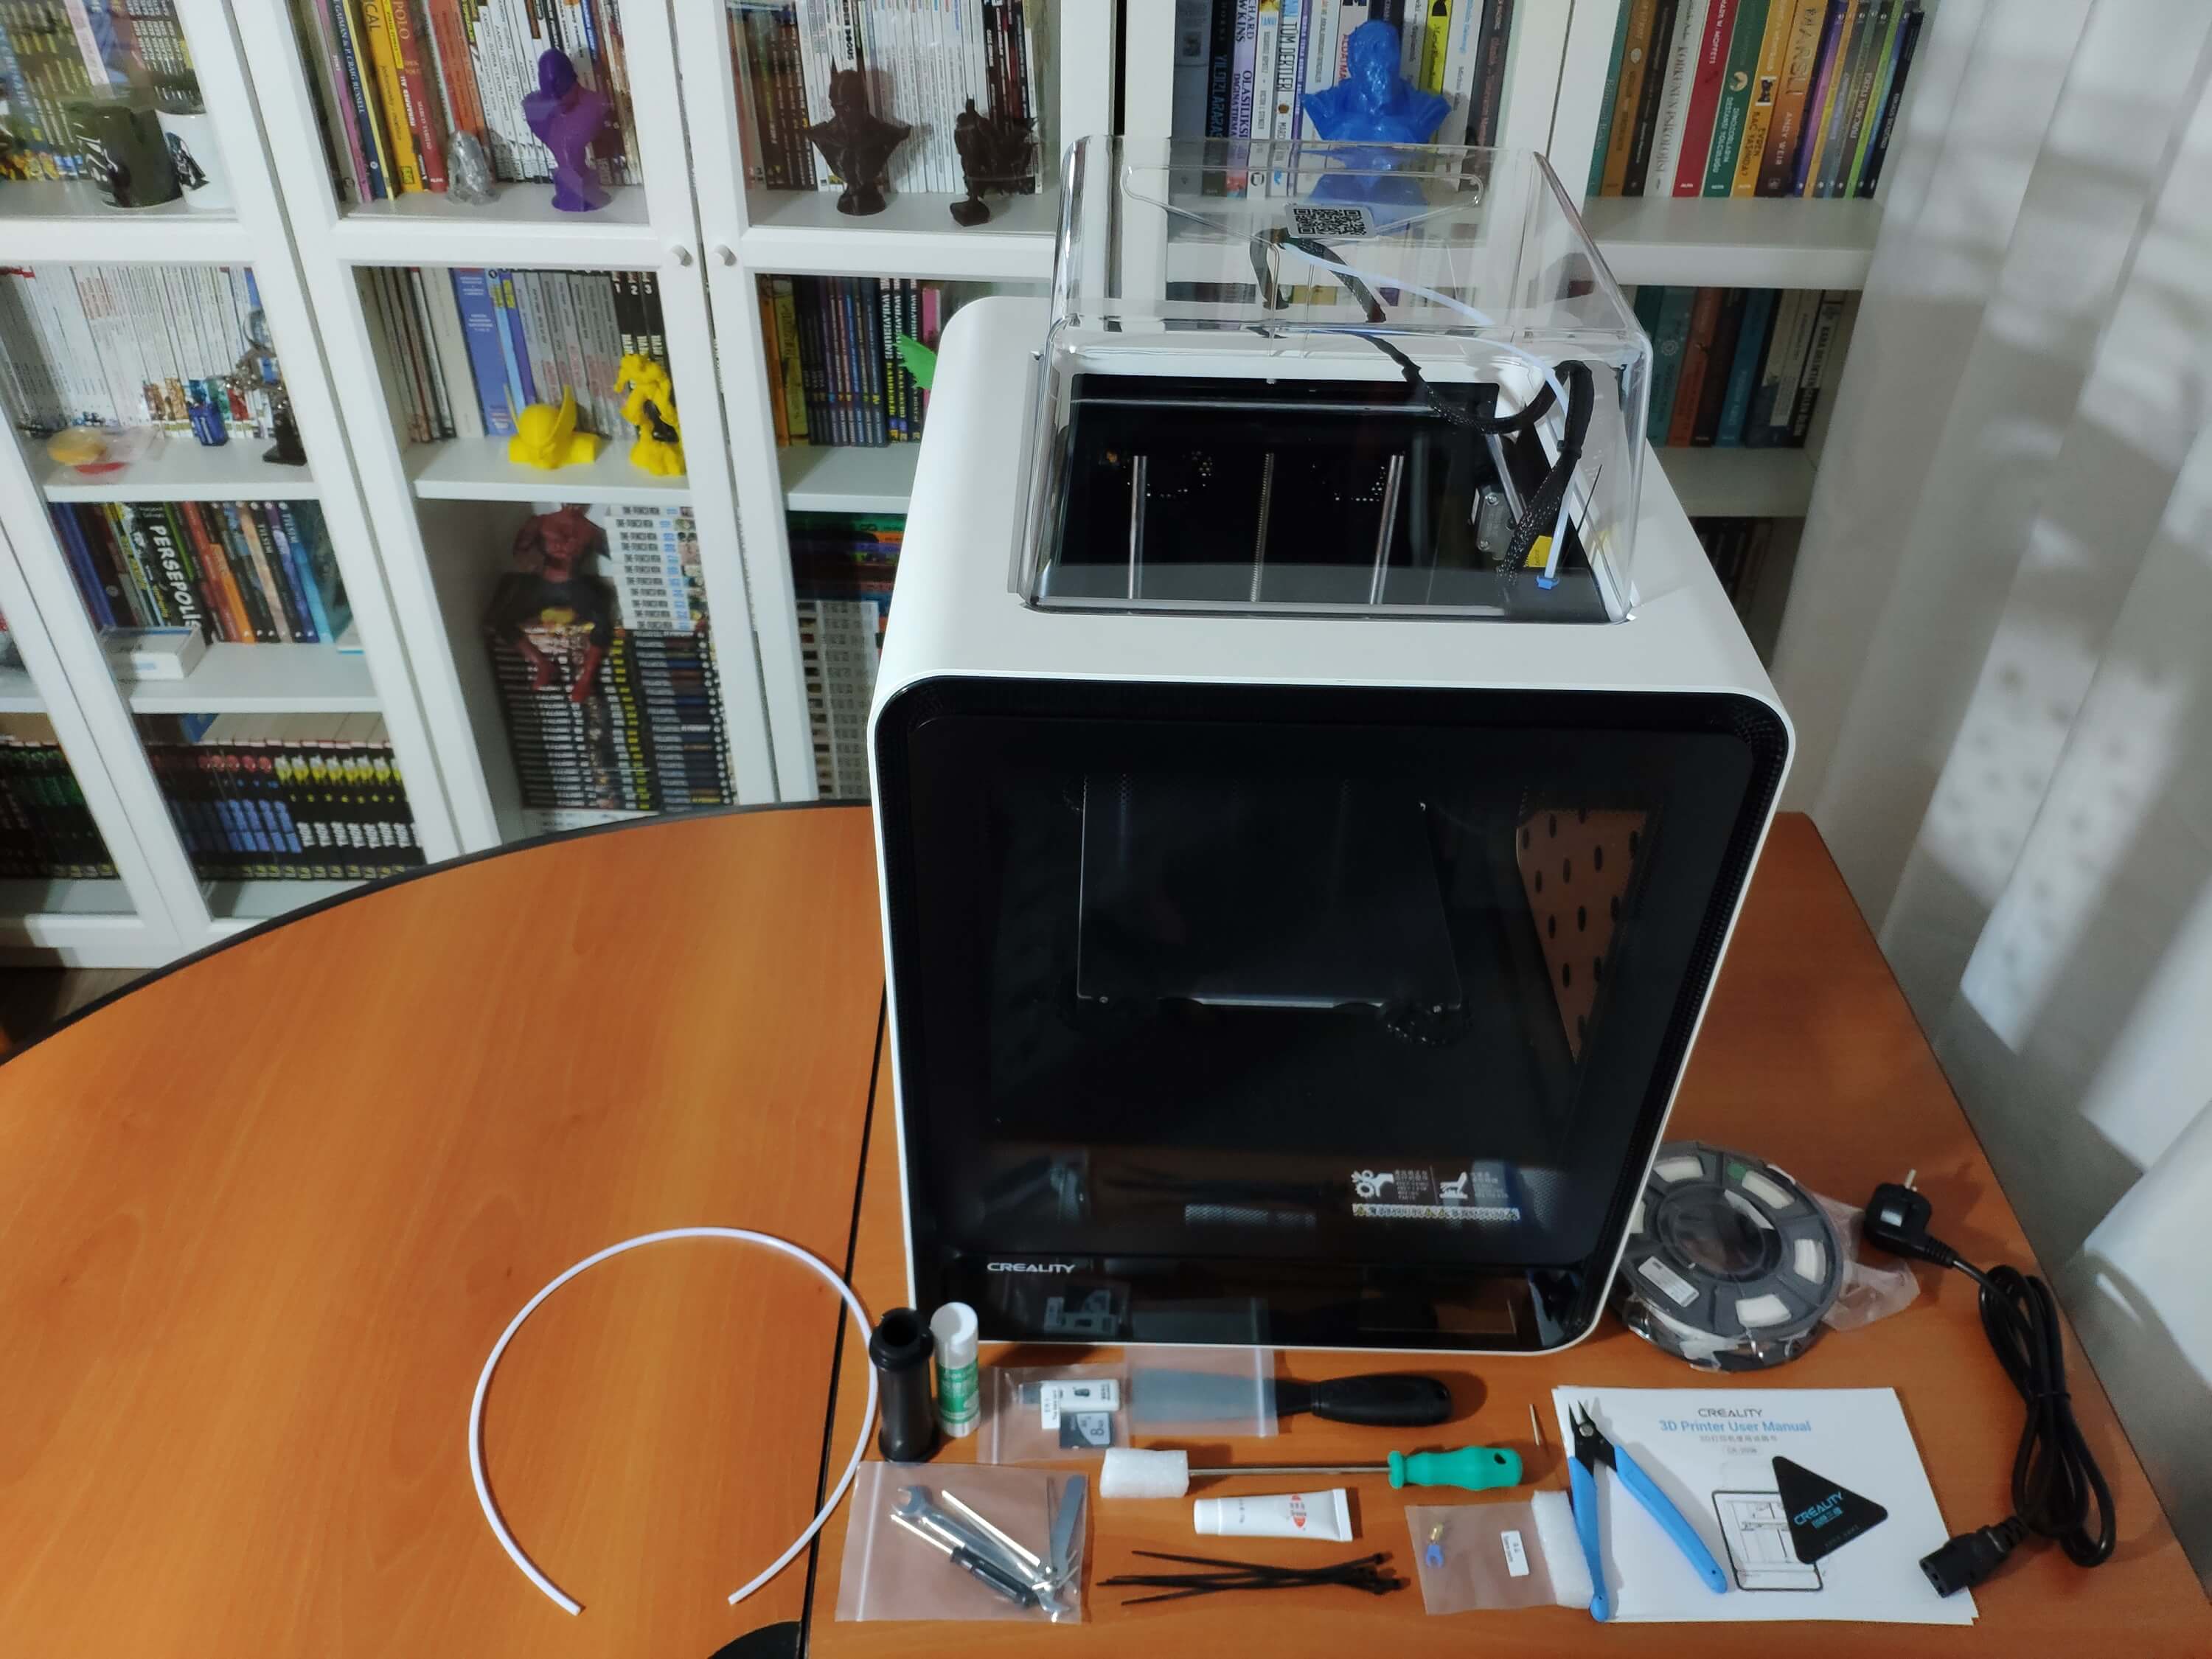
Finally, I printed all parts (models) with my Creality CR-200B 3D Printer. It is my first fully-enclosed FDM 3D printer, and I must say that I got excellent prints effortlessly with the CR-200B :)
Figure - 81.25
If you are a maker planning to print your 3D models to create more complex projects, I highly recommend the CR-200B. Since the CR-200B is fully-enclosed, you can print high-resolution 3D models with PLA and ABS filaments. Also, it has a smart filament runout sensor and the resume printing option for power failures.
According to my experience, there are only two downsides of the CR-200B: relatively small build size (200 x 200 x 200 mm) and manual leveling. Conversely, thanks to the large leveling nuts and assisted leveling, I was able to level the bed and start printing my first model in less than 30 minutes.
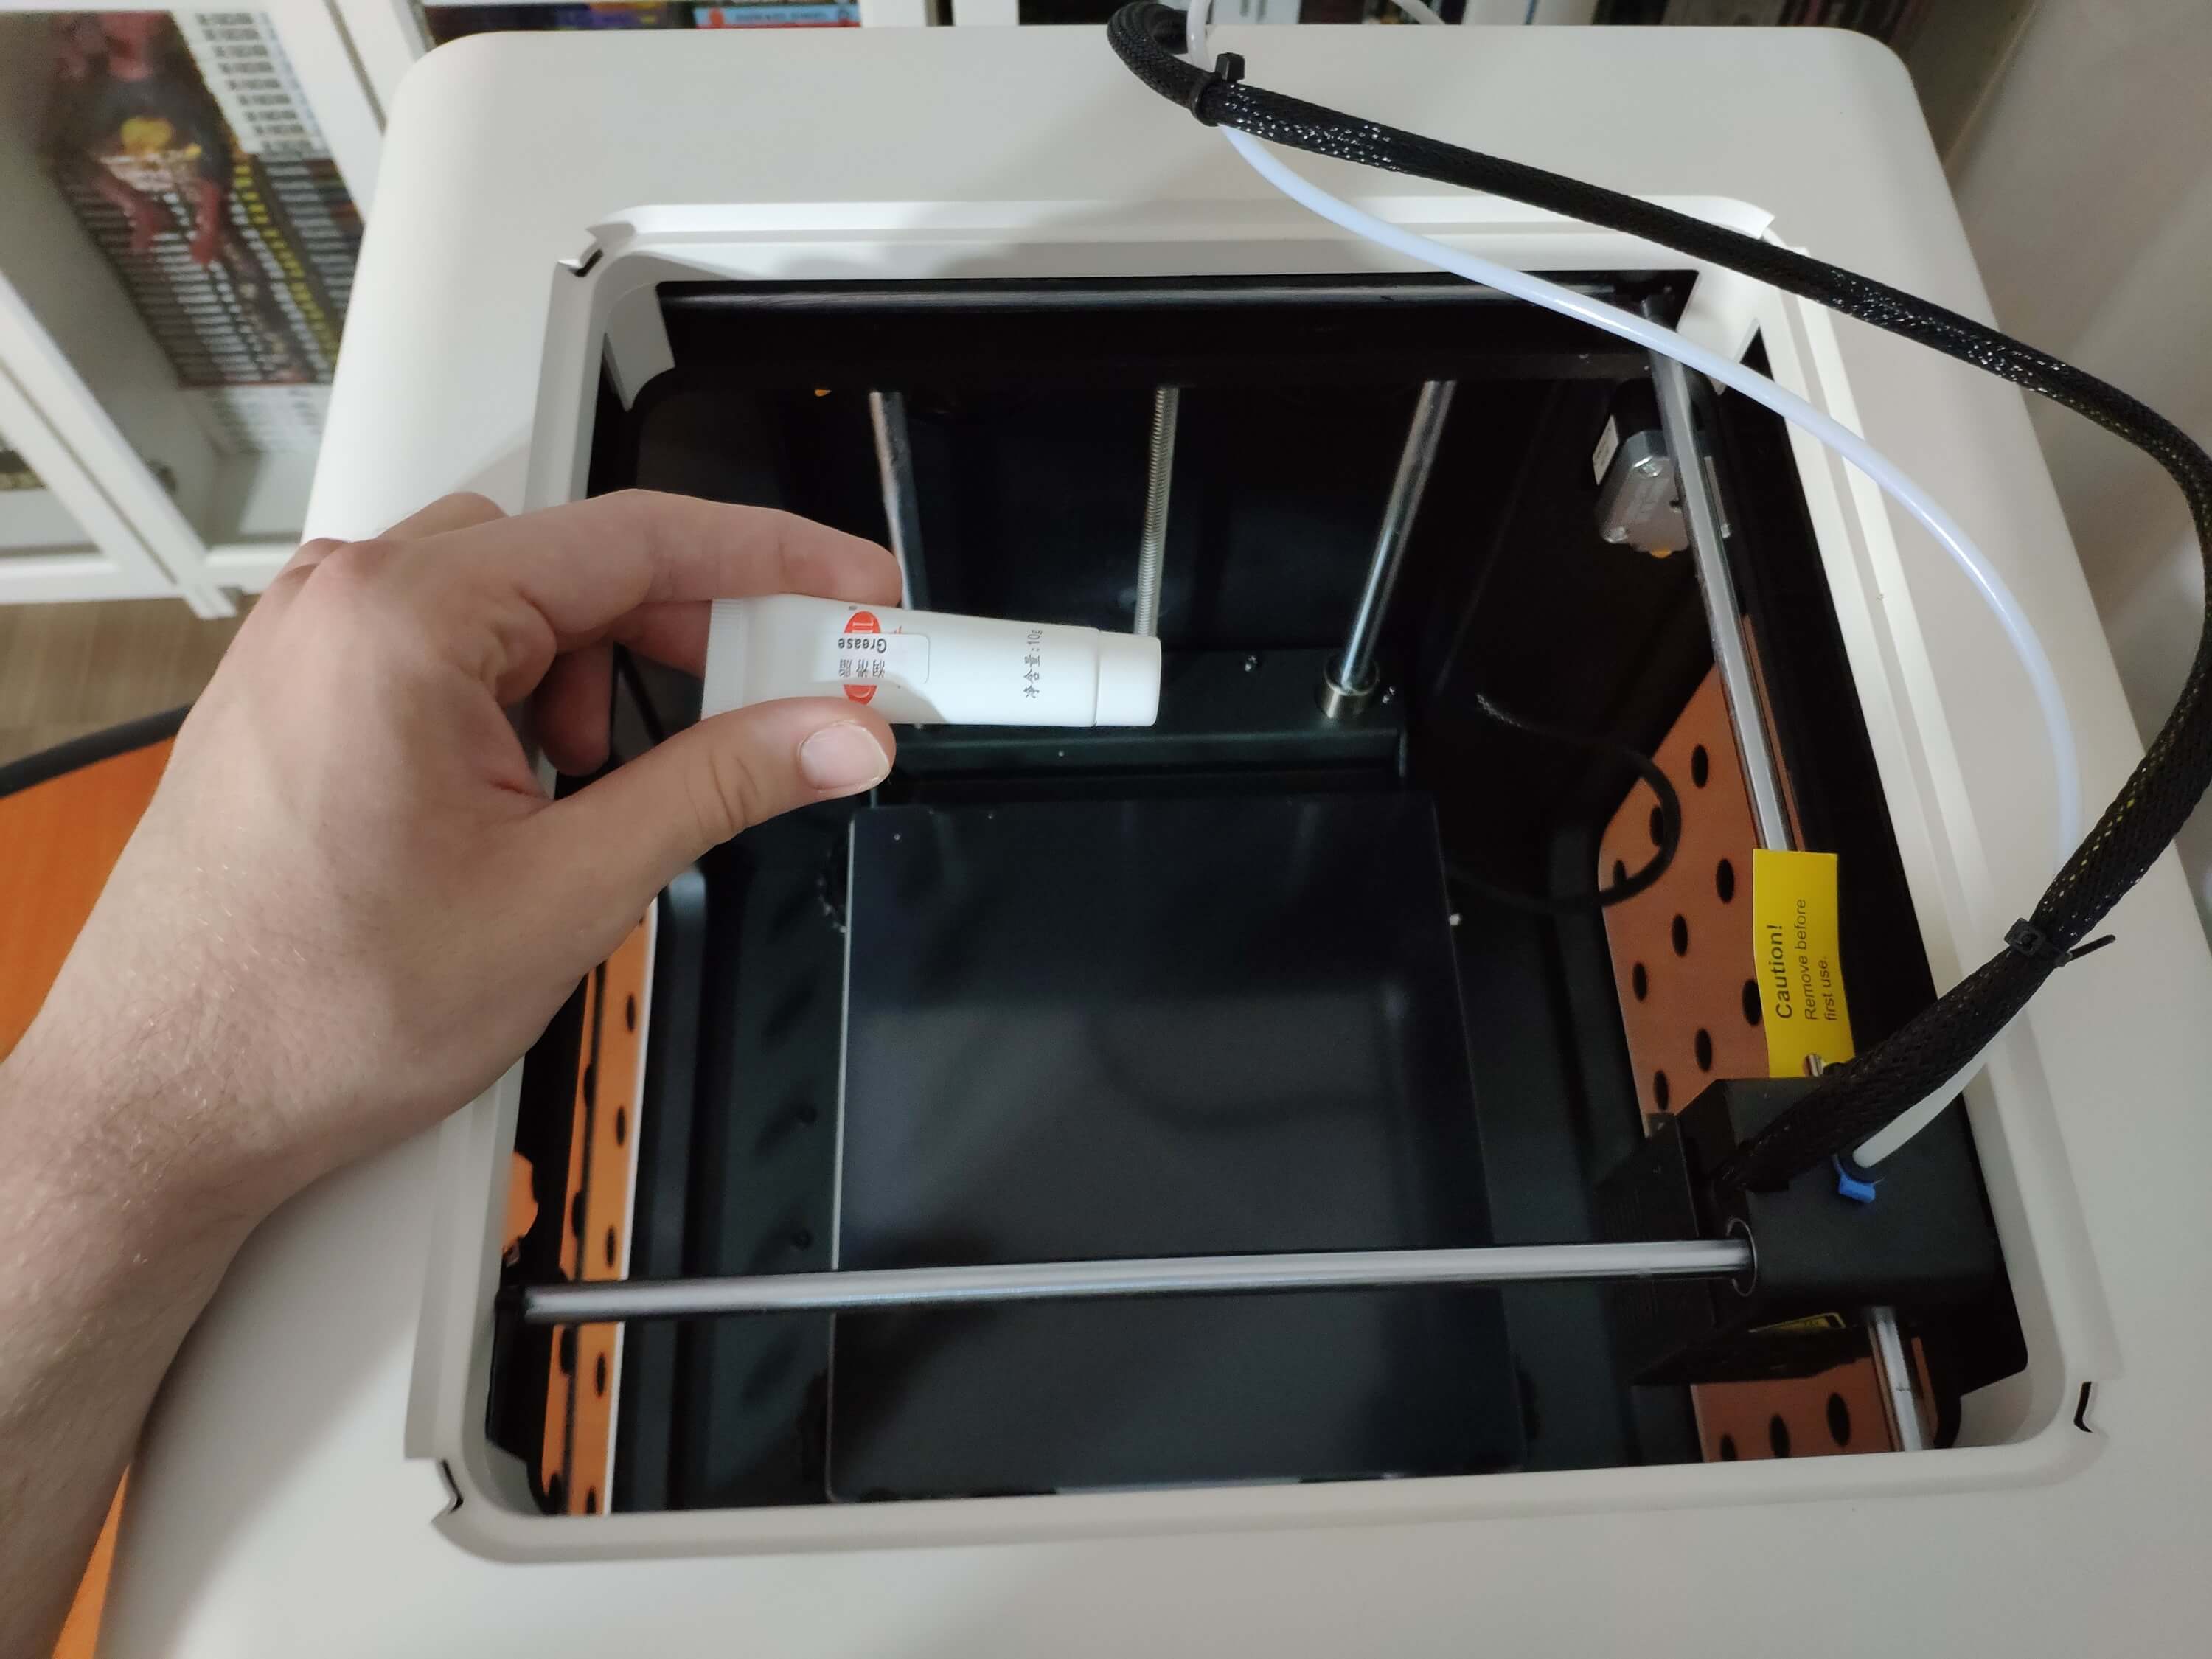
#️⃣ Before the first use, remove unnecessary cable ties and apply grease to the rails.
Figure - 81.26
Figure - 81.27
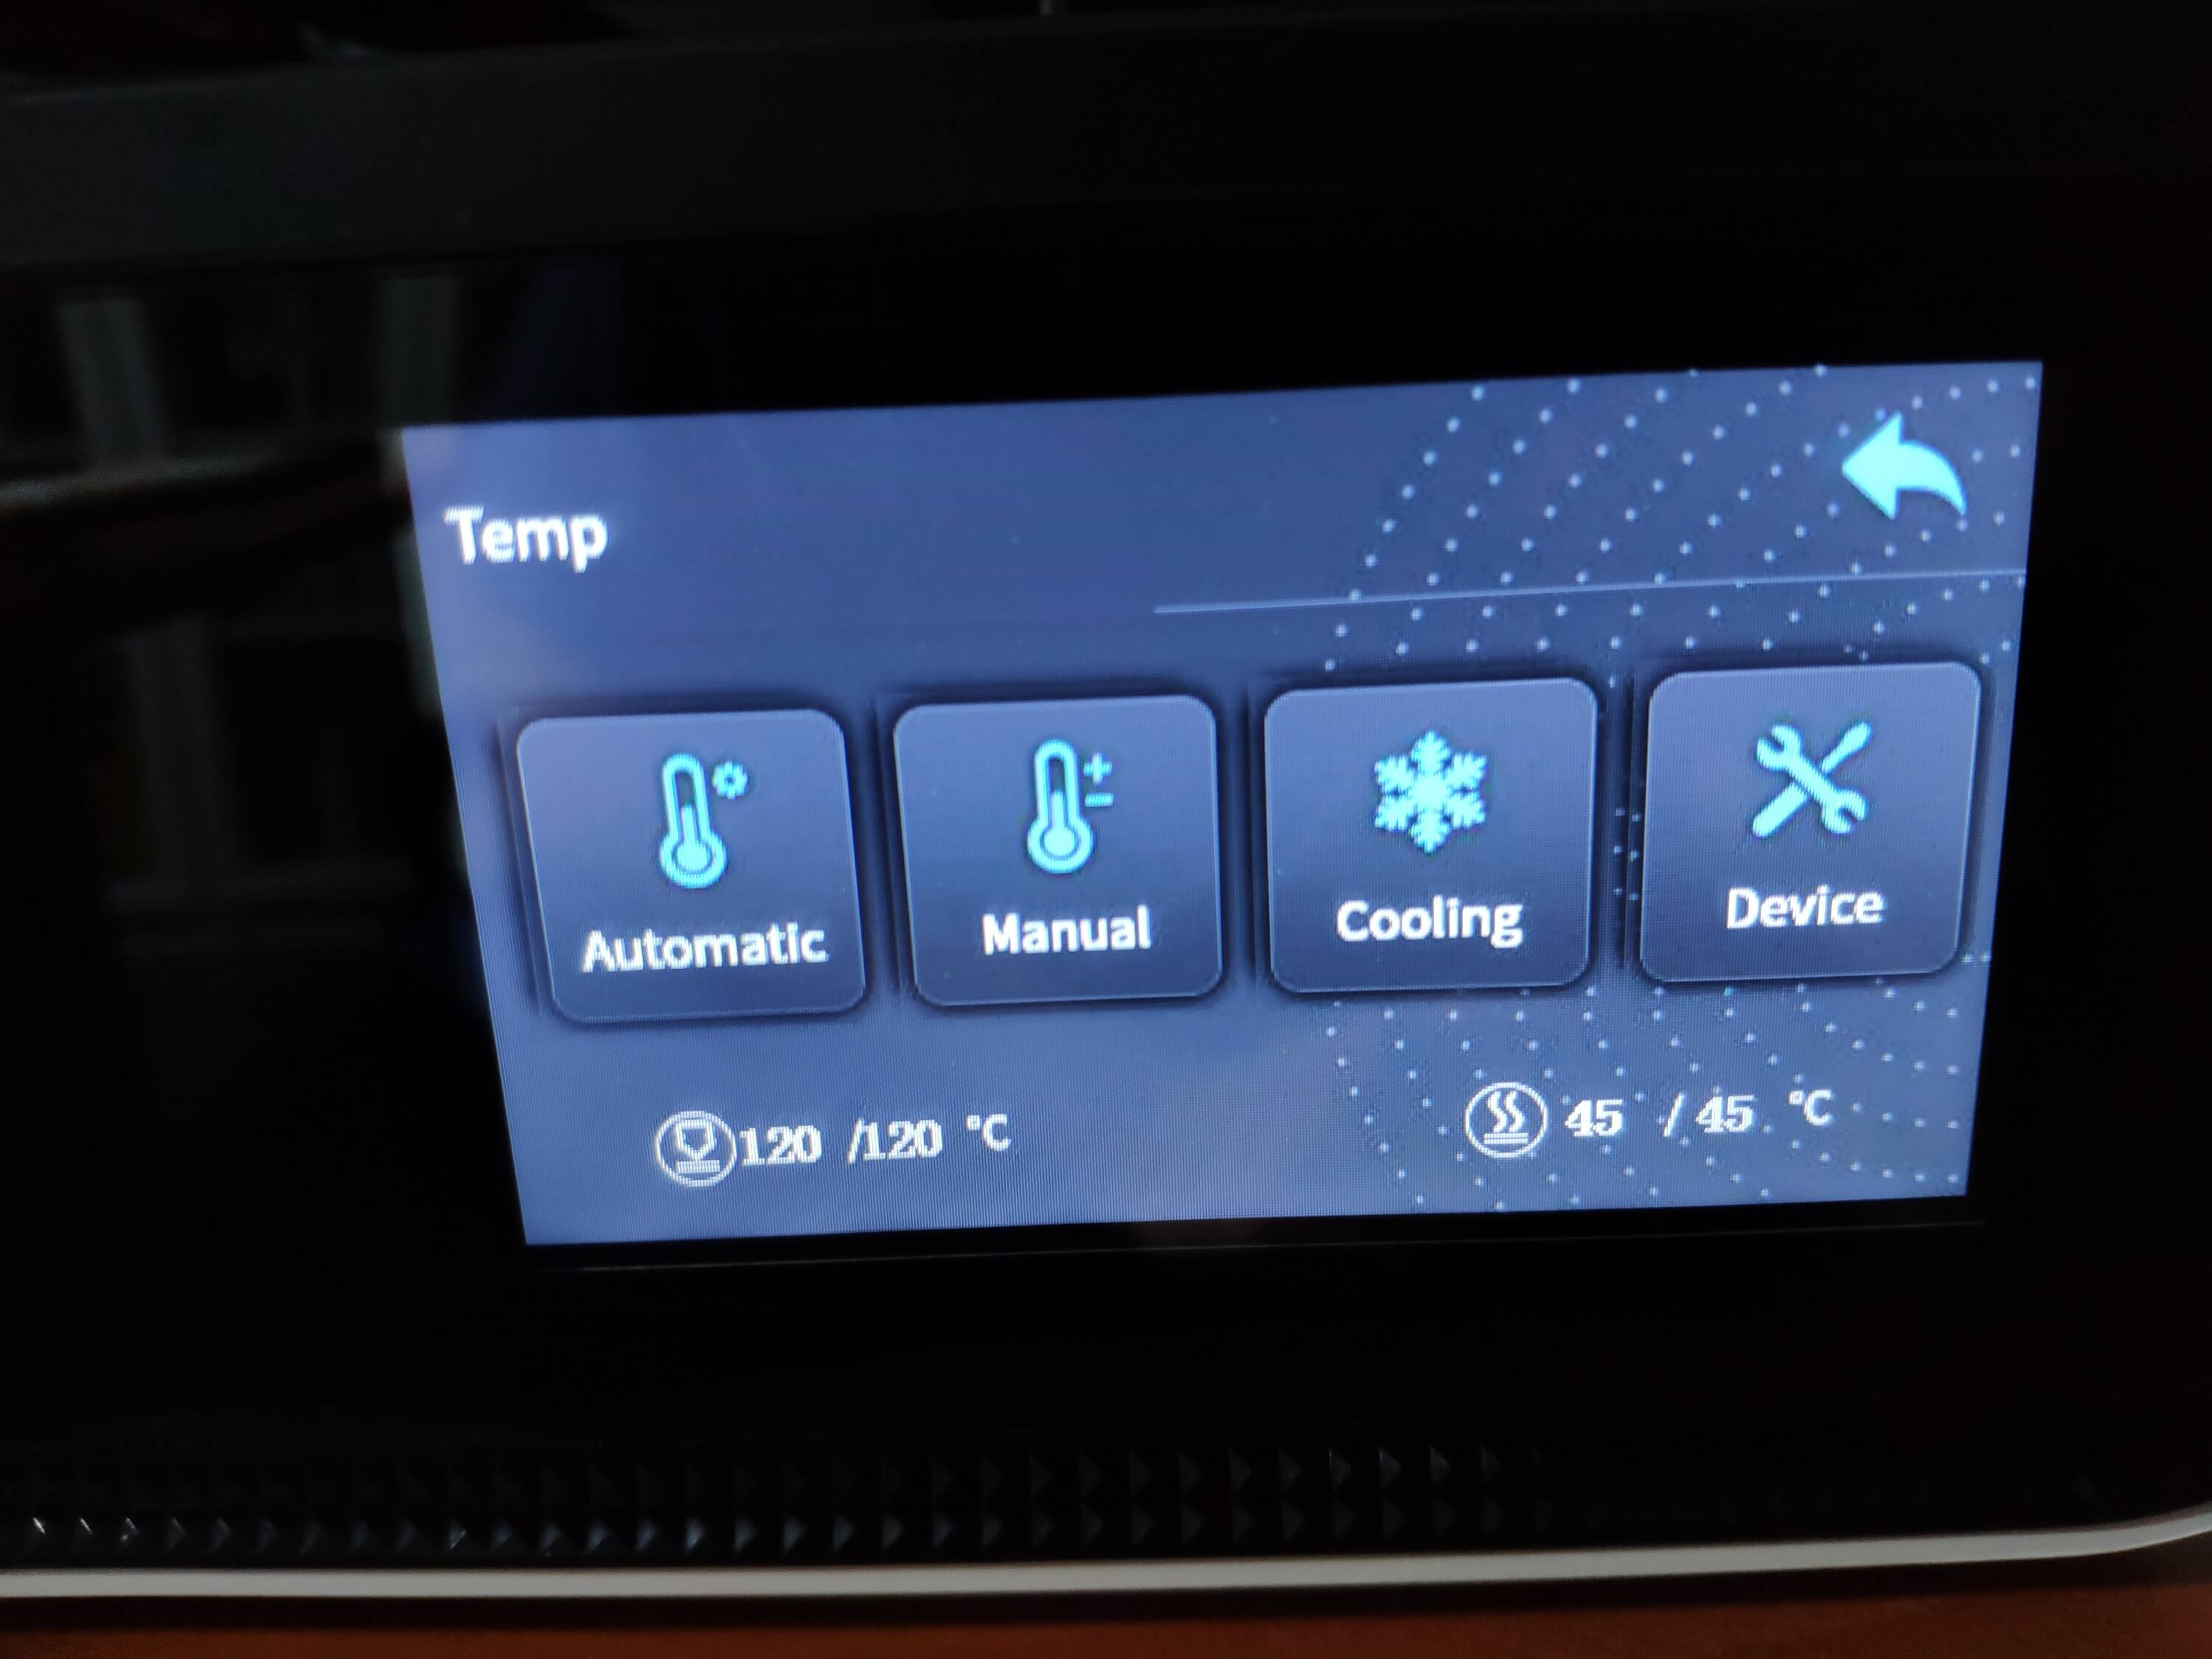
#️⃣ Test the nozzle and hot bed temperatures.
Figure - 81.28
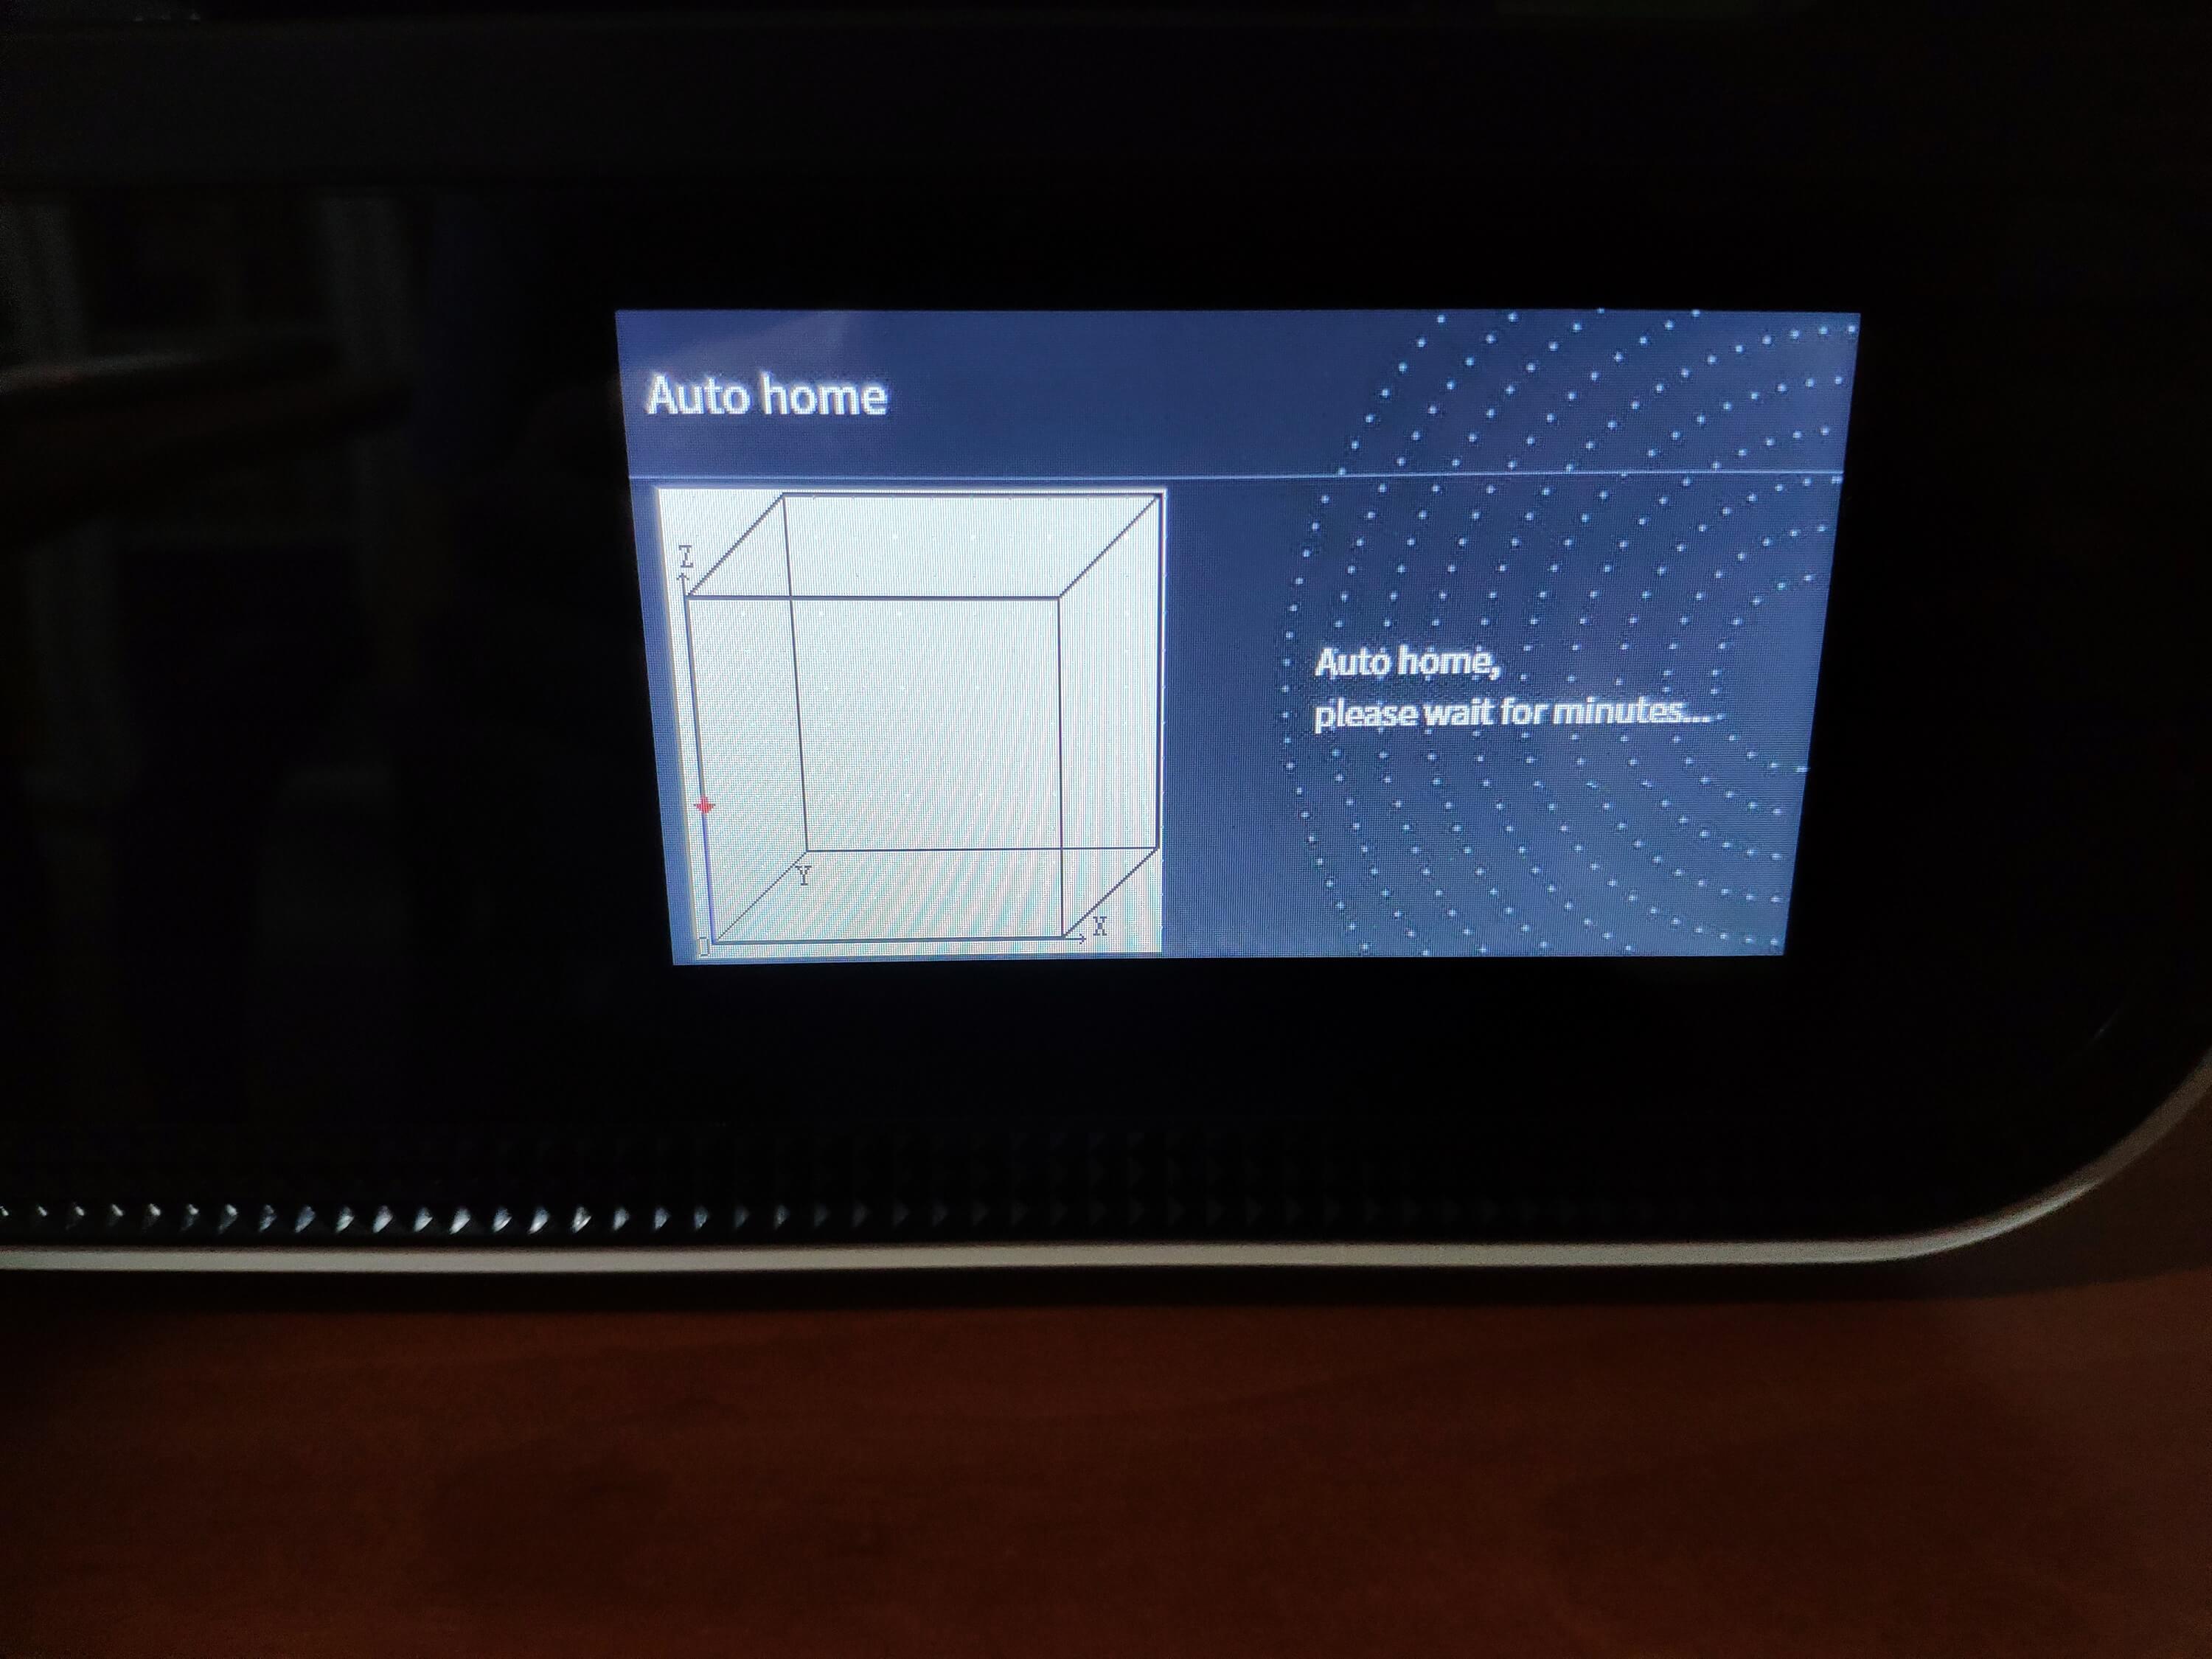
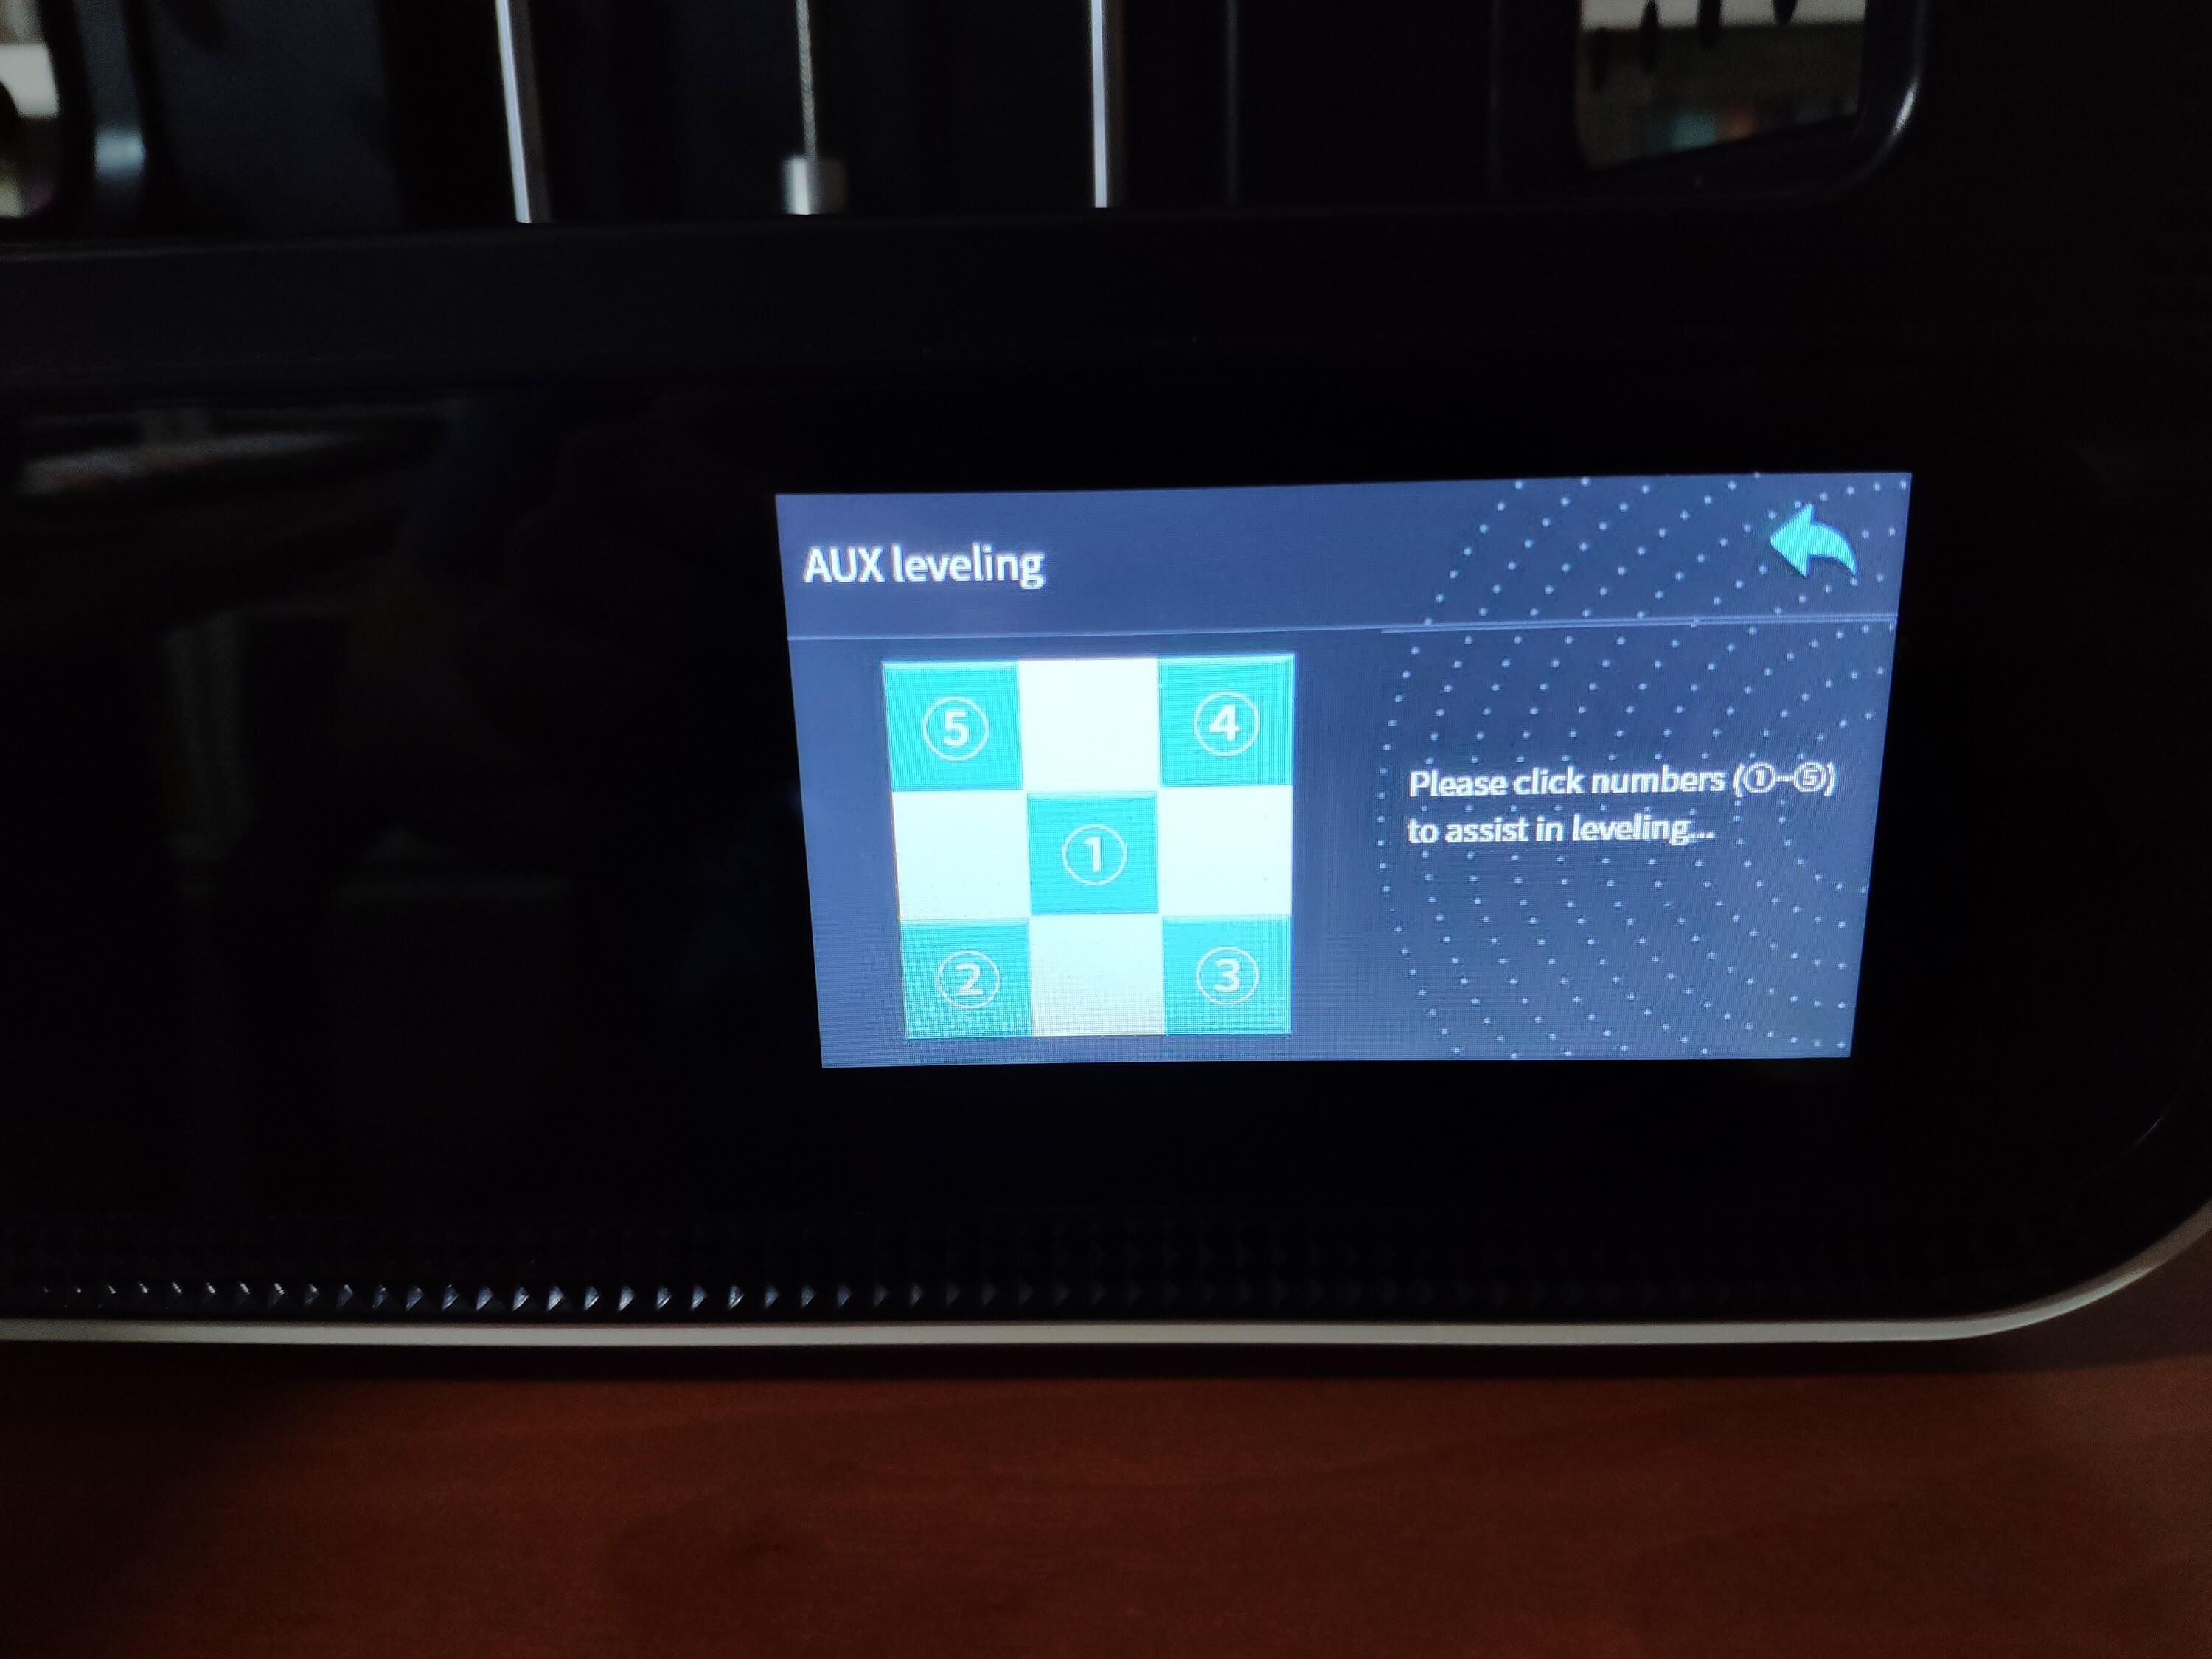
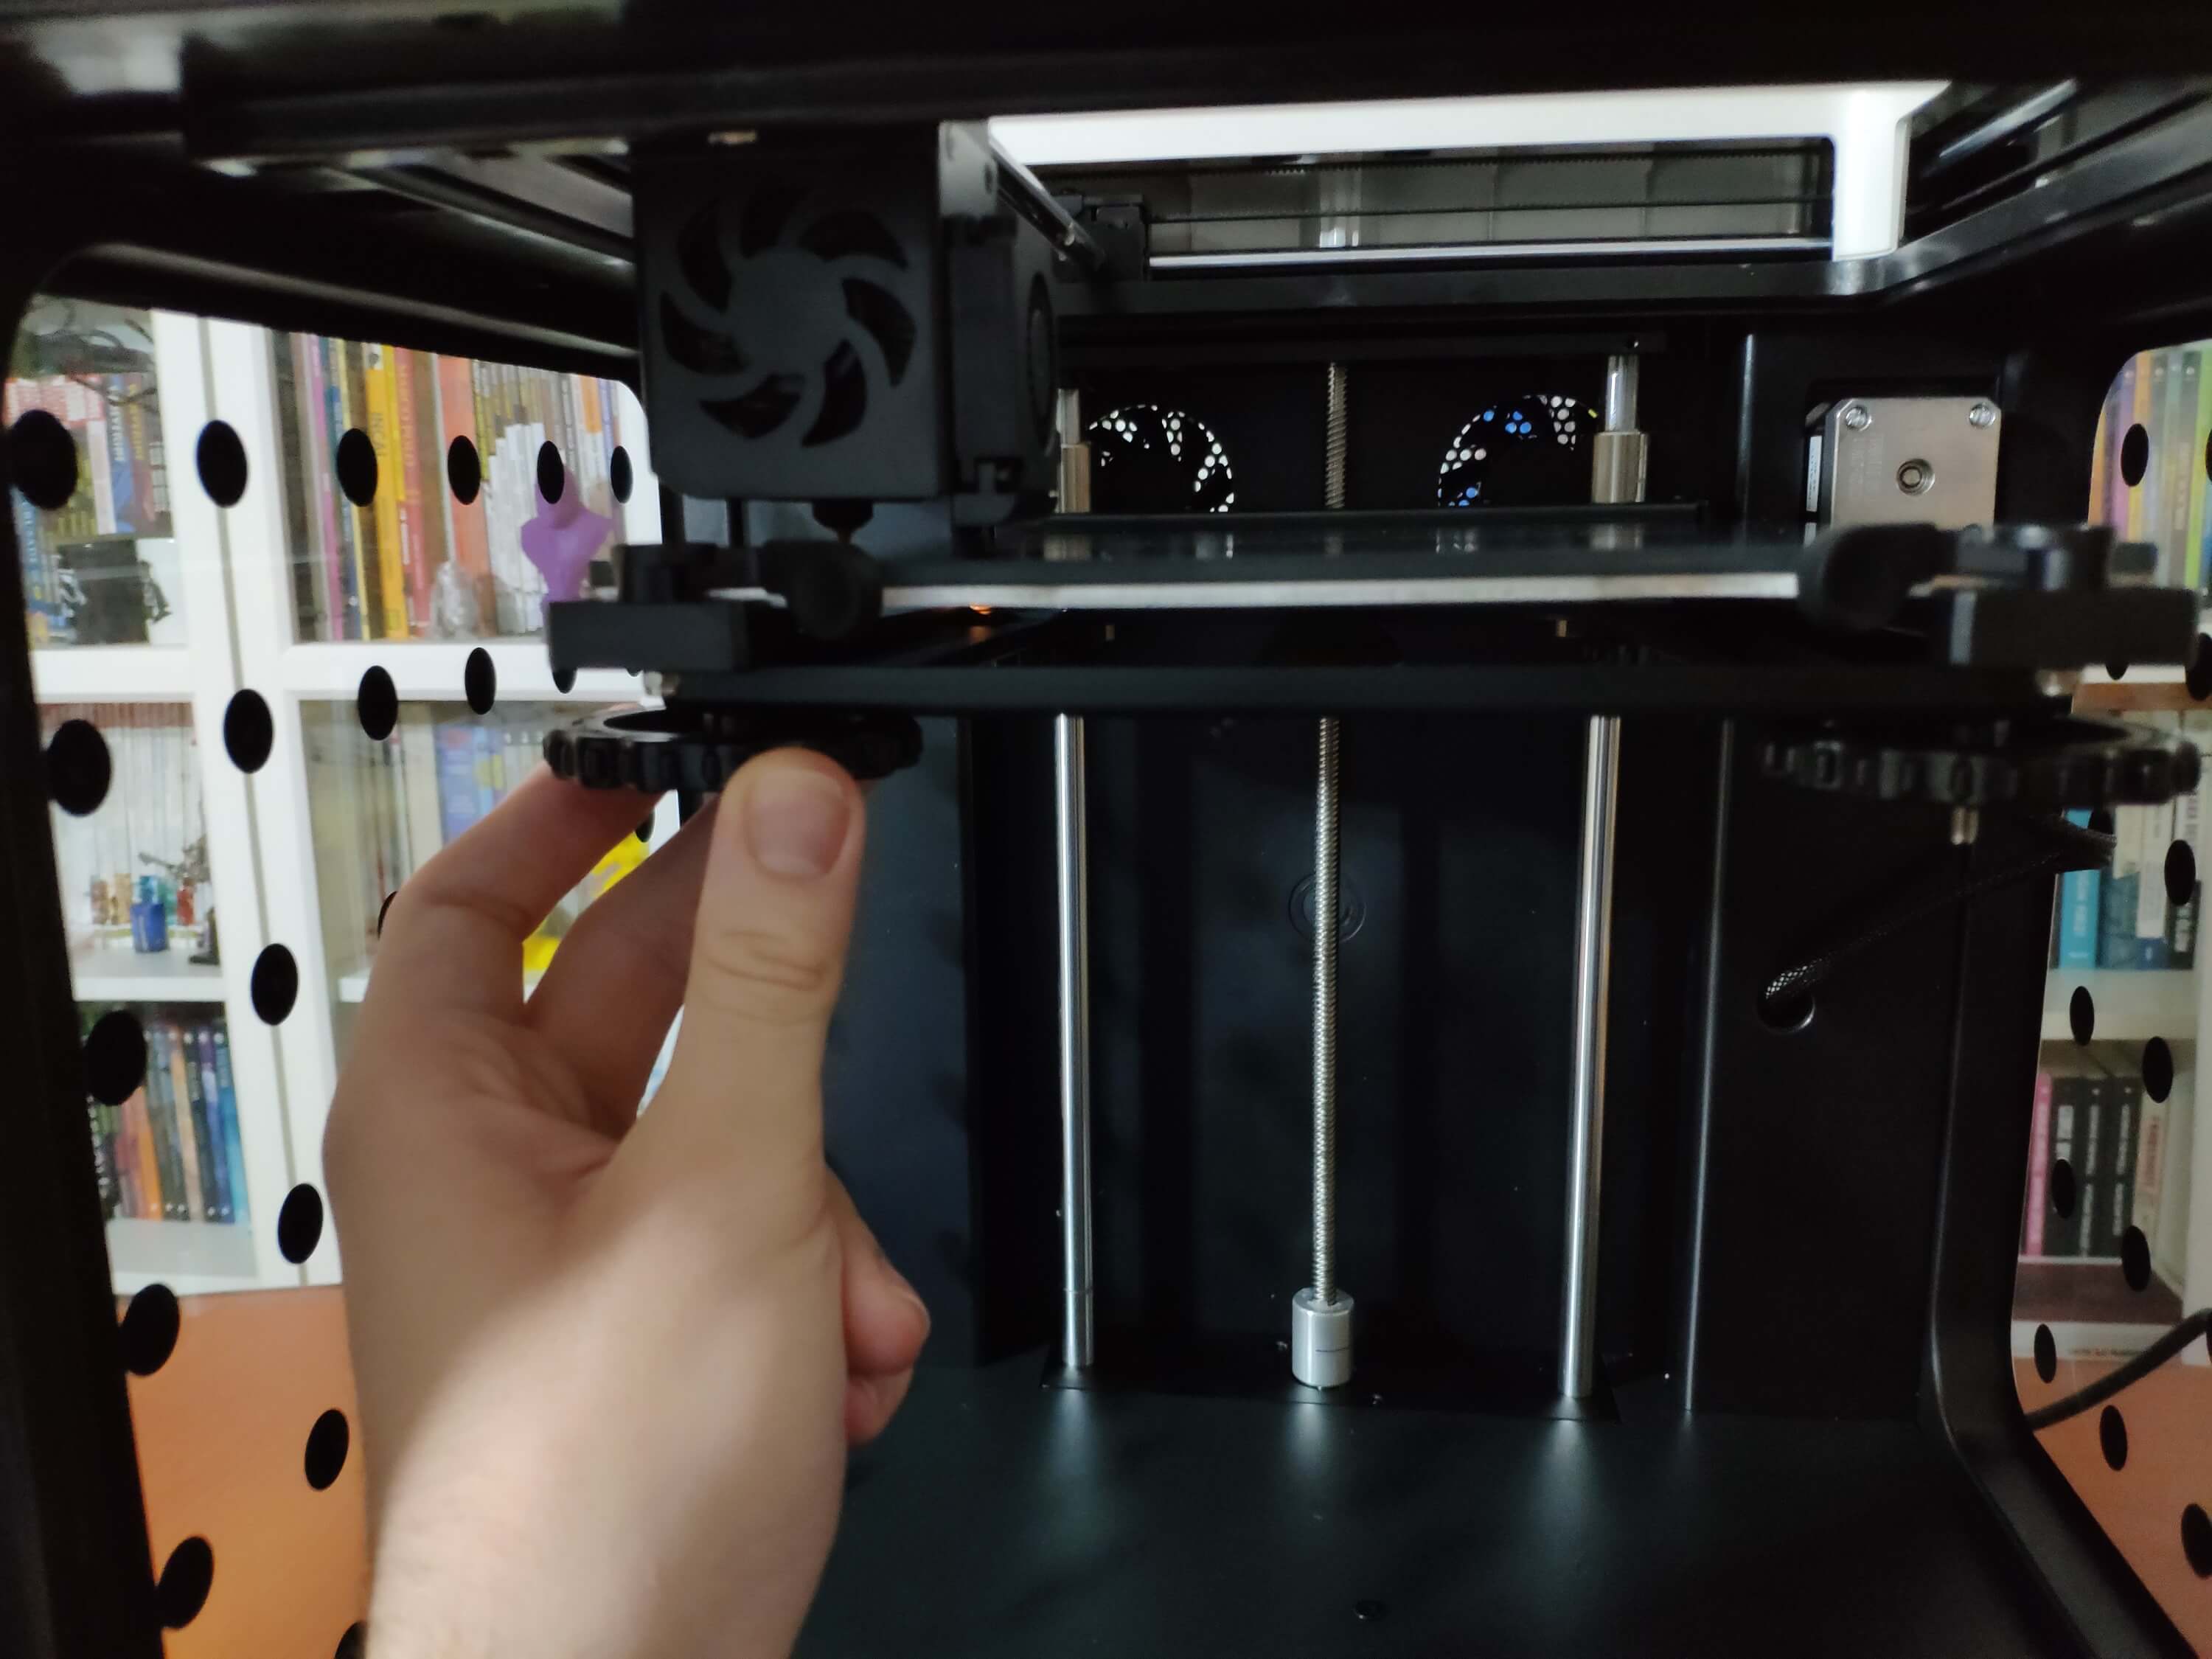
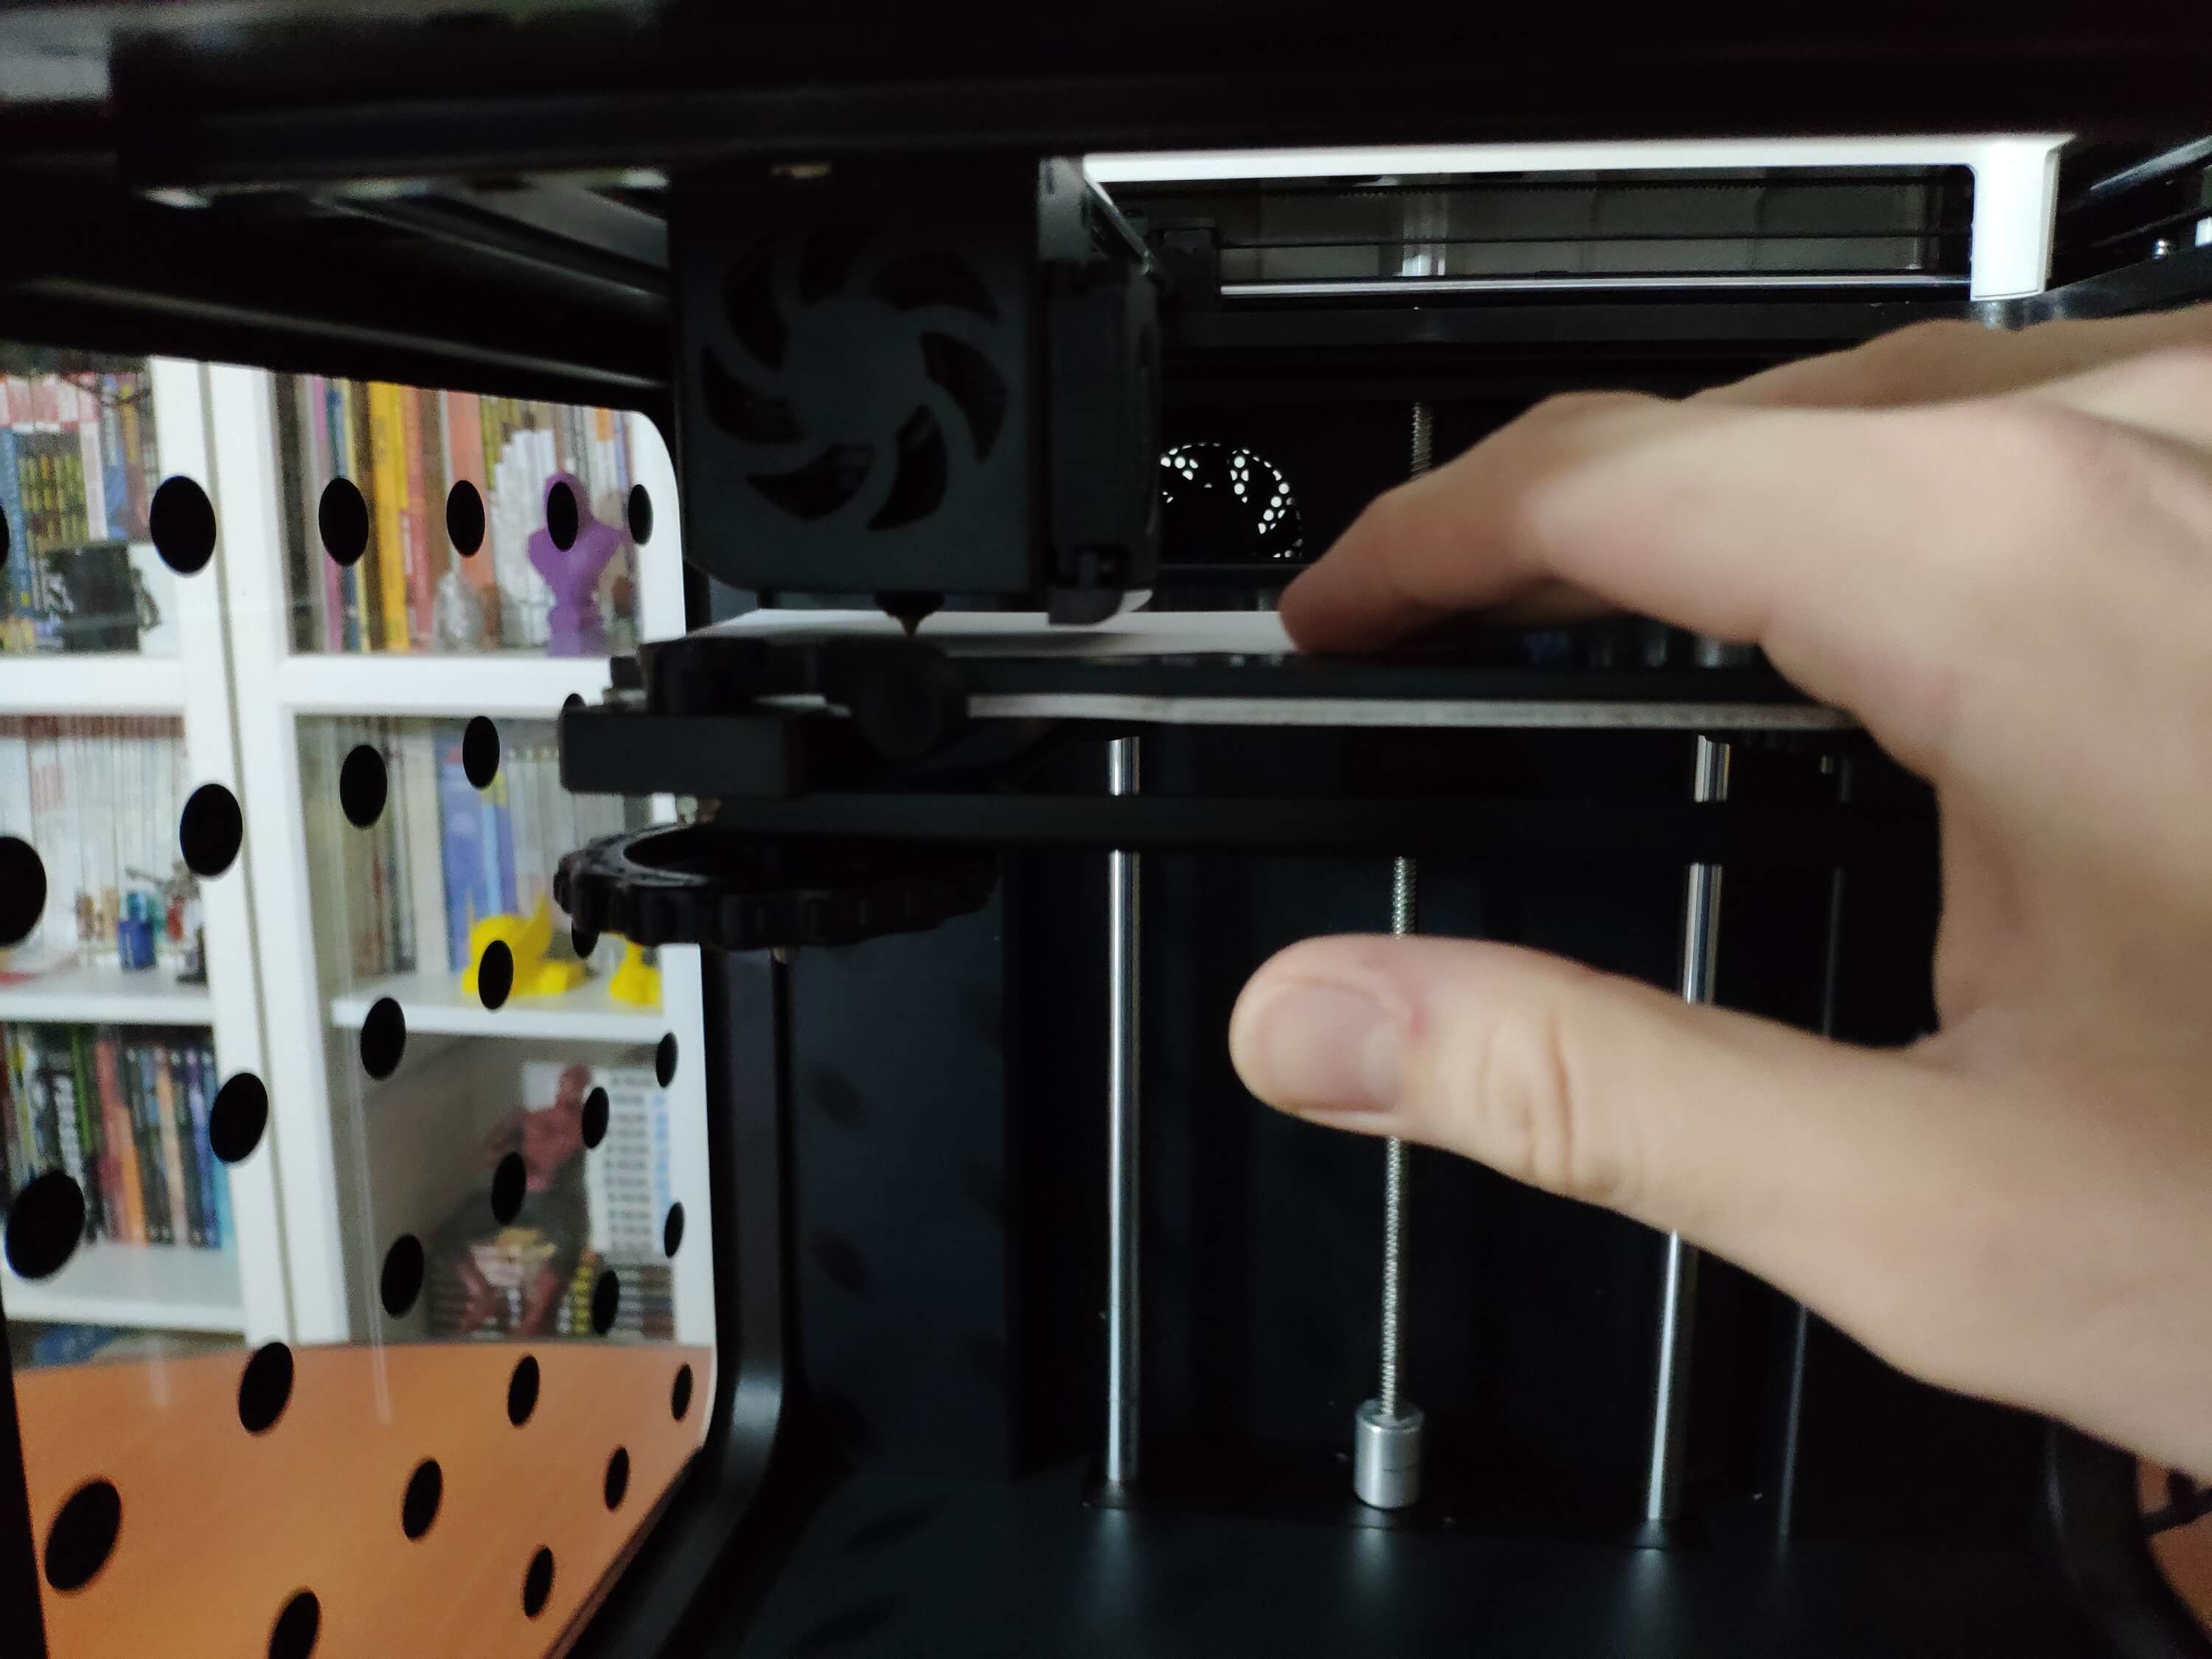
#️⃣ Go to Settings ➡ Leveling and adjust four predefined points by utilizing the leveling nuts.
Figure - 81.29
Figure - 81.30
Figure - 81.31
Figure - 81.32
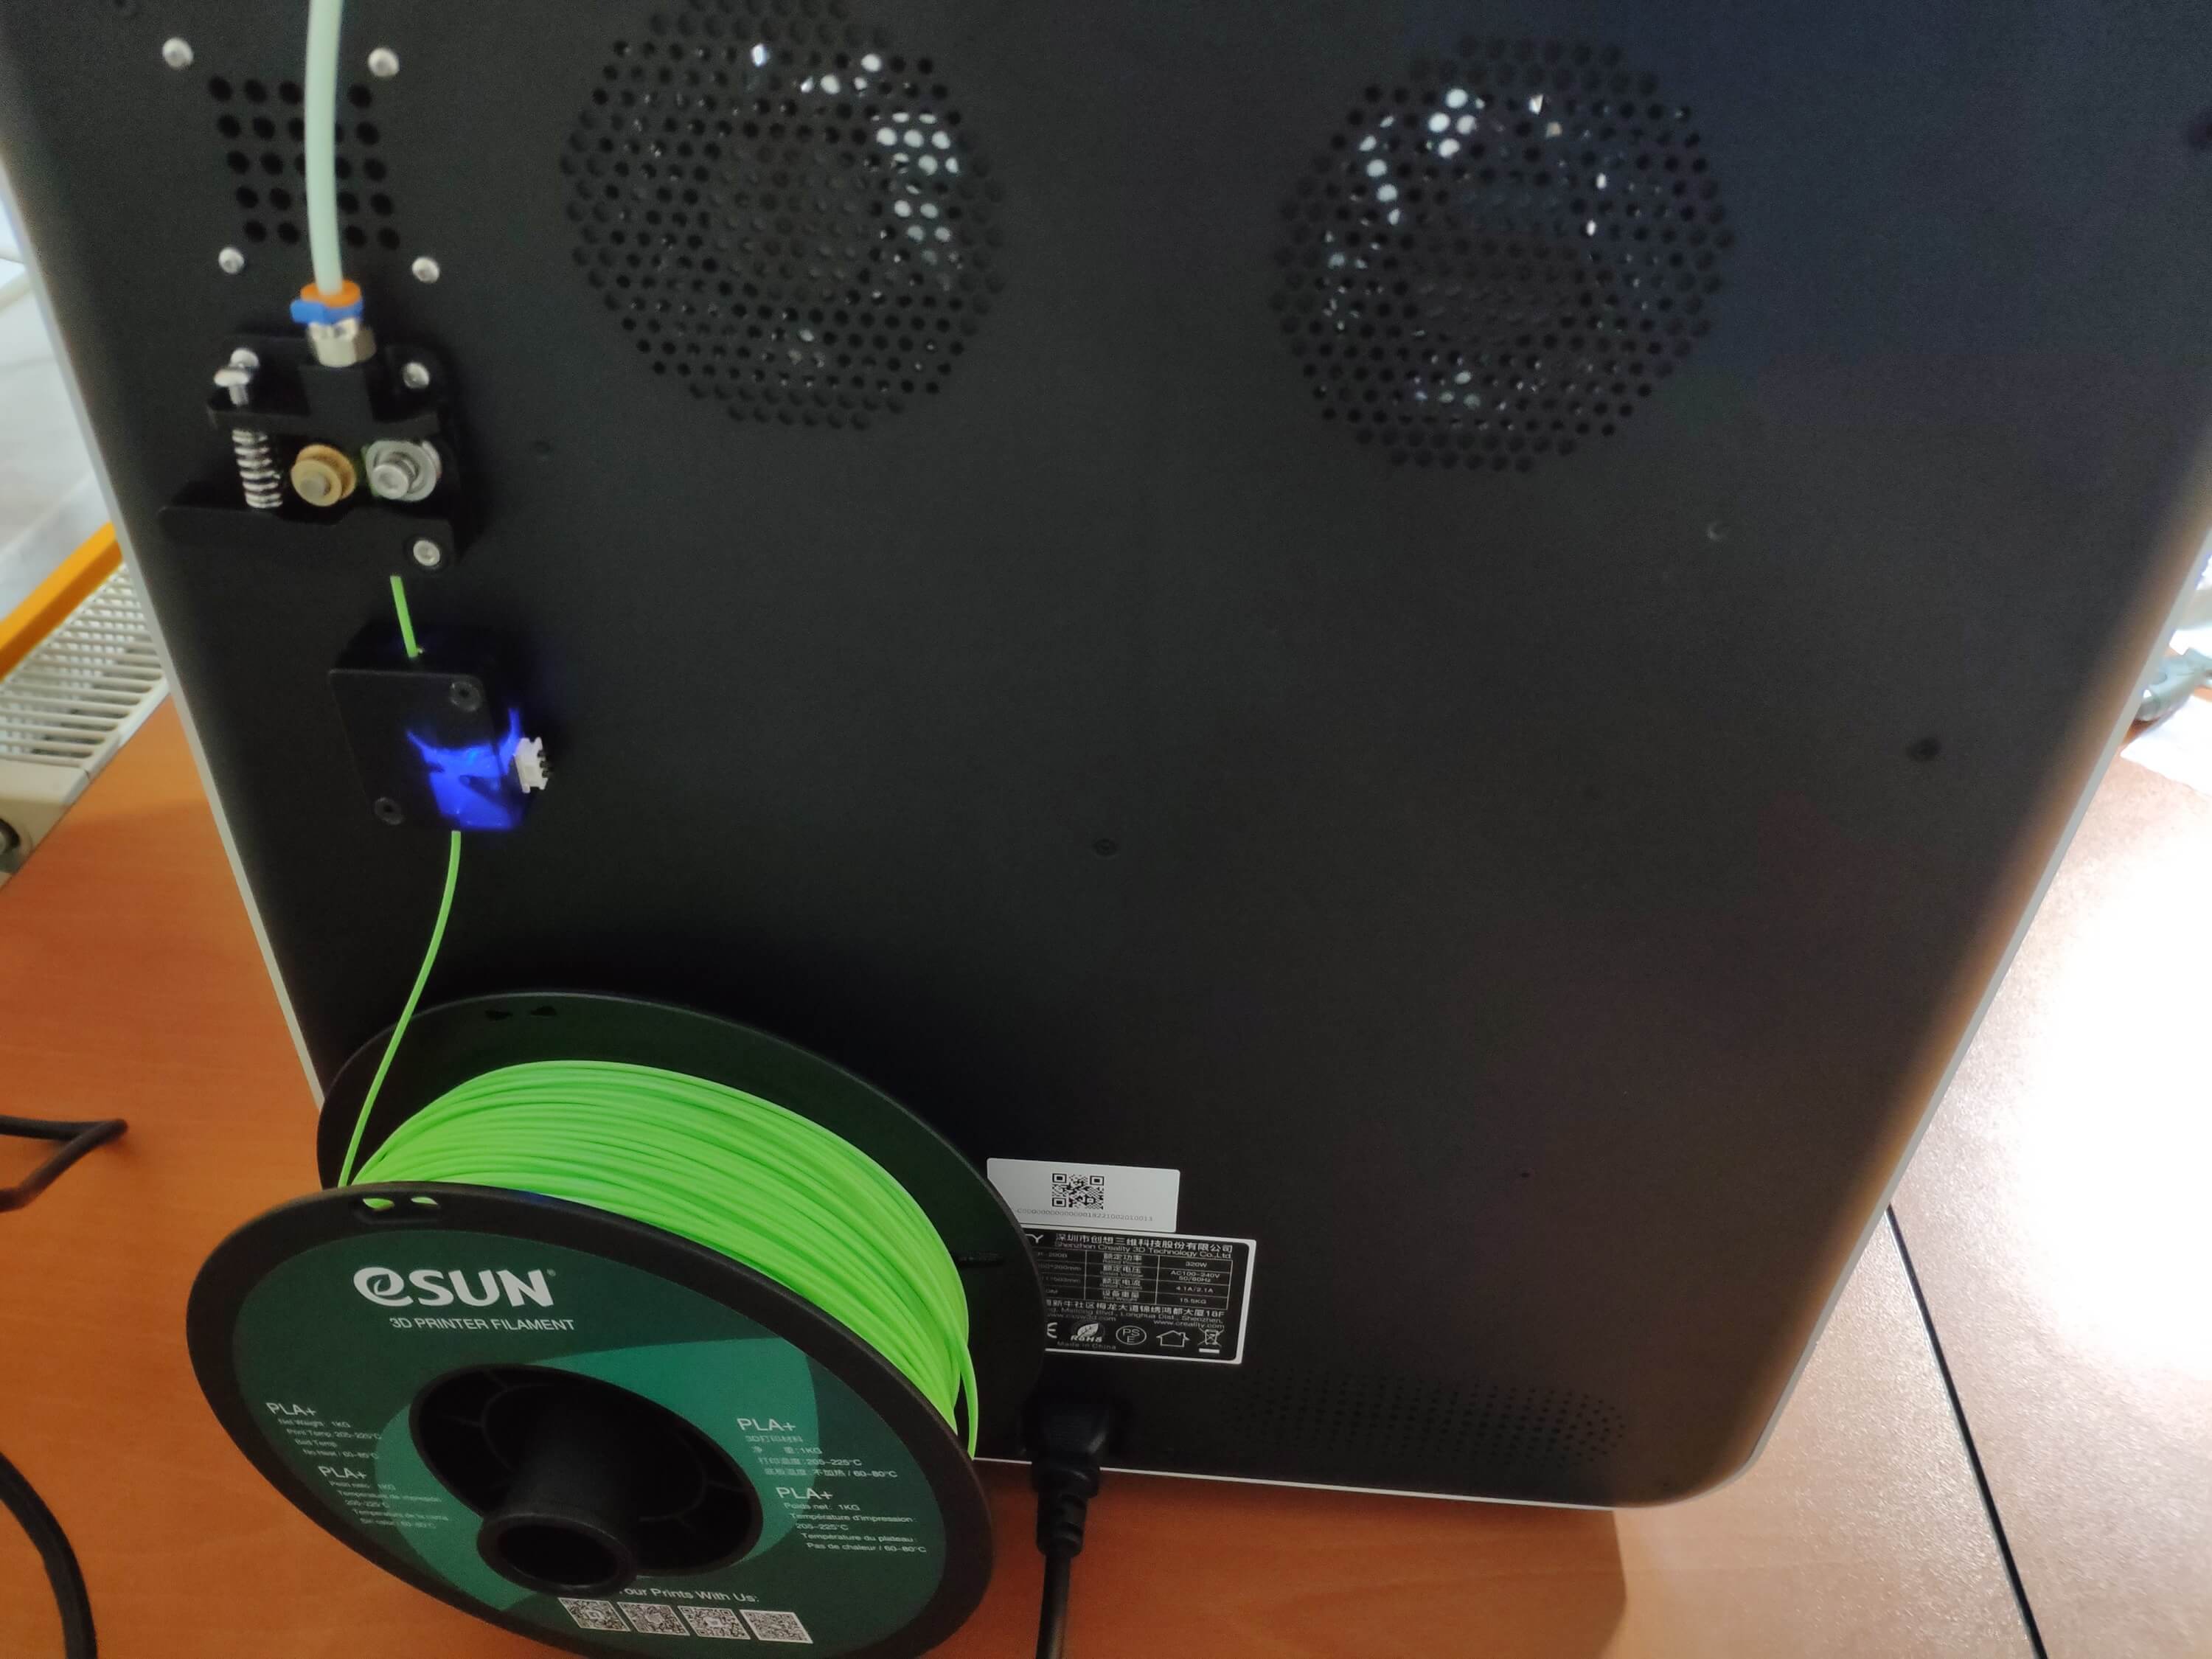
#️⃣ Finally, attach the spool holder and feed the extruder with the filament.
Figure - 81.33
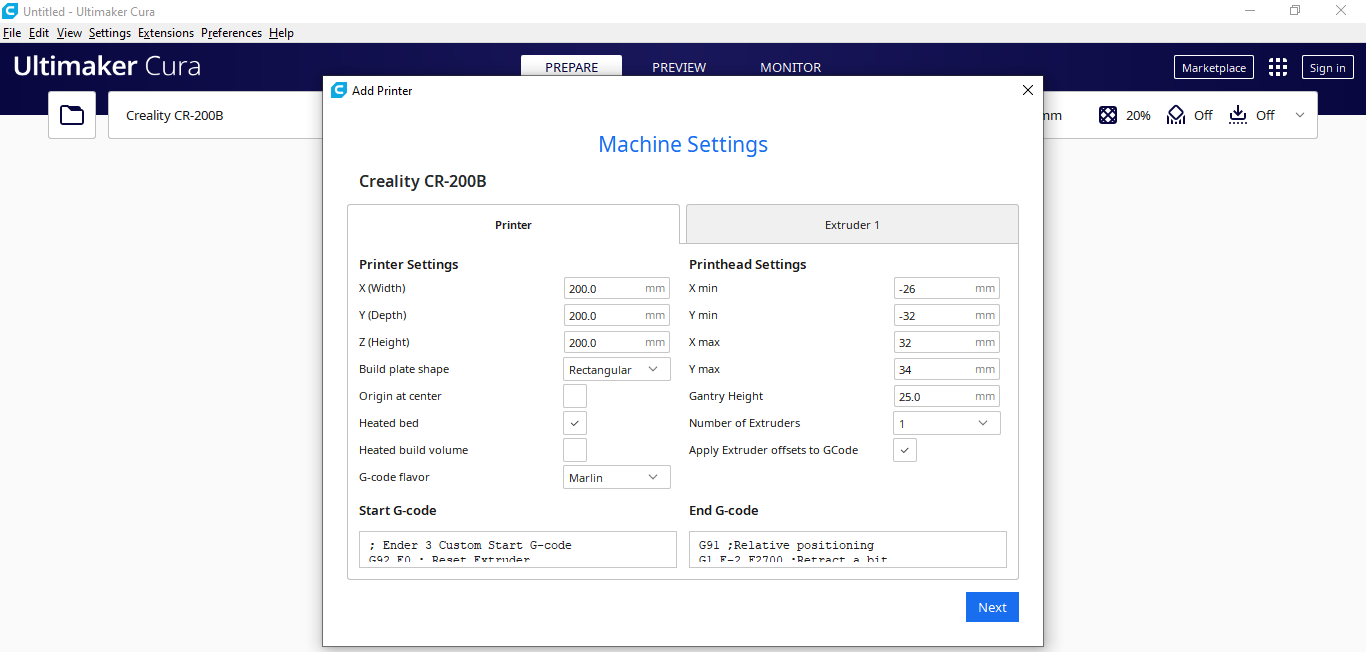
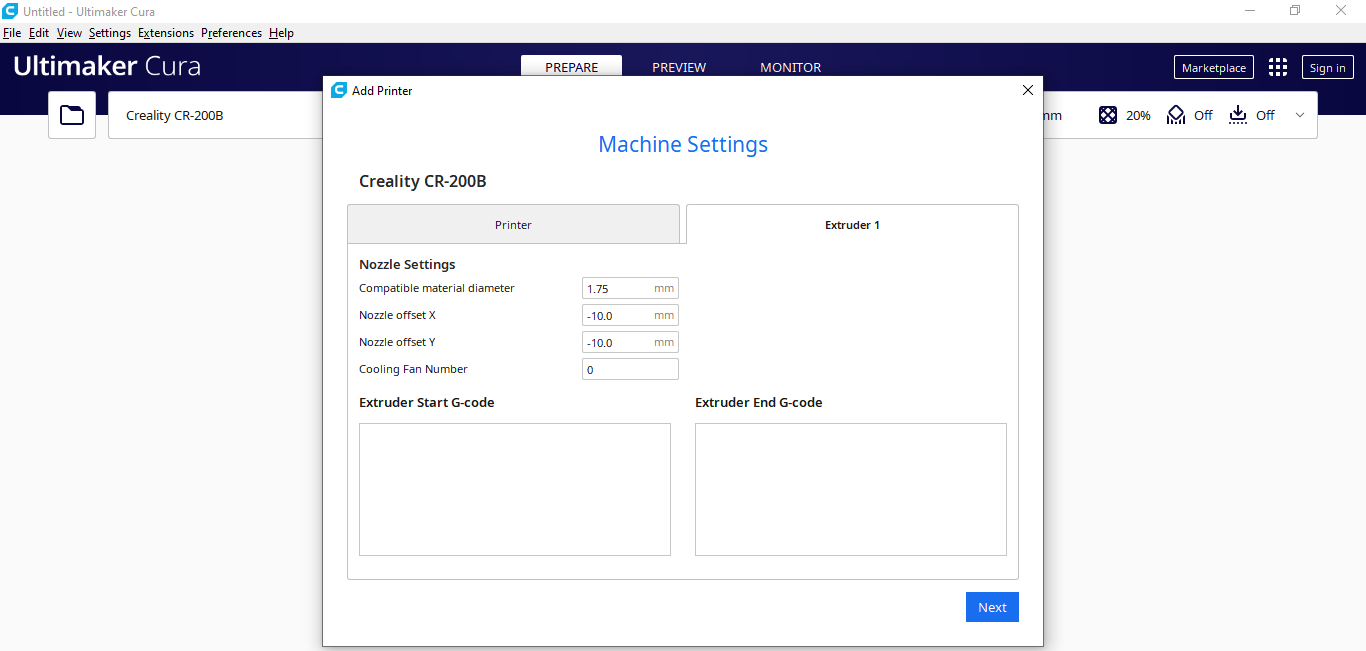
#️⃣ Since the CR-200B is not officially supported by Cura, select the Ender-3 profile and change the build size to 200 x 200 x 200 mm. Also, to compensate for the nozzle placement, set the Nozzle offset X and Y values to -10 mm on the Extruder 1 tab.
Figure - 81.34
Figure - 81.35
Step 2.1: Assembling the lighting system and inserting the PCB
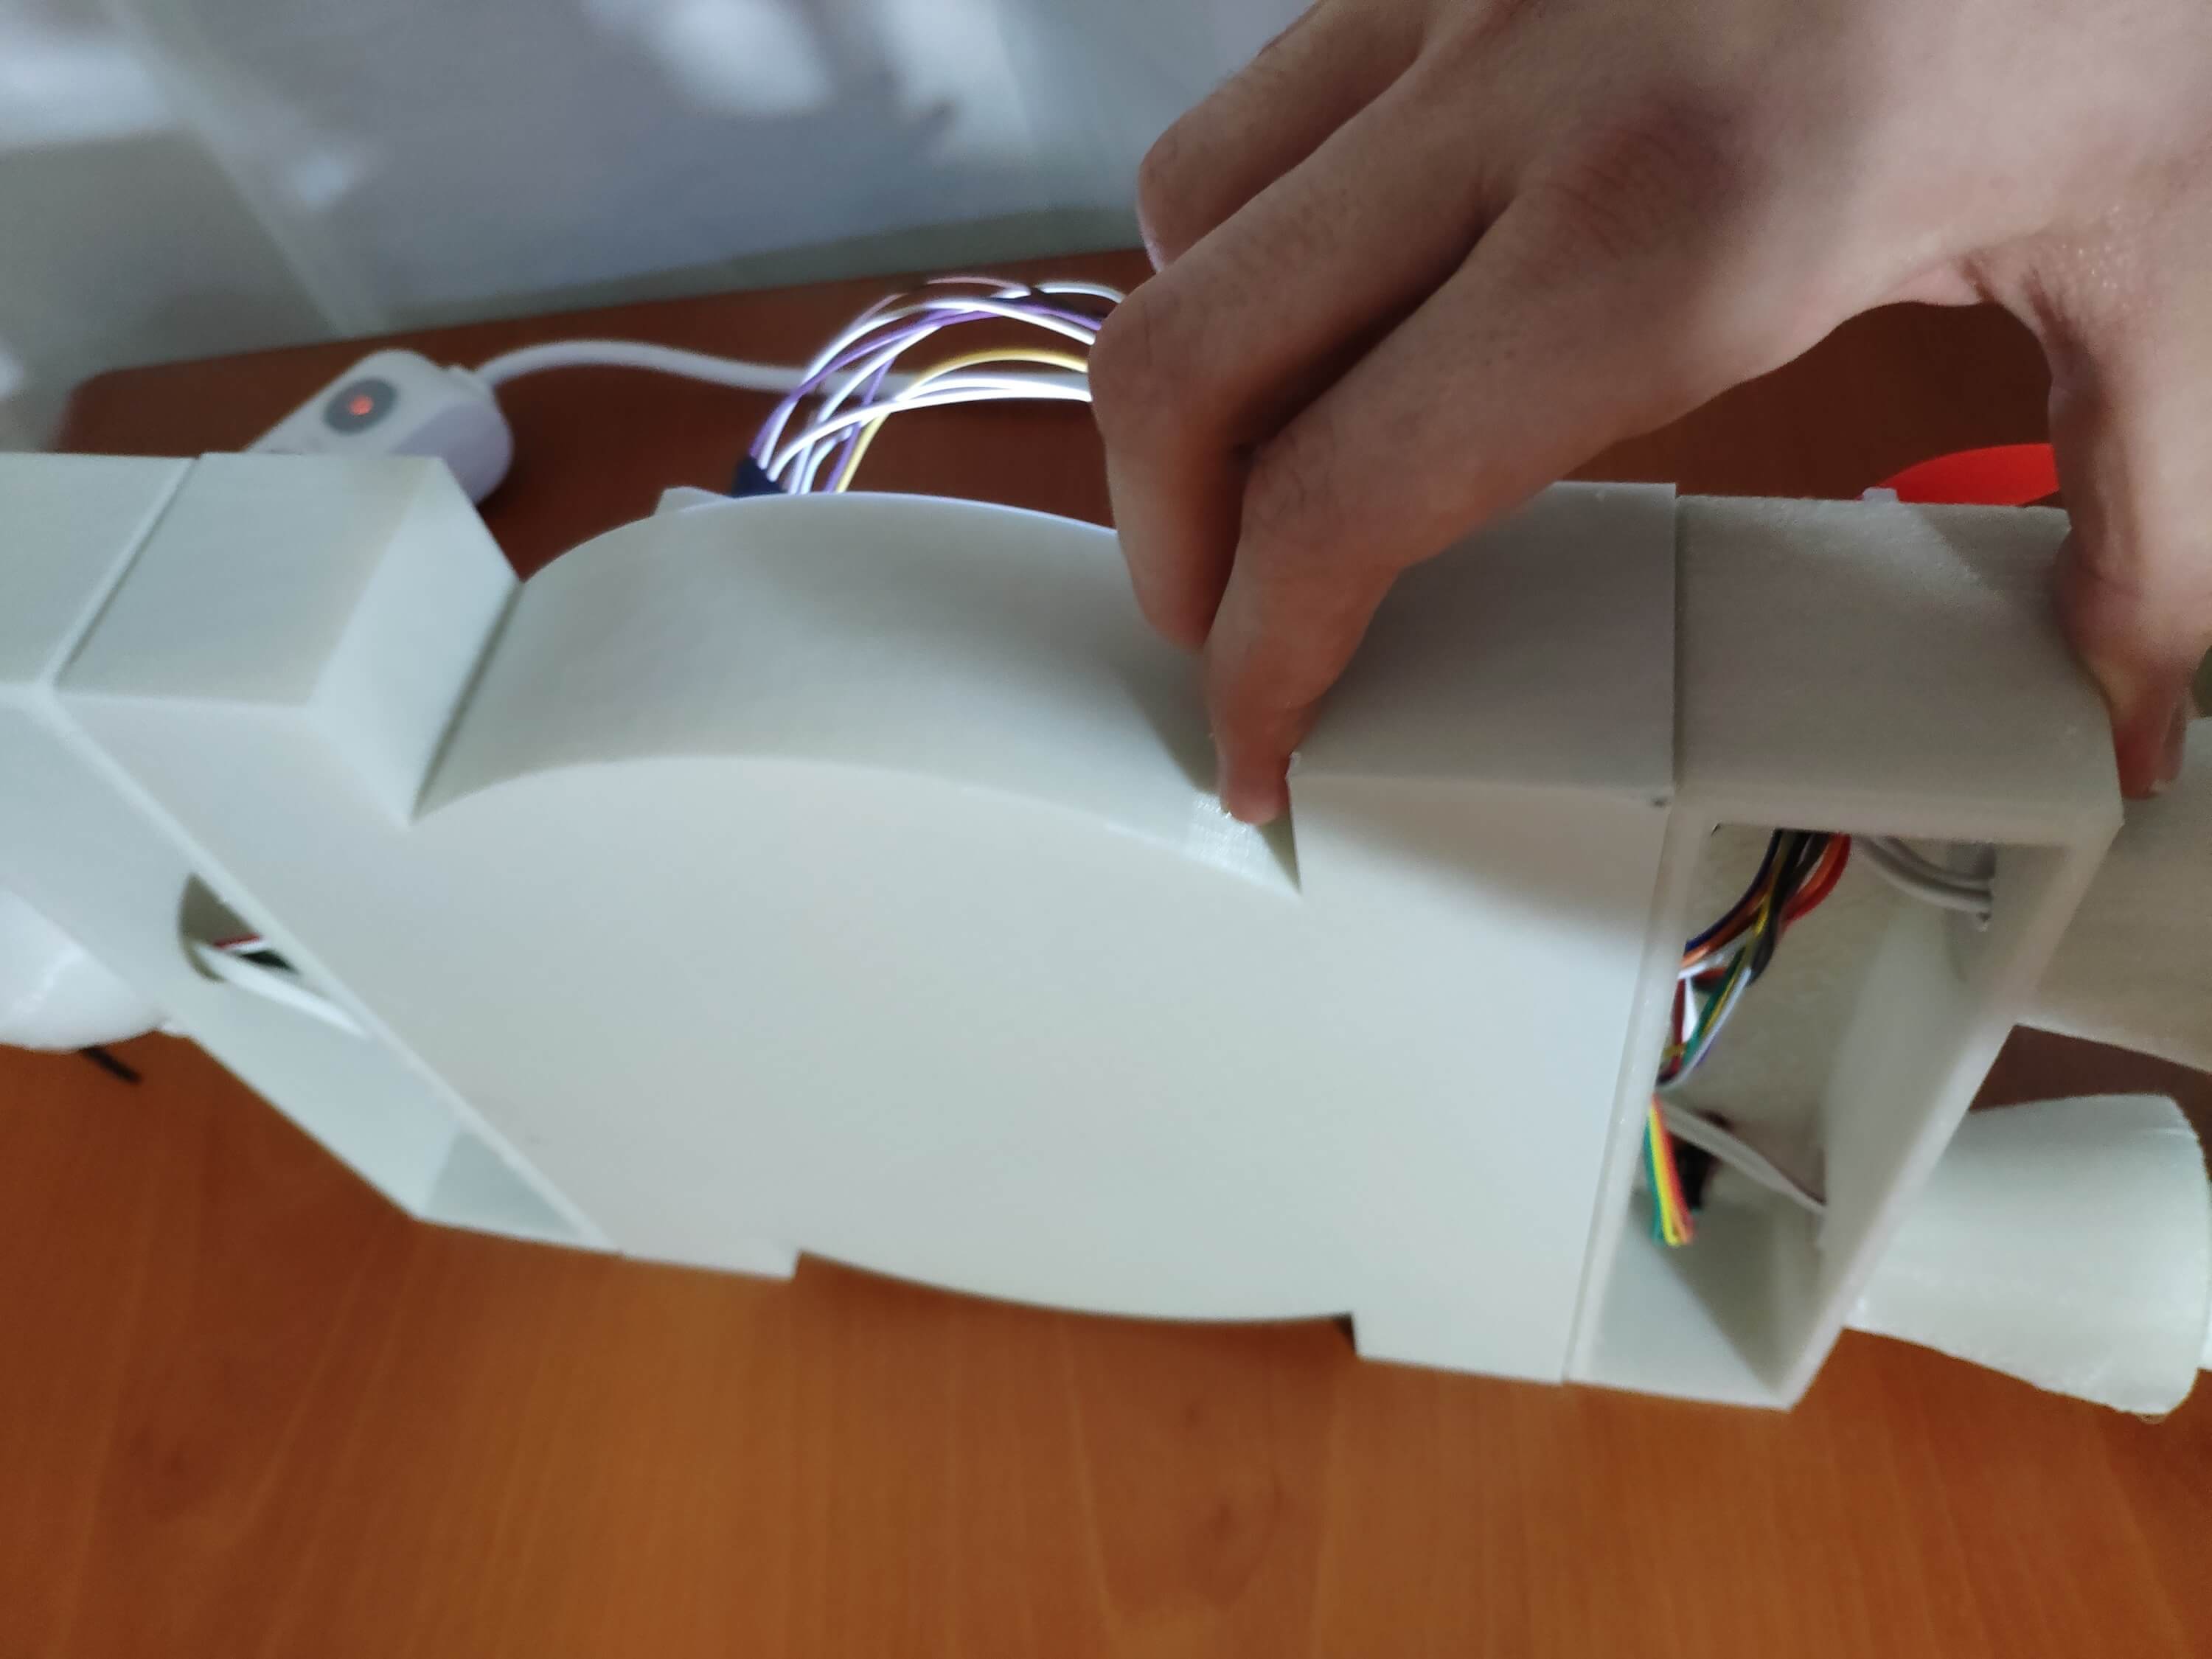
After printing all parts (main case, lights, and plug), I made wire connections and fastened all components to their corresponding slots on the lighting structure parts (main case, lights, and plug) via a hot glue gun. Then, I attached the lighting structure parts together by utilizing their built-in joints.
Finally, I placed and fastened the Millennium Falcon-inspired PCB via the specialized slot converted from its KiCad board outline layer (Edge.Cut) on the main case.
Figure - 81.36
Figure - 81.37
Figure - 81.38
Figure - 81.39
Figure - 81.40
Figure - 81.41
Figure - 81.42
Figure - 81.43
Figure - 81.44
Figure - 81.45
Figure - 81.46
Figure - 81.47
Figure - 81.48
Figure - 81.49
Figure - 81.50
Figure - 81.51
After assembling the lighting structure, I affixed the Master Yoda bust (replica) to the top of the plug part via the hot glue gun.
Figure - 81.52
Figure - 81.53
Figure - 81.54
As mentioned earlier, I utilized luminous PLA filaments (green and blue) to capture the mysterious essence of The Force. Therefore, the lighting structure looks awesome and coruscates stunningly in the dark :)
Figure - 81.55
Figure - 81.56
Figure - 81.57
Figure - 81.58
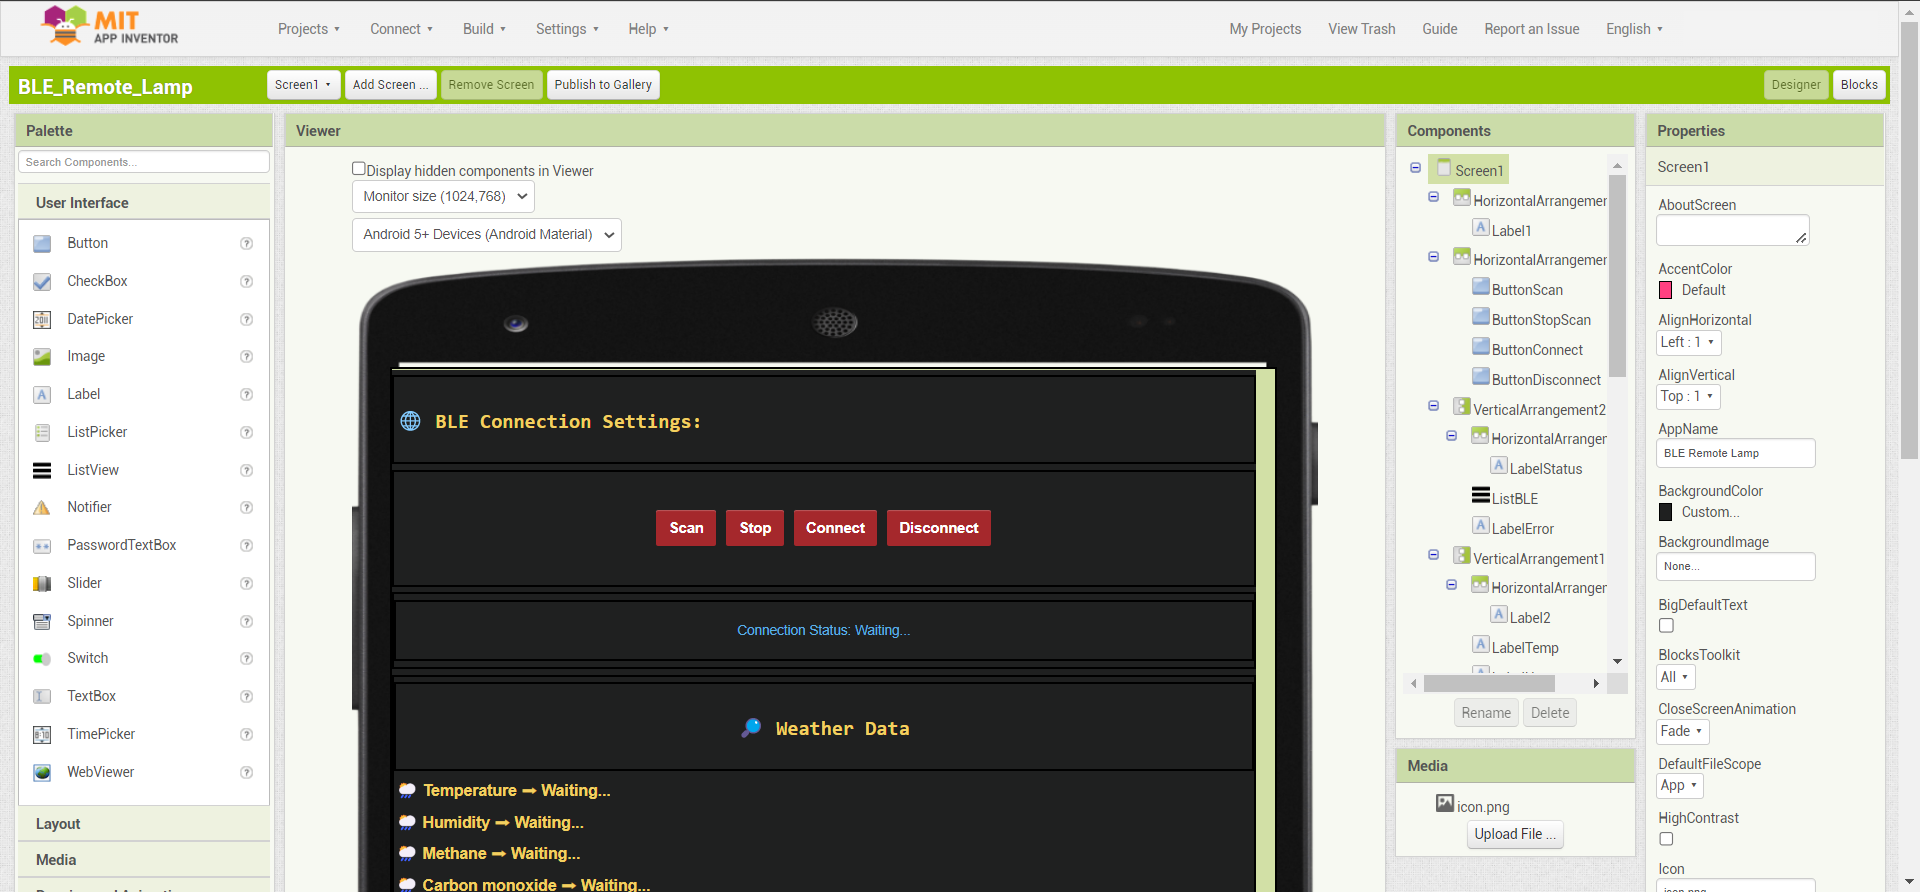
Step 3: Developing a BLE-enabled Android application w/ the MIT APP Inventor
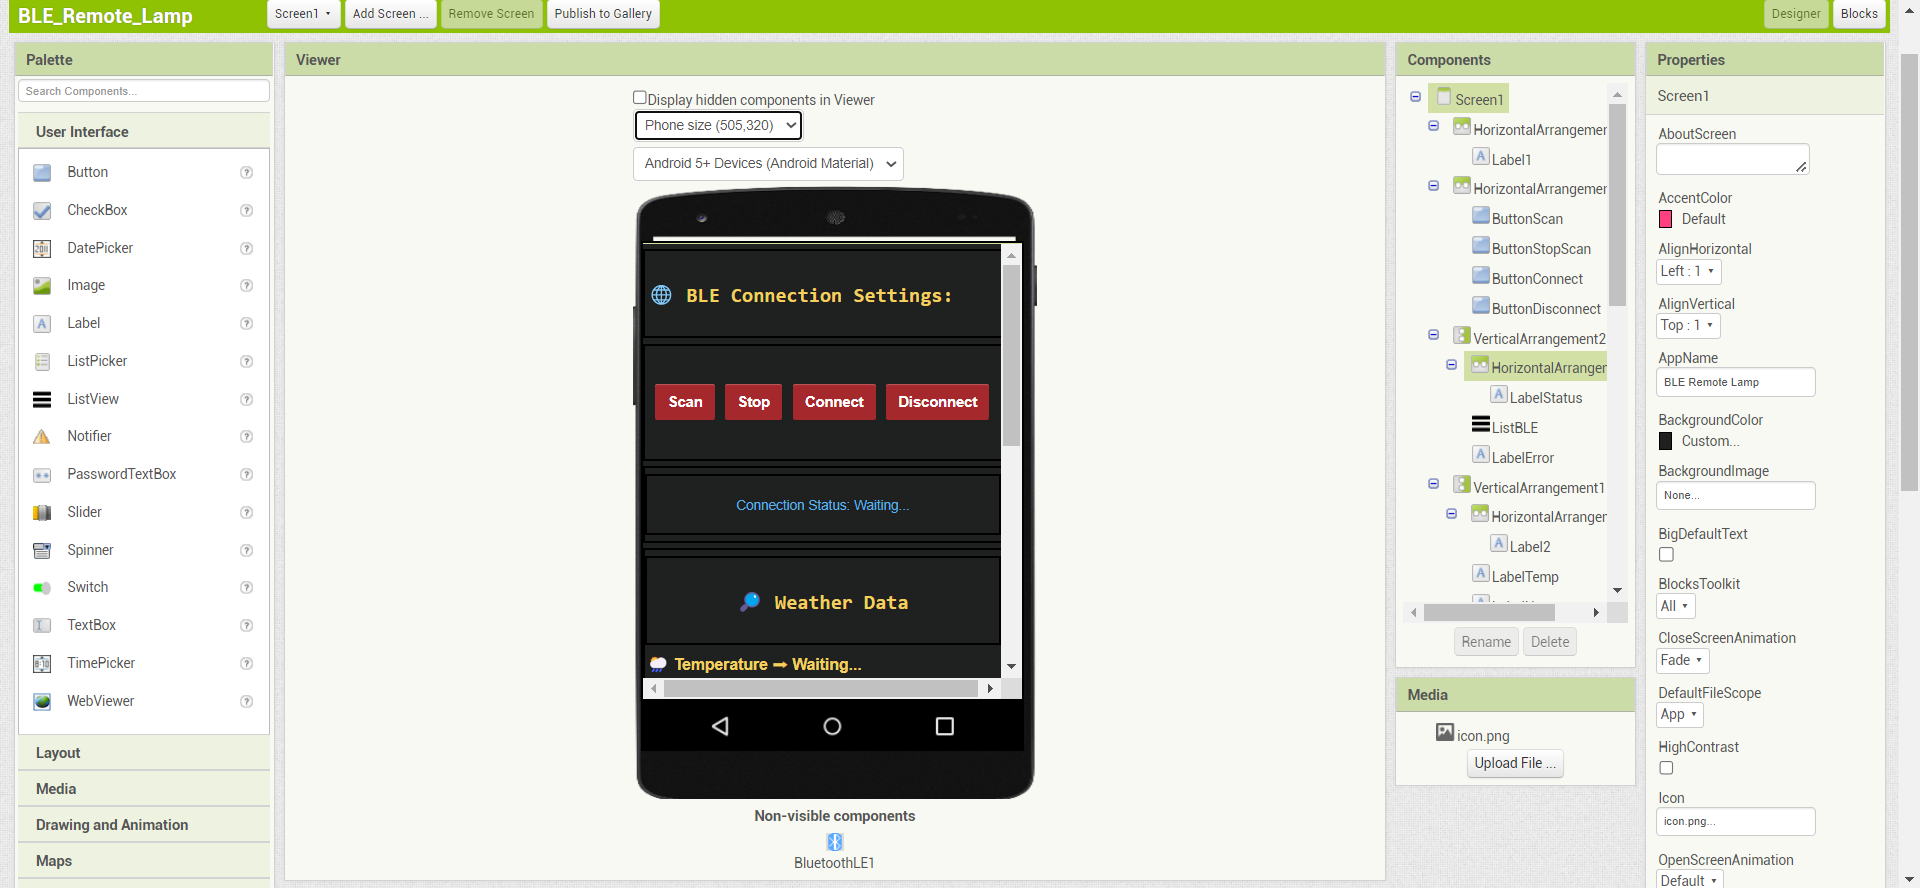
To be able to obtain the transmitted (advertised) information from the lighting system and pass commands to the lighting system over BLE, I decided to develop an Android application from scratch with the MIT APP Inventor.
MIT App Inventor is an intuitive, visual programming environment that allows developers to build fully functional Android applications. Its blocks-based tool (drag-and-drop) facilitates the creation of complex, high-impact apps in significantly less time than the traditional programming environments.
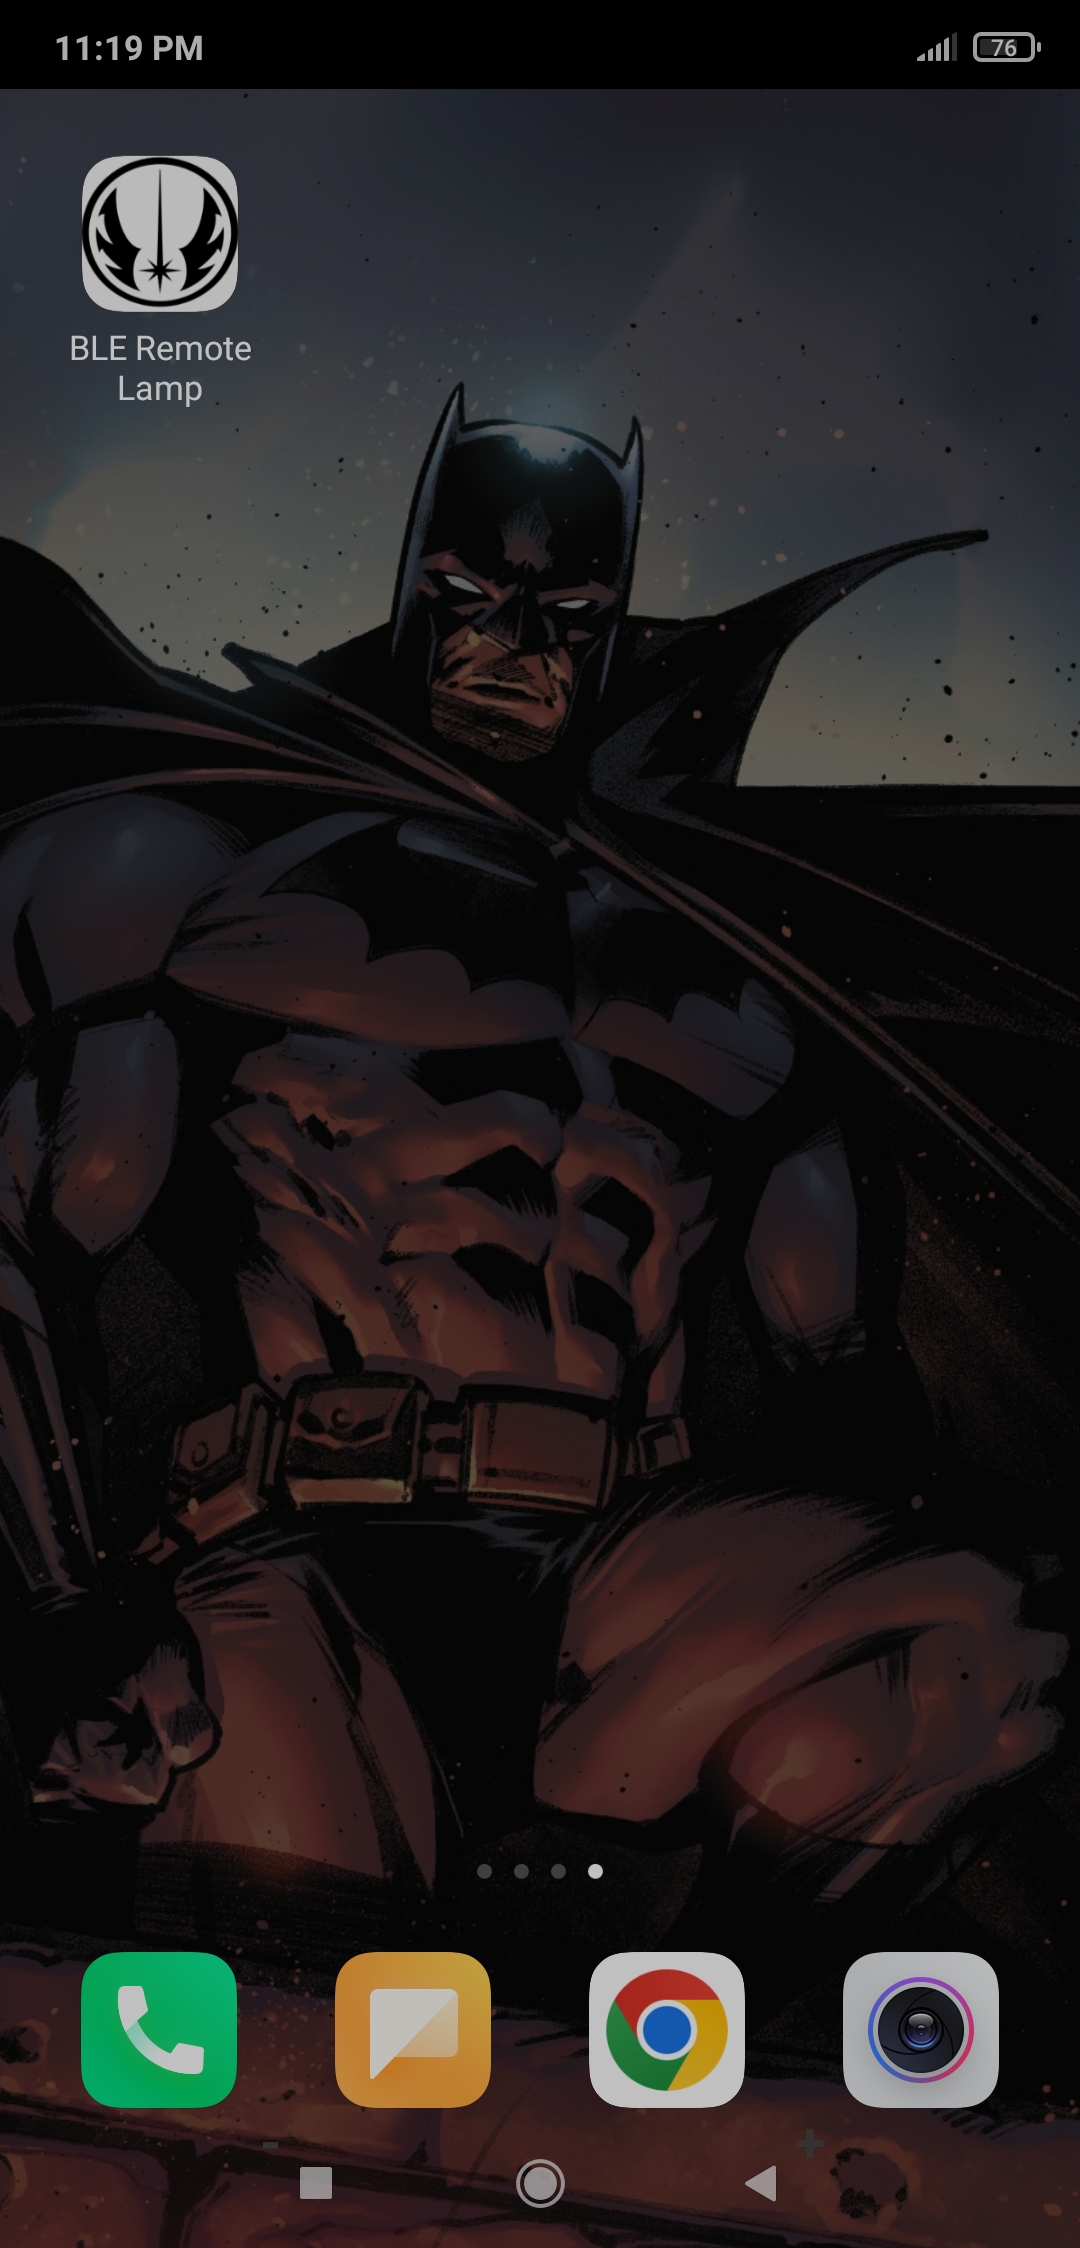
After developing my application, named BLE Remote Lamp, I published it on Google Play. So, you can install the BLE Remote Lamp app on any compatible Android device via Google Play.
#️⃣ Download the BLE Remote Lamp app's project file in the aia format (BLE_Remote_Lamp.aia) and import the aia file into the MIT App Inventor.
Figure - 81.59
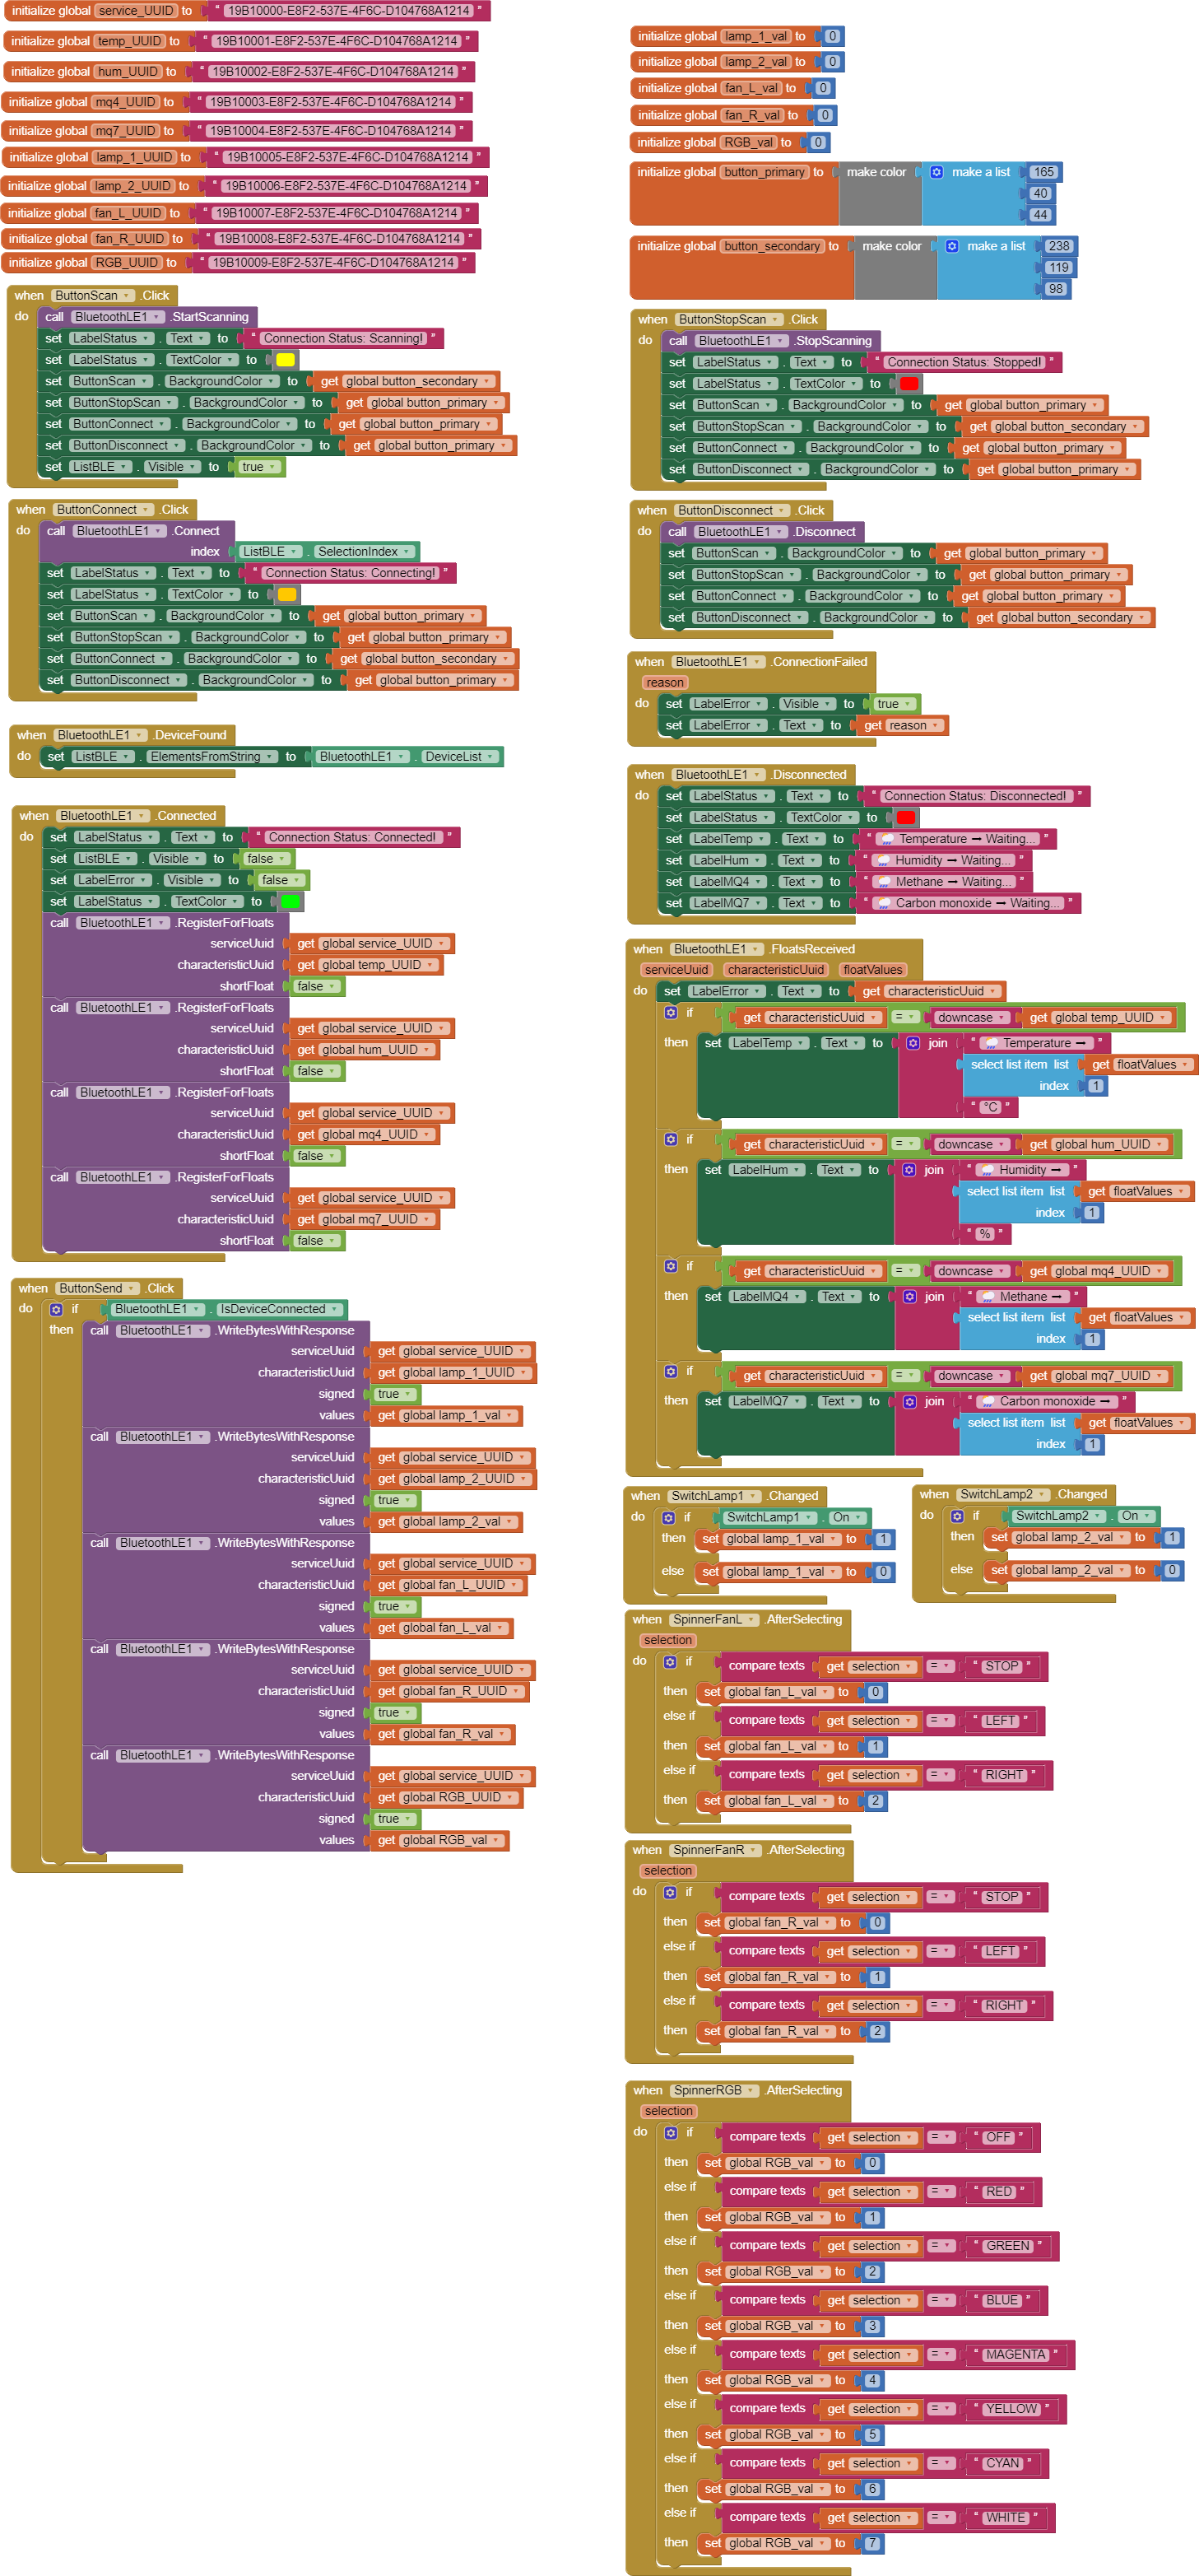
#️⃣ Since the MIT App Inventor does not support BLE connectivity by default, download the latest version of the BluetoothLE extension and import the BluetoothLE extension into the BLE Remote Lamp project.
In this tutorial, you can get more information regarding enabling BLE connectivity on the MIT App Inventor.
Figure - 81.60
#️⃣ Inspect the BLE Remote Lamp project functions and source code in the Blocks editor.
Figure - 81.61
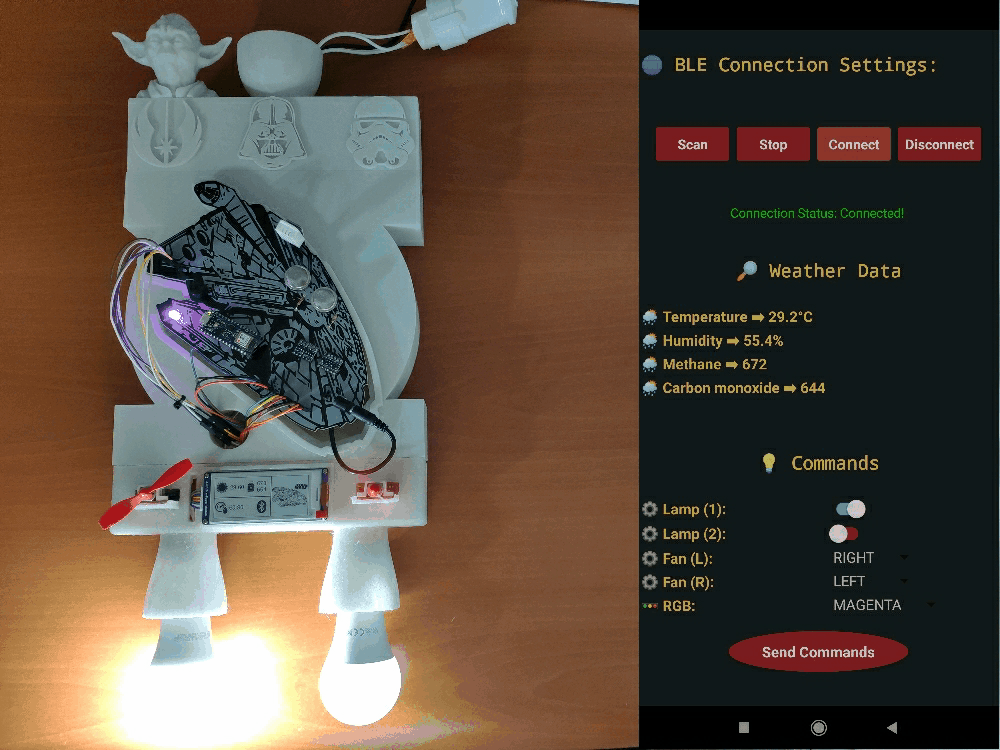
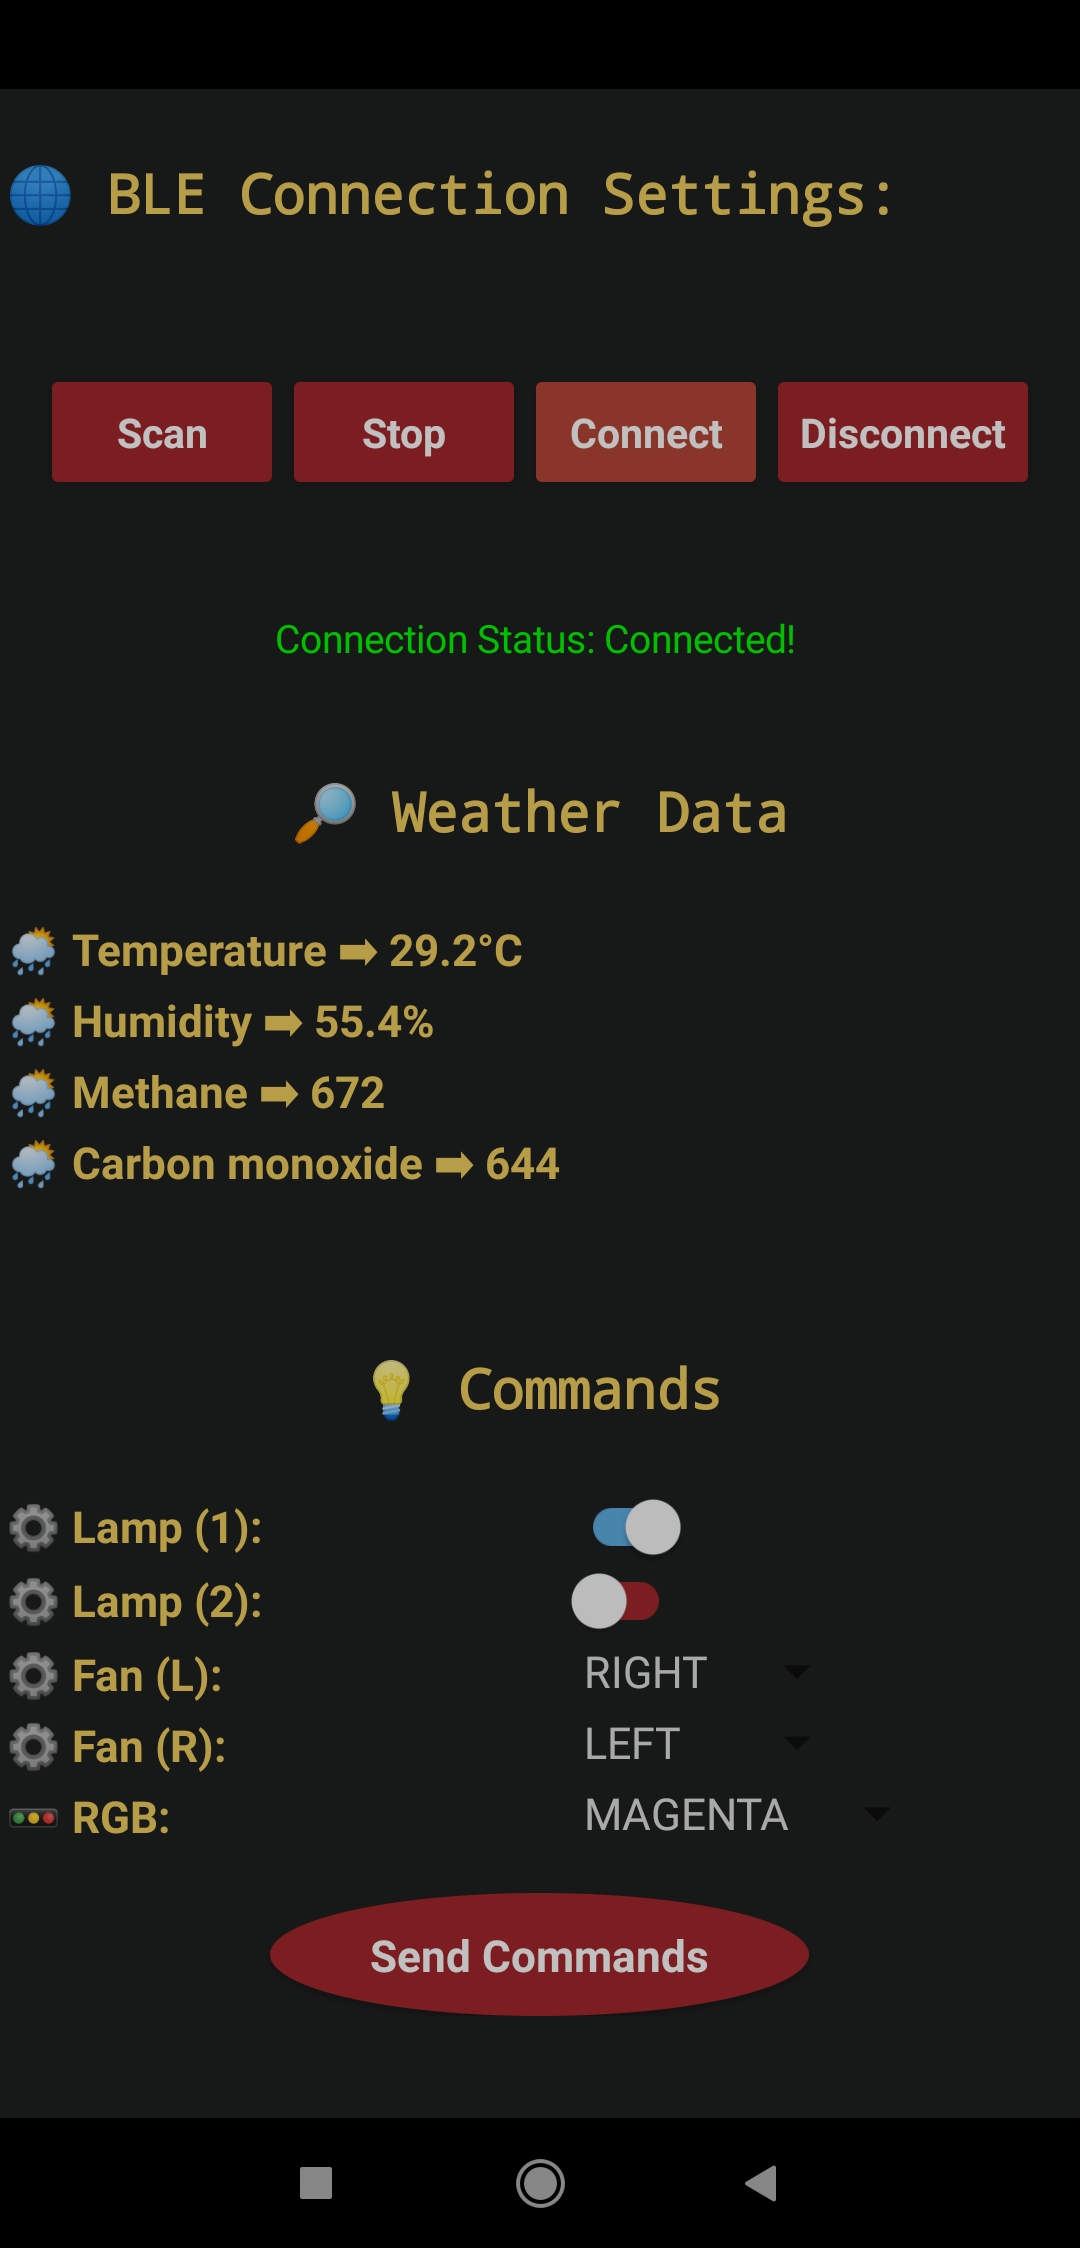
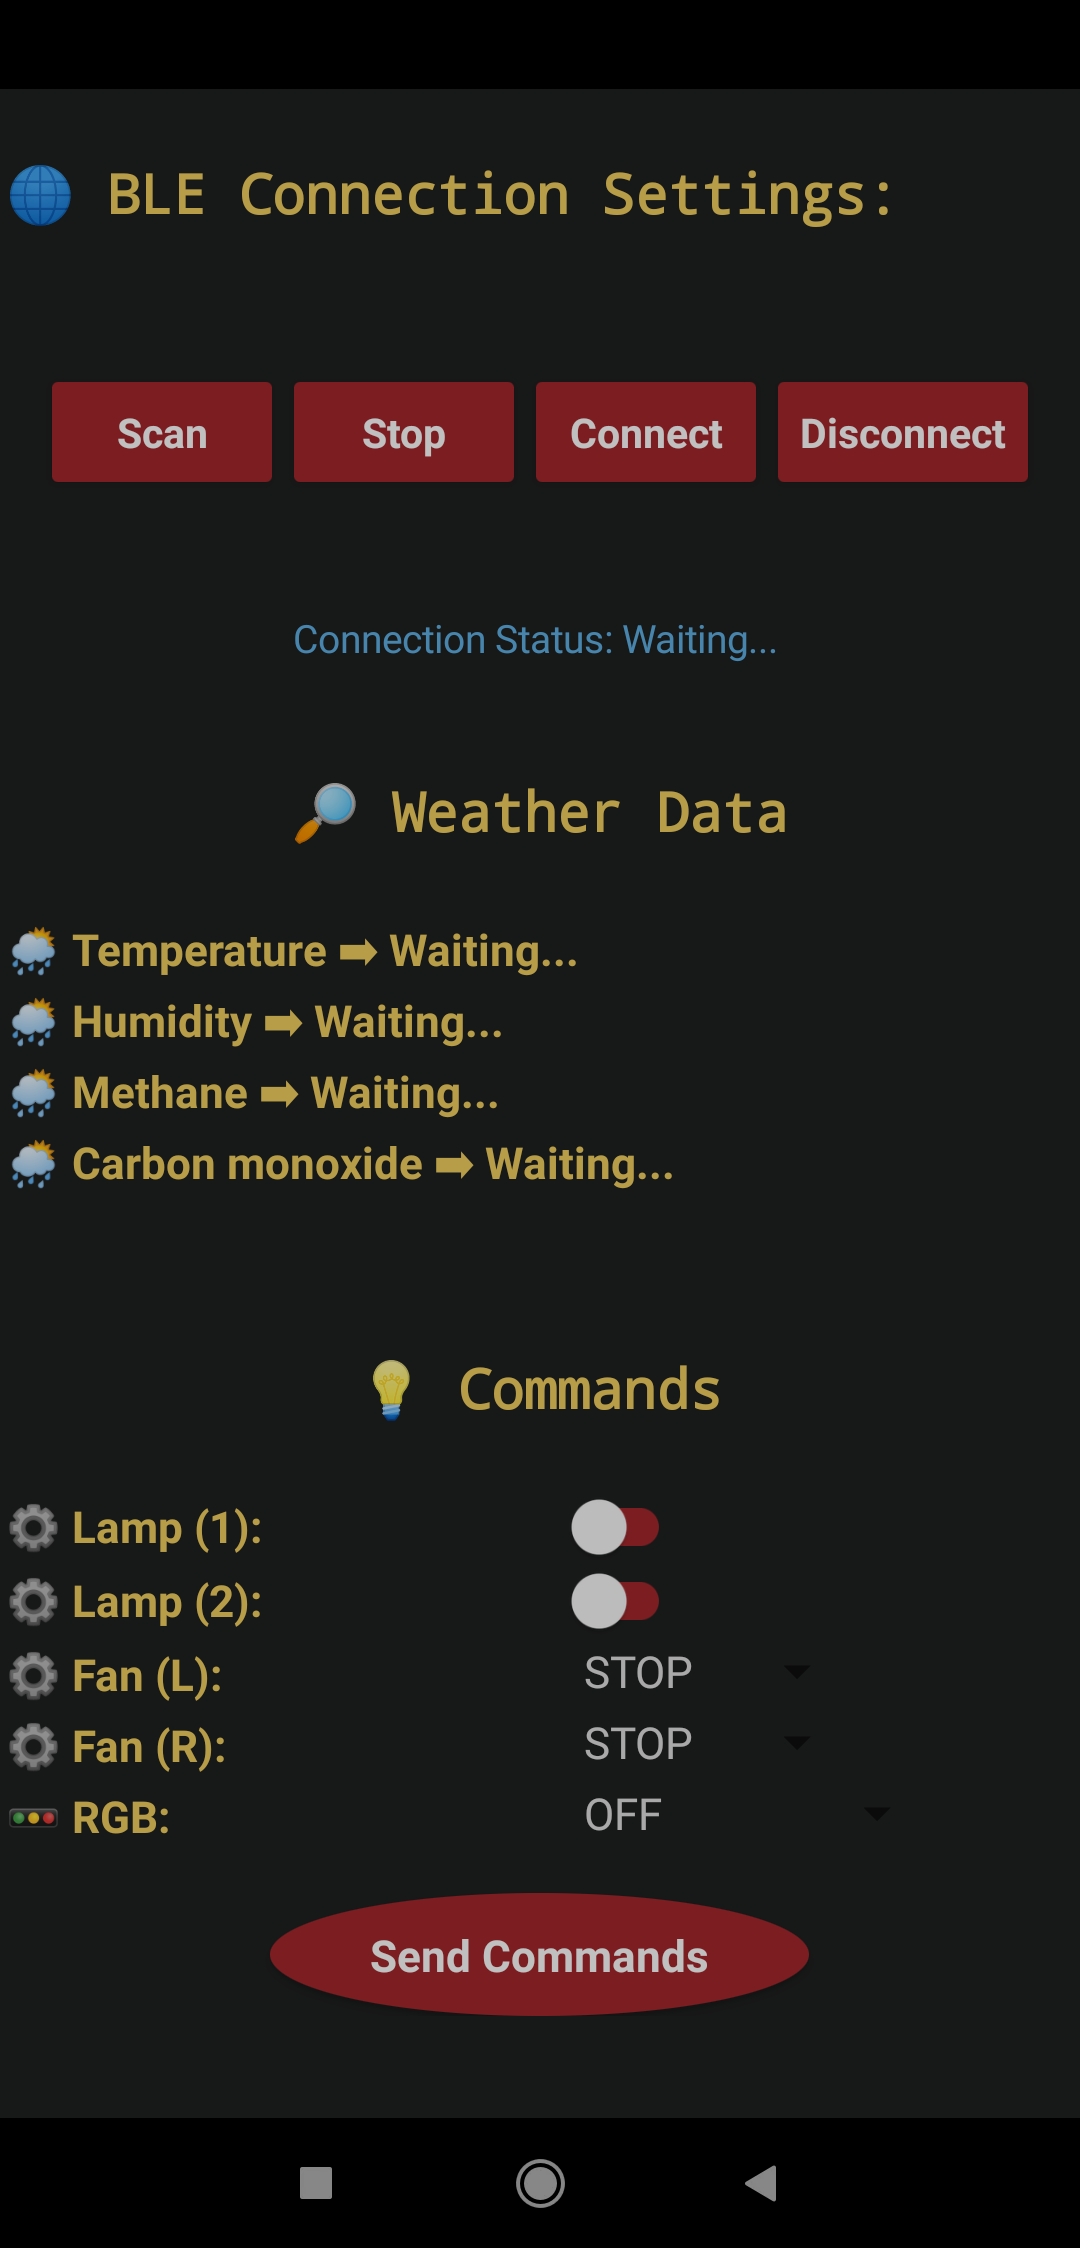
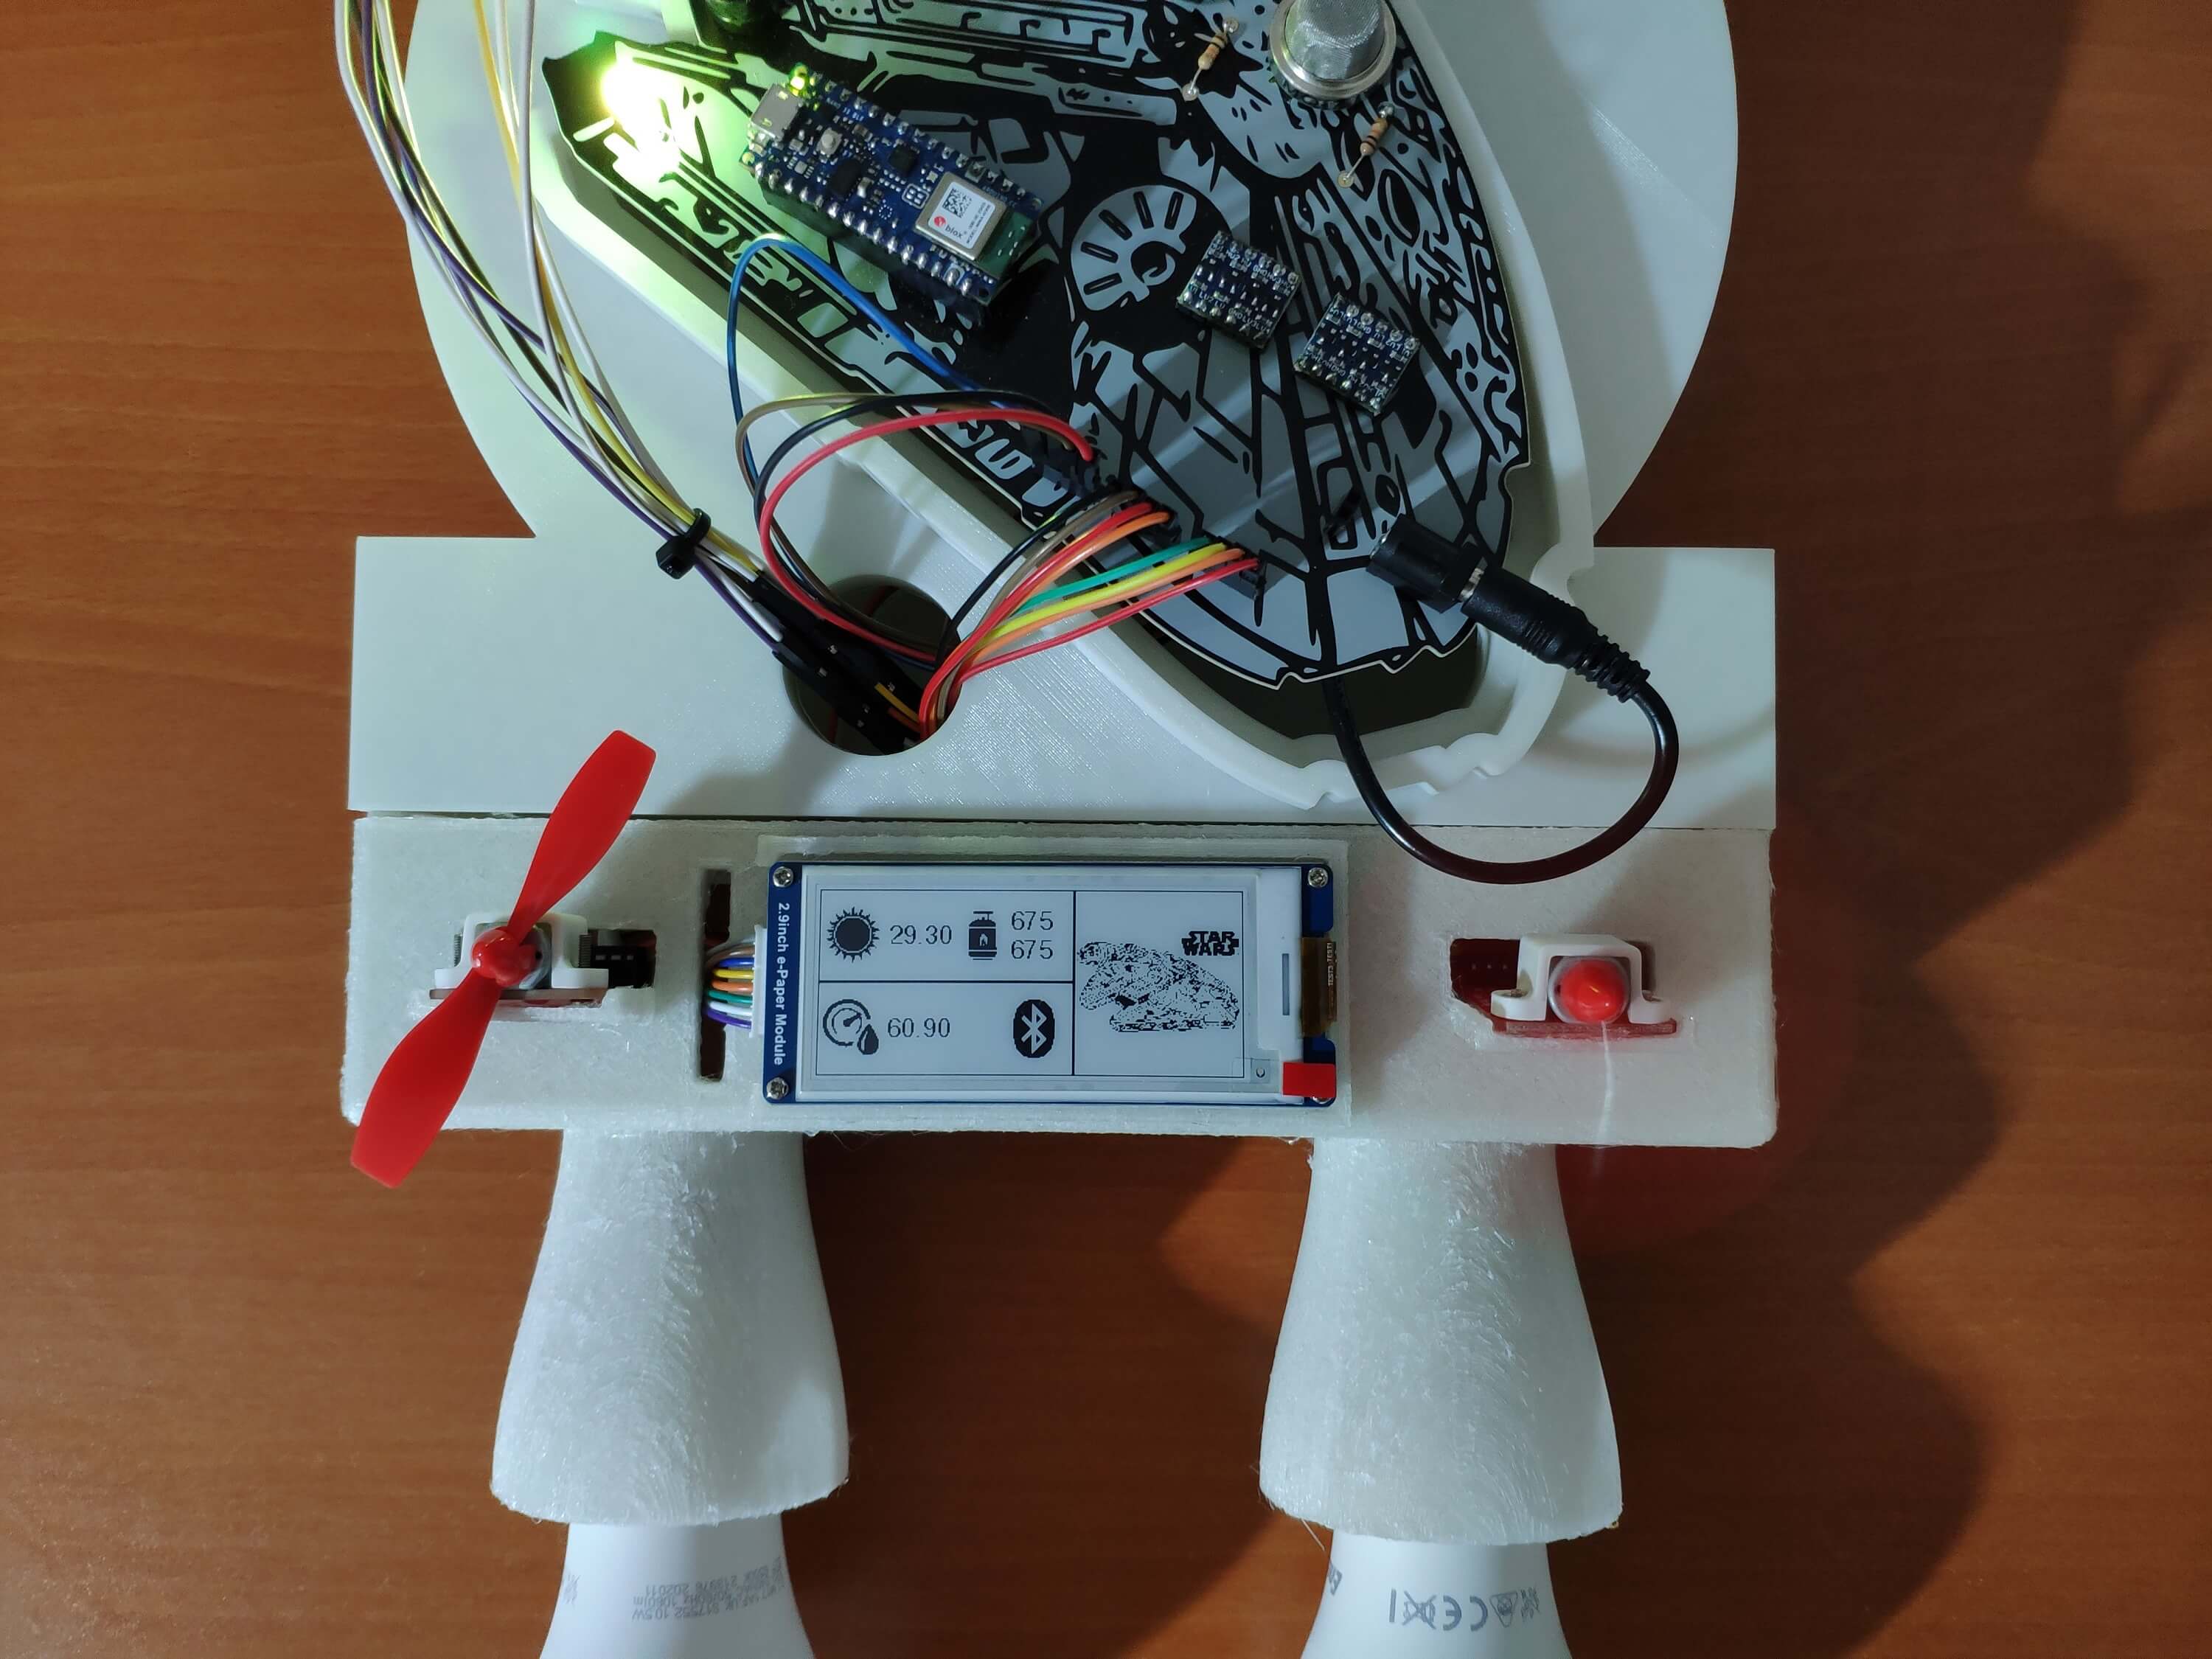
After installing the BLE Remote Lamp app on a compatible Android device, the app starts displaying the transmitted (advertised) information from the lighting system over BLE immediately to inform the user of evaluated weather and gas data:
Temperature (°C)
Humidity (%)
Methane
Carbon monoxide
#️⃣ Also, the application lets the user transfer commands to the lighting system to control and adjust its various features:
Lamp (1)
Lamp (2)
Fan (L)
Fan (R)
RGB
Figure - 81.62
Step 4: Setting up the Arduino Nano 33 BLE
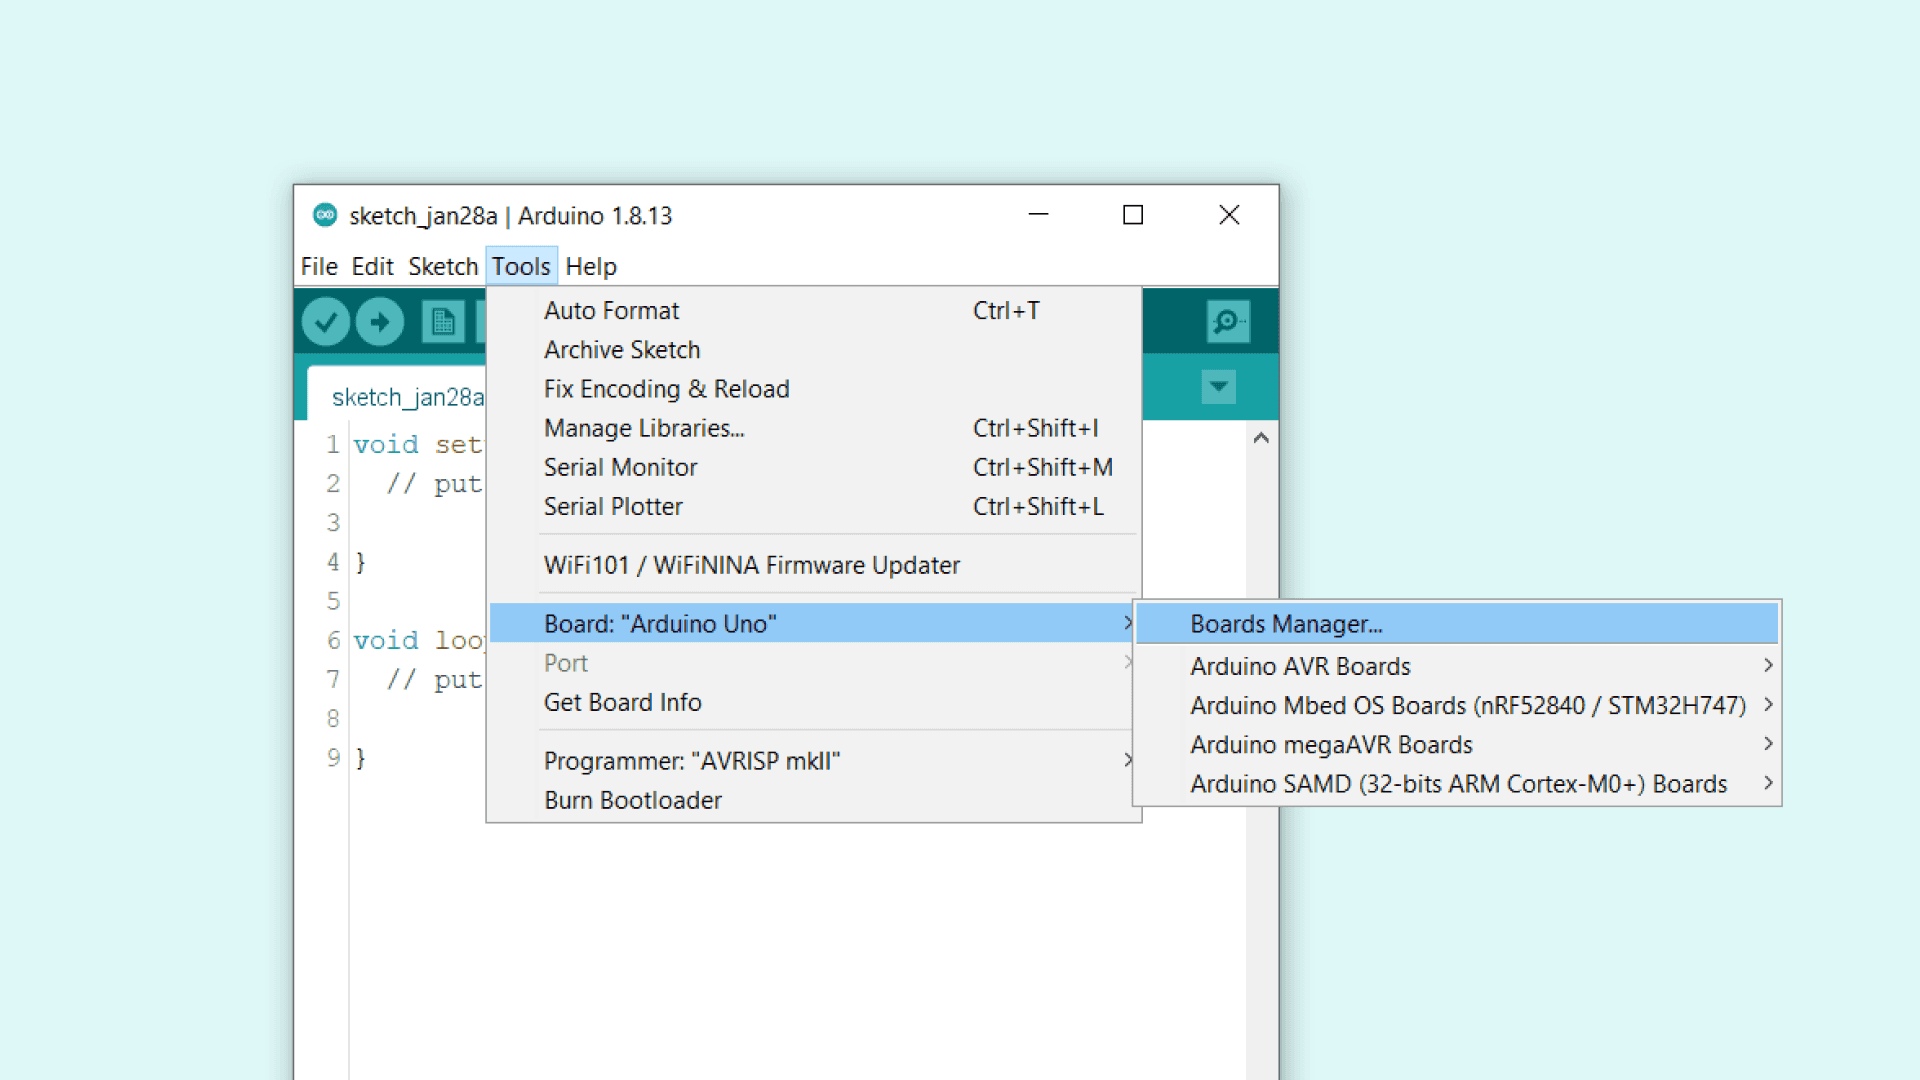
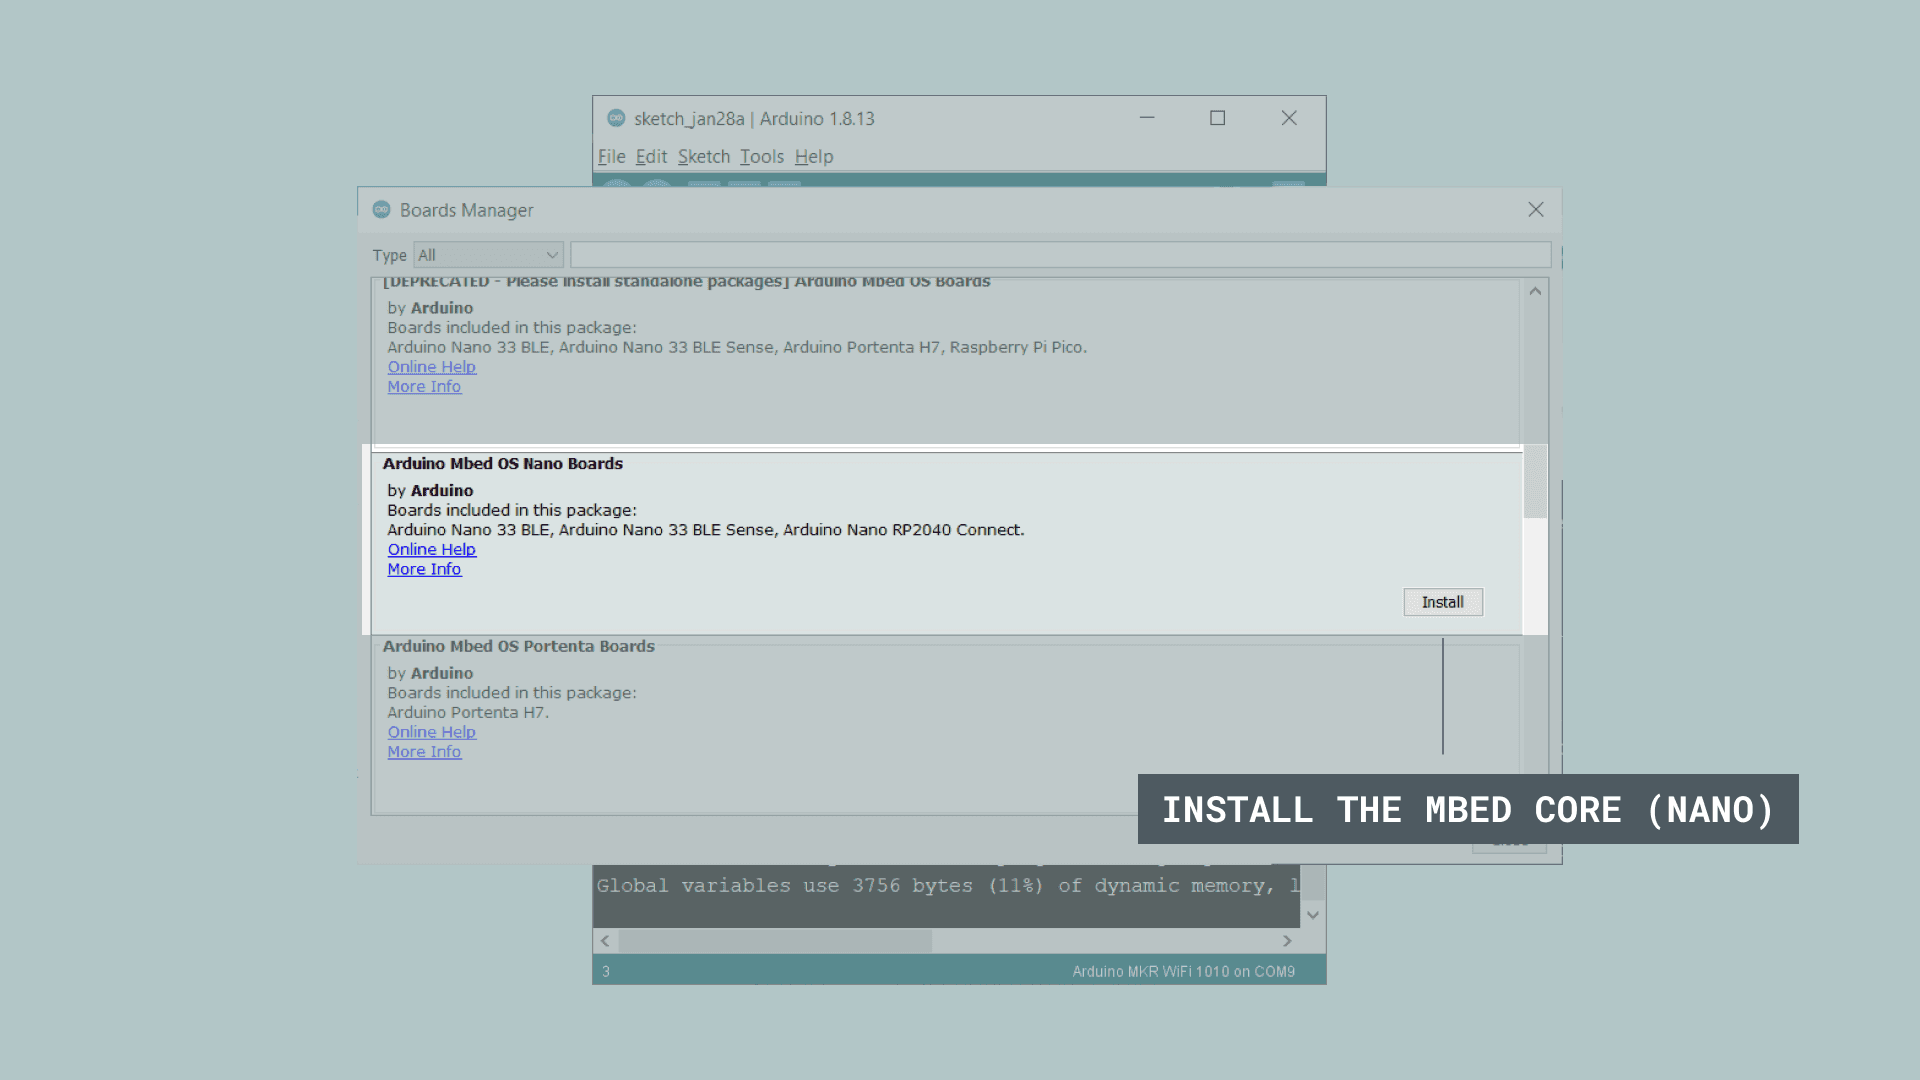
#️⃣ To install the required core, navigate to Tools ➡ Board ➡ Boards Manager and search for Arduino Mbed OS Nano Boards.
Figure - 81.63
Figure - 81.64
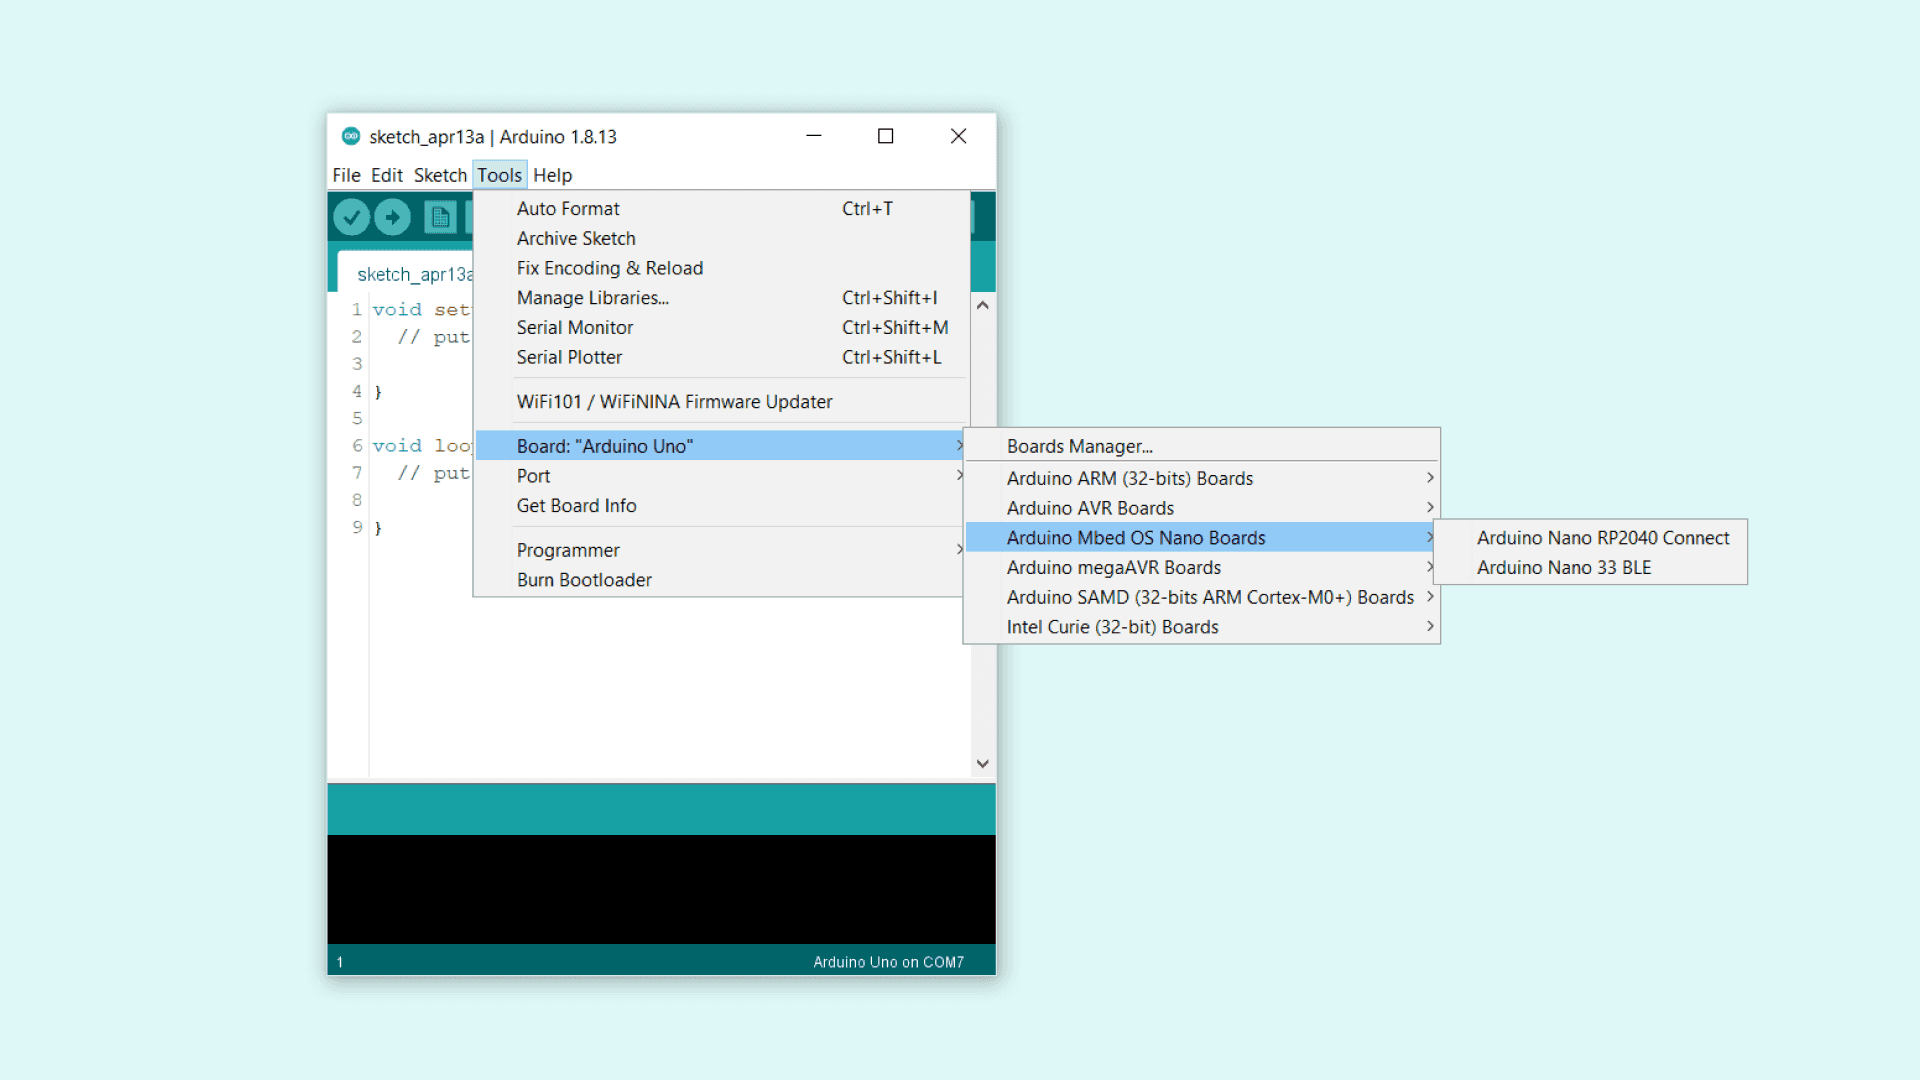
#️⃣ Then, to select the Nano 33 BLE, go to Tools ➡ Board ➡ Arduino Mbed OS Nano Boards.
Figure - 81.65
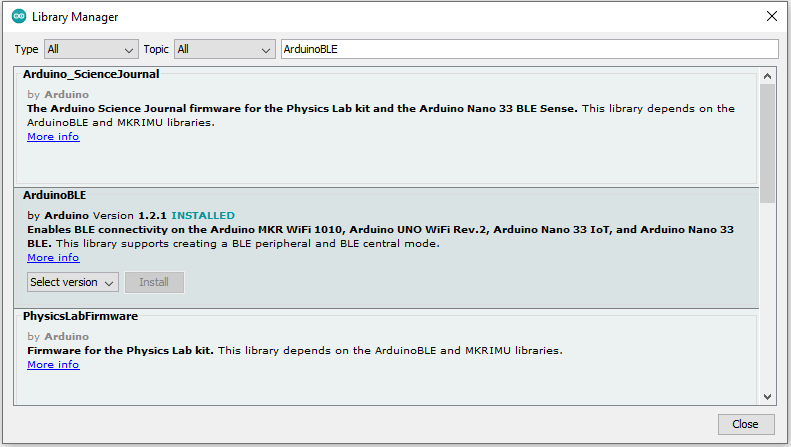
#️⃣ To download the ArduinoBLE library on the Arduino IDE, go to Sketch ➡ Include Library ➡ Manage Libraries… and search for ArduinoBLE.
Figure - 81.66
#️⃣ Download the required libraries for the Waveshare 2.9" e-Paper module and the DHT22 temperature and humidity sensor:
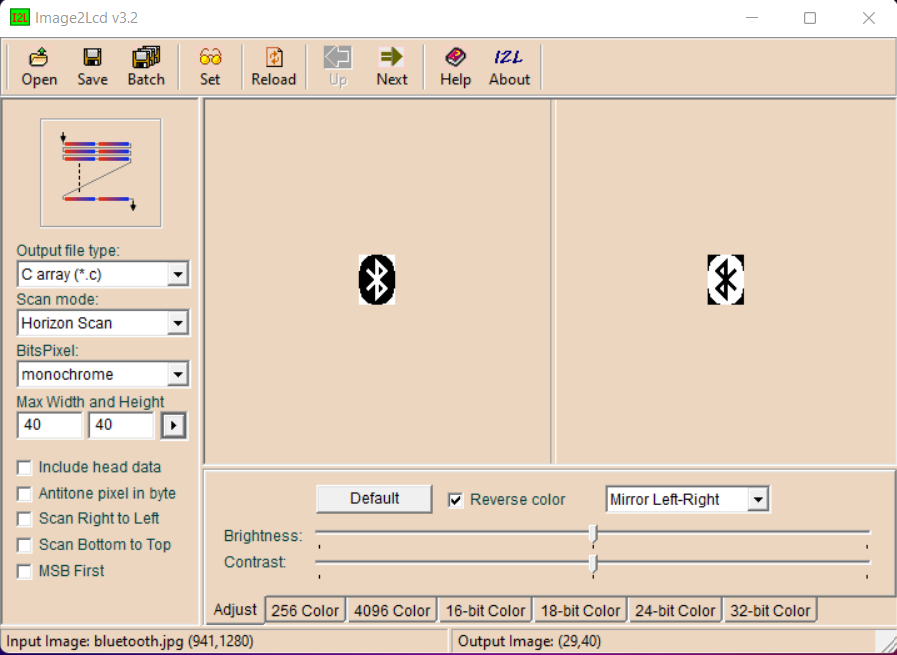
Step 4.1: Displaying images on the Waveshare 2.9'' e-Paper module
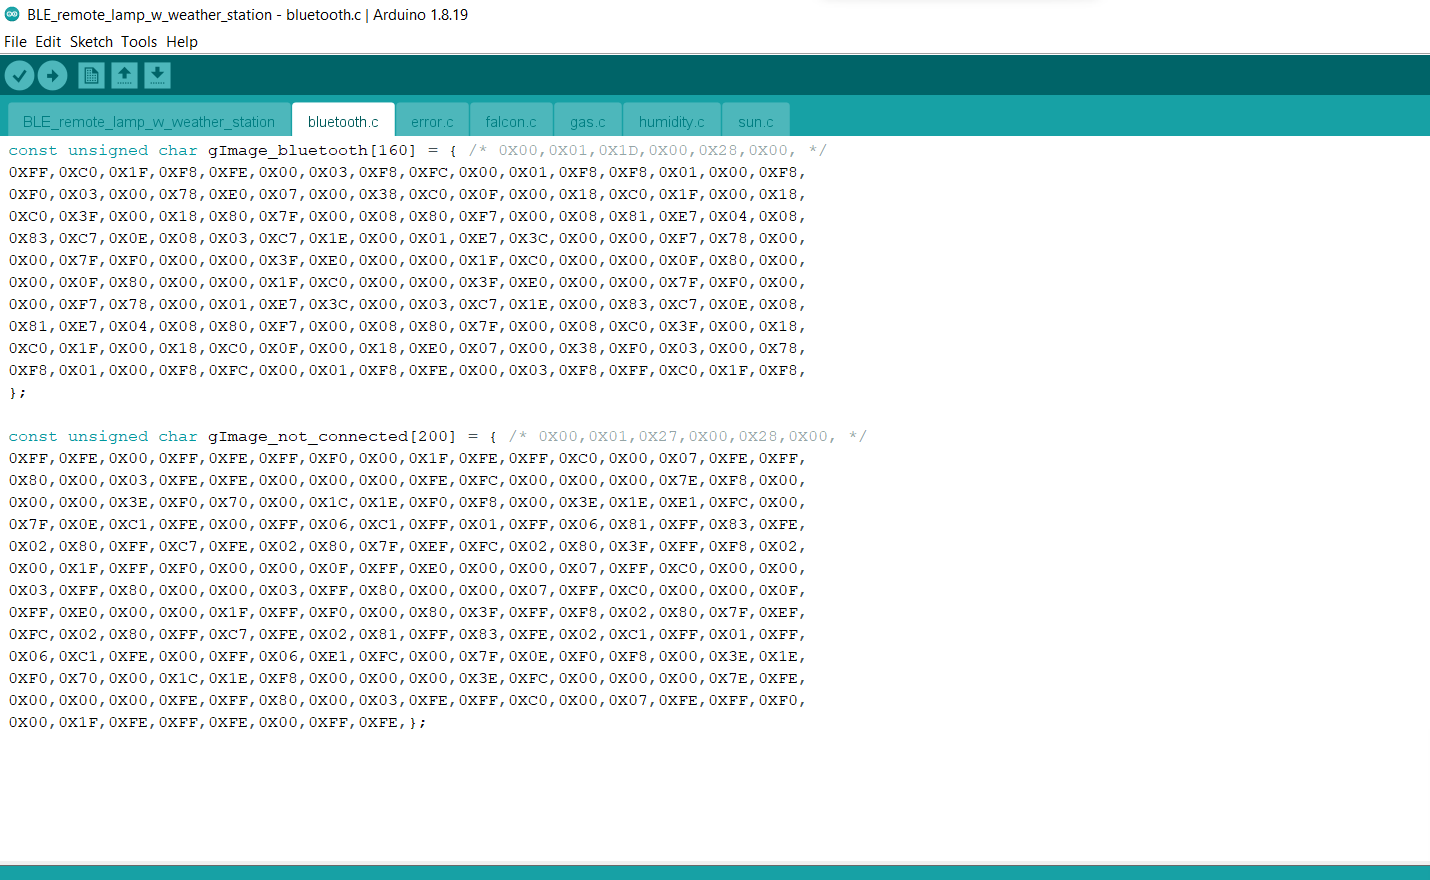
To display images (black and white) on the Waveshare 2.9" e-Paper module successfully, I needed to create monochromatic bitmaps in the supported pixel format from PNG or JPG files and convert those bitmaps to data (.c) arrays.
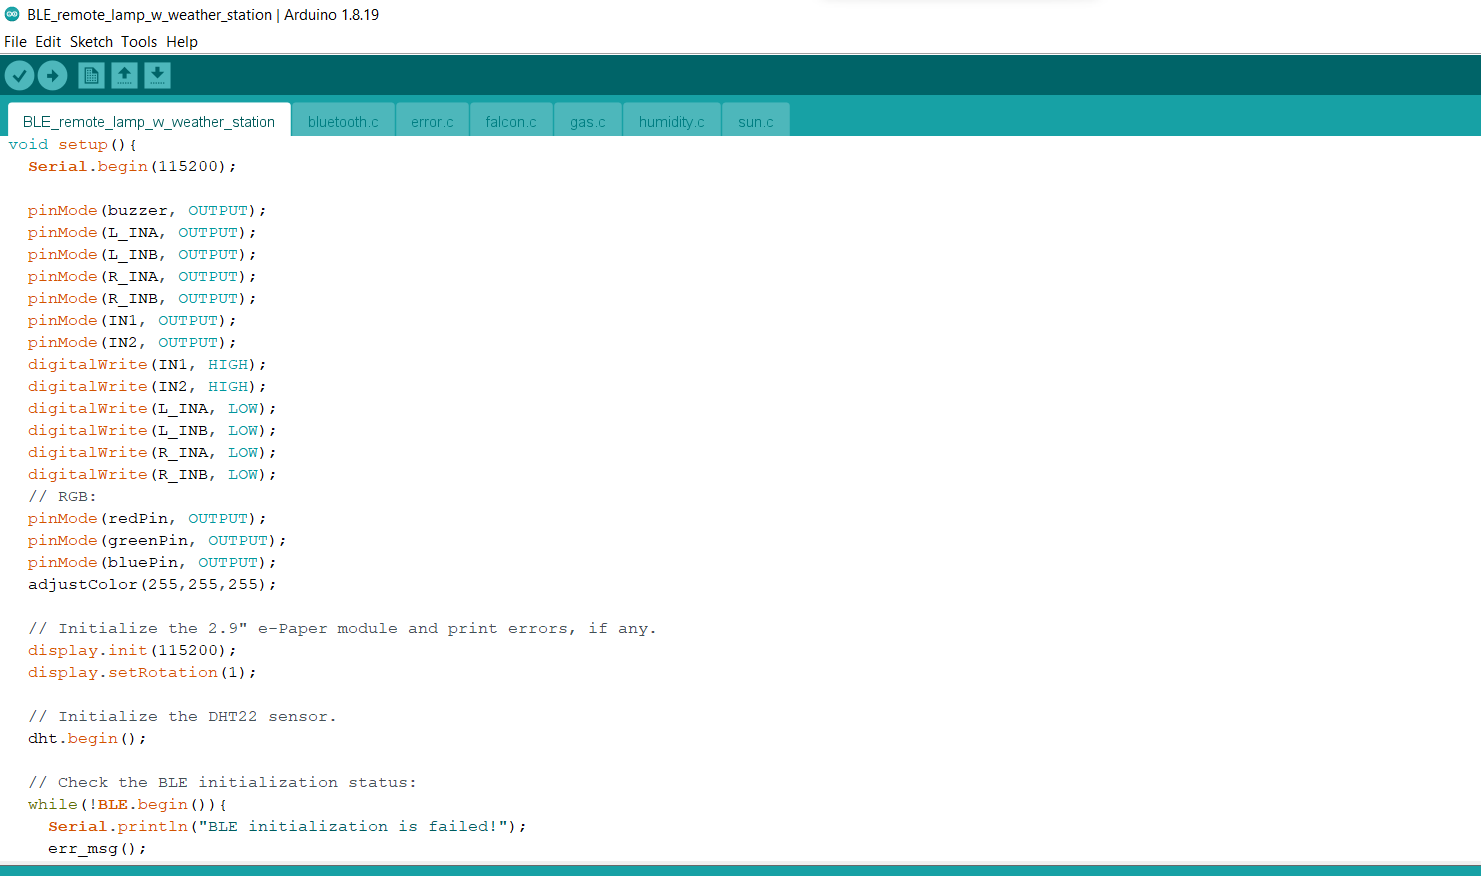
After setting up the Arduino Nano 33 BLE and installing the required libraries, I programmed the Nano 33 BLE to advertise (transmit) the collected weather and gas information as a peripheral device. Also, it can receive the transferred commands from the Android application.
In any Bluetooth® Low Energy (also referred to as Bluetooth® LE or BLE) connection, devices can have one of these two roles: the central and the peripheral. A peripheral device (also called a client) advertises or broadcasts information about itself to devices in its range, while a central device (also called a server) performs scans to listen for devices broadcasting information. You can get more information regarding BLE connections and procedures, such as services and characteristics, from here.
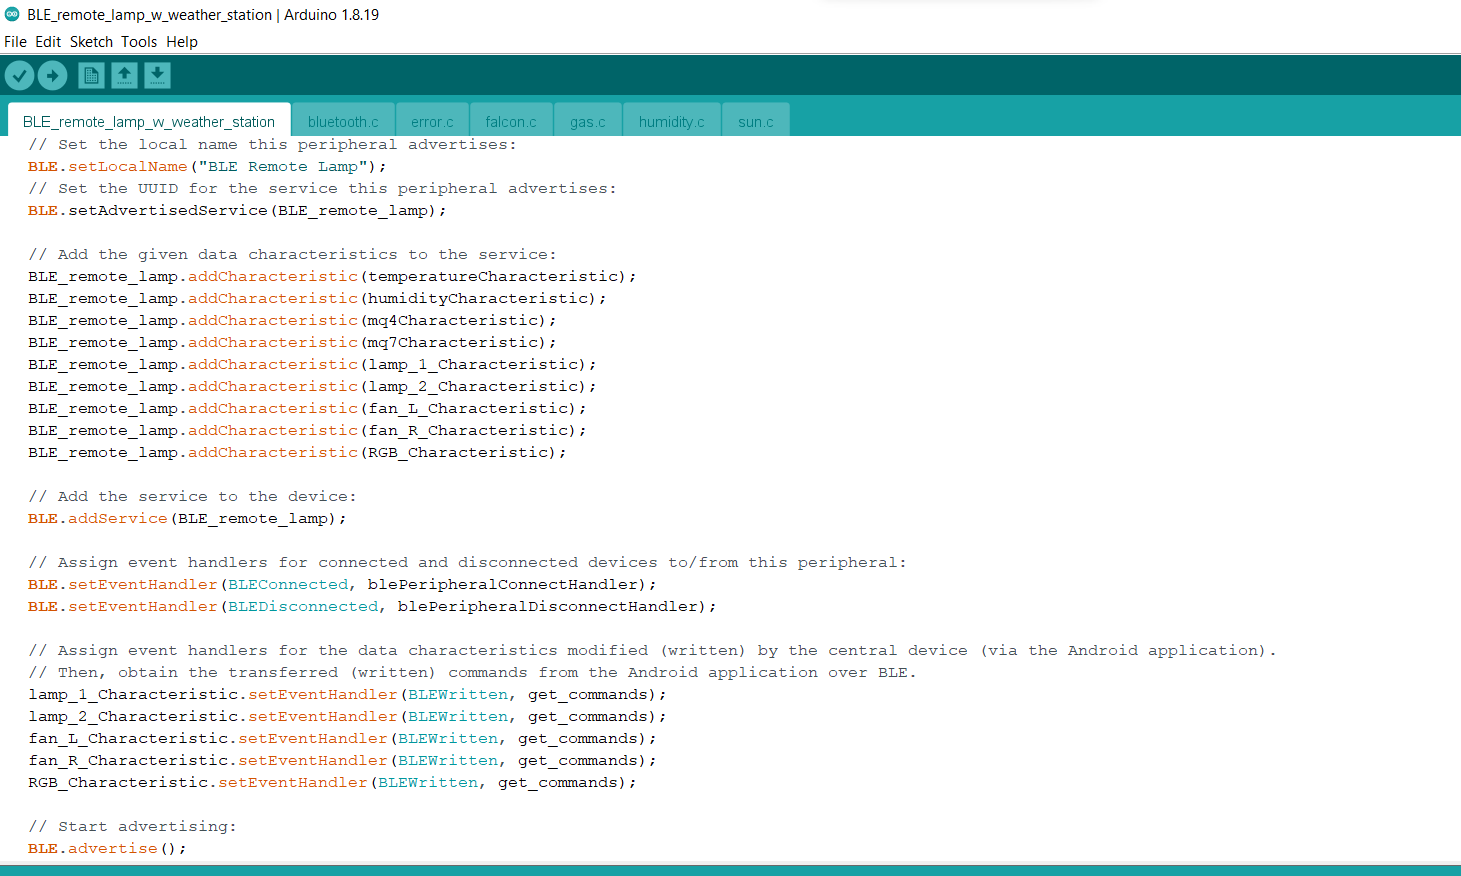
To avoid latency or packet loss while advertising (transmitting) weather and gas information and receiving commands from the Android application over BLE, I utilized individual float data characteristics for the advertised information and byte data characteristics for the received commands.
  BLE.setLocalName("BLE Remote Lamp");
  // Set the UUID for the service this peripheral advertises:
  BLE.setAdvertisedService(BLE_remote_lamp);

  // Add the given data characteristics to the service:
  BLE_remote_lamp.addCharacteristic(temperatureCharacteristic);
  BLE_remote_lamp.addCharacteristic(humidityCharacteristic);
  BLE_remote_lamp.addCharacteristic(mq4Characteristic);
  BLE_remote_lamp.addCharacteristic(mq7Characteristic);
  BLE_remote_lamp.addCharacteristic(lamp_1_Characteristic);
  BLE_remote_lamp.addCharacteristic(lamp_2_Characteristic);
  BLE_remote_lamp.addCharacteristic(fan_L_Characteristic);
  BLE_remote_lamp.addCharacteristic(fan_R_Characteristic);
  BLE_remote_lamp.addCharacteristic(RGB_Characteristic);

  // Add the service to the device:
  BLE.addService(BLE_remote_lamp);

  // Assign event handlers for connected and disconnected devices to/from this peripheral:
  BLE.setEventHandler(BLEConnected, blePeripheralConnectHandler);
  BLE.setEventHandler(BLEDisconnected, blePeripheralDisconnectHandler);

  // Assign event handlers for the data characteristics modified (written) by the central device (via the Android application).
  // Then, obtain the transferred (written) commands from the Android application over BLE.
  lamp_1_Characteristic.setEventHandler(BLEWritten, get_commands);
  lamp_2_Characteristic.setEventHandler(BLEWritten, get_commands);
  fan_L_Characteristic.setEventHandler(BLEWritten, get_commands);
  fan_R_Characteristic.setEventHandler(BLEWritten, get_commands);
  RGB_Characteristic.setEventHandler(BLEWritten, get_commands);

  // Start advertising:
  BLE.advertise();
  Serial.println(("Bluetooth device active, waiting for connections..."));
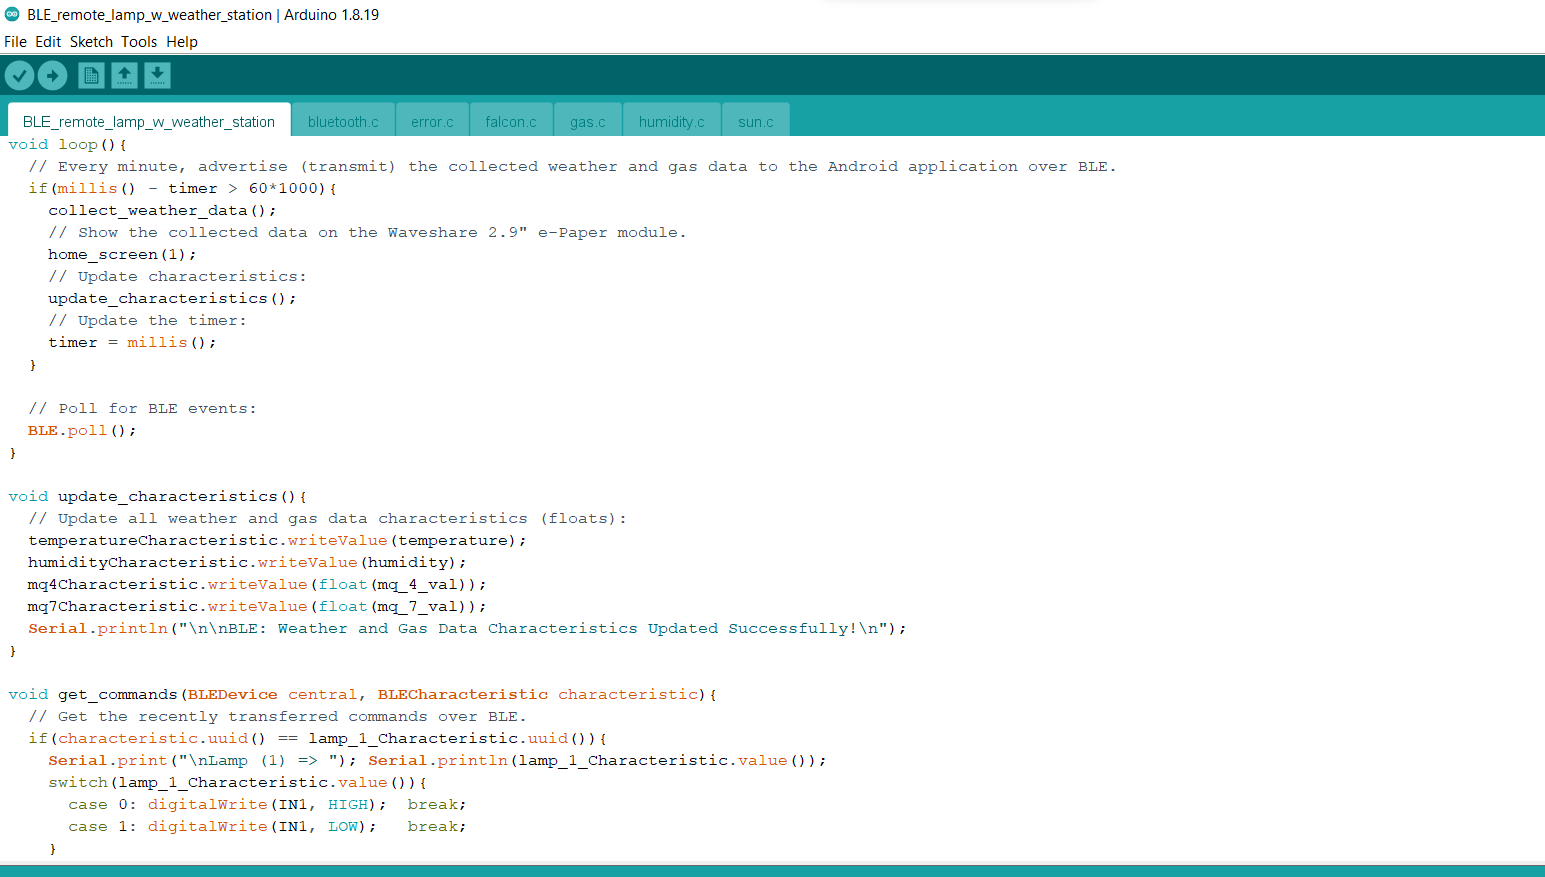
⭐ In the get_commands function:
⭐ When being activated, obtain the recently transferred (written) command from the Android application over BLE.
⭐ Depending on the received command, adjust the lighting system features.
void get_commands(BLEDevice central, BLECharacteristic characteristic){
// Get the recently transferred commands over BLE.
if(characteristic.uuid() == lamp_1_Characteristic.uuid()){
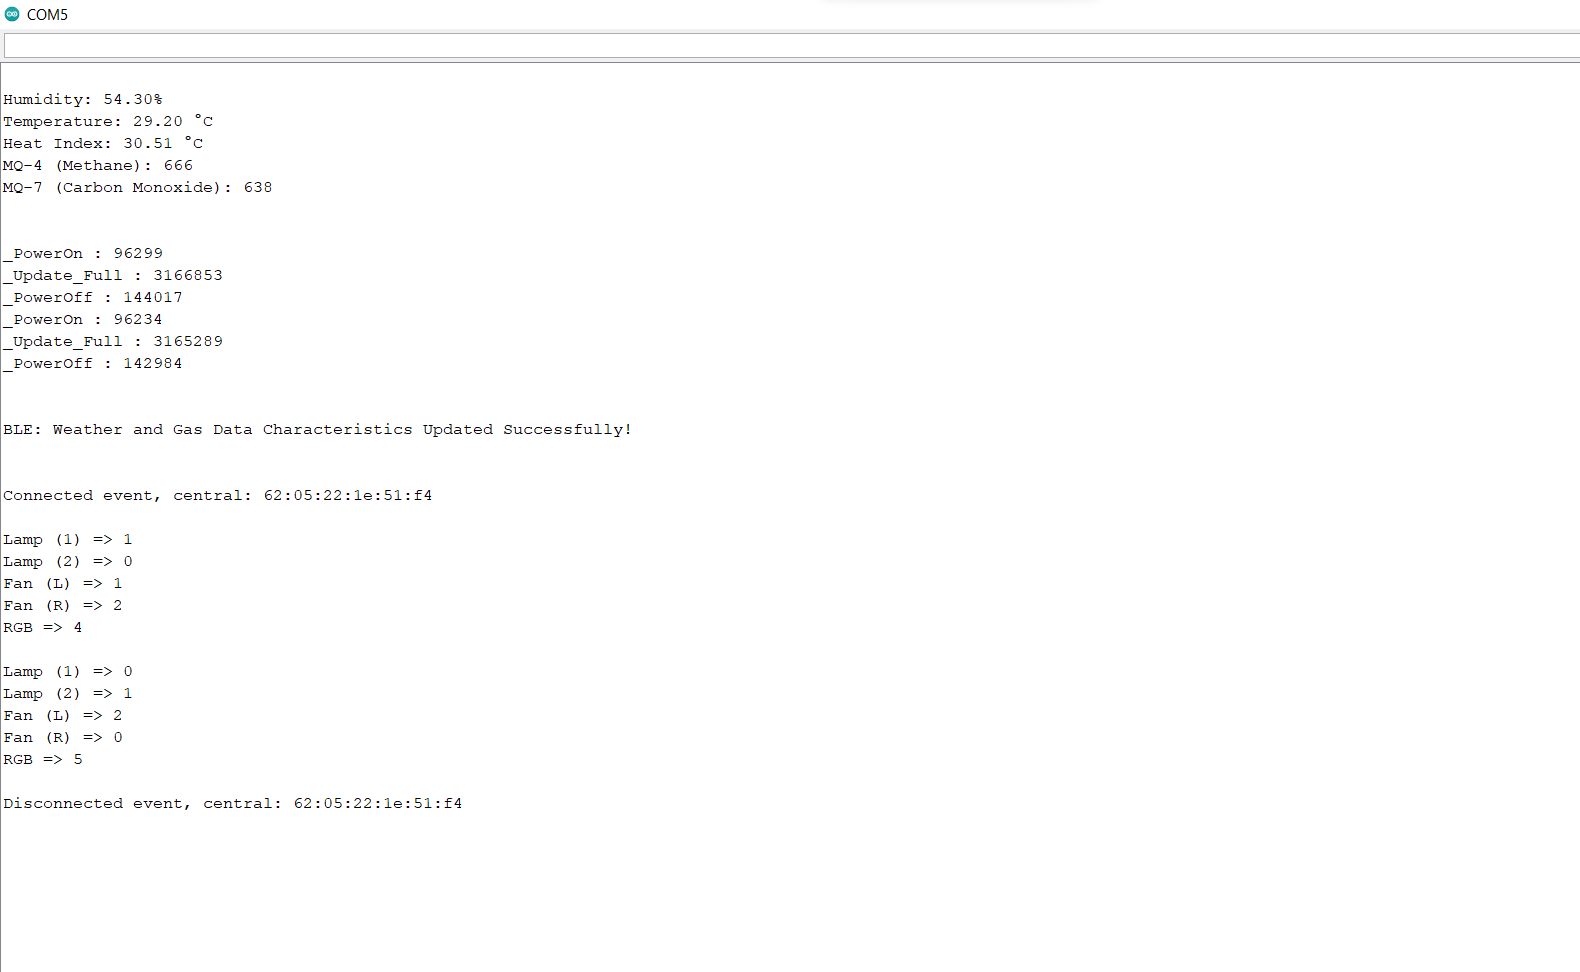
Serial.print("\nLamp (1) => "); Serial.println(lamp_1_Characteristic.value());
switch(lamp_1_Characteristic.value()){
case 0: digitalWrite(IN1, HIGH); break;
case 1: digitalWrite(IN1, LOW); break;
}
}
if(characteristic.uuid() == lamp_2_Characteristic.uuid()){
Serial.print("Lamp (2) => "); Serial.println(lamp_2_Characteristic.value());
switch(lamp_2_Characteristic.value()){
case 0: digitalWrite(IN2, HIGH); break;
case 1: digitalWrite(IN2, LOW); break;
}
}
if(characteristic.uuid() == fan_L_Characteristic.uuid()){
Serial.print("Fan (L) => "); Serial.println(fan_L_Characteristic.value());
switch(fan_L_Characteristic.value()){
case 0: digitalWrite(L_INA, LOW); digitalWrite(L_INB, LOW); break;
case 1: digitalWrite(L_INA, HIGH); digitalWrite(L_INB, LOW); break;
case 2: digitalWrite(L_INA, LOW); digitalWrite(L_INB, HIGH); break;
}
}
if(characteristic.uuid() == fan_R_Characteristic.uuid()){
Serial.print("Fan (R) => "); Serial.println(fan_R_Characteristic.value());
switch(fan_R_Characteristic.value()){
case 0: digitalWrite(R_INA, LOW); digitalWrite(R_INB, LOW); break;
case 1: digitalWrite(R_INA, HIGH); digitalWrite(R_INB, LOW); break;
case 2: digitalWrite(R_INA, LOW); digitalWrite(R_INB, HIGH); break;
}
}
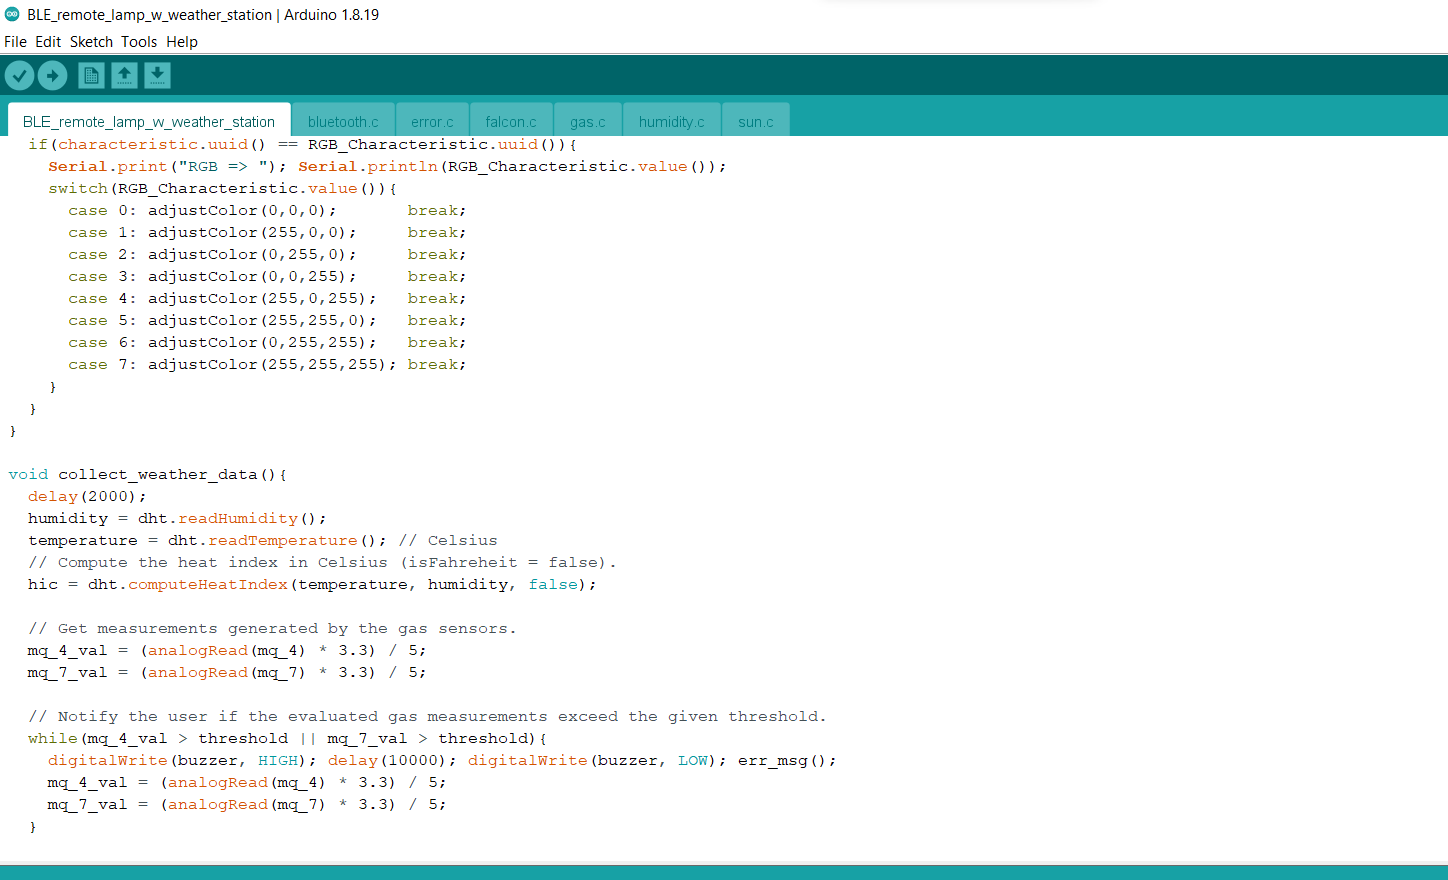
if(characteristic.uuid() == RGB_Characteristic.uuid()){
Serial.print("RGB => "); Serial.println(RGB_Characteristic.value());
switch(RGB_Characteristic.value()){
case 0: adjustColor(0,0,0); break;
case 1: adjustColor(255,0,0); break;
case 2: adjustColor(0,255,0); break;
case 3: adjustColor(0,0,255); break;
case 4: adjustColor(255,0,255); break;
case 5: adjustColor(255,255,0); break;
case 6: adjustColor(0,255,255); break;
case 7: adjustColor(255,255,255); break;
}
}
}
⭐ In the collect_weather_data function:
⭐ Obtain temperature and humidity measurements generated by the DHT22 sensor.
⭐ Get measurements generated by the MQ-4 and MQ-7 air quality sensors.
⭐ Notify the user if the evaluated gas measurements exceed the given threshold.
void collect_weather_data(){
  delay(2000);
  humidity = dht.readHumidity();
  temperature = dht.readTemperature(); // Celsius
  // Compute the heat index in Celsius (isFahreheit = false).
  hic = dht.computeHeatIndex(temperature, humidity, false);

  // Get measurements generated by the gas sensors.
  mq_4_val = (analogRead(mq_4) * 3.3) / 5;
  mq_7_val = (analogRead(mq_7) * 3.3) / 5;

  // Notify the user if the evaluated gas measurements exceed the given threshold.
  while(mq_4_val > threshold || mq_7_val > threshold){
    digitalWrite(buzzer, HIGH); delay(10000); digitalWrite(buzzer, LOW); err_msg();
    mq_4_val = (analogRead(mq_4) * 3.3) / 5;
    mq_7_val = (analogRead(mq_7) * 3.3) / 5;
  }

  Serial.print(F("\nHumidity: ")); Serial.print(humidity); Serial.println("%");
  Serial.print(F("Temperature: ")); Serial.print(temperature); Serial.println(" °C");
  Serial.print("Heat Index: "); Serial.print(hic); Serial.println(" °C");
  Serial.print("MQ-4 (Methane): "); Serial.println(mq_4_val);
  Serial.print("MQ-7 (Carbon Monoxide): "); Serial.println(mq_7_val);
  Serial.println("\n");
}
⭐ In the update_characteristics function, update all float data characteristics to transmit (advertise) the collected weather and gas information over BLE.
void update_characteristics(){
  // Update all weather and gas data characteristics (floats):
  temperatureCharacteristic.writeValue(temperature);
  humidityCharacteristic.writeValue(humidity);
  mq4Characteristic.writeValue(float(mq_4_val));
  mq7Characteristic.writeValue(float(mq_7_val));
  Serial.println("\n\nBLE: Weather and Gas Data Characteristics Updated Successfully!\n");
}
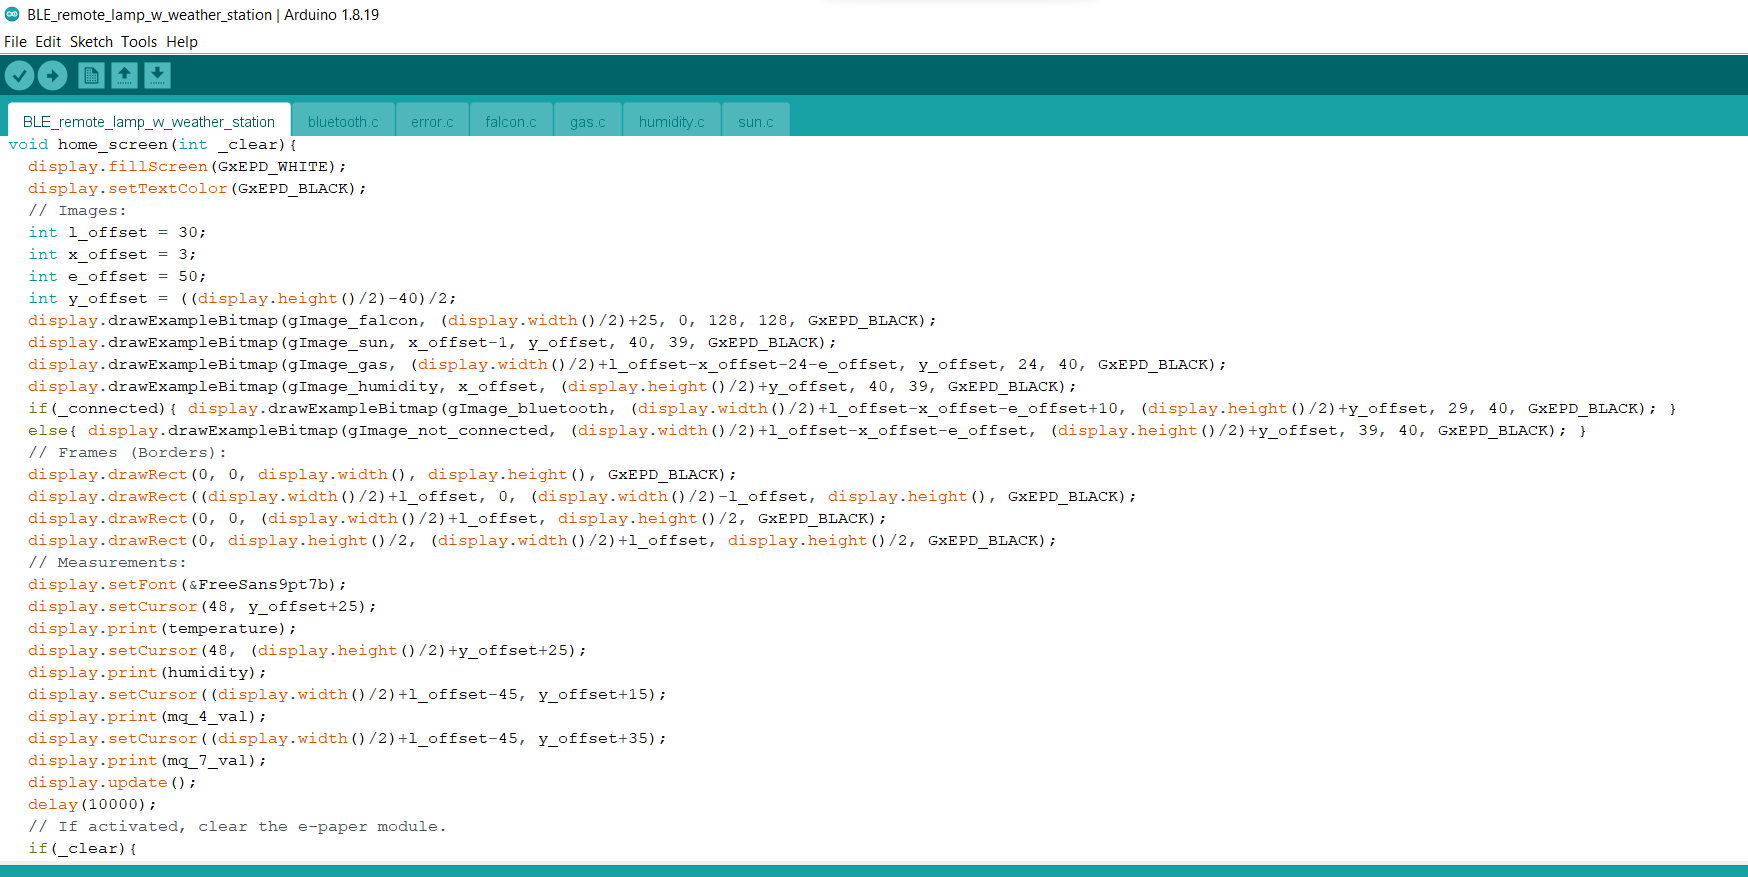
⭐ In the home_screen function:
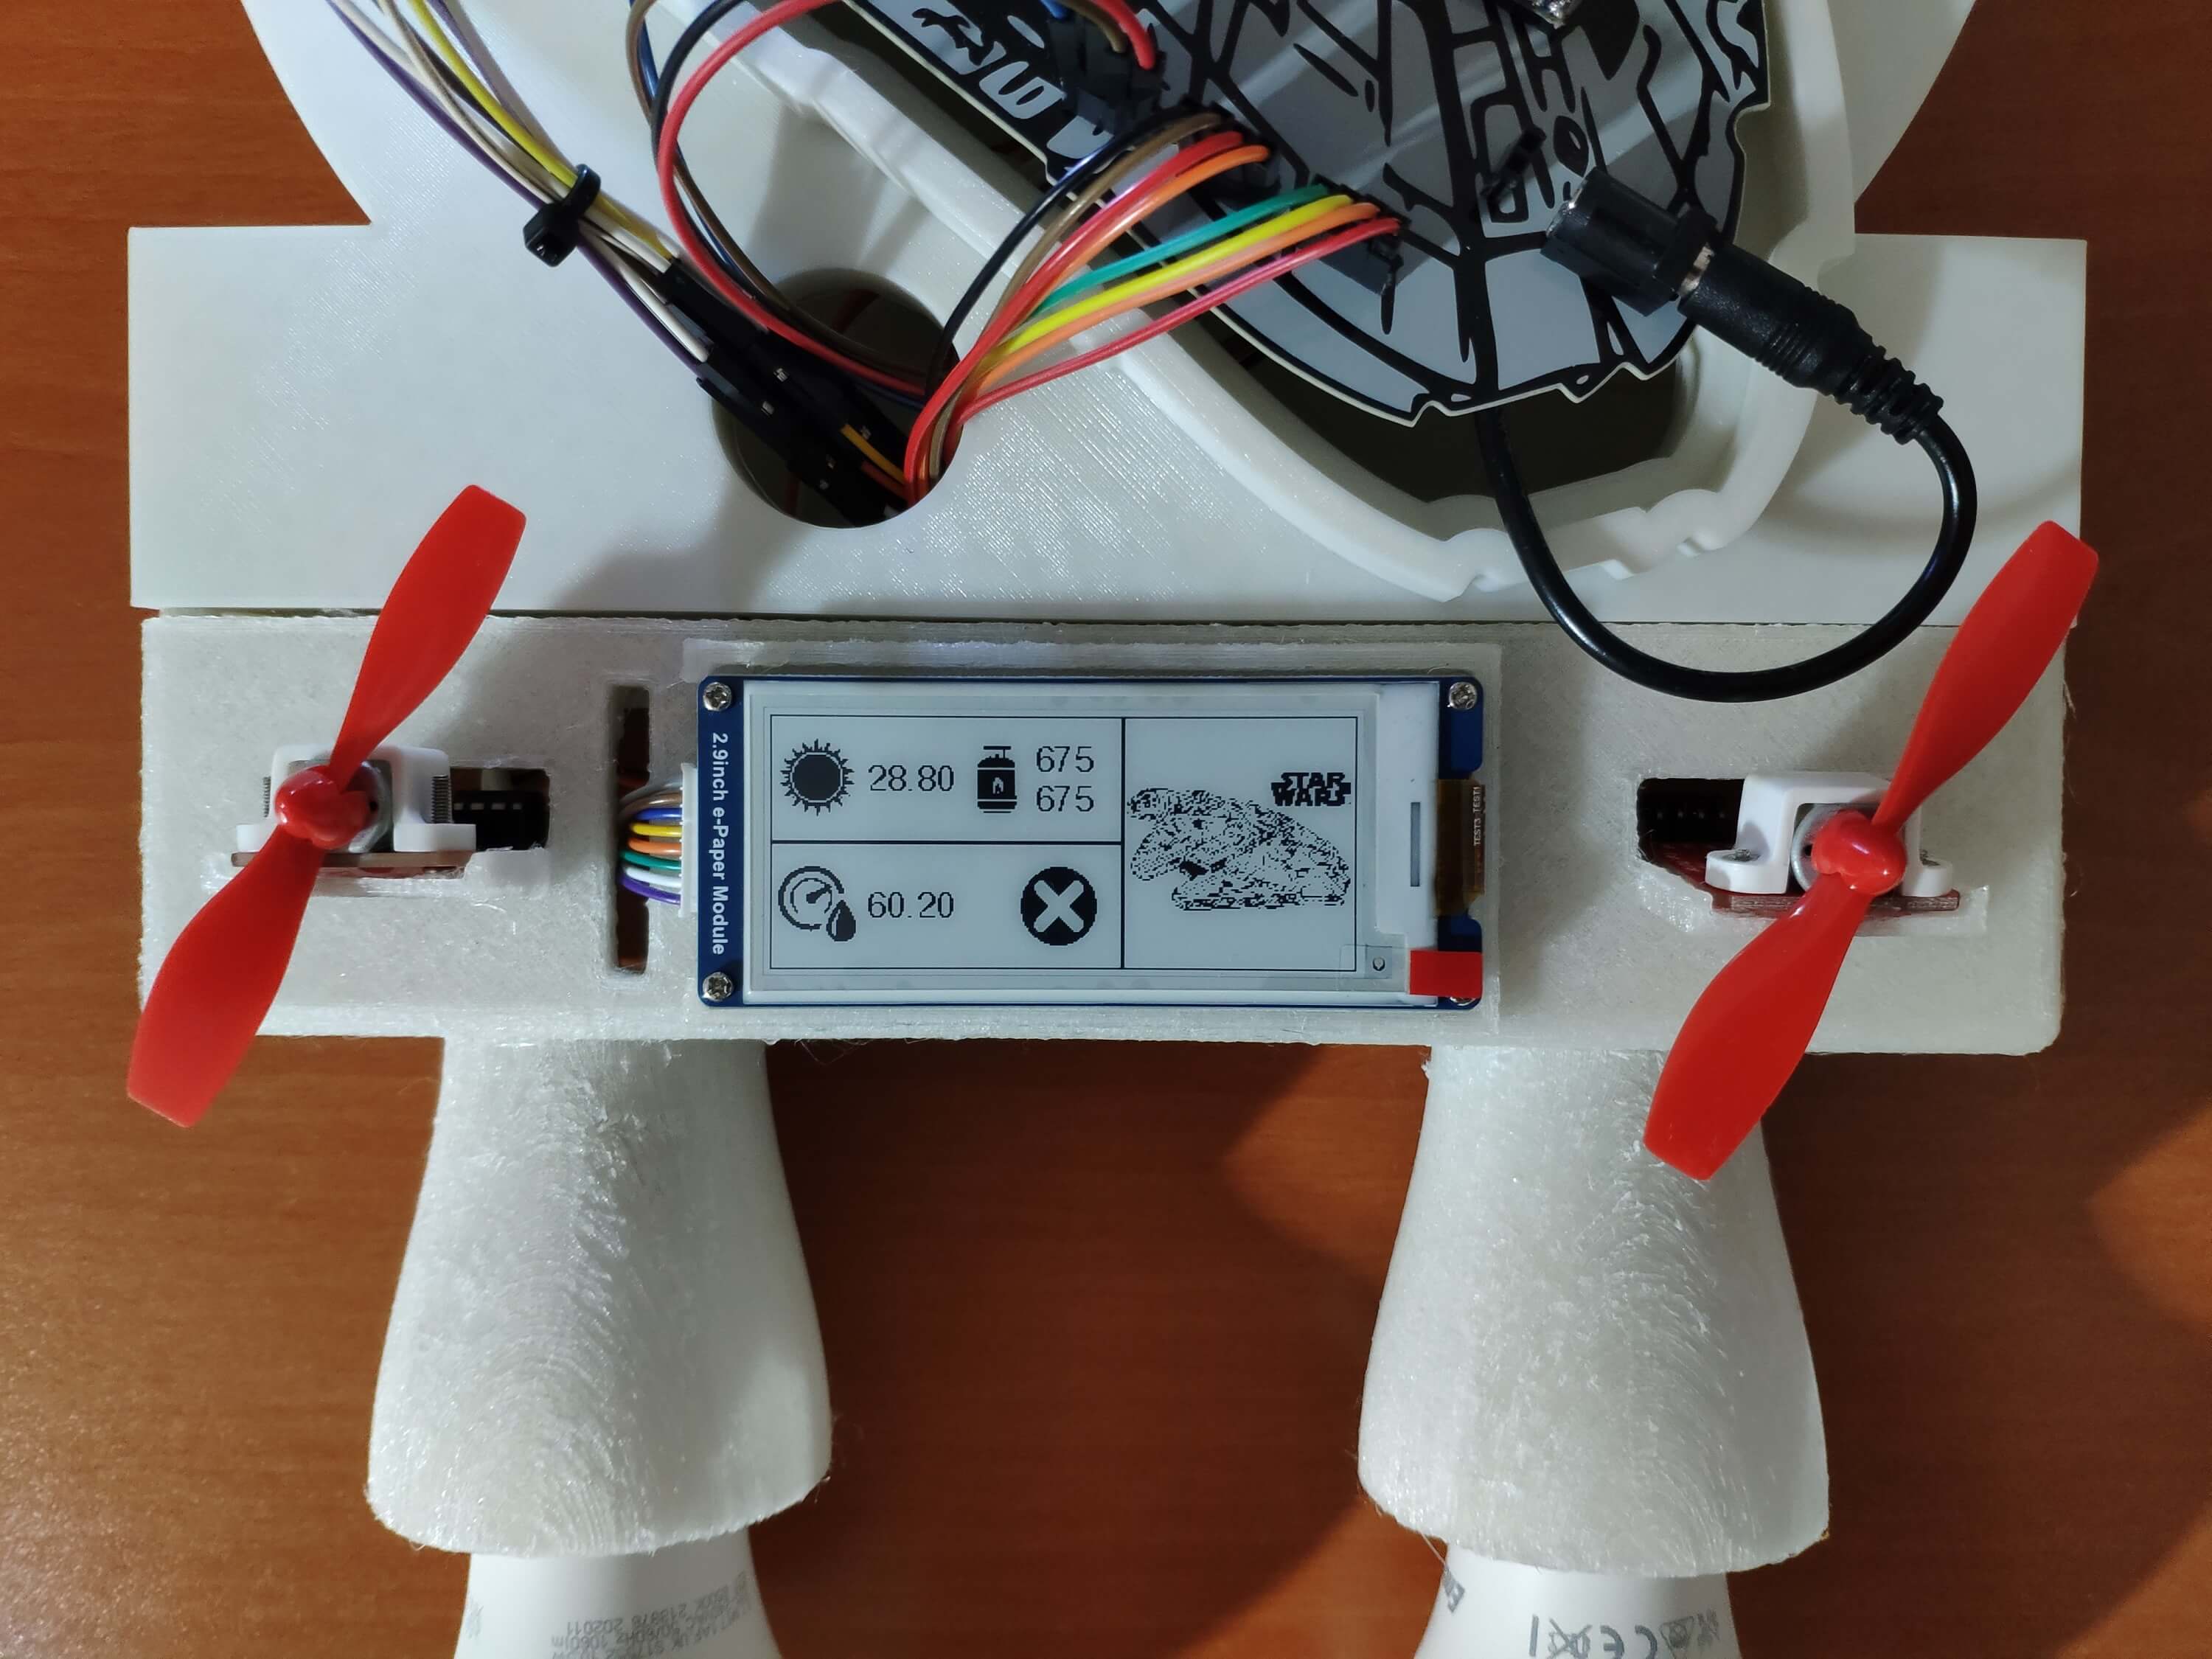
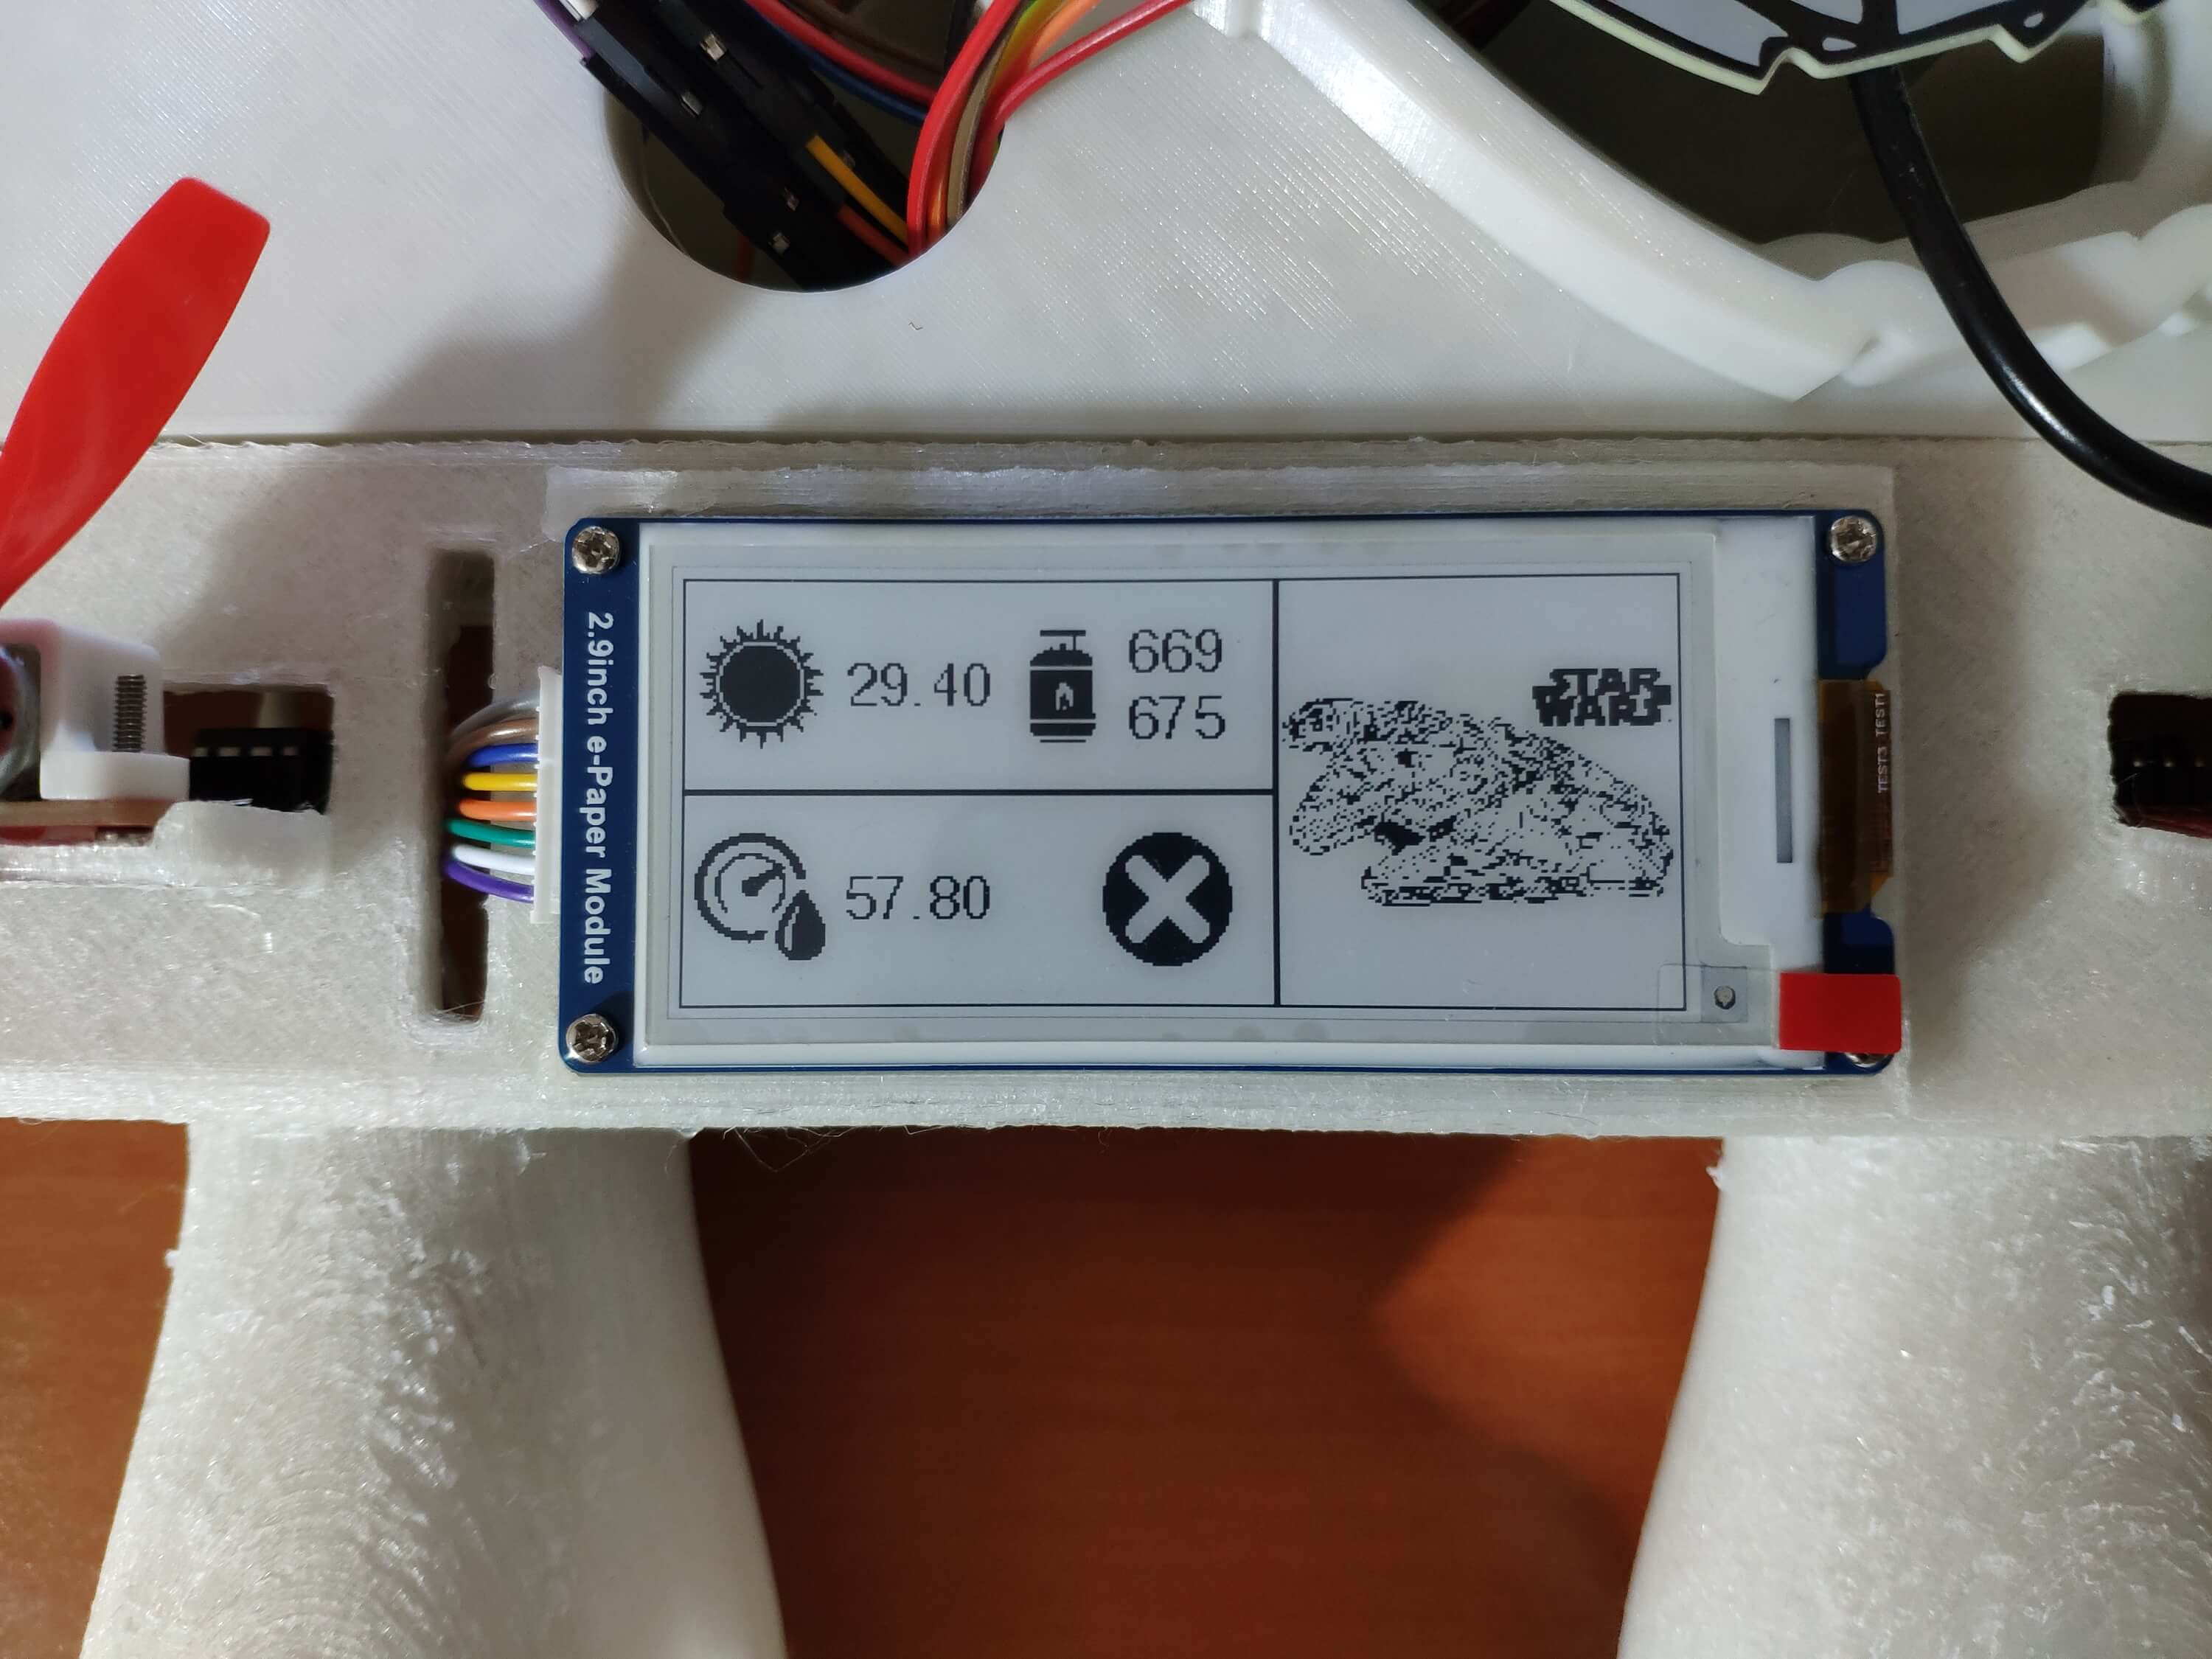
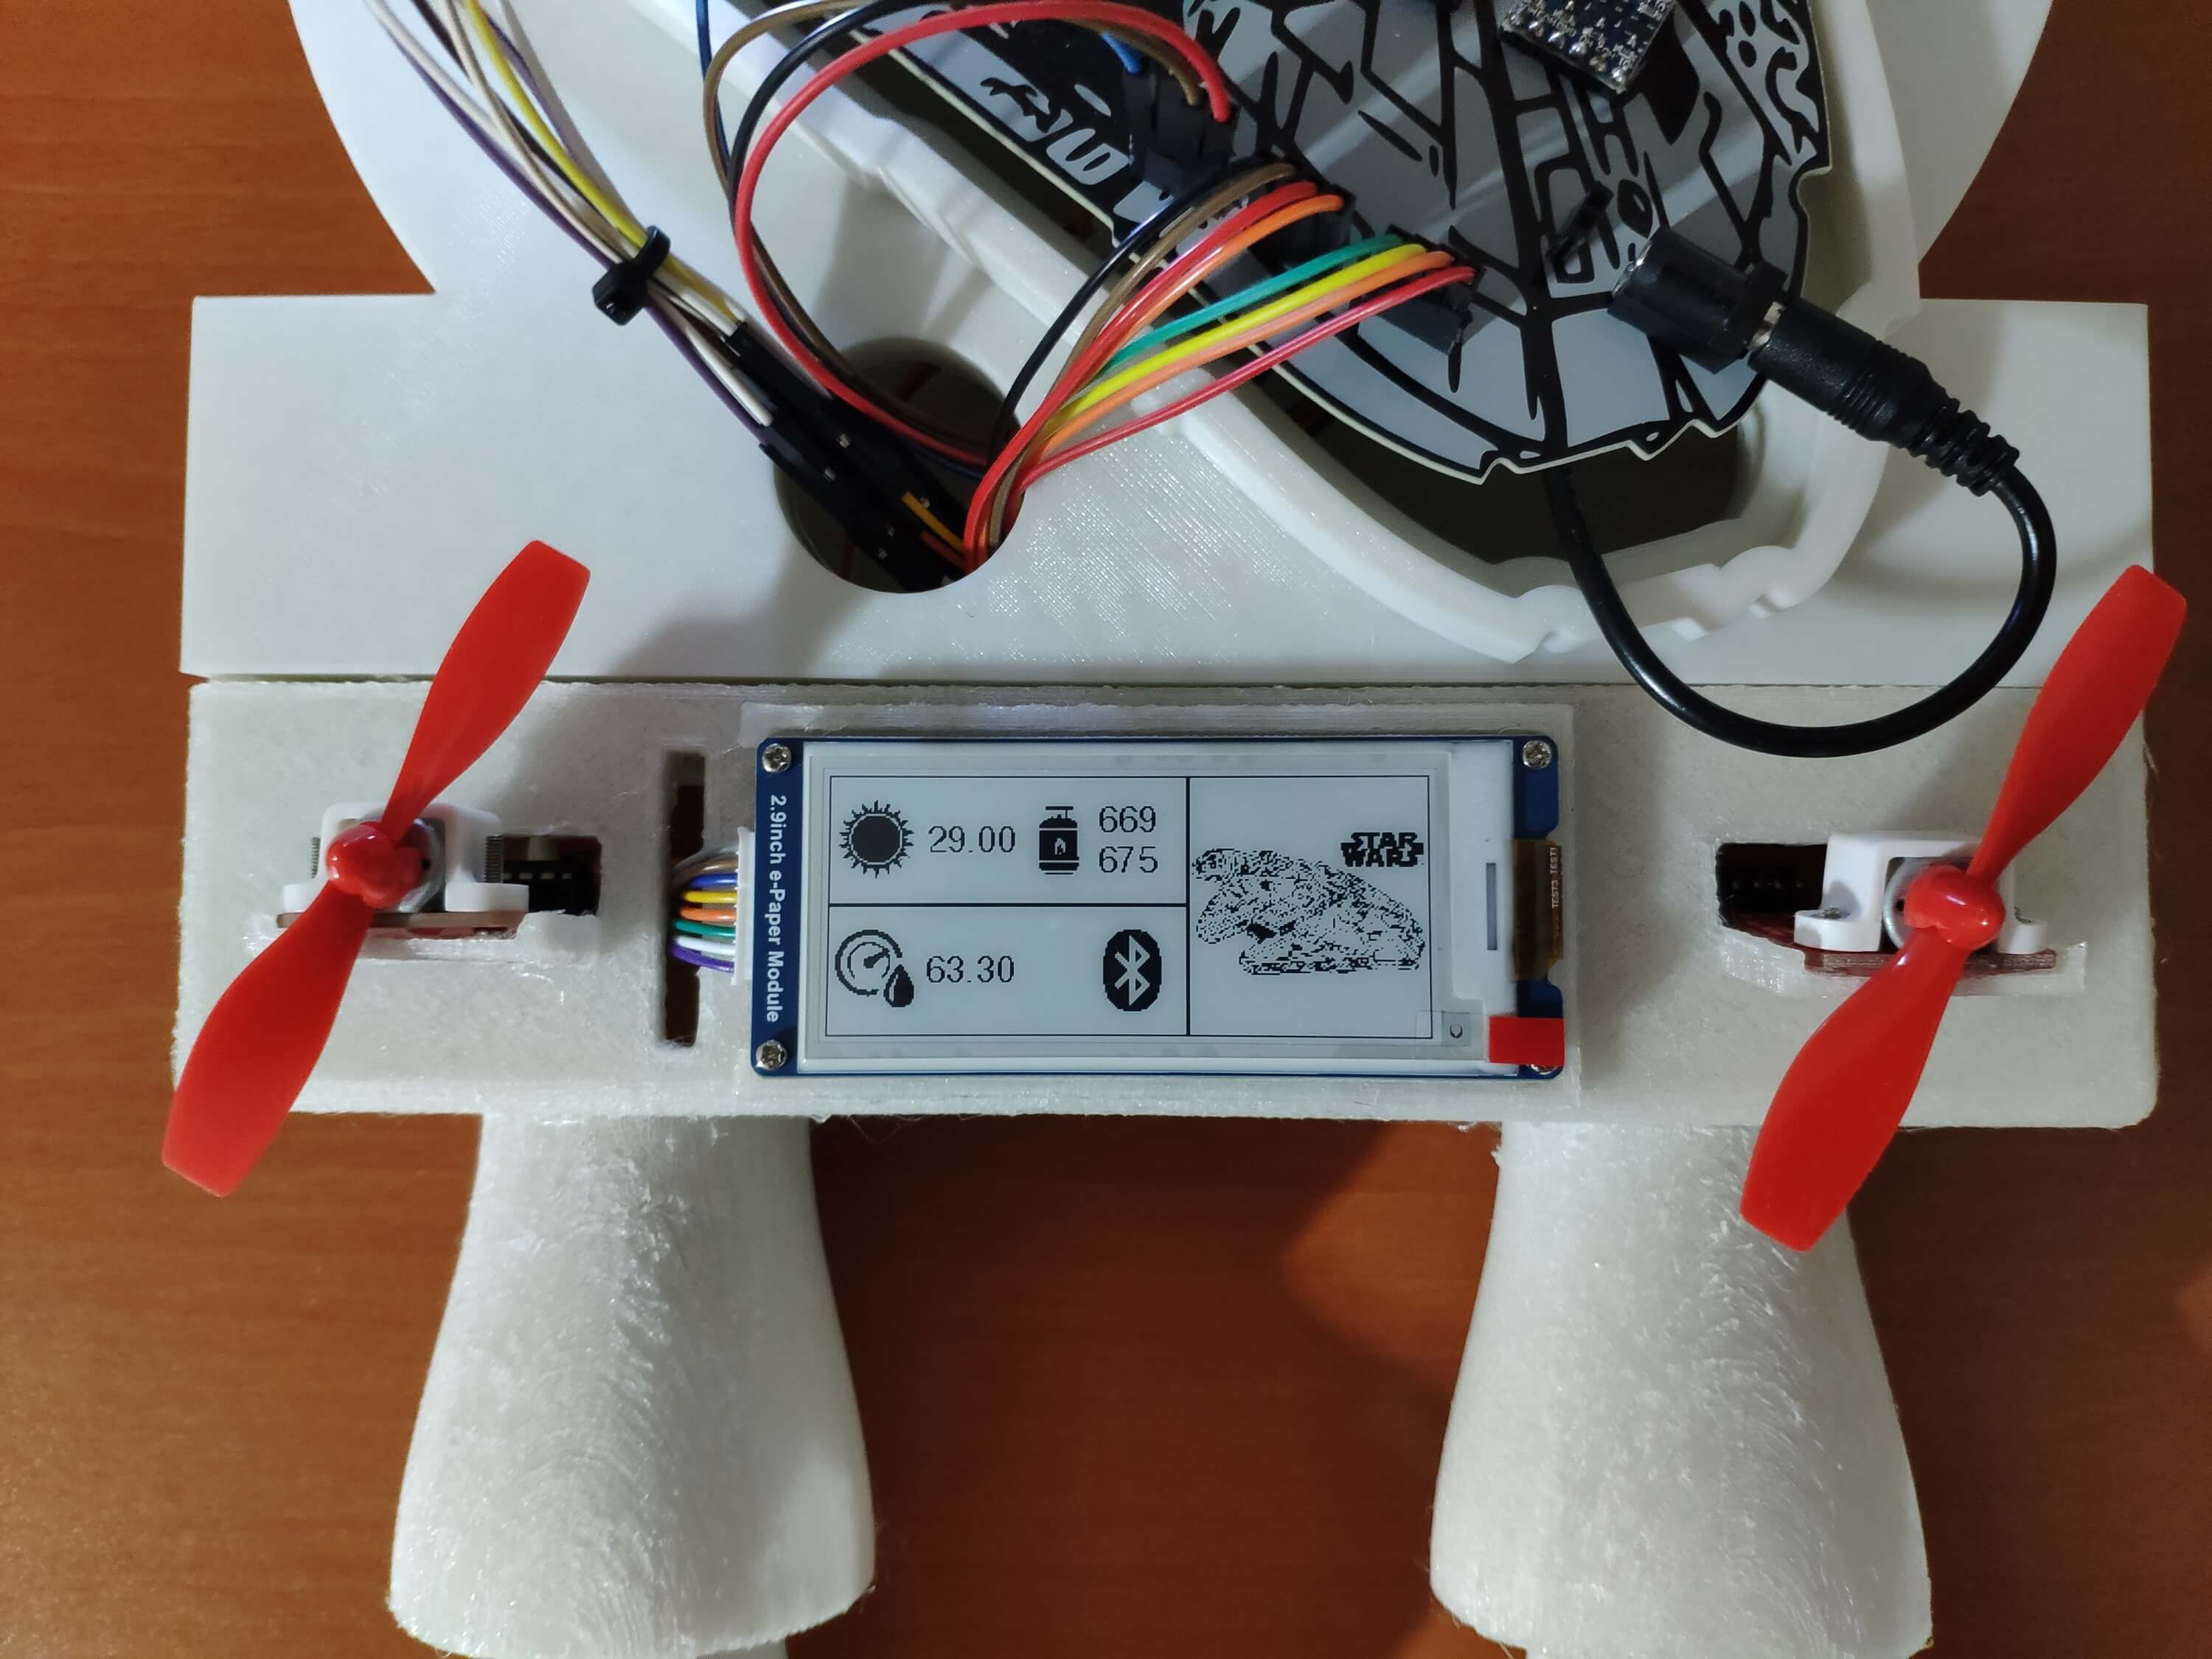
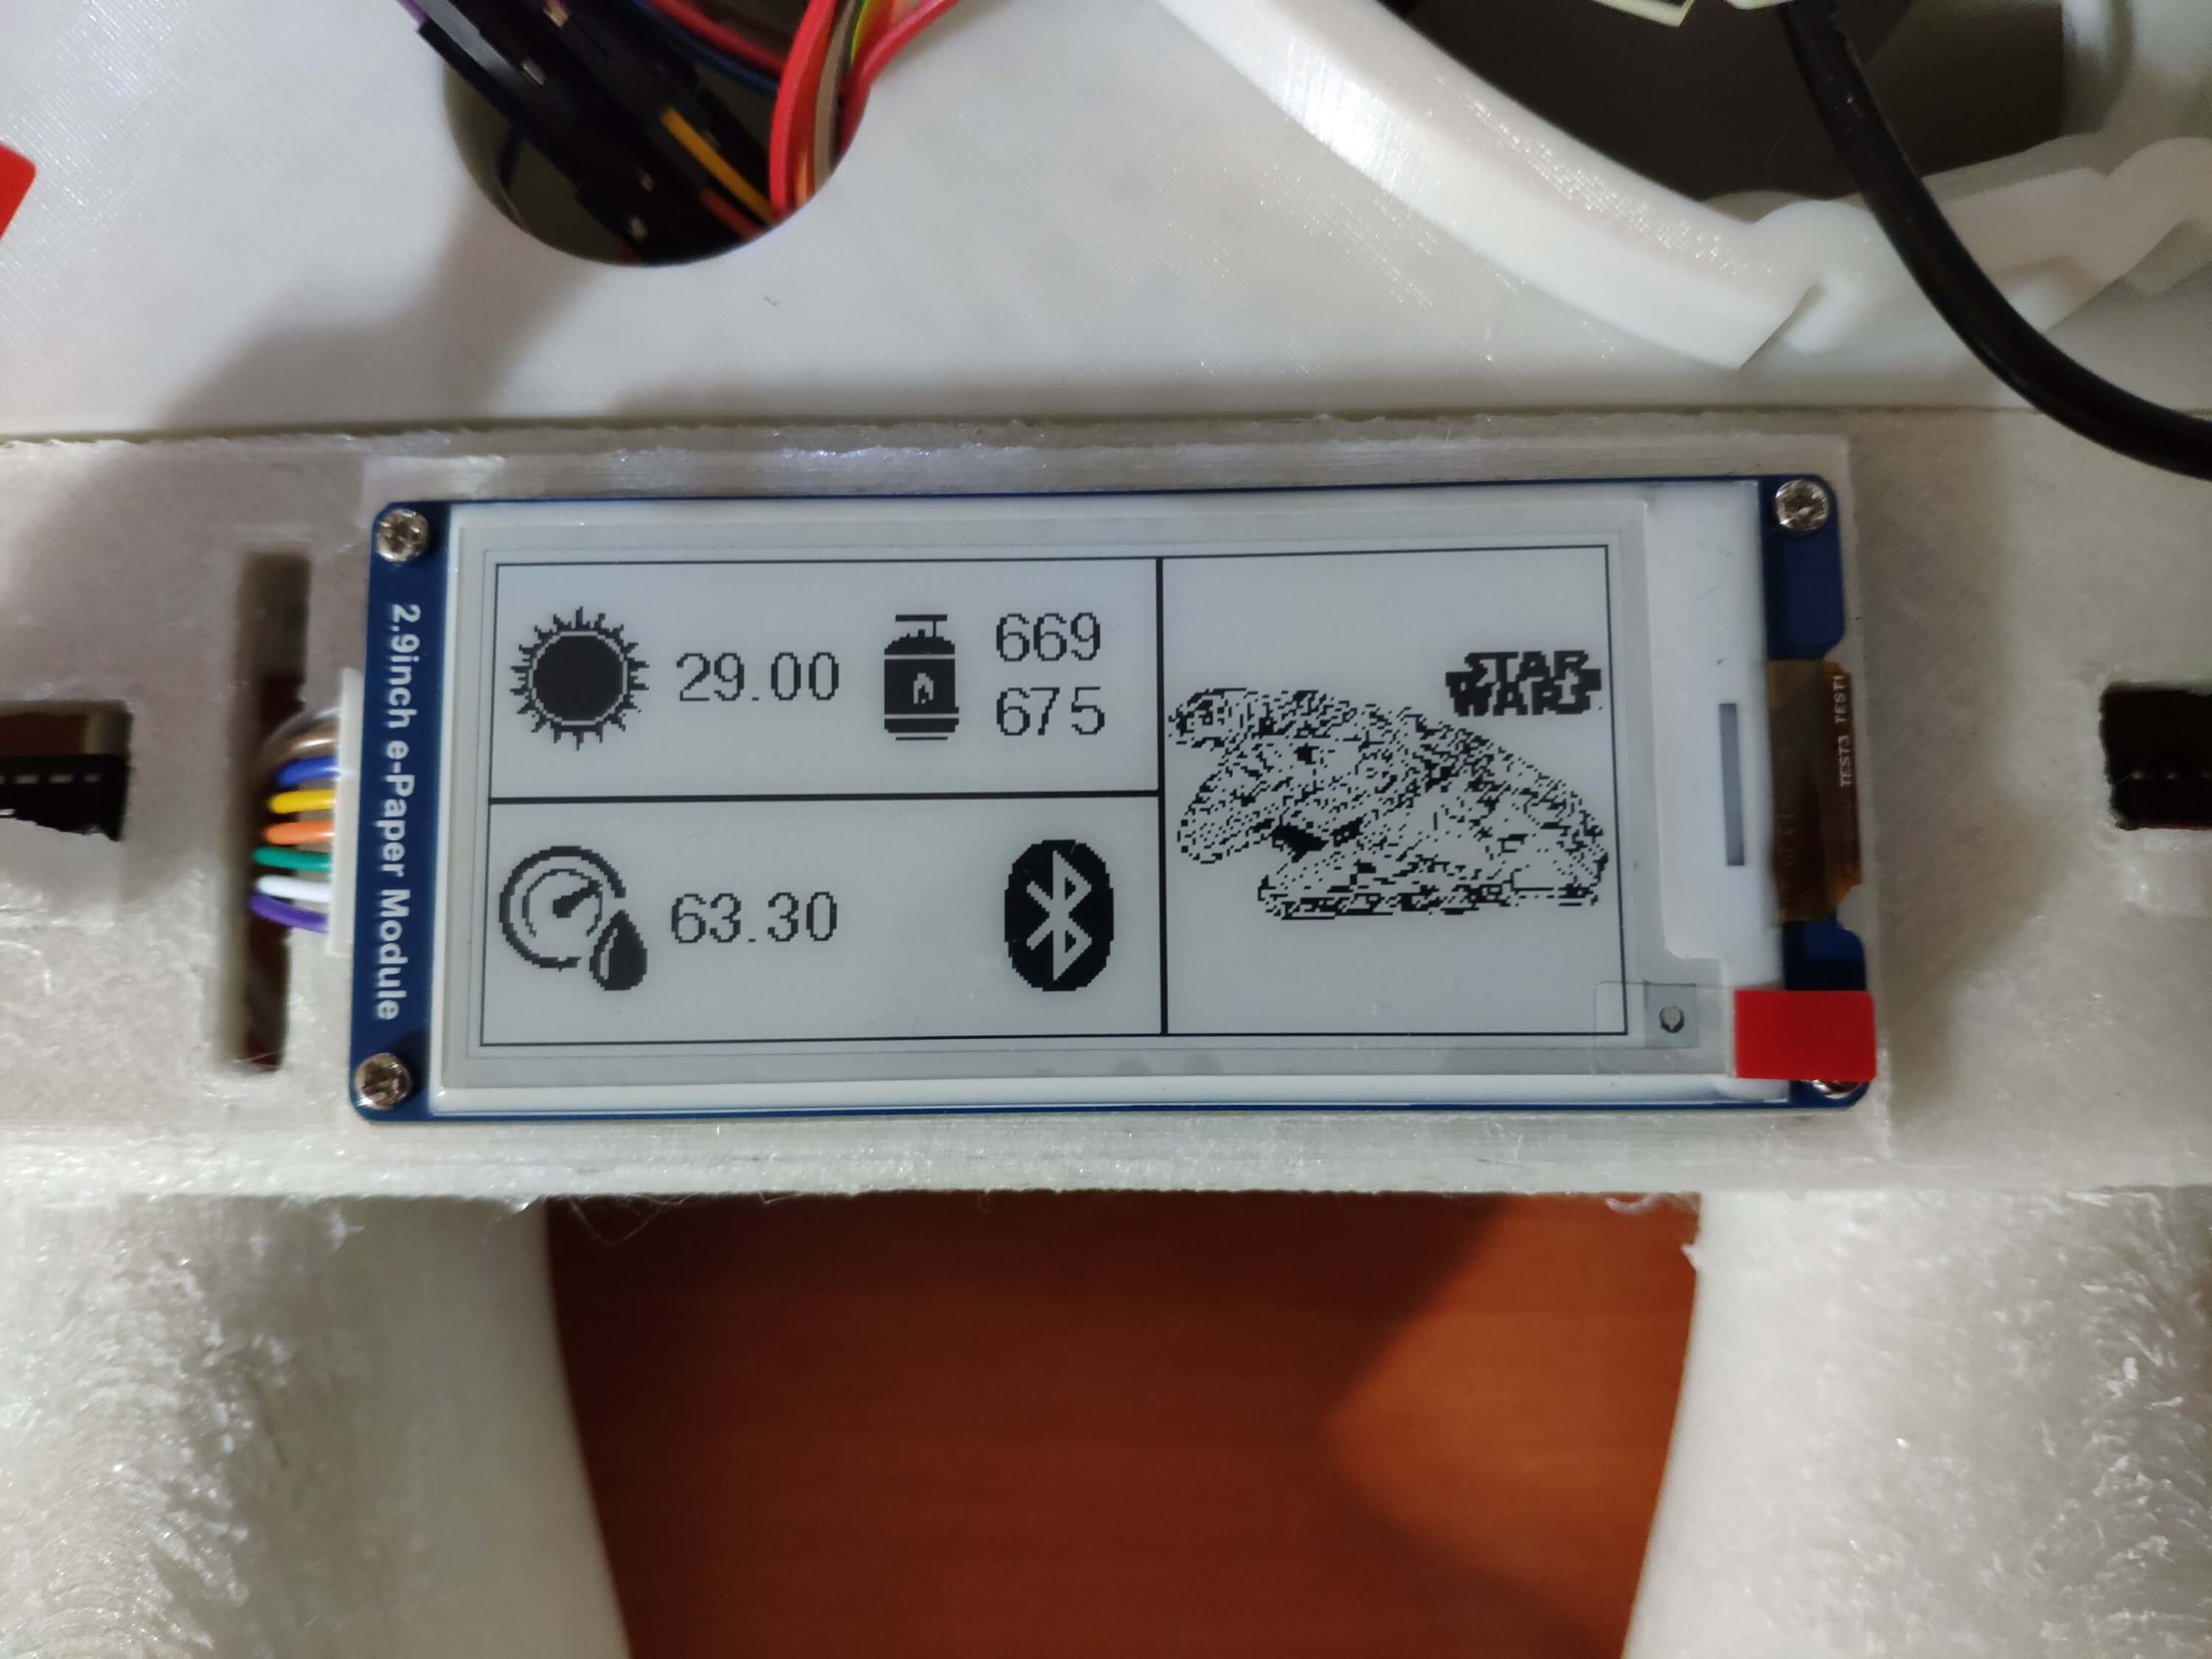
⭐ Define frames (borders) and display the recently collected weather and gas data on the 2.9" e-Paper module with complementing icons.
⭐ Also, change the BLE connection status icon when the Nano 33 BLE is connected or disconnected to/from the central device via the Android application.
⭐ If activated, fill the e-Paper module white after each update.
⭐ Every minute, advertise (transmit) the recently collected weather and gas information to the Android application over BLE.
⭐ After updating data characteristics, display the collected data and the BLE connection status (connected or disconnected) on the 2.9" e-Paper module.
⭐ Finally, update the timer.
  if(millis() - timer > 60*1000){
    collect_weather_data();
    // Show the collected data on the Waveshare 2.9" e-Paper module.
    home_screen(1);
    // Update characteristics:
    update_characteristics();
    // Update the timer:
    timer = millis();
  }
Figure - 81.69
Figure - 81.70
Figure - 81.71
Figure - 81.72
Figure - 81.73
Figure - 81.74
Modes and Features
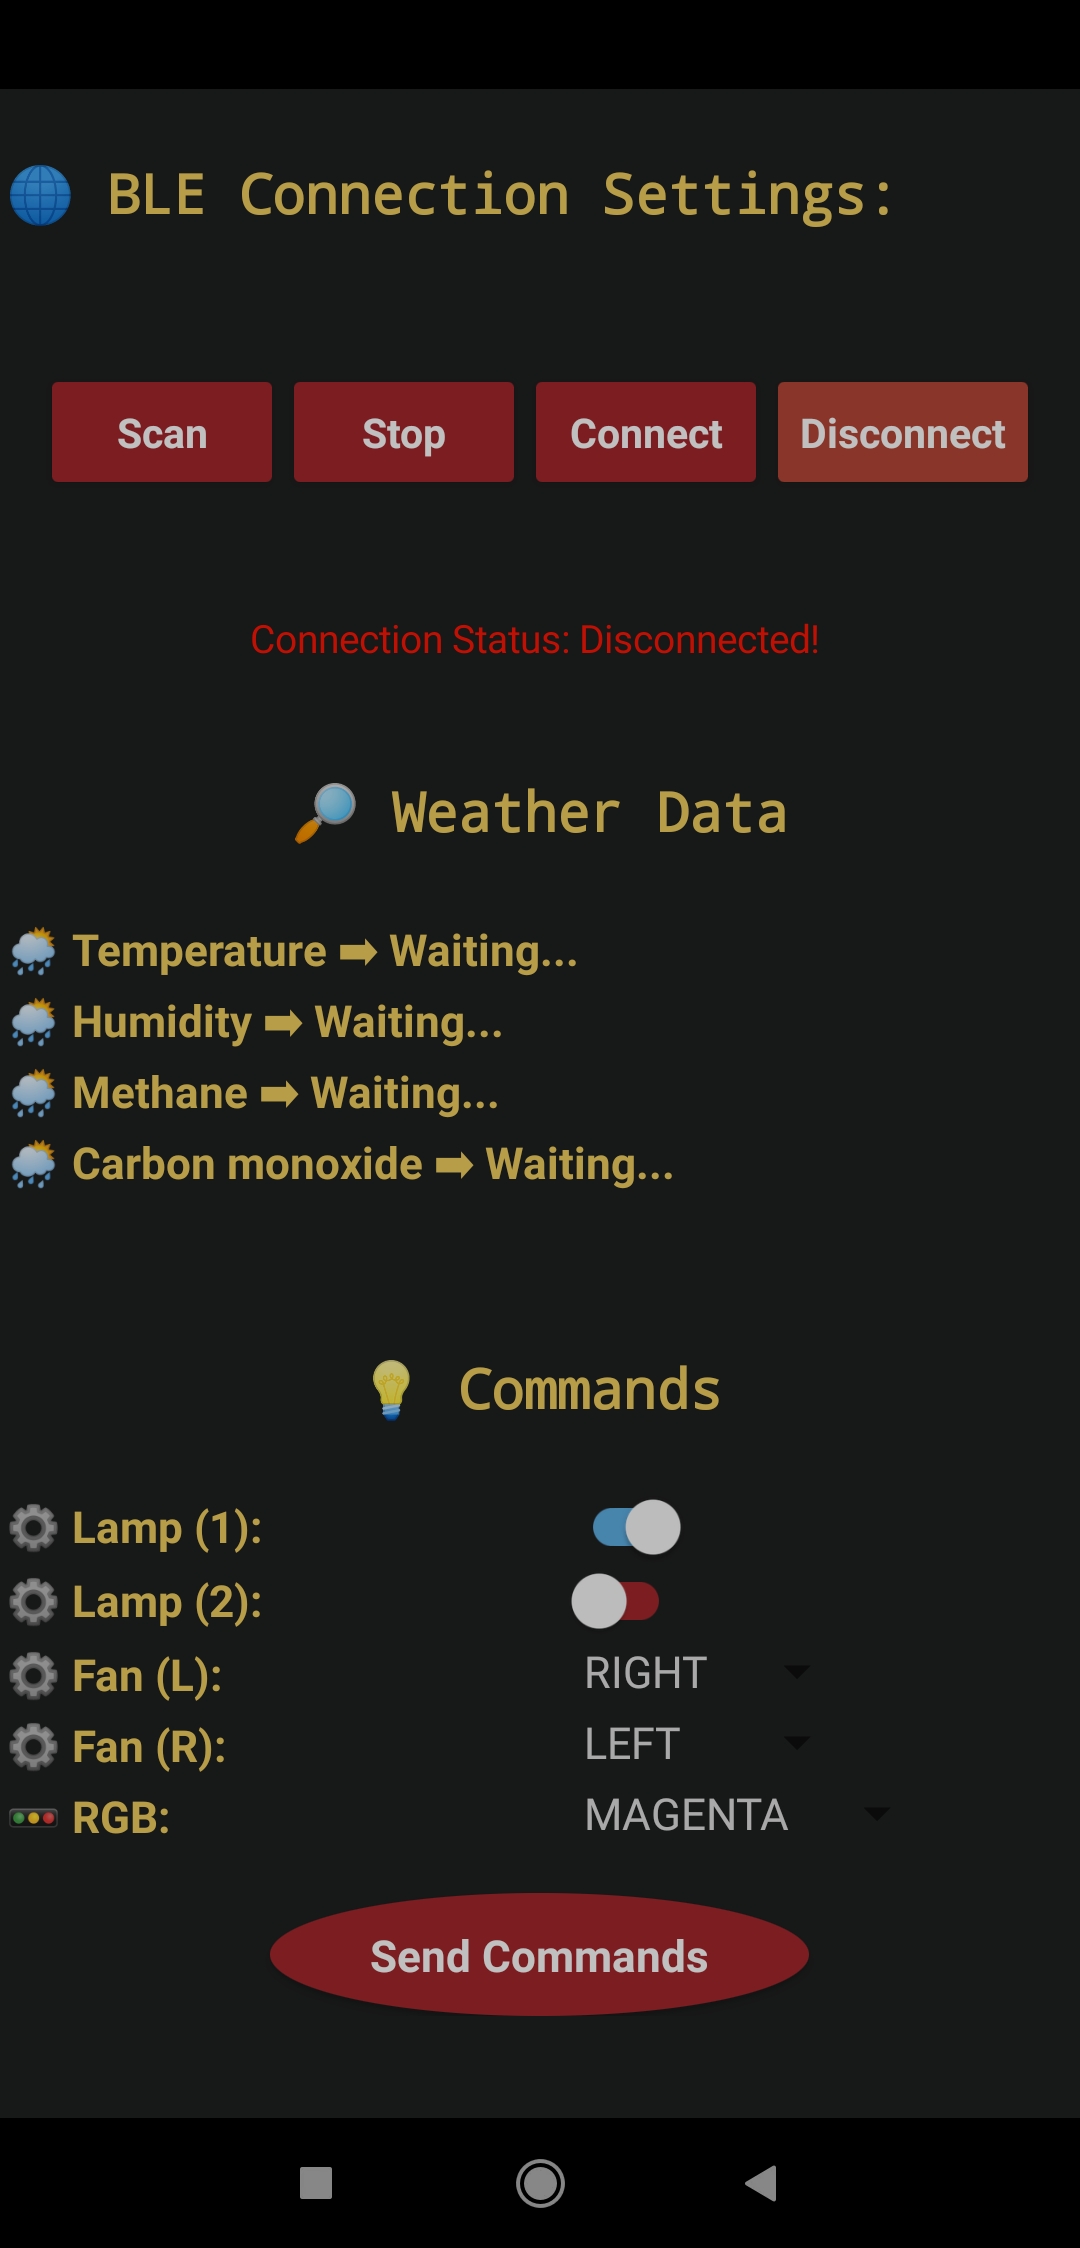
💡📲 The Android application (BLE Remote Lamp) allows the user to scan BLE devices and connect this lighting system via the Nano 33 BLE named BLE Remote Lamp.
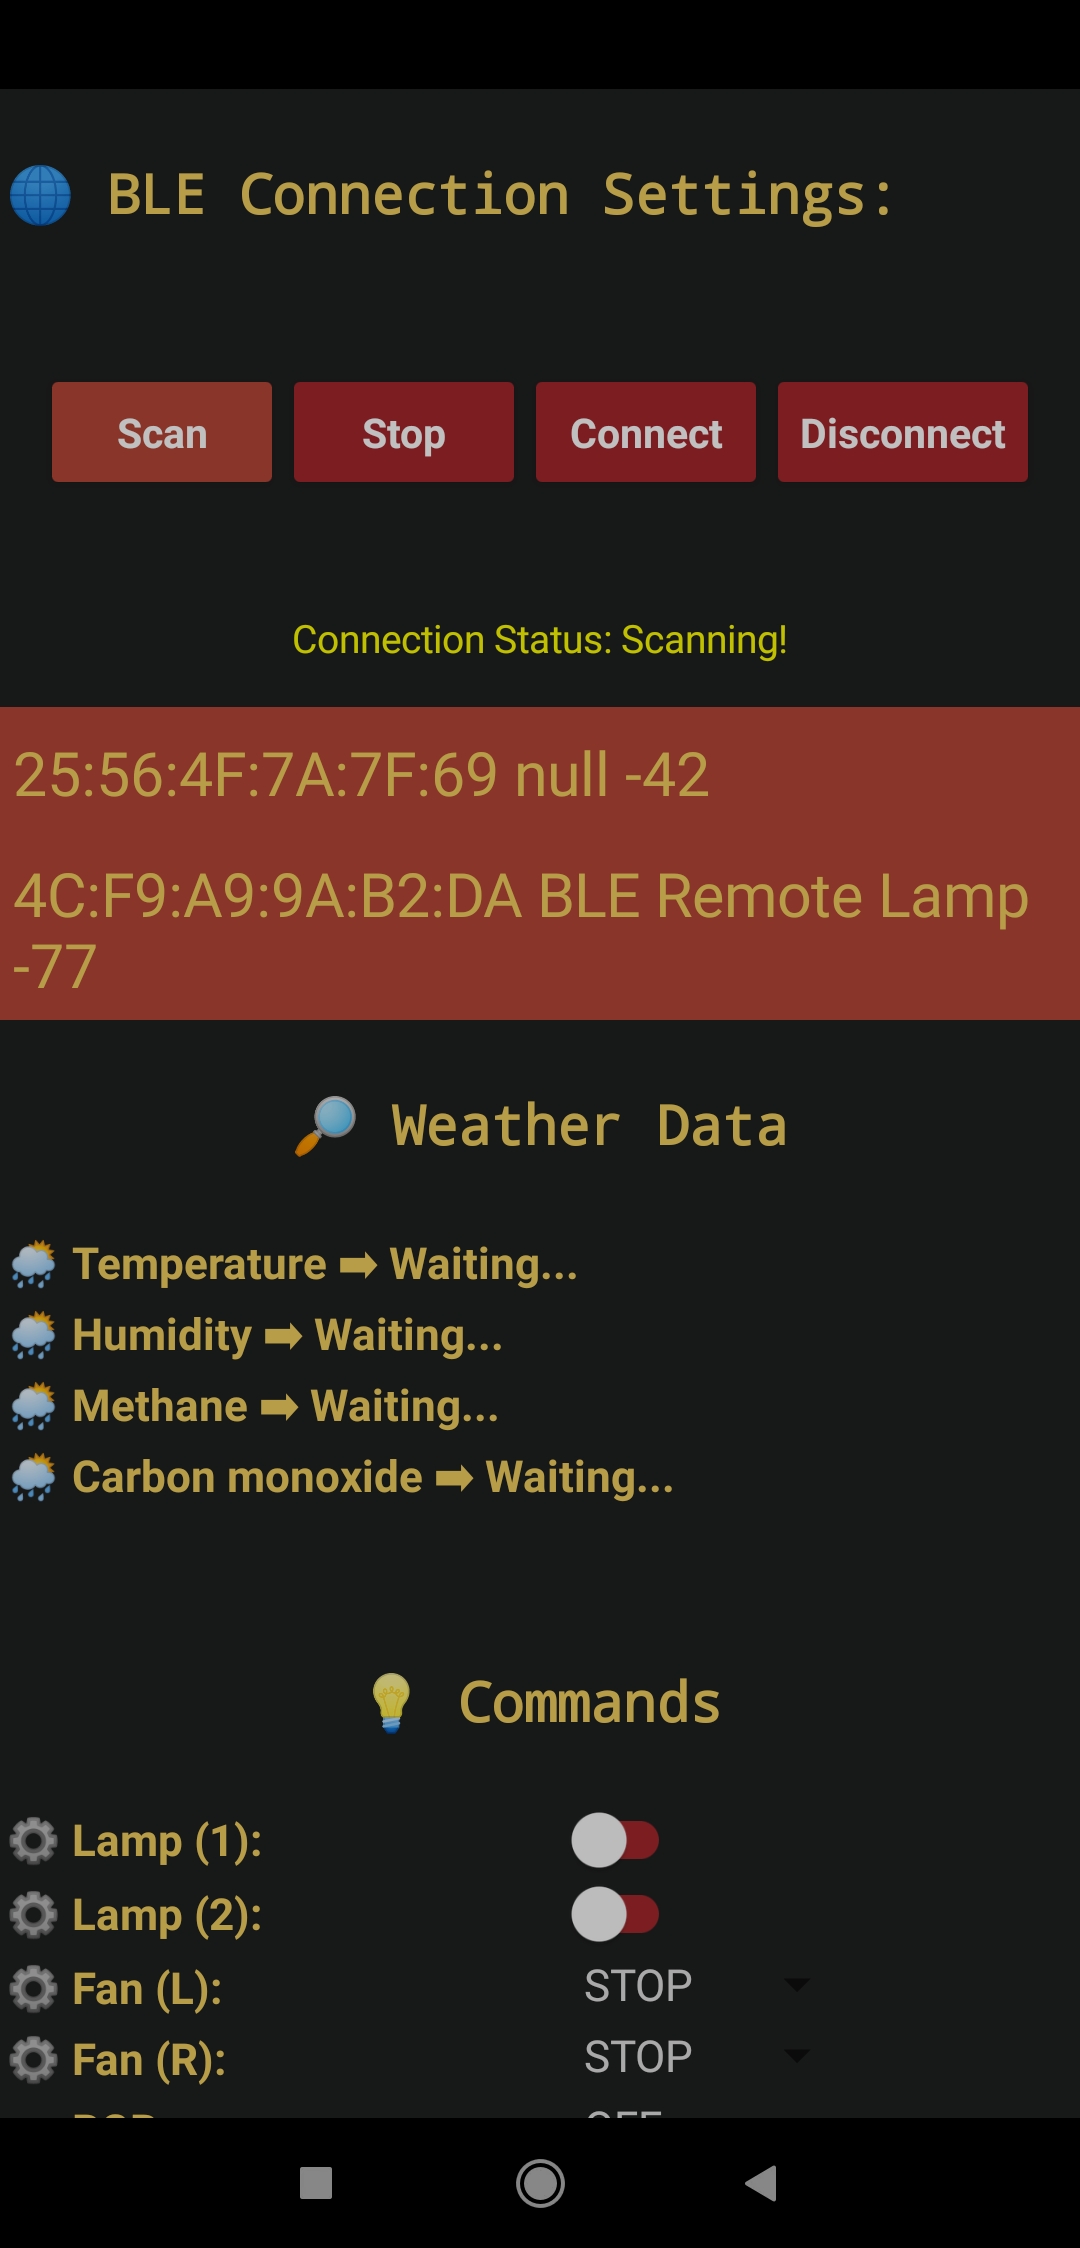
💡📲 If the Scan button is pressed, the application scans for compatible BLE devices and shows them as a list.
Figure - 81.75
Figure - 81.76
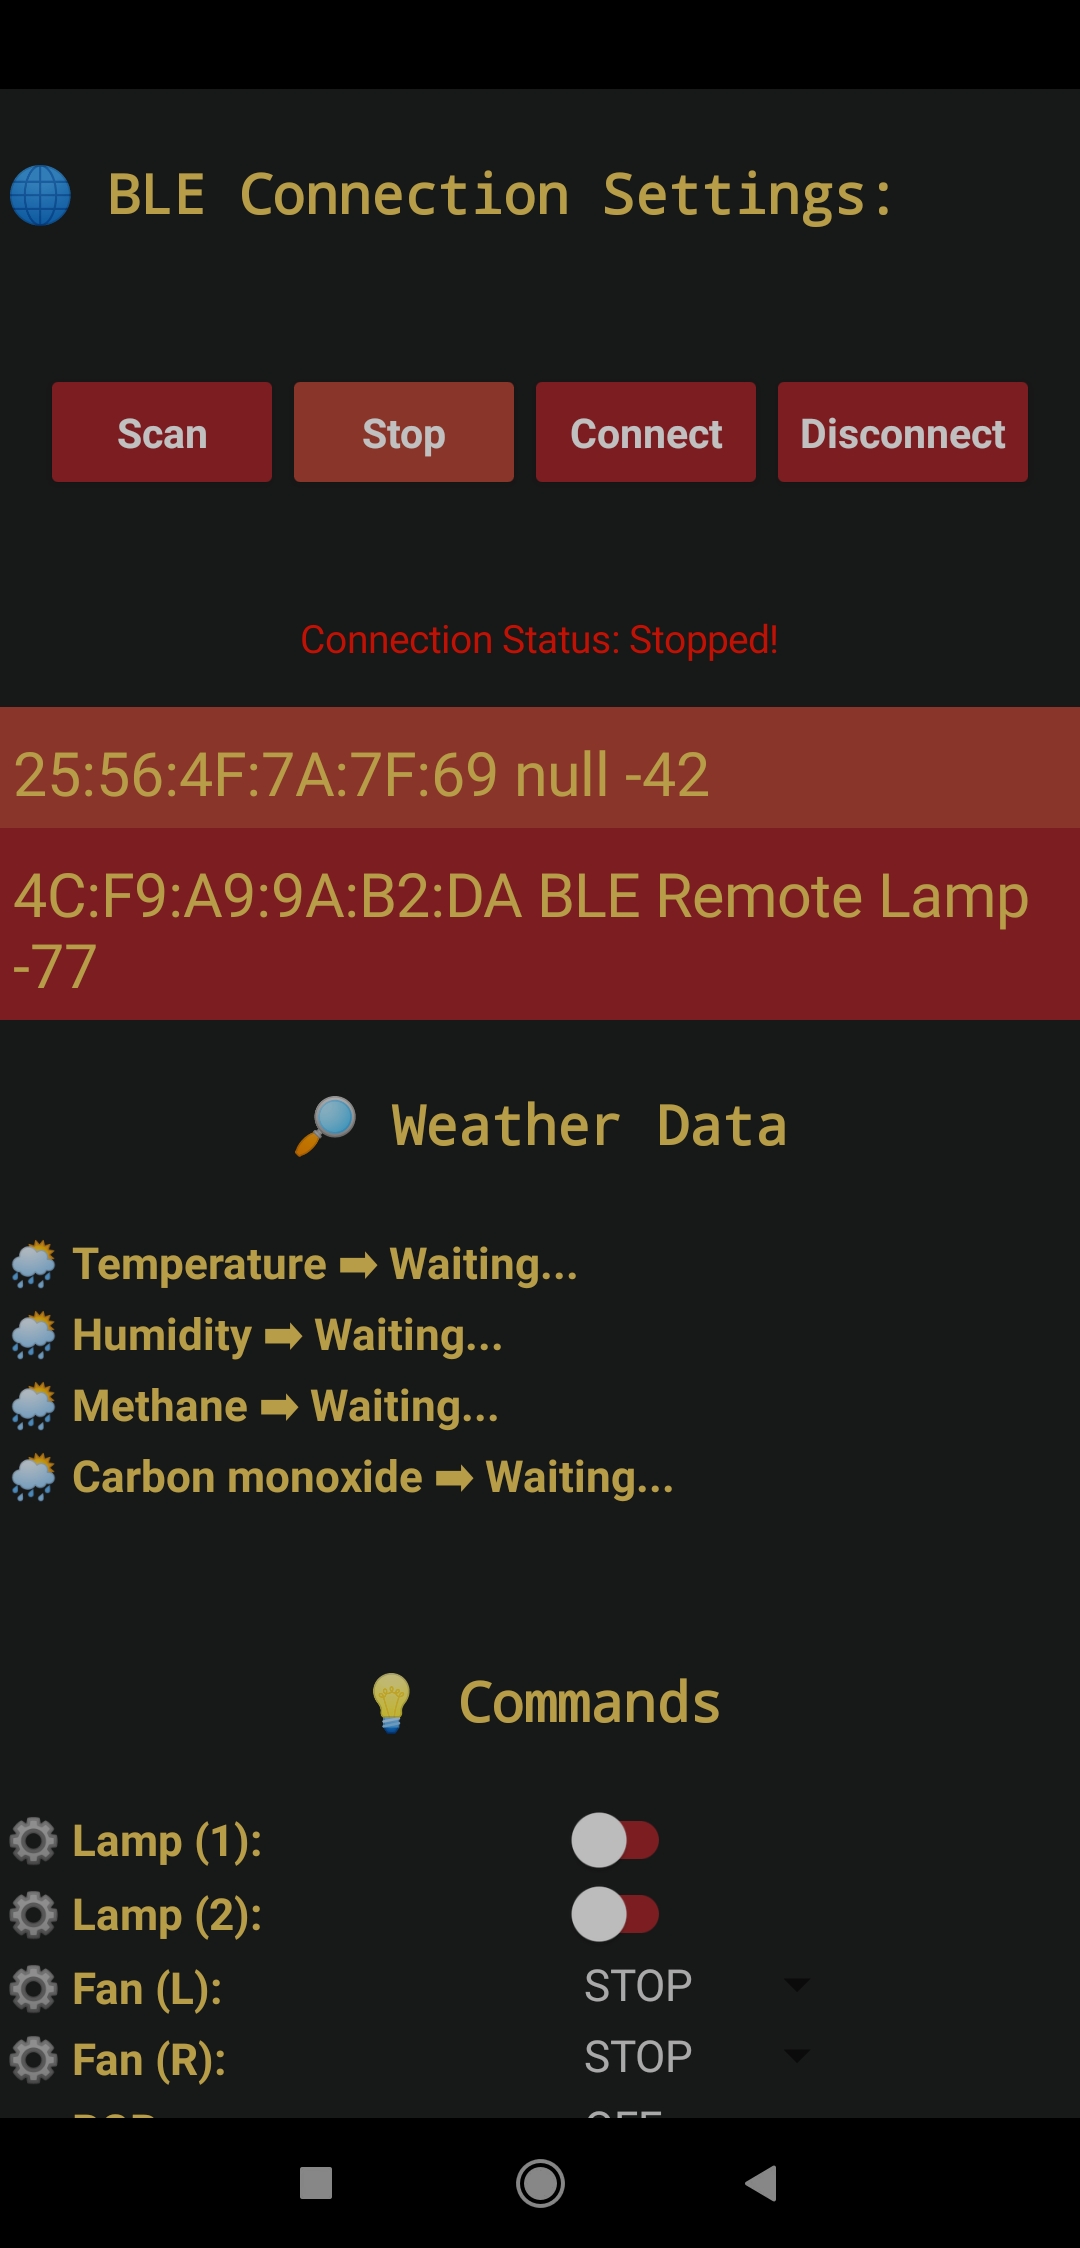
💡📲 If the Stop button is pressed, the application desists from scanning devices.
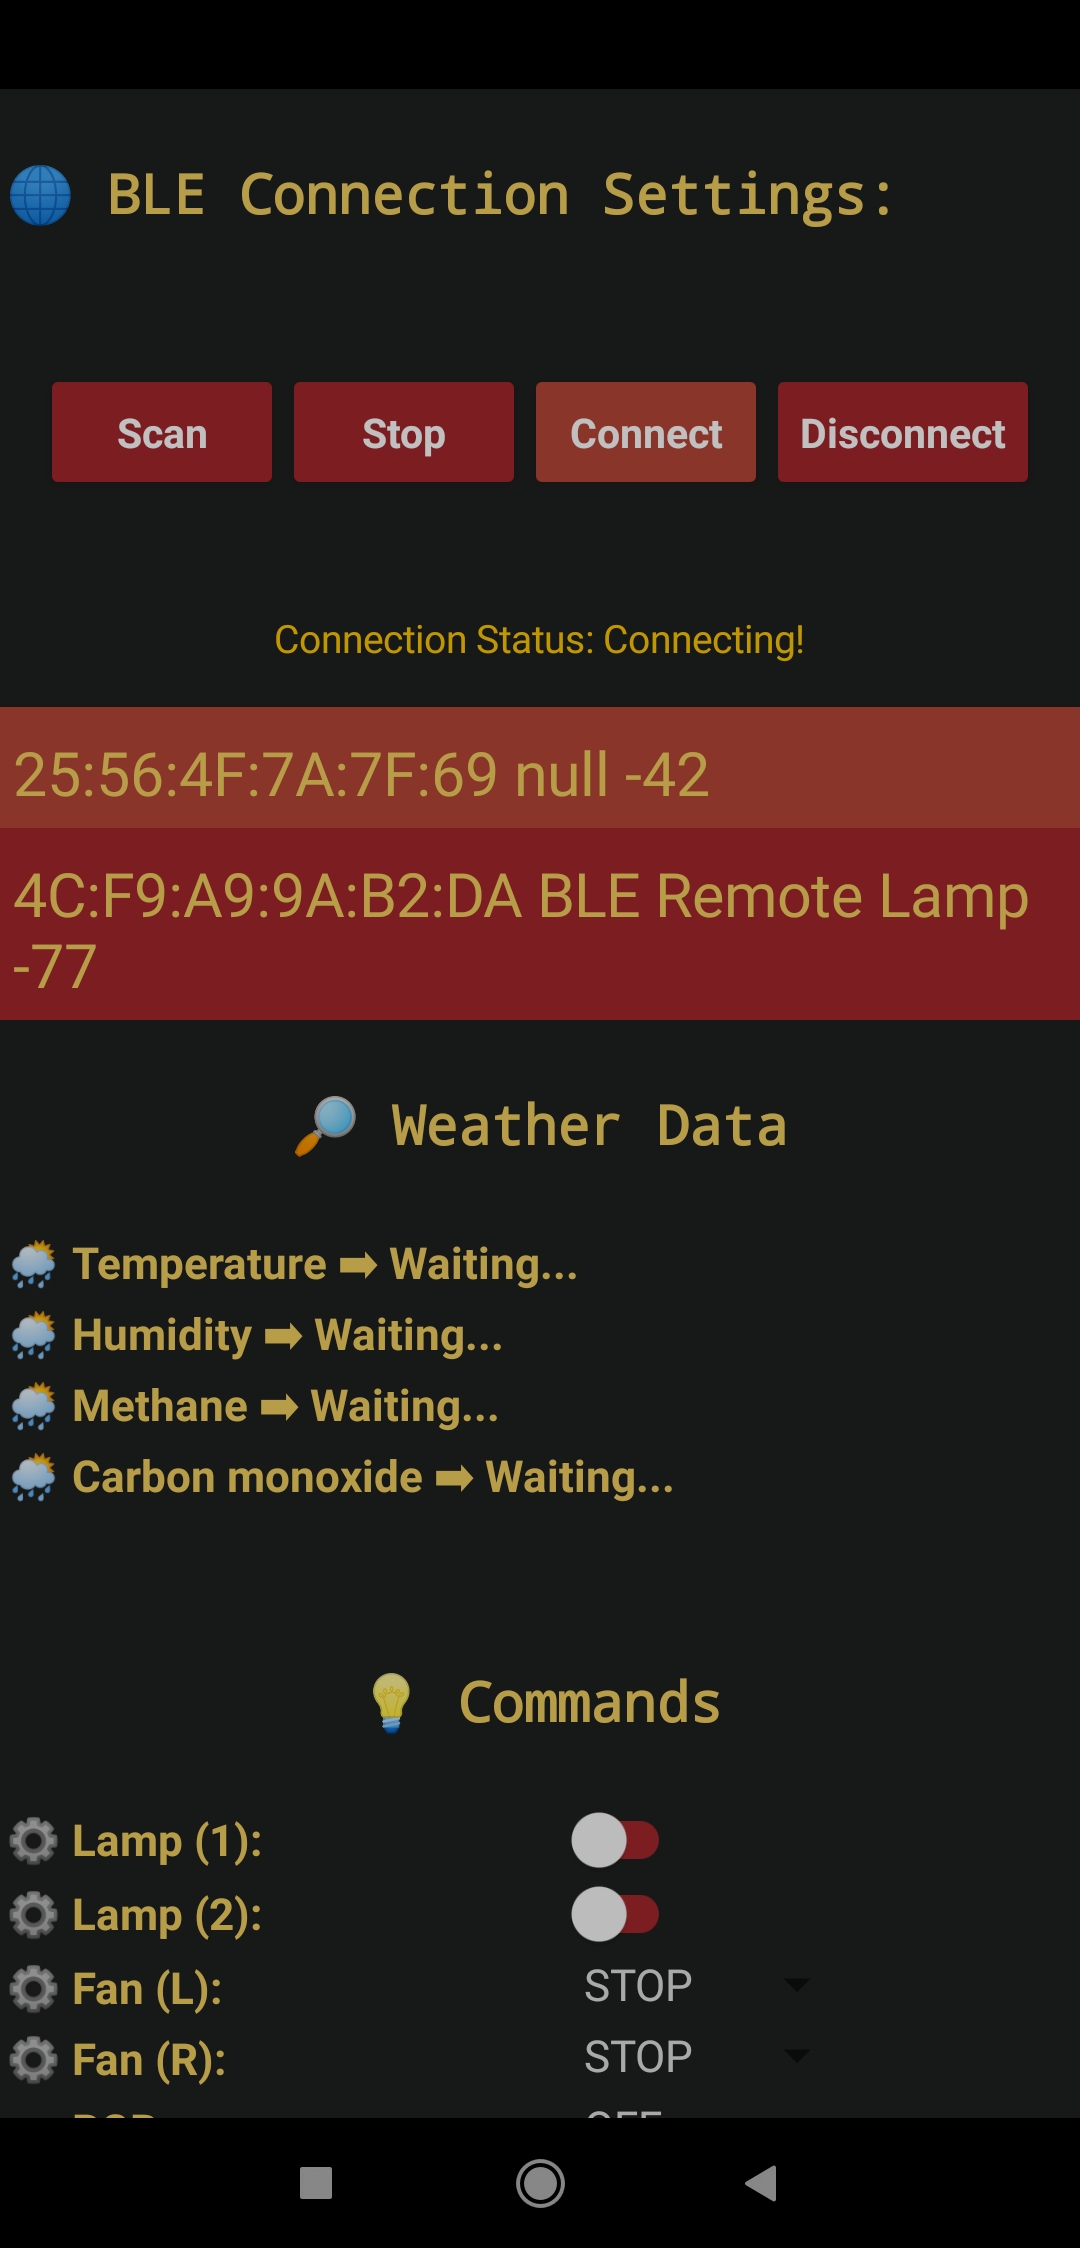
💡📲 If the Connect button is pressed, the application attempts to connect to the selected BLE device (lighting system) over BLE.
Figure - 81.77
Figure - 81.78
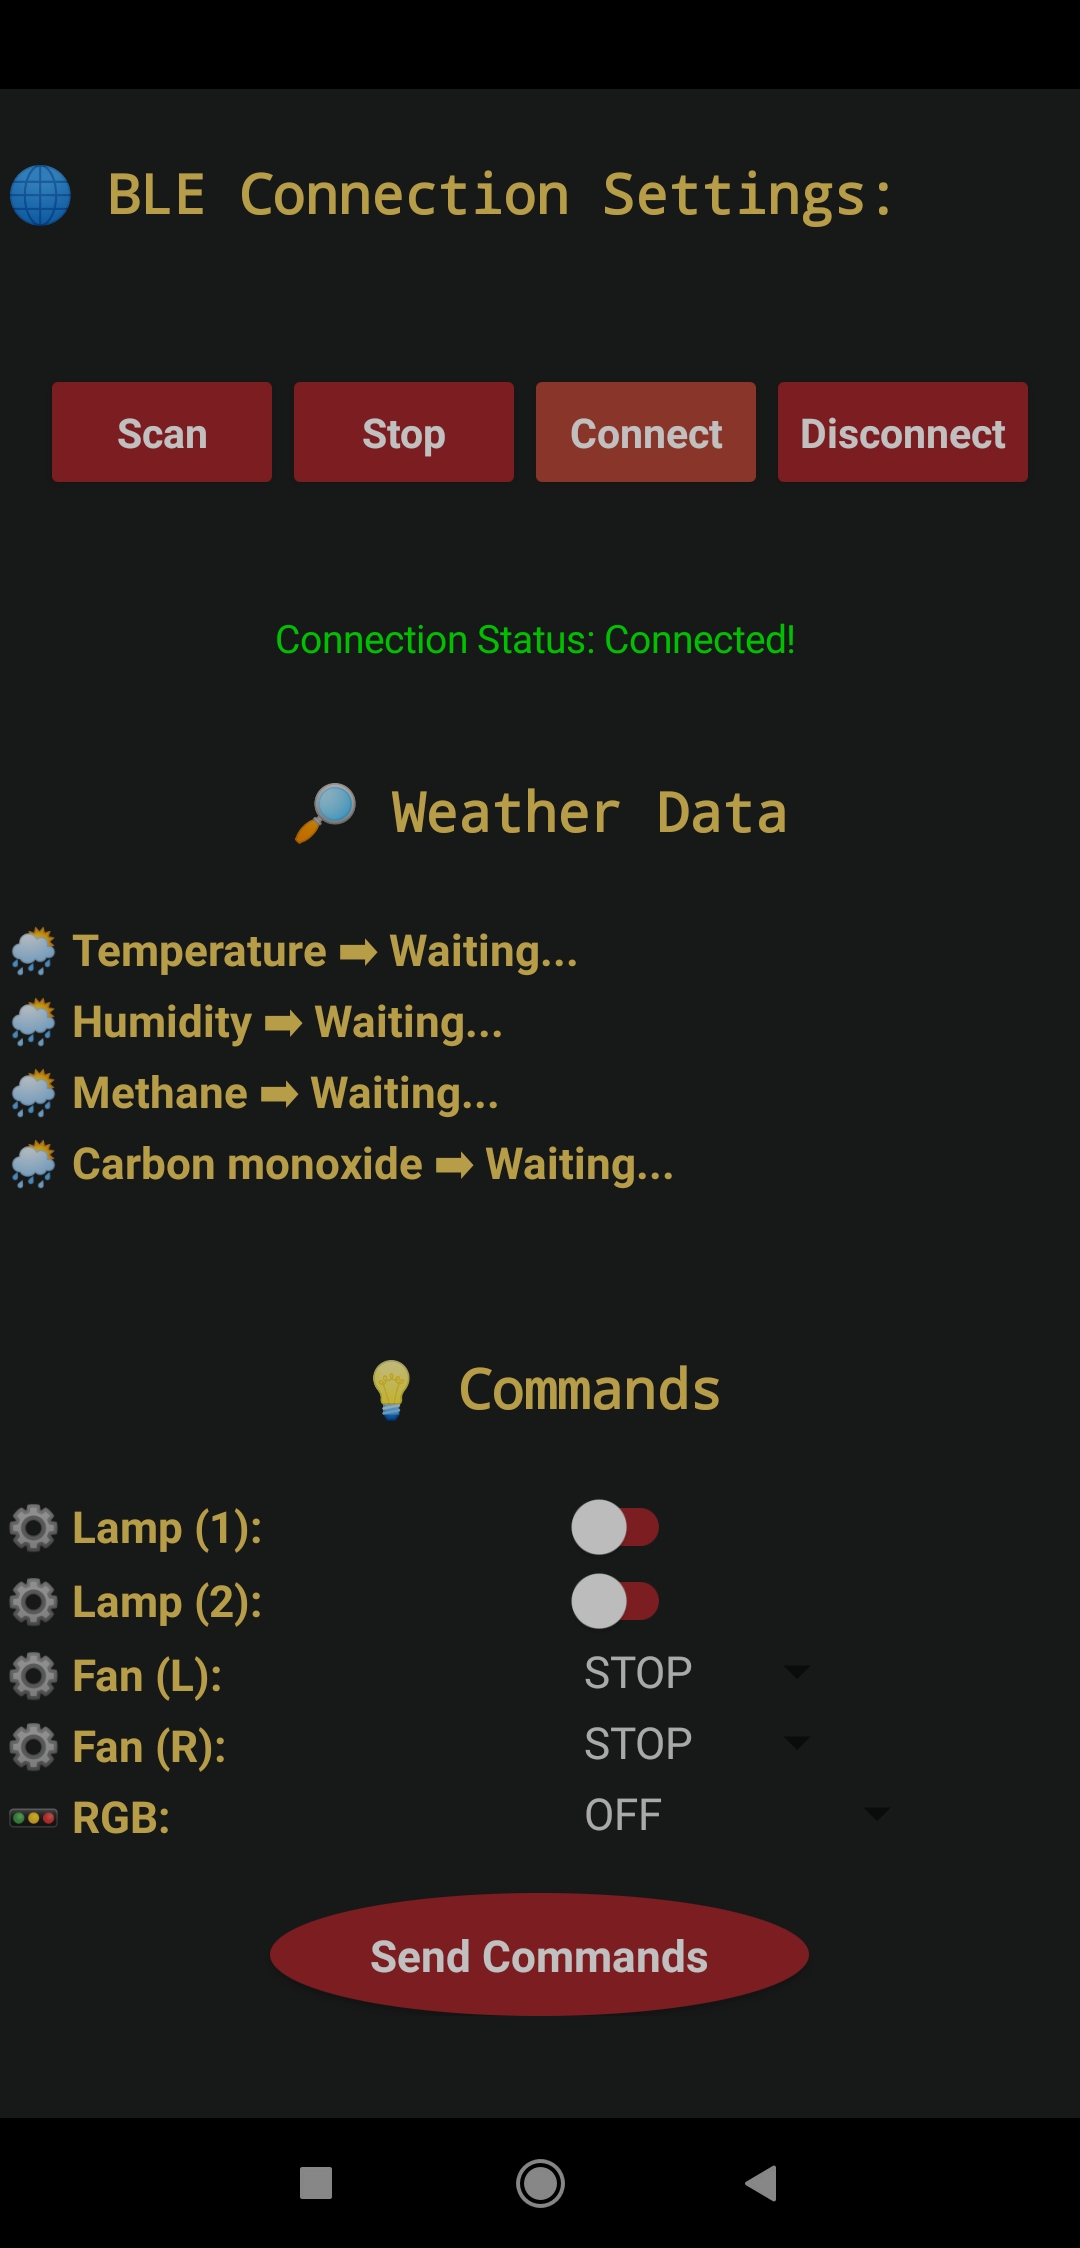
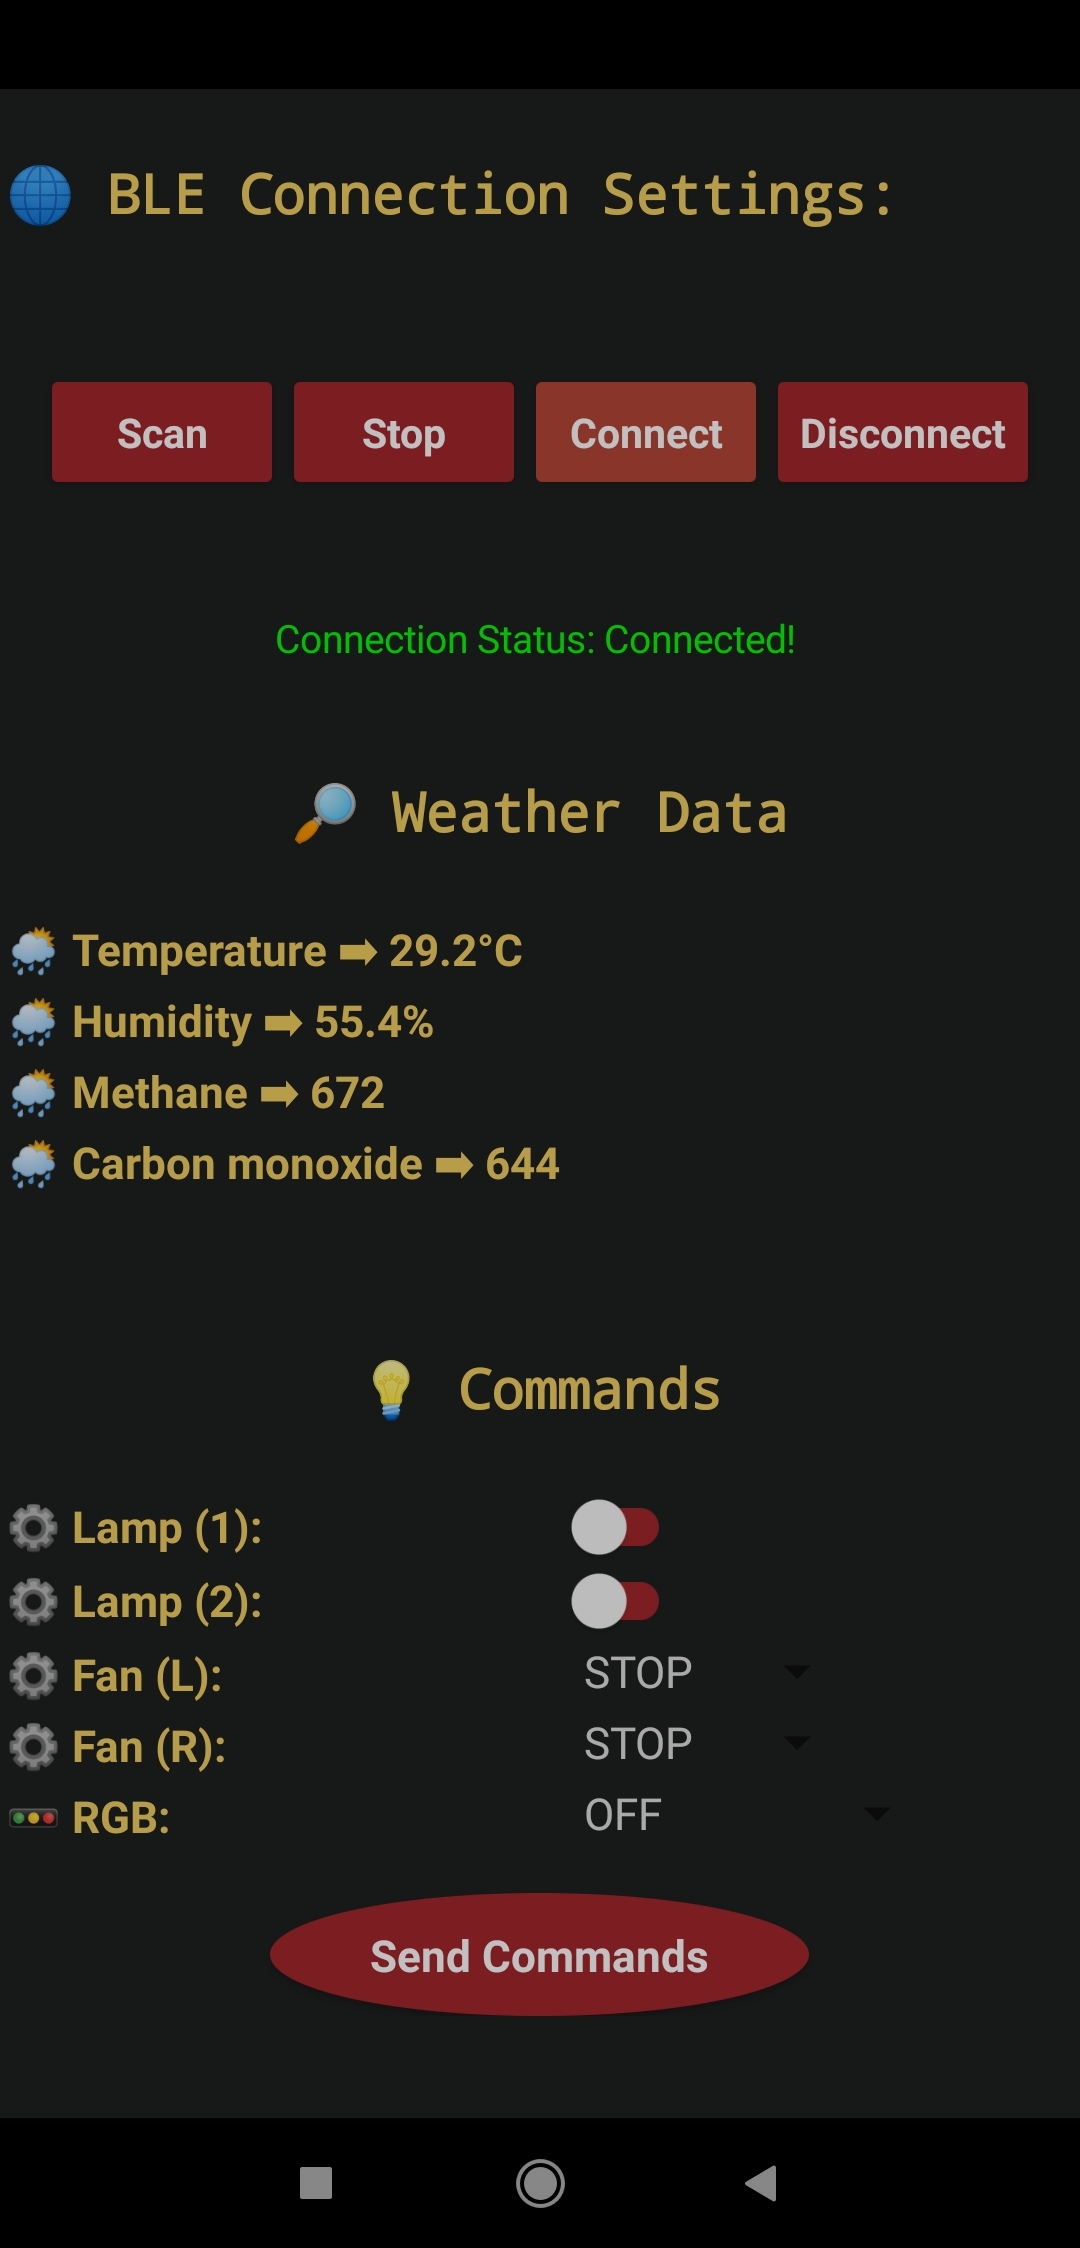
💡📲 If the application connects to the Nano 33 BLE (peripheral device) as the central device successfully, the application waits for the advertised (transmitted) data packets from the lighting system.
Figure - 81.79
💡📲 Every minute, the lighting system collects weather and gas information to display them on the Waveshare 2.9" e-Paper module with their complementing icons. If the central device (Android app) is connected to the Nano 33 BLE successfully, the lighting system advertises (transmits) the collected data over BLE to the application.
💡📲 Also, it changes the BLE connection status icon on the e-Paper module when the Nano 33 BLE is connected or disconnected to/from the central device via the Android application.
💡📲 Then, the application shows the recently collected data advertised (transmitted) by the lighting system.
Temperature (°C)
Humidity (%)
Methane
Carbon monoxide
Figure - 81.80
Figure - 81.81
Figure - 81.82
Figure - 81.83
Figure - 81.84
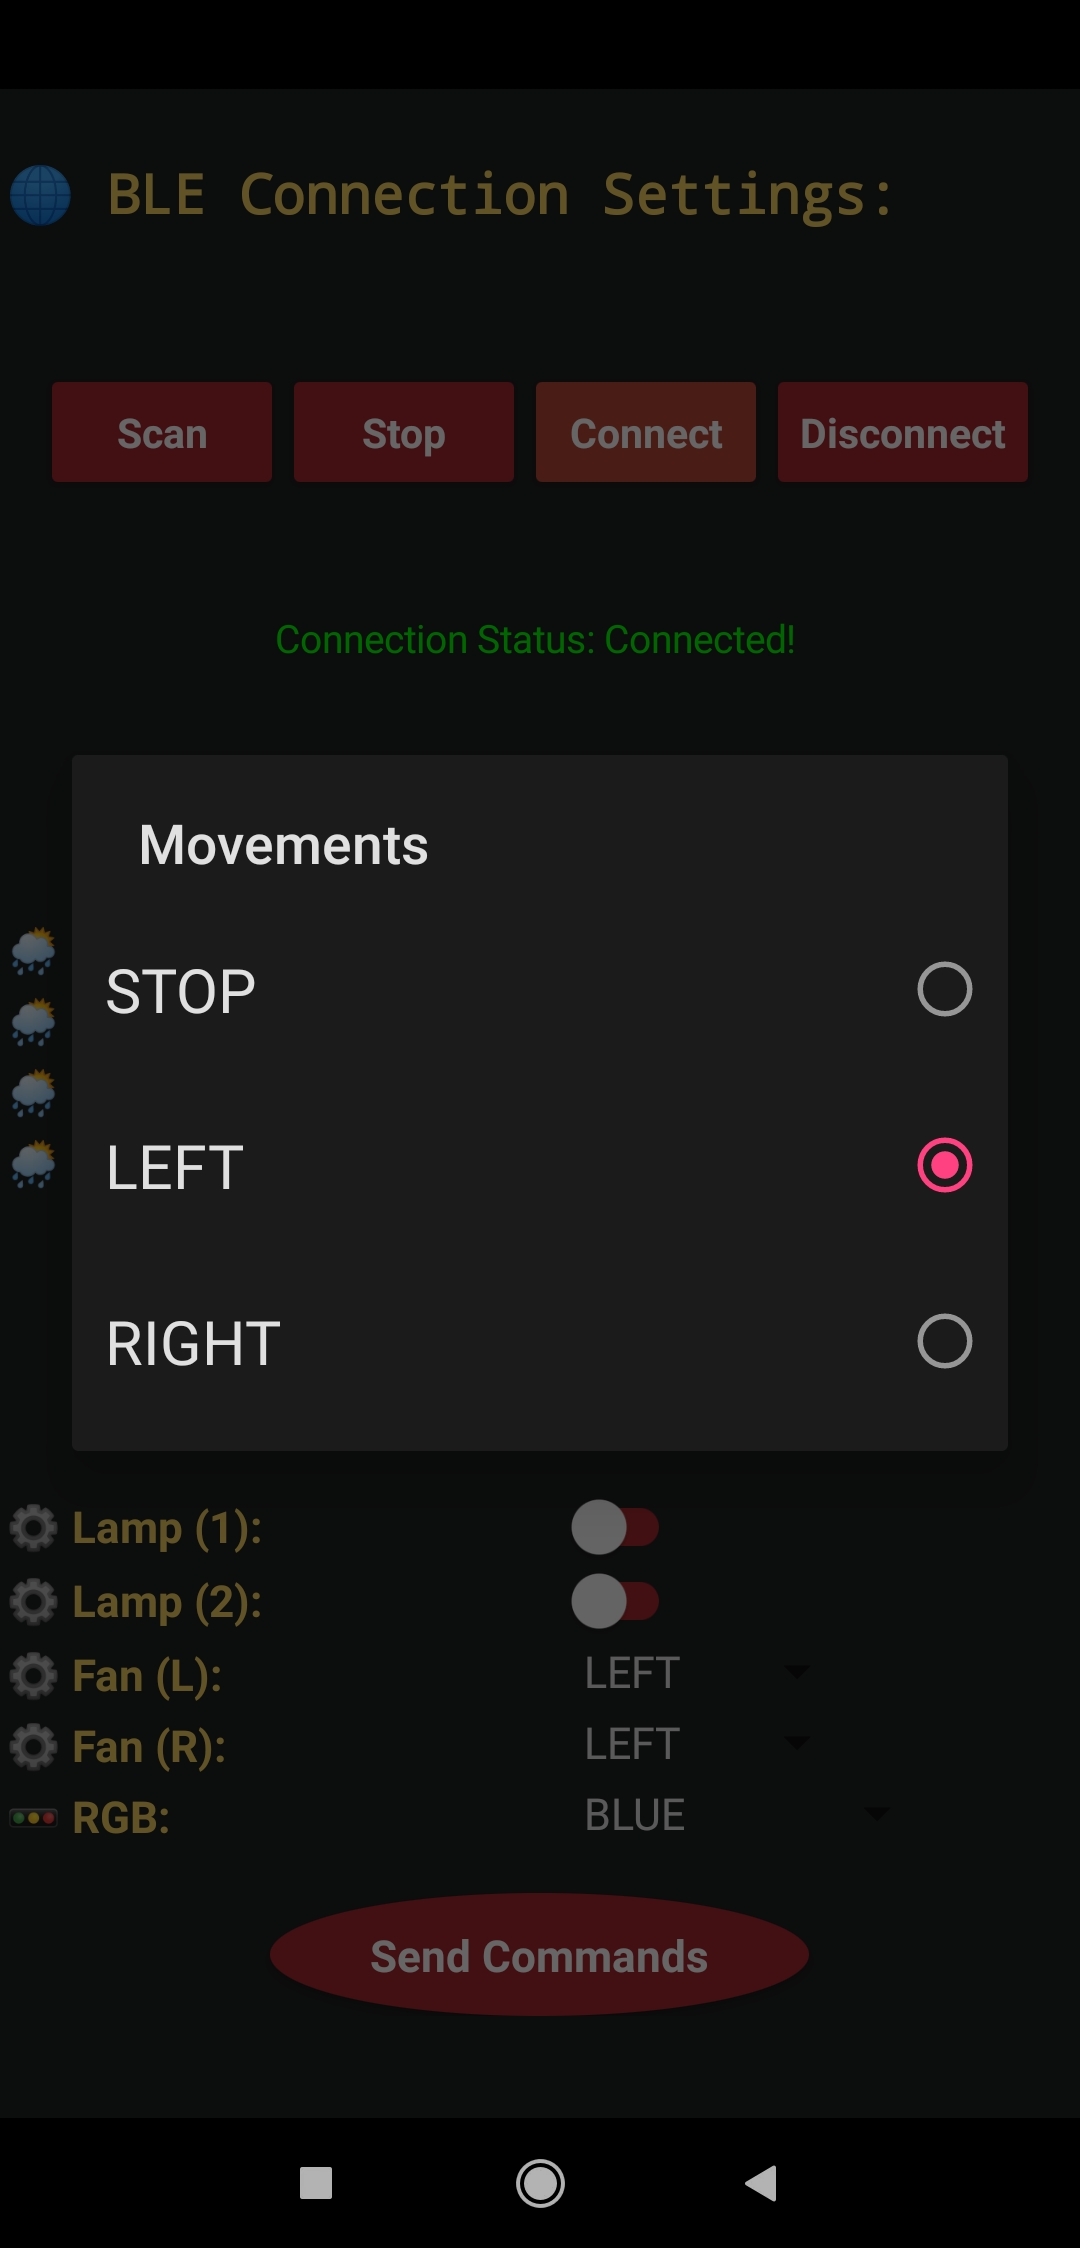
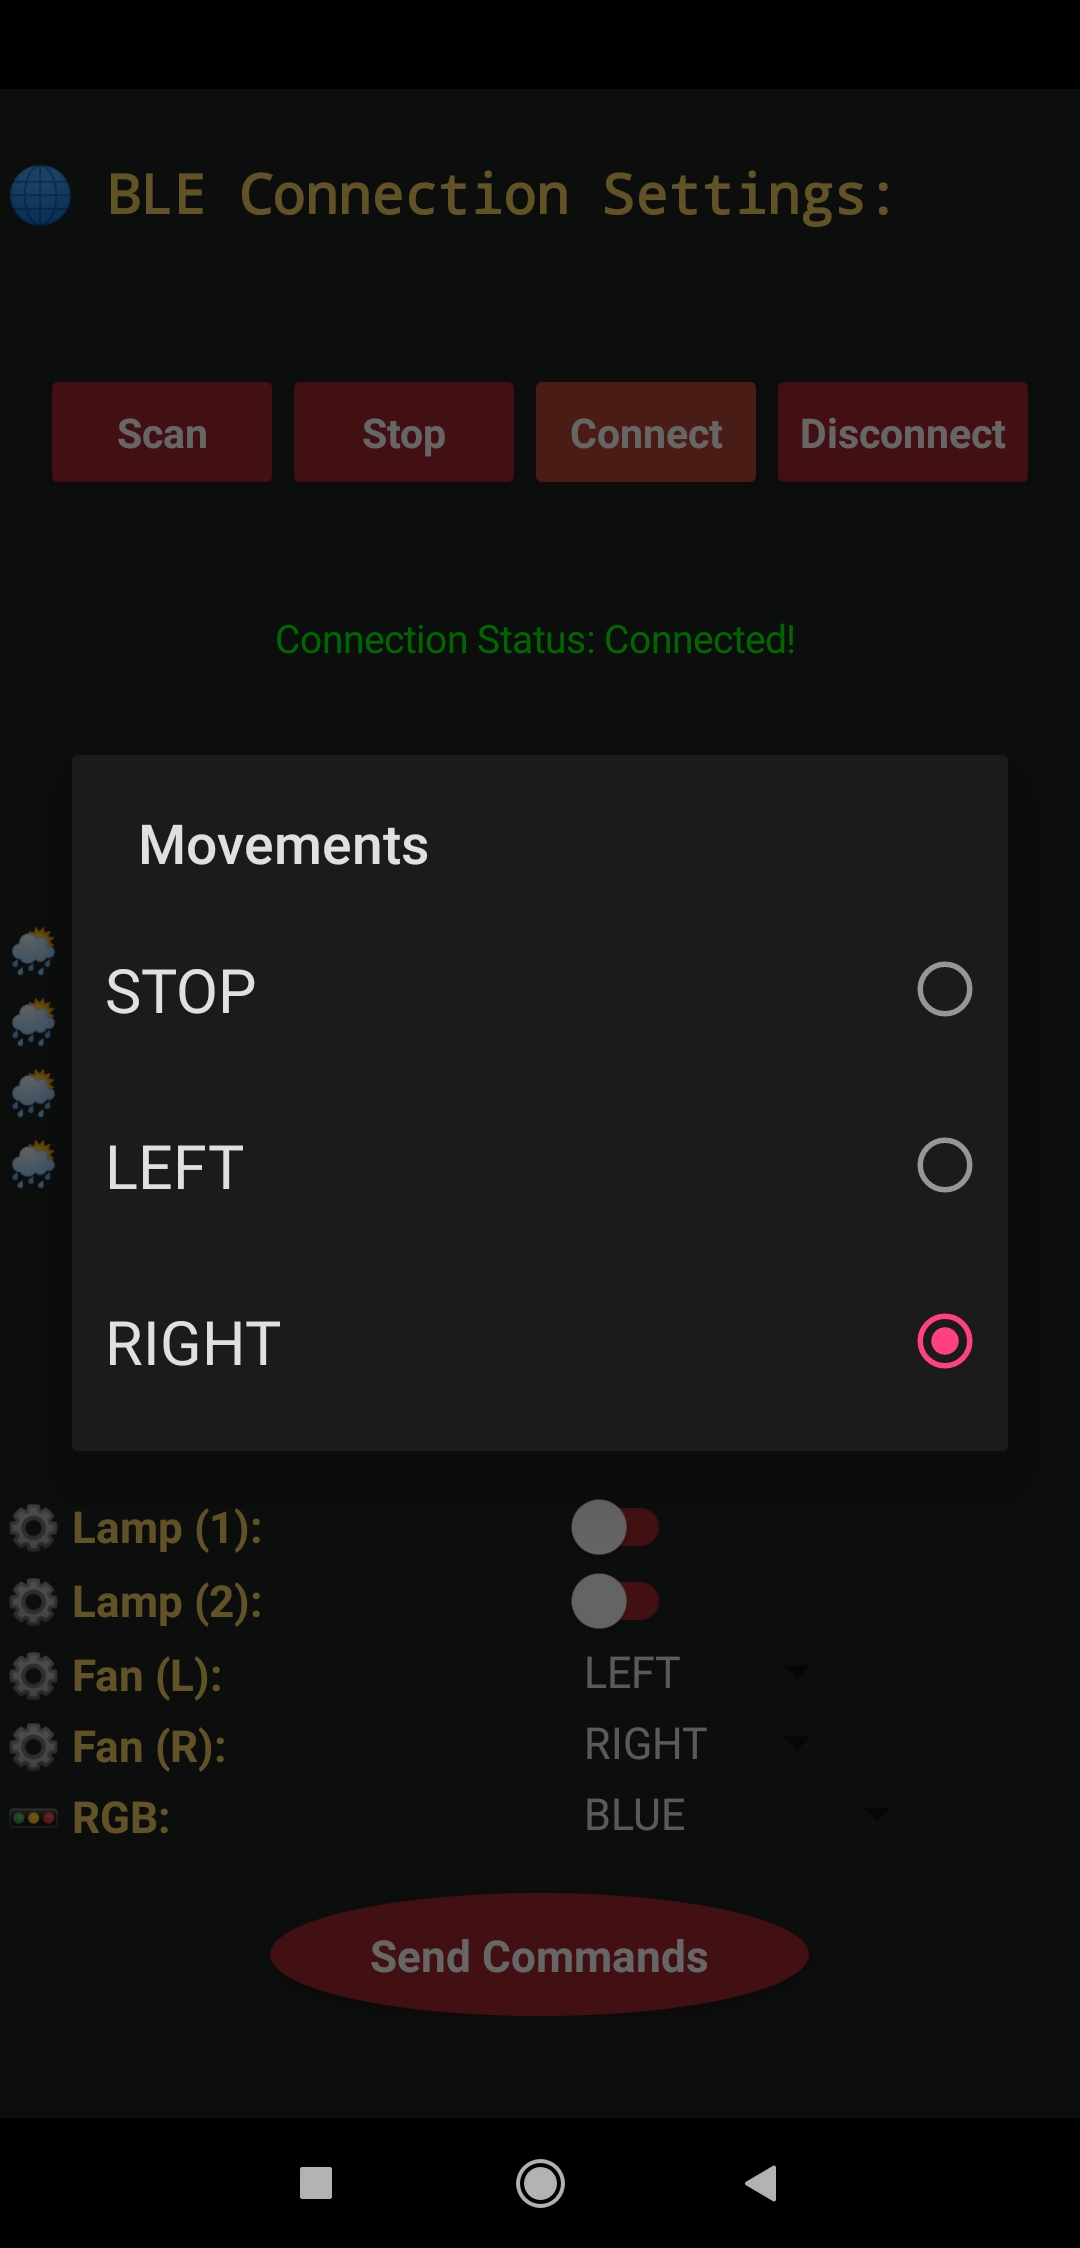
💡📲 If the Send Commands button is pressed, the application transfers the given commands to the lighting system over BLE so as to adjust its features.
💡📲 The application lets the user control the movements of two integrated L9110 fan motors on the lighting system.
Fan (L) ➡ STOP, LEFT, or RIGHT
Fan (R) ➡ STOP, LEFT, or RIGHT
Figure - 81.85
Figure - 81.86
Figure - 81.87
Figure - 81.88
Figure - 81.89
Figure - 81.90
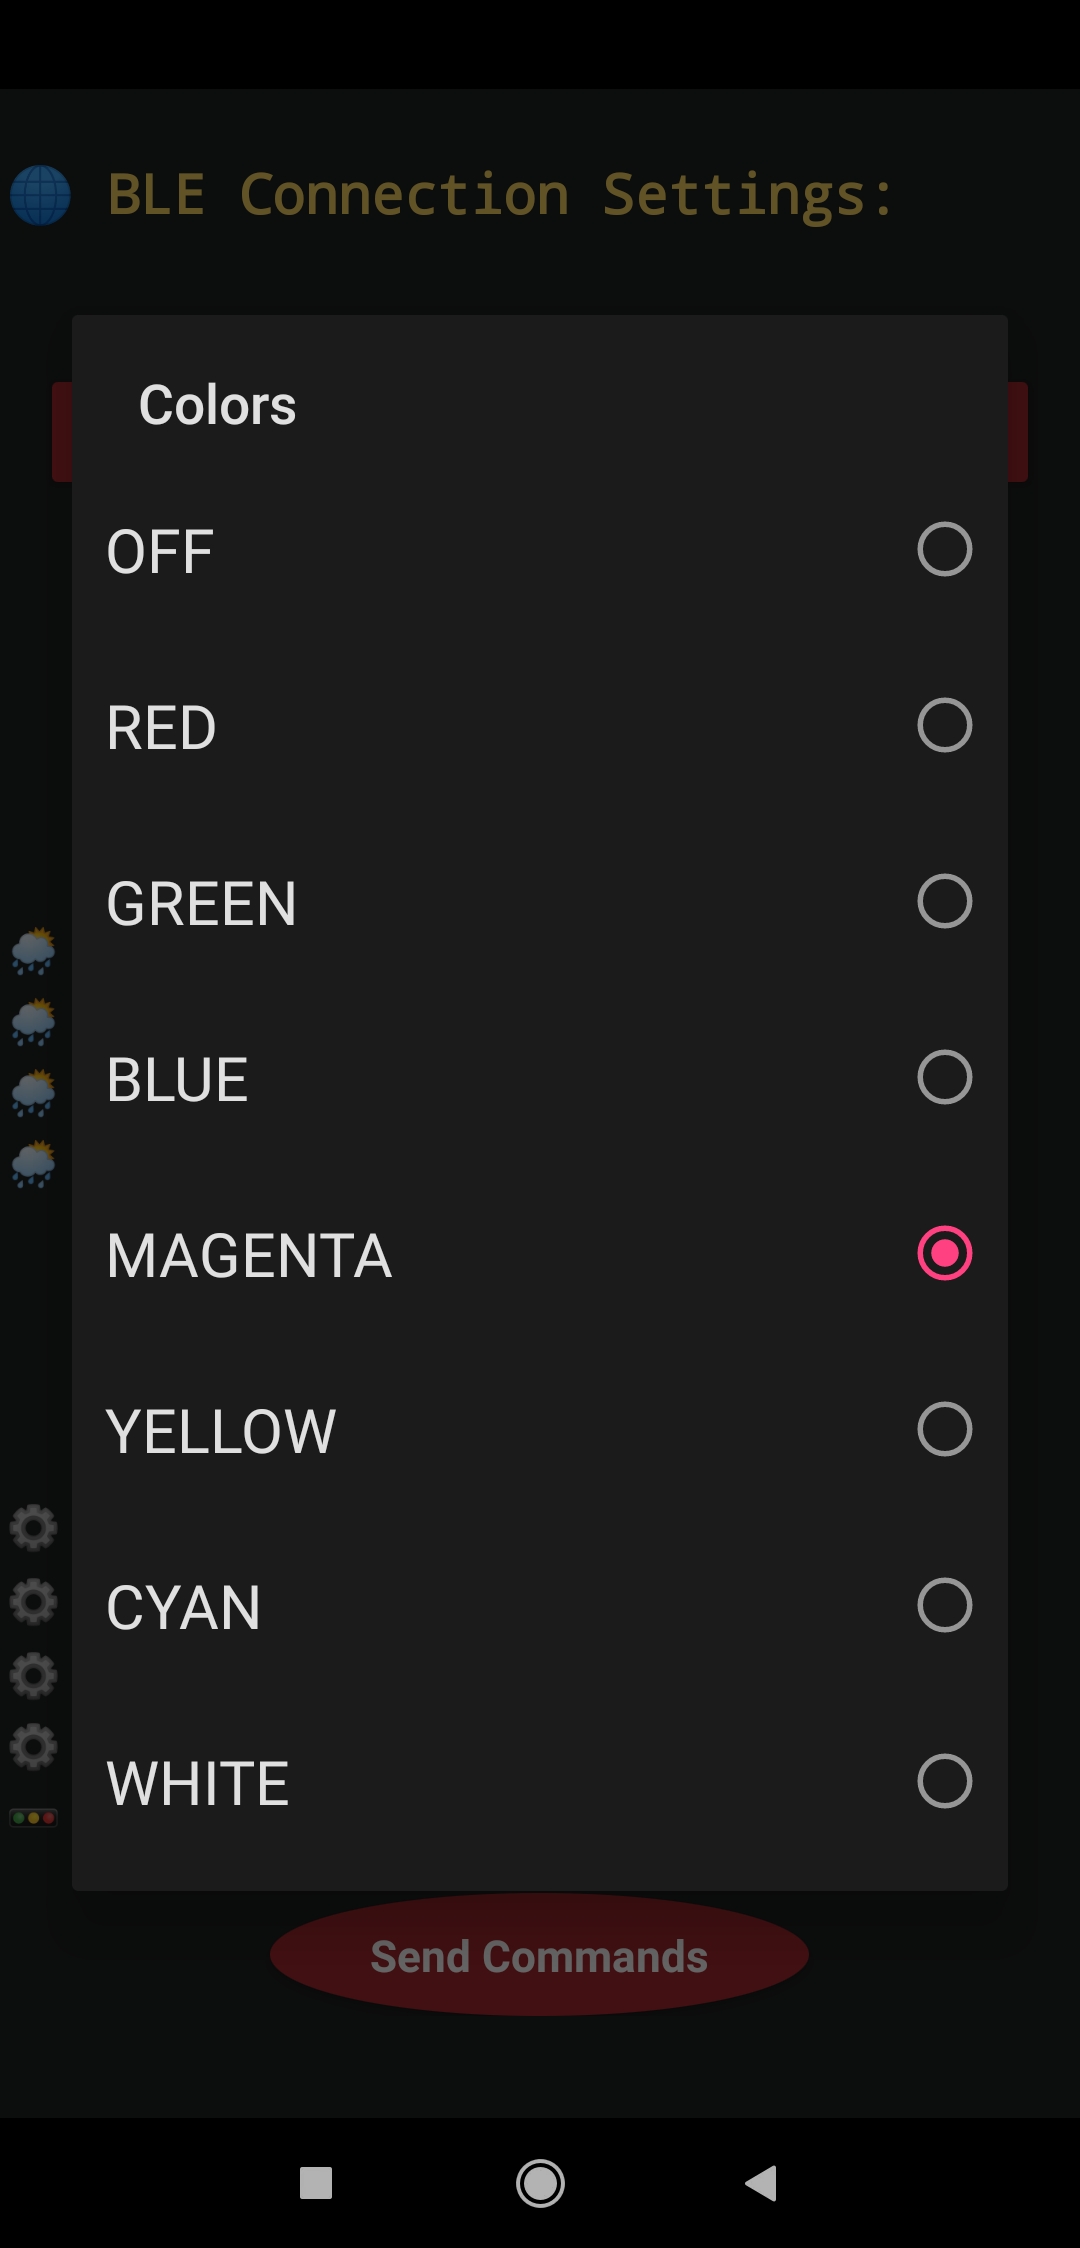
💡📲 The application allows the user to adjust the color of the built-in RGB LED on the Millennium Falcon PCB.
OFF
RED
GREEN
BLUE
MAGENTA
YELLOW
CYAN
WHITE
Figure - 81.91
Figure - 81.92
Figure - 81.93
Figure - 81.94
💡📲 The application lets the user turn on or off two LED light bulbs attached to the lighting structure.
Lamp (1) ➡ ON or OFF
Lamp (2) ➡ ON or OFF
Figure - 81.95
Figure - 81.96
Figure - 81.97
Figure - 81.98
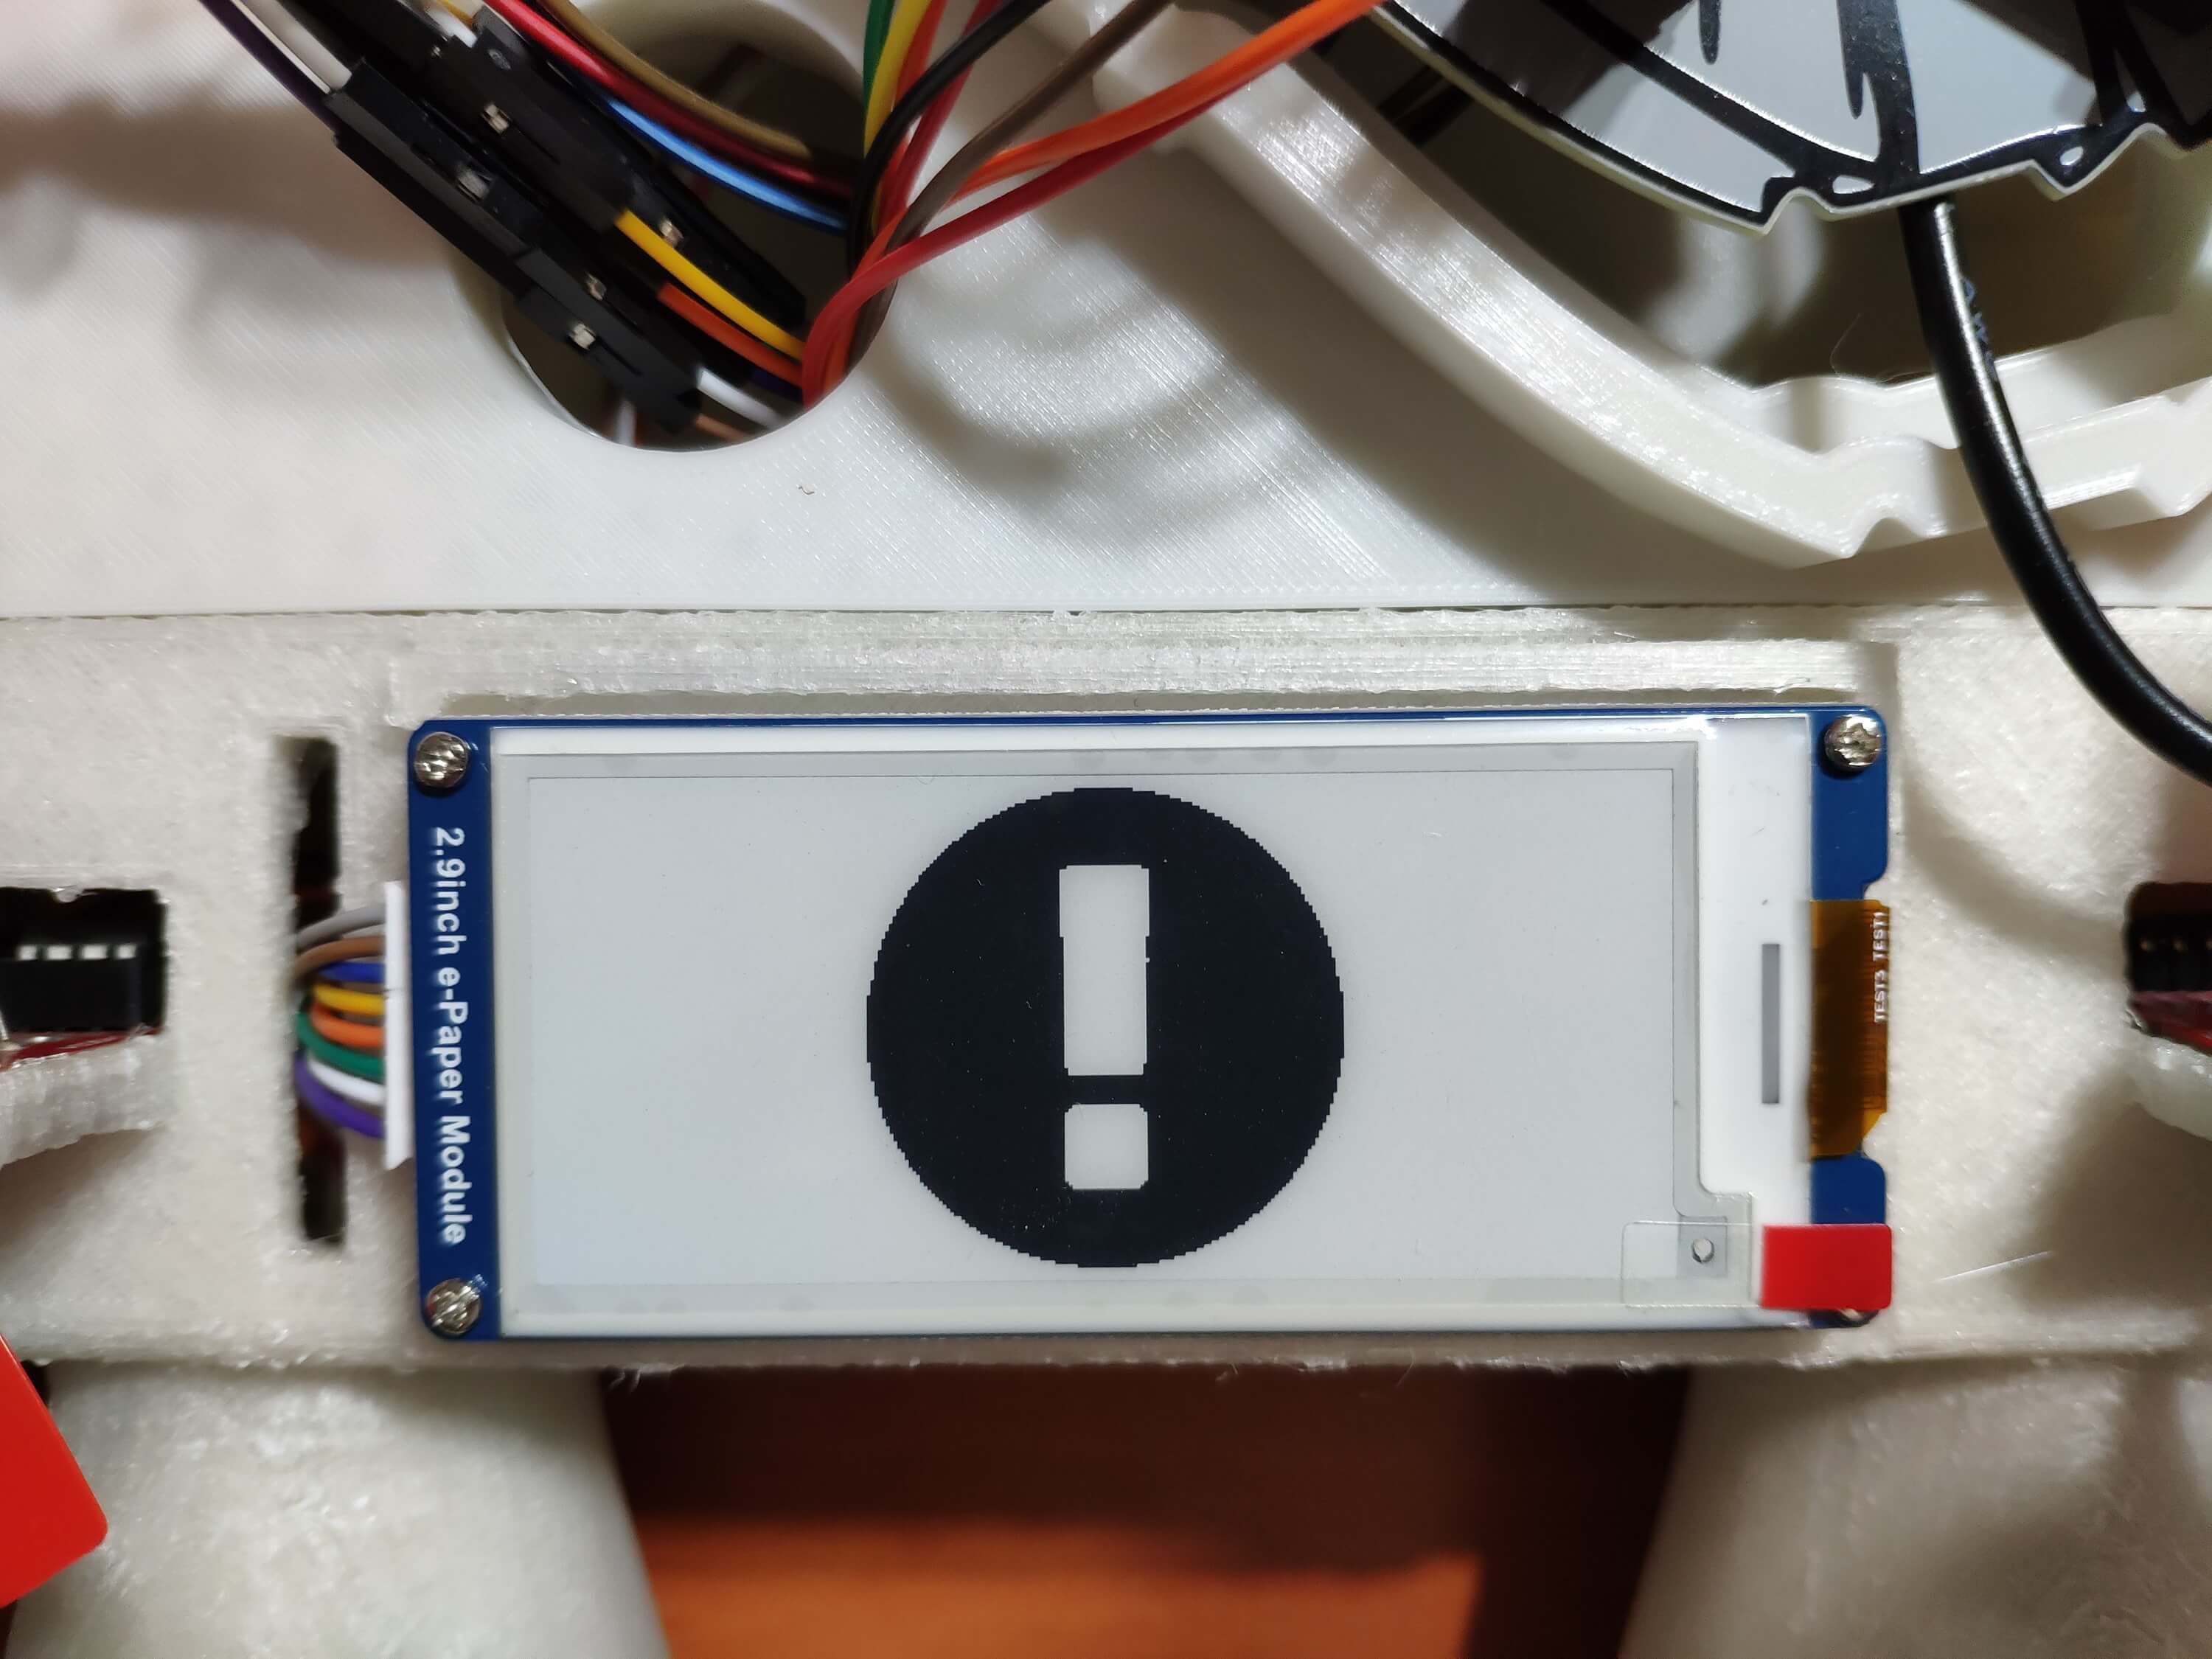
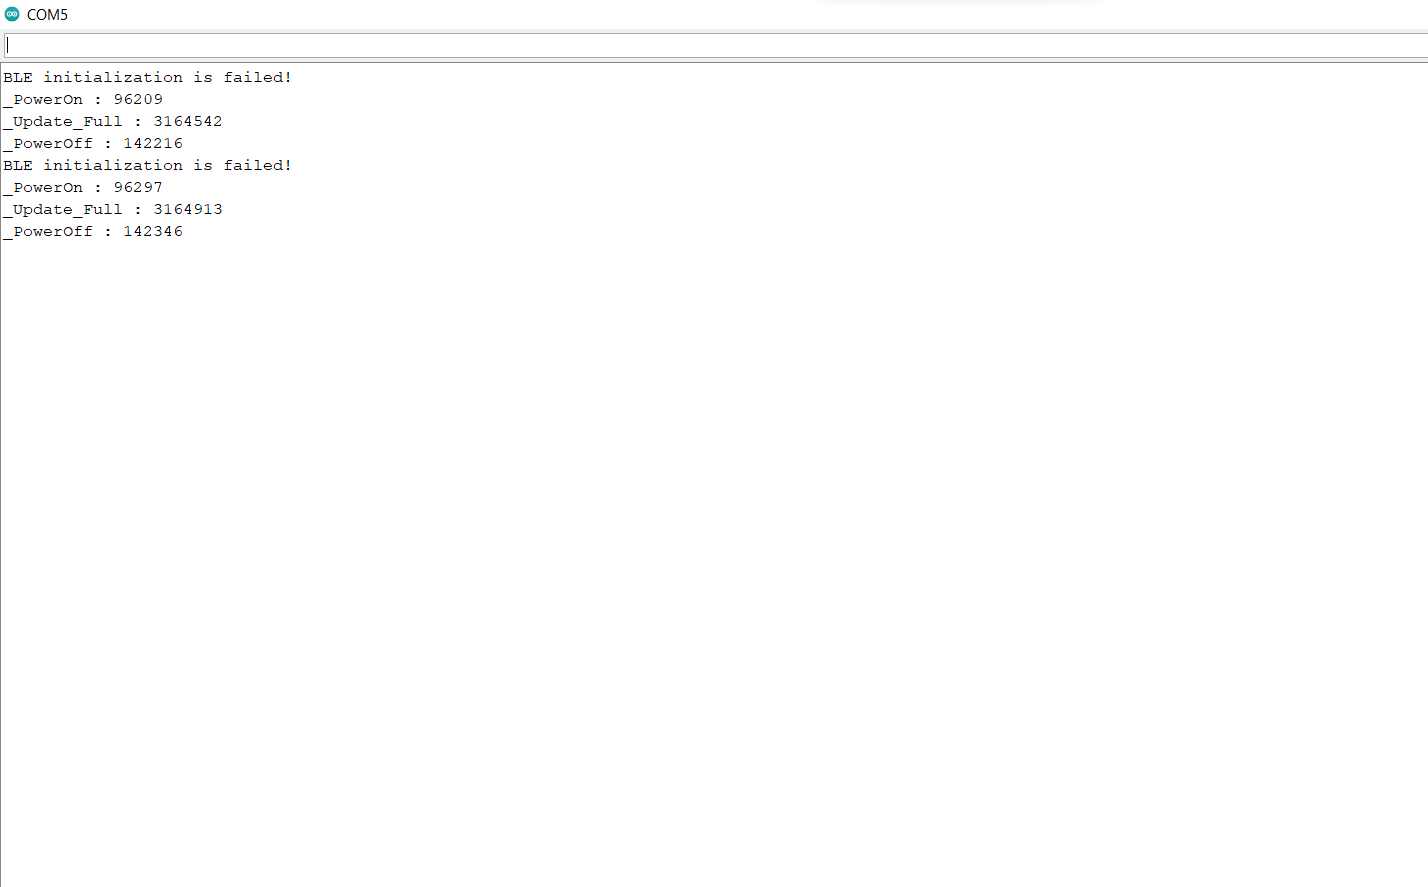
💡📲 If the Nano 33 BLE throws an error while operating, the lighting system shows the error message on the Waveshare e-Paper module, turns the RGB LED to red, and prints the error details on the serial monitor.
💡📲 If the evaluated gas measurements exceed the given threshold, the lighting system shows the error message on the Waveshare e-Paper module, turns the RGB LED to red, and notifies the user via the buzzer.
Figure - 81.99
Figure - 81.100
Figure - 81.101
💡📲 Also, the lighting system prints notifications and sensor measurements on the serial monitor for debugging.
Figure - 81.102
💡📲 If the Disconnect button is pressed, the application disconnects from the Nano 33 BLE and clears all received information.