I have a gradually growing Twitter account for my website to showcase my projects and articles. Most of the time, I forget to check if there is a change in the follower count of my Twitter account to discern the account growth chronologically. Thus, I decided to create this apparatus placed on my desk, which displays information of my Twitter account:
current follower count,
current account name and ID,
three preceding follower counts.
First of all, to manage to glean information from Twitter by avoiding any authentification process pertaining to the Twitter API, I chose to use a content delivery network (CDN) - cdn.syndication.twimg - to obtain the number of followers of a selected Twitter account by its screen name. When I managed to get information from Twitter, I programmed a web application in PHP, named Twitter Follower Tracker, running on Raspberry Pi to print a data packet containing:
the follower count,
the account name,
and the account ID.
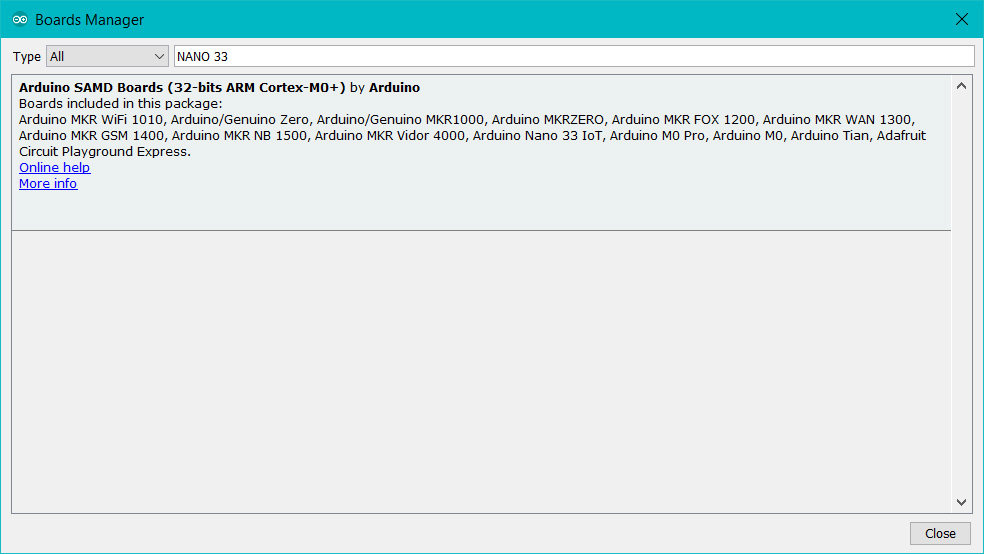
Then, I used an Arduino Nano 33 IoT to get my Twitter account information and follower count transferred by the PHP web application and display them with a Nokia 5110 Screen.
Finally, I added a COM-09032 analog joystick and two buttons to control the menu options and scroll text.
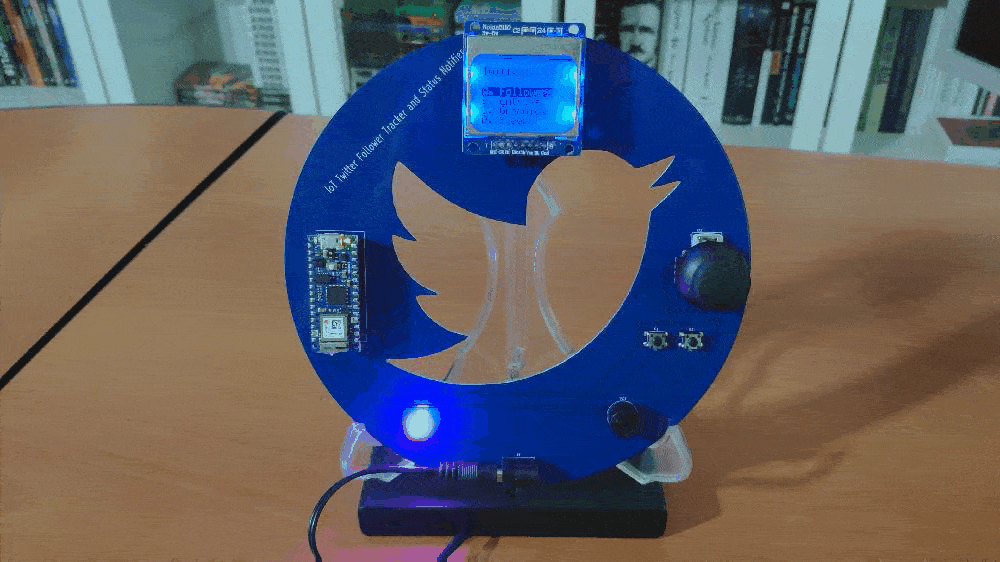
After completing wiring on a breadboard and testing the code, I designed a PCB (Twitter Follower Tracker) having the Twitter logo carved at its center. It became a stylish and fitting addition to my desk as an efficient apparatus to track the follower count of my account :)
In addition to displaying information, the device:
Notifies the user when there is a change in the follower count - INC or DEC.
Shows monochrome images as a screensaver if selected.
Huge thanks to PCBWay for sponsoring this project.
Figure - 61.1
Figure - 61.2
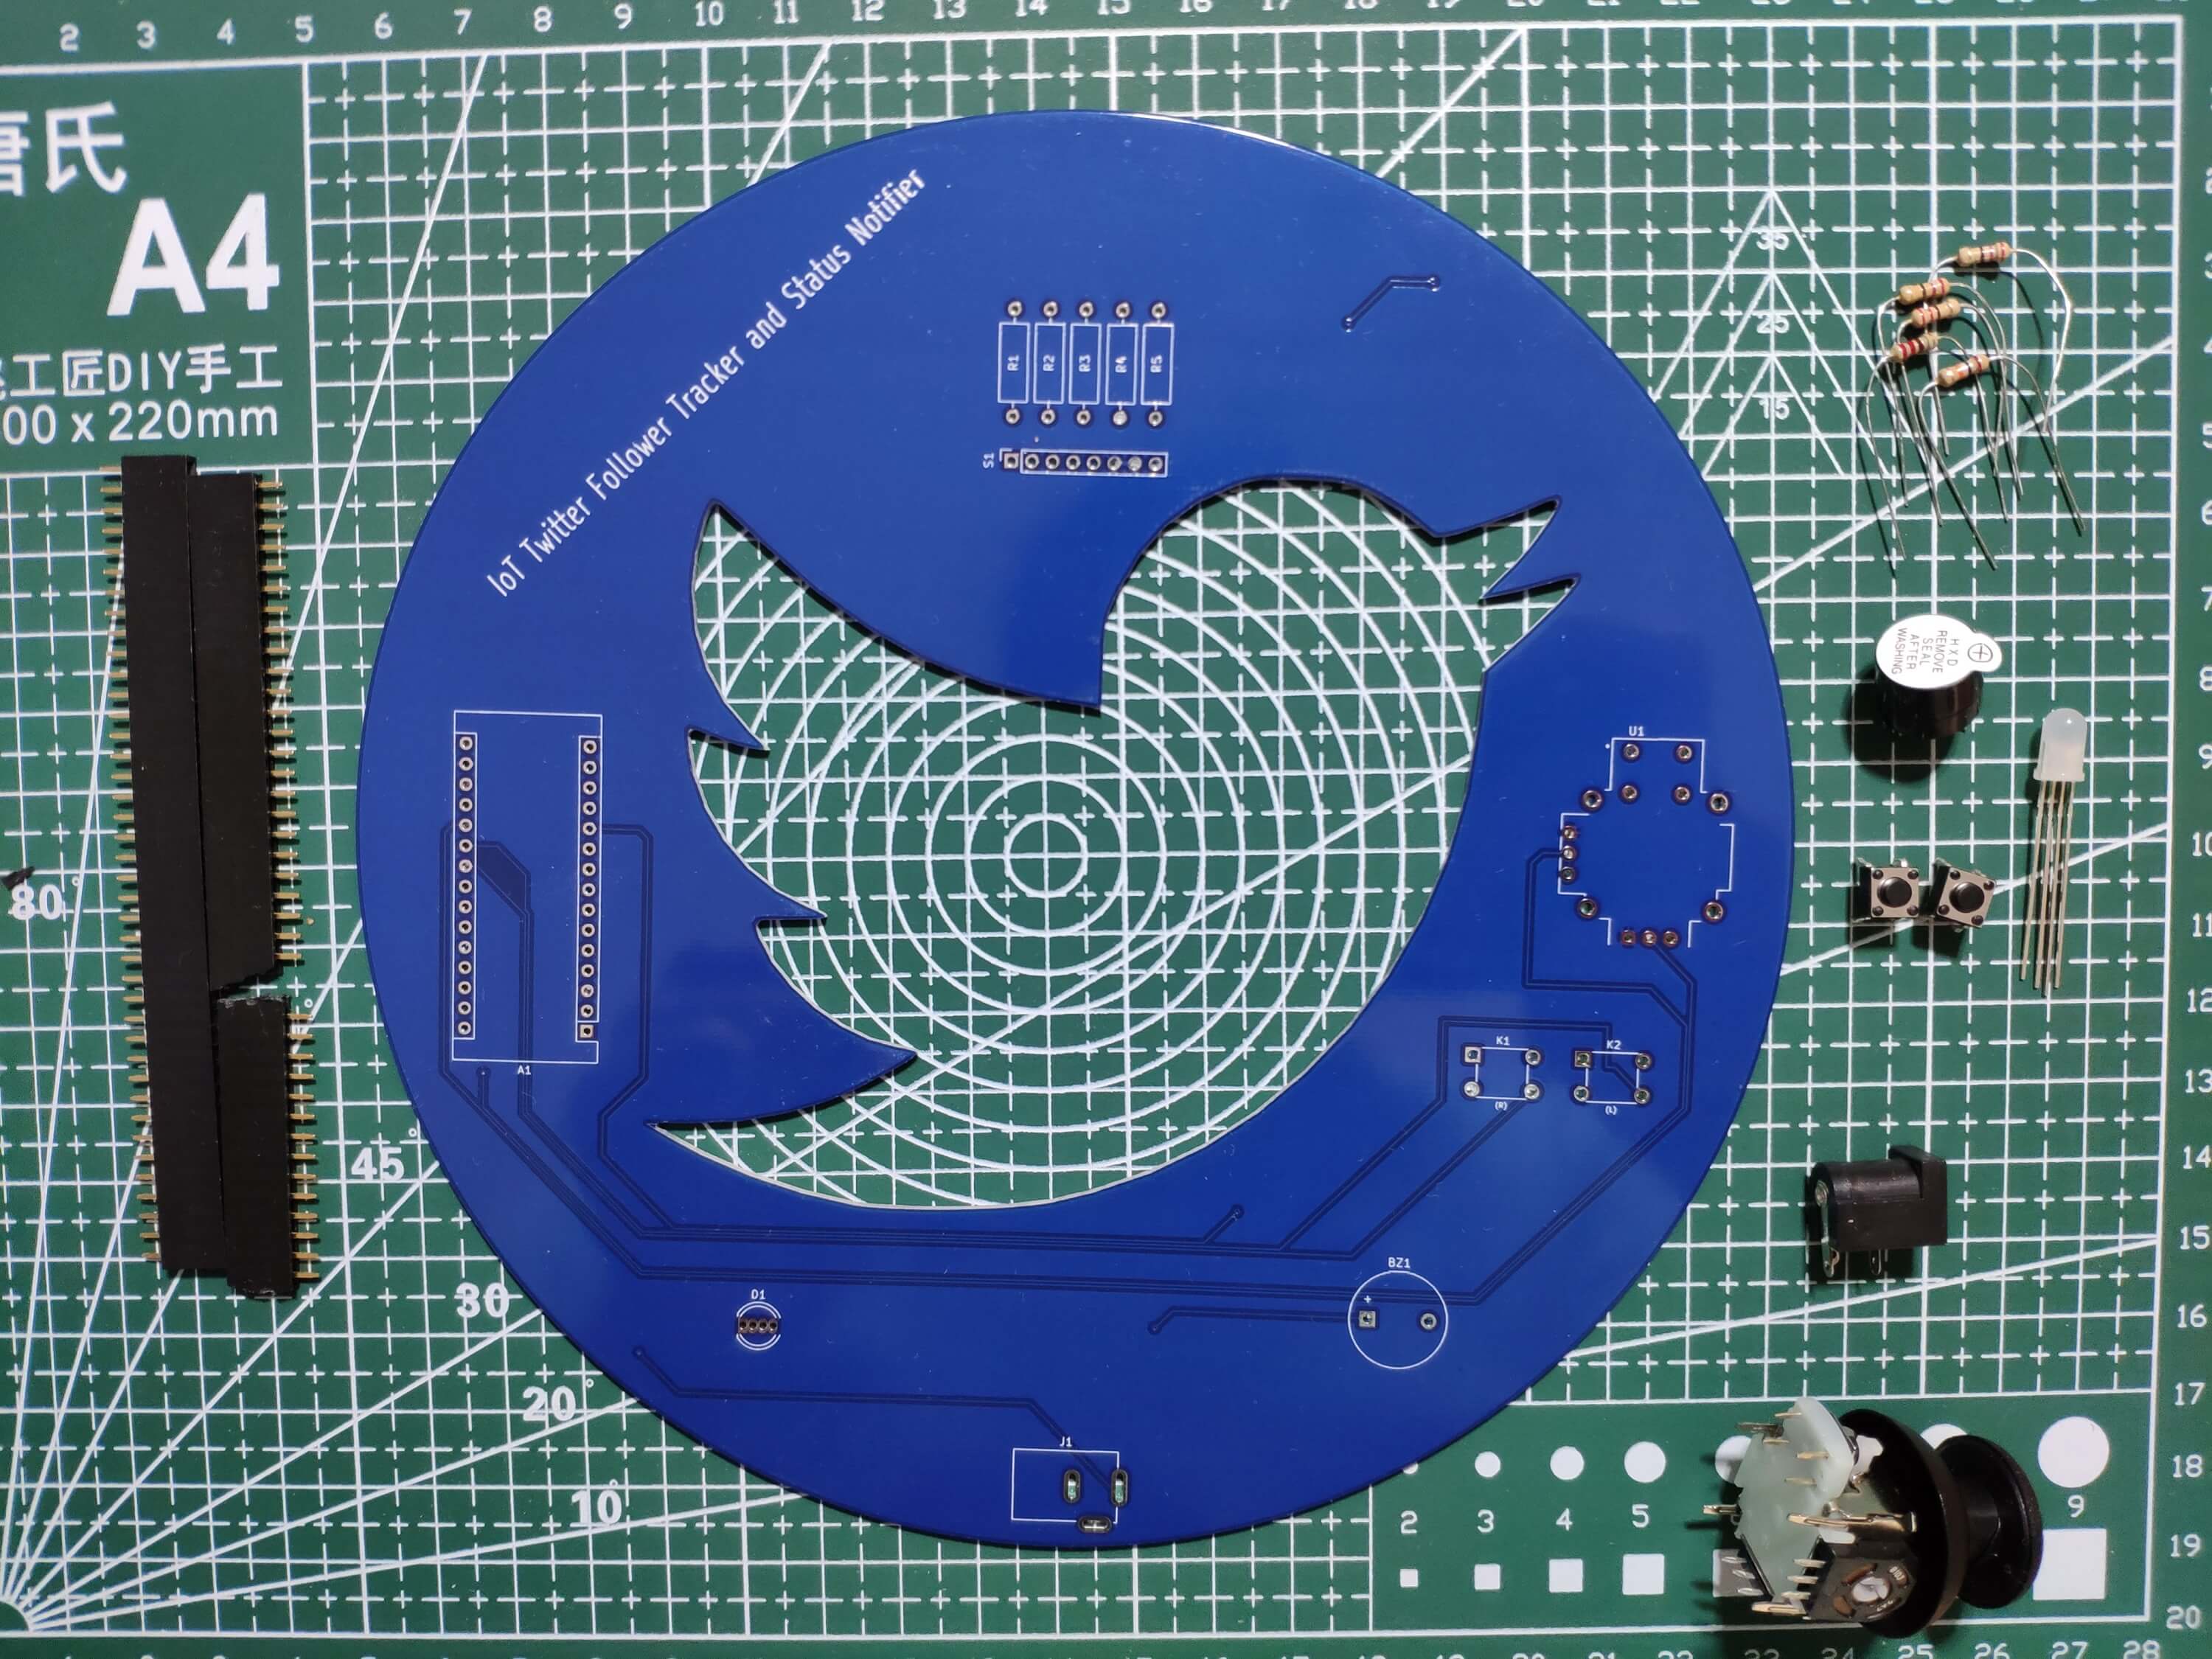
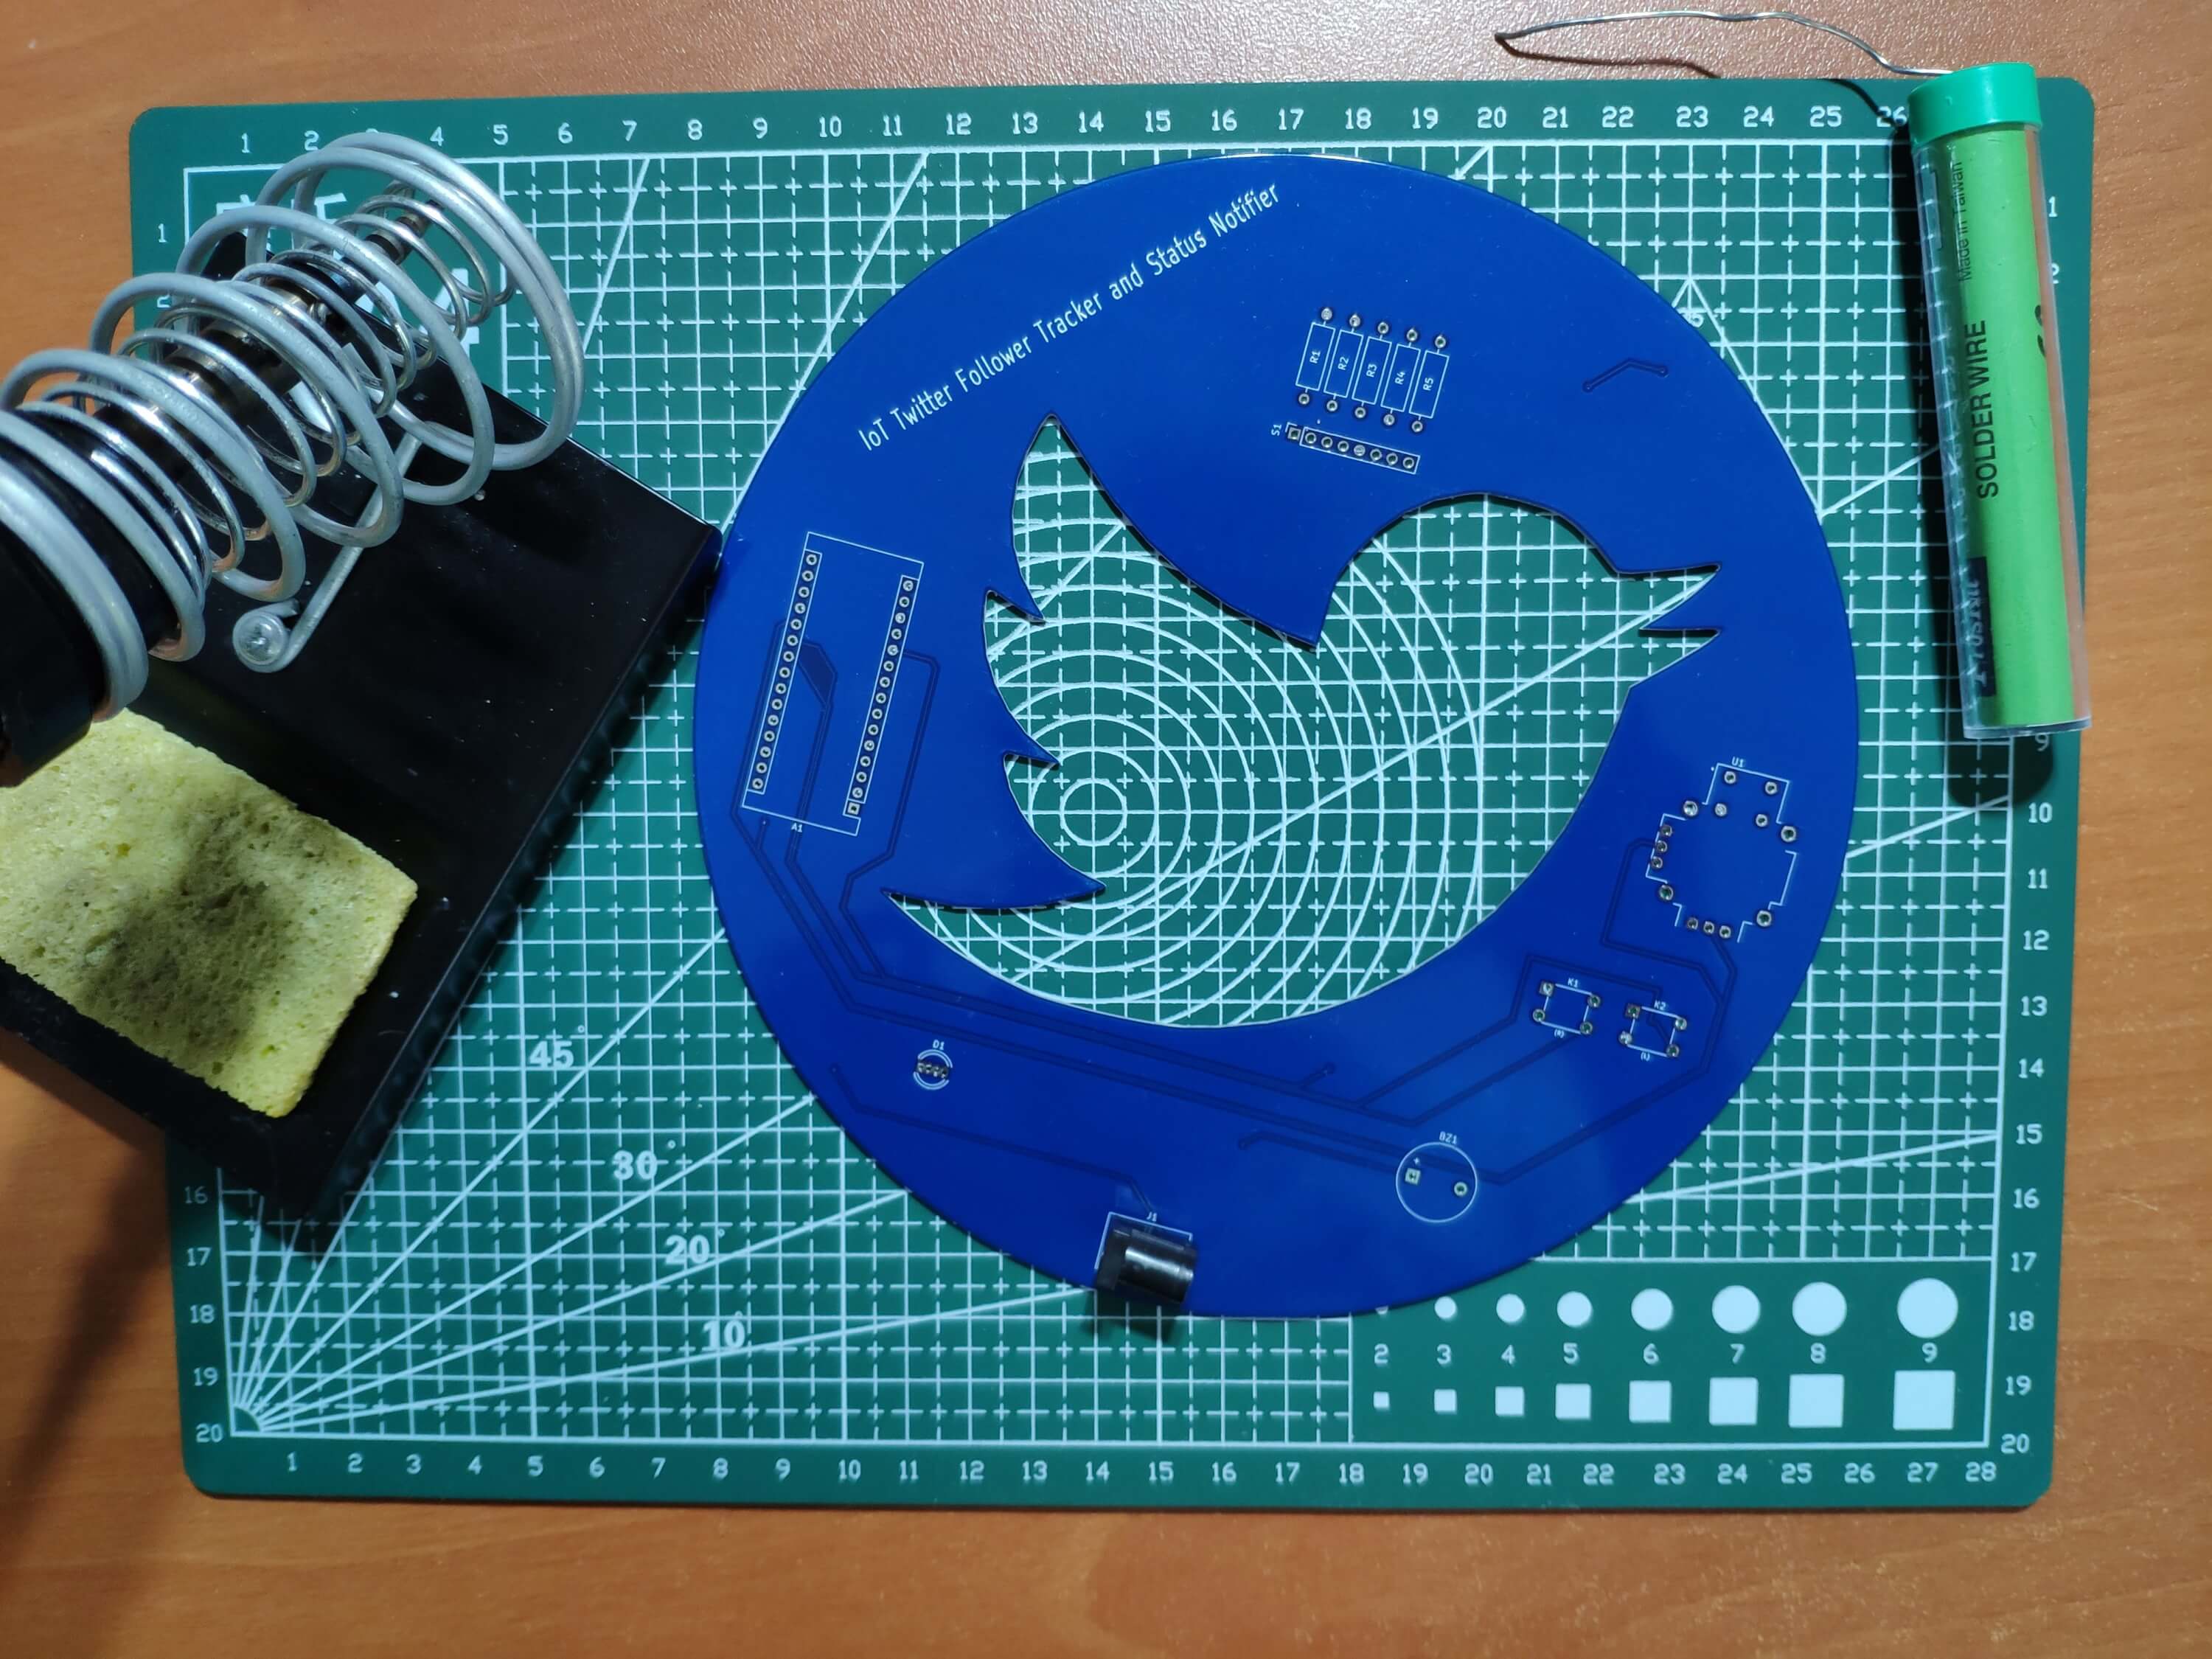
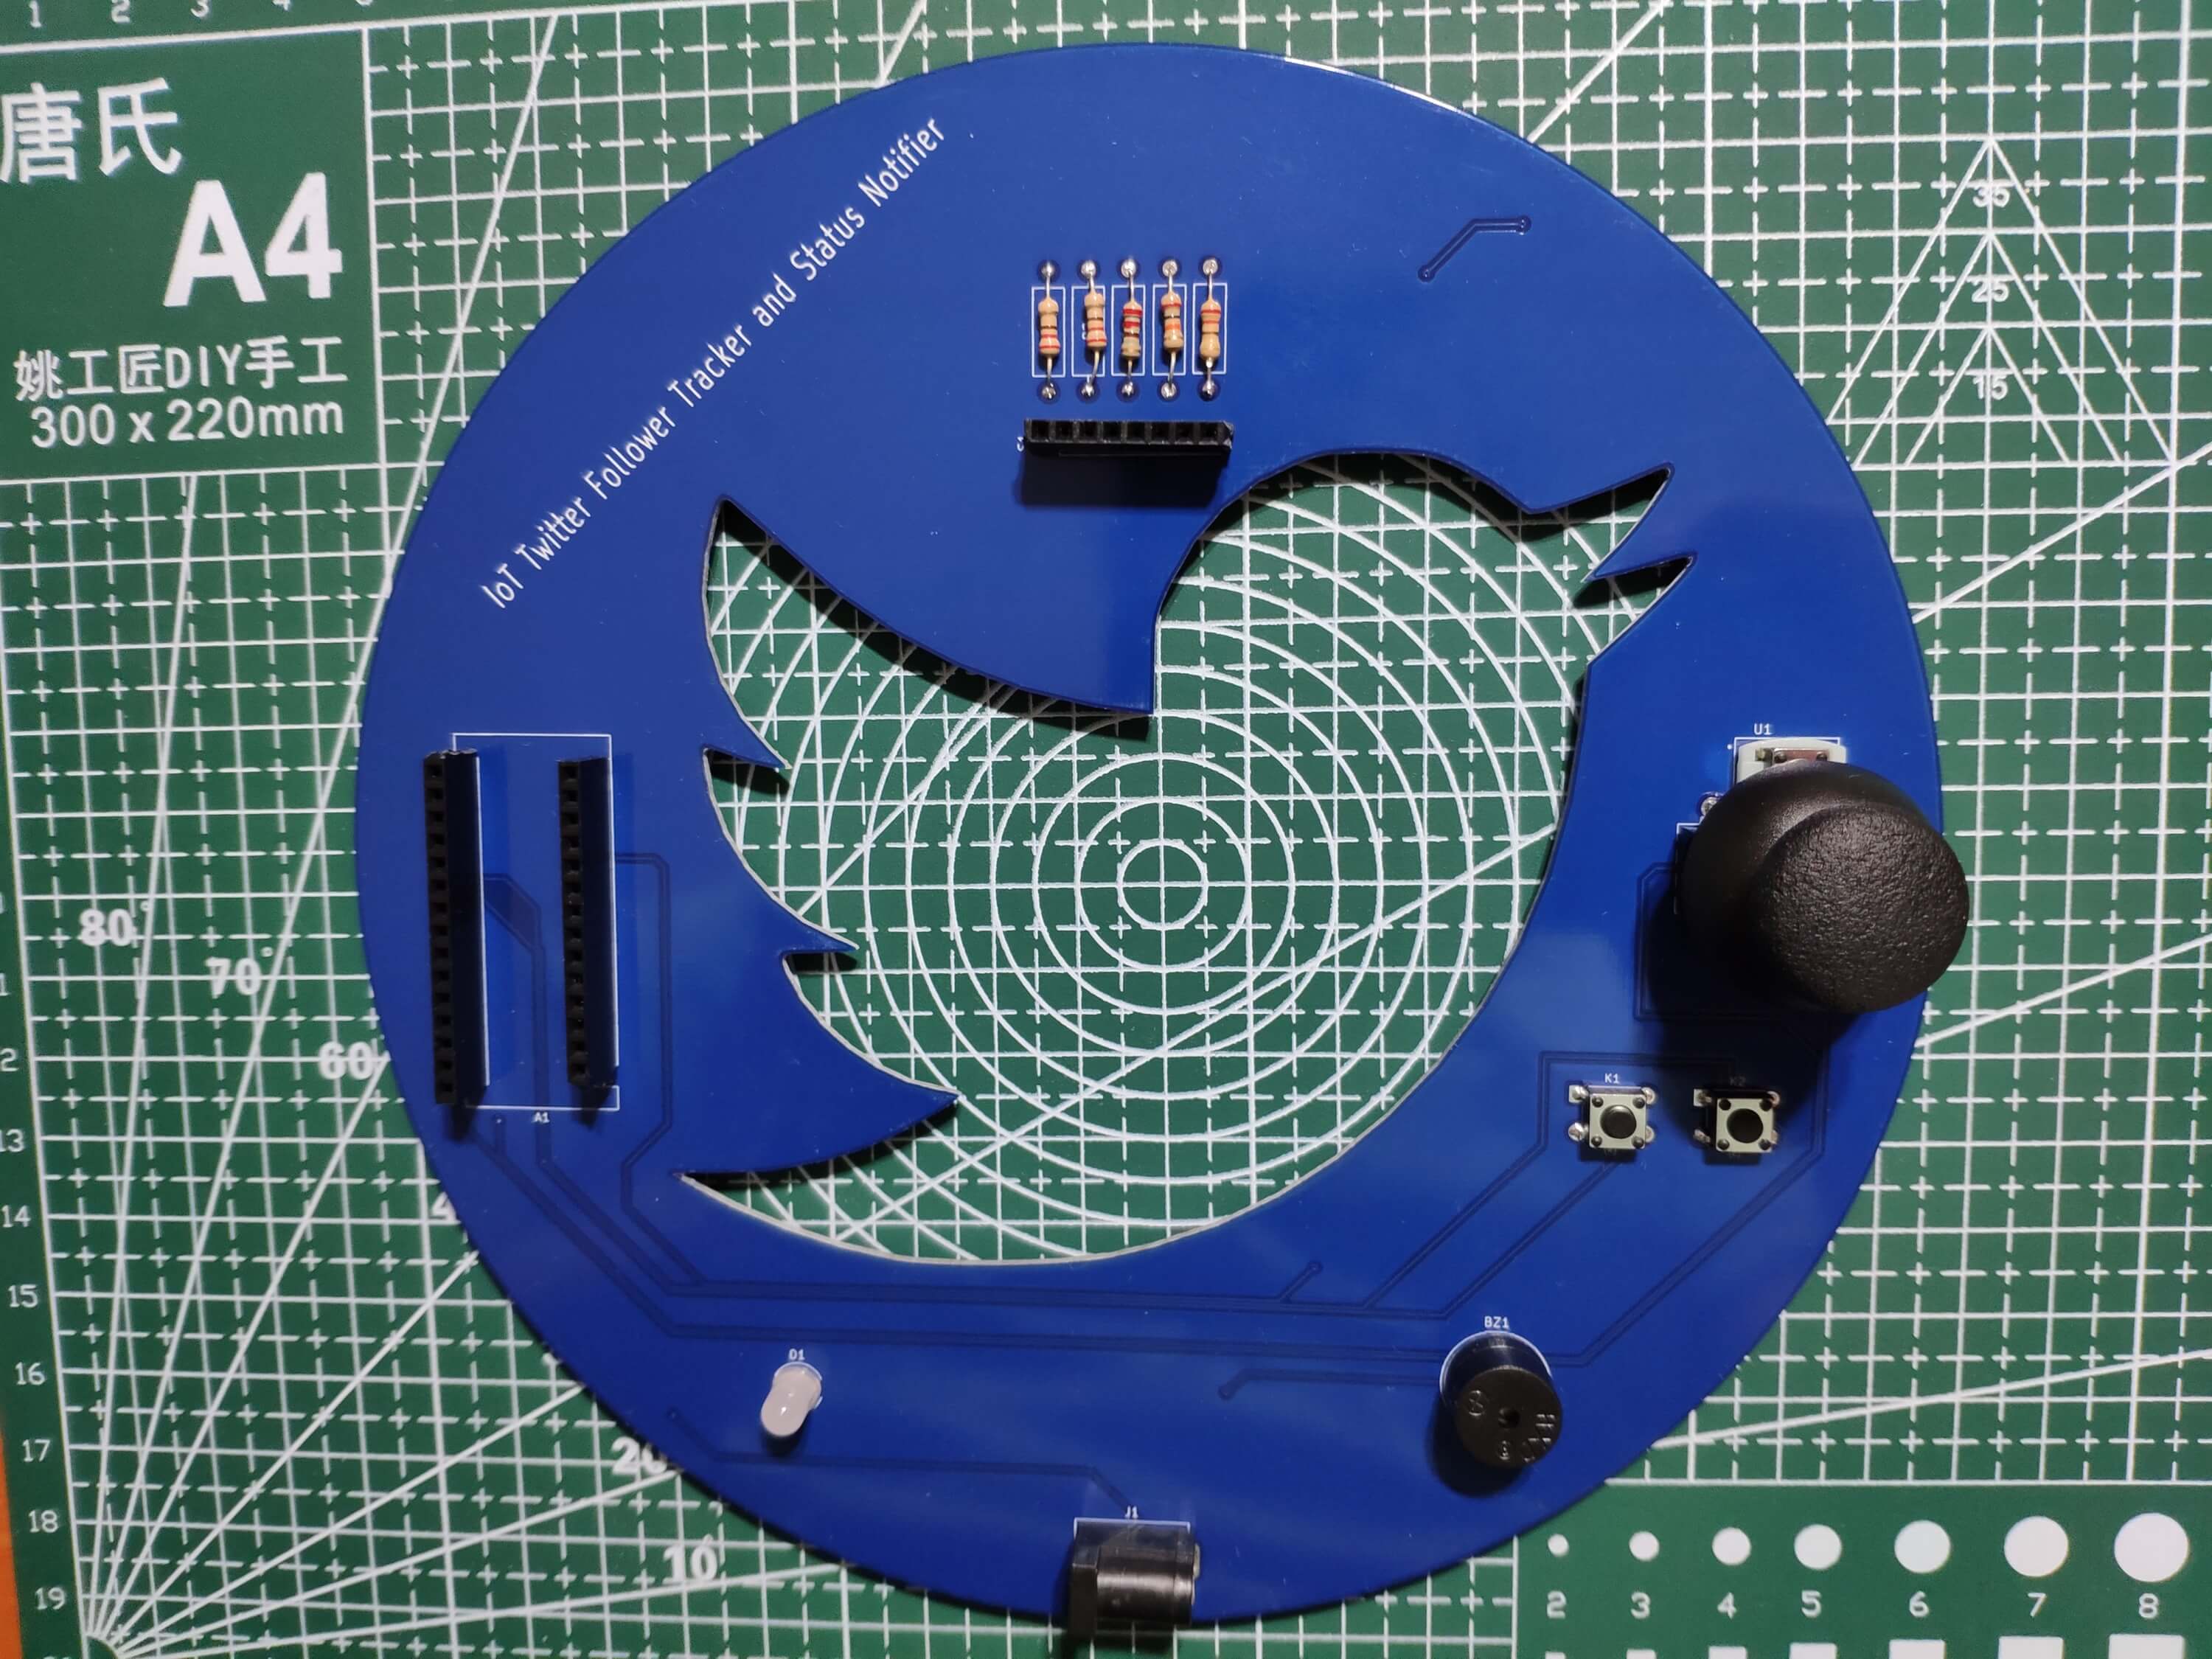
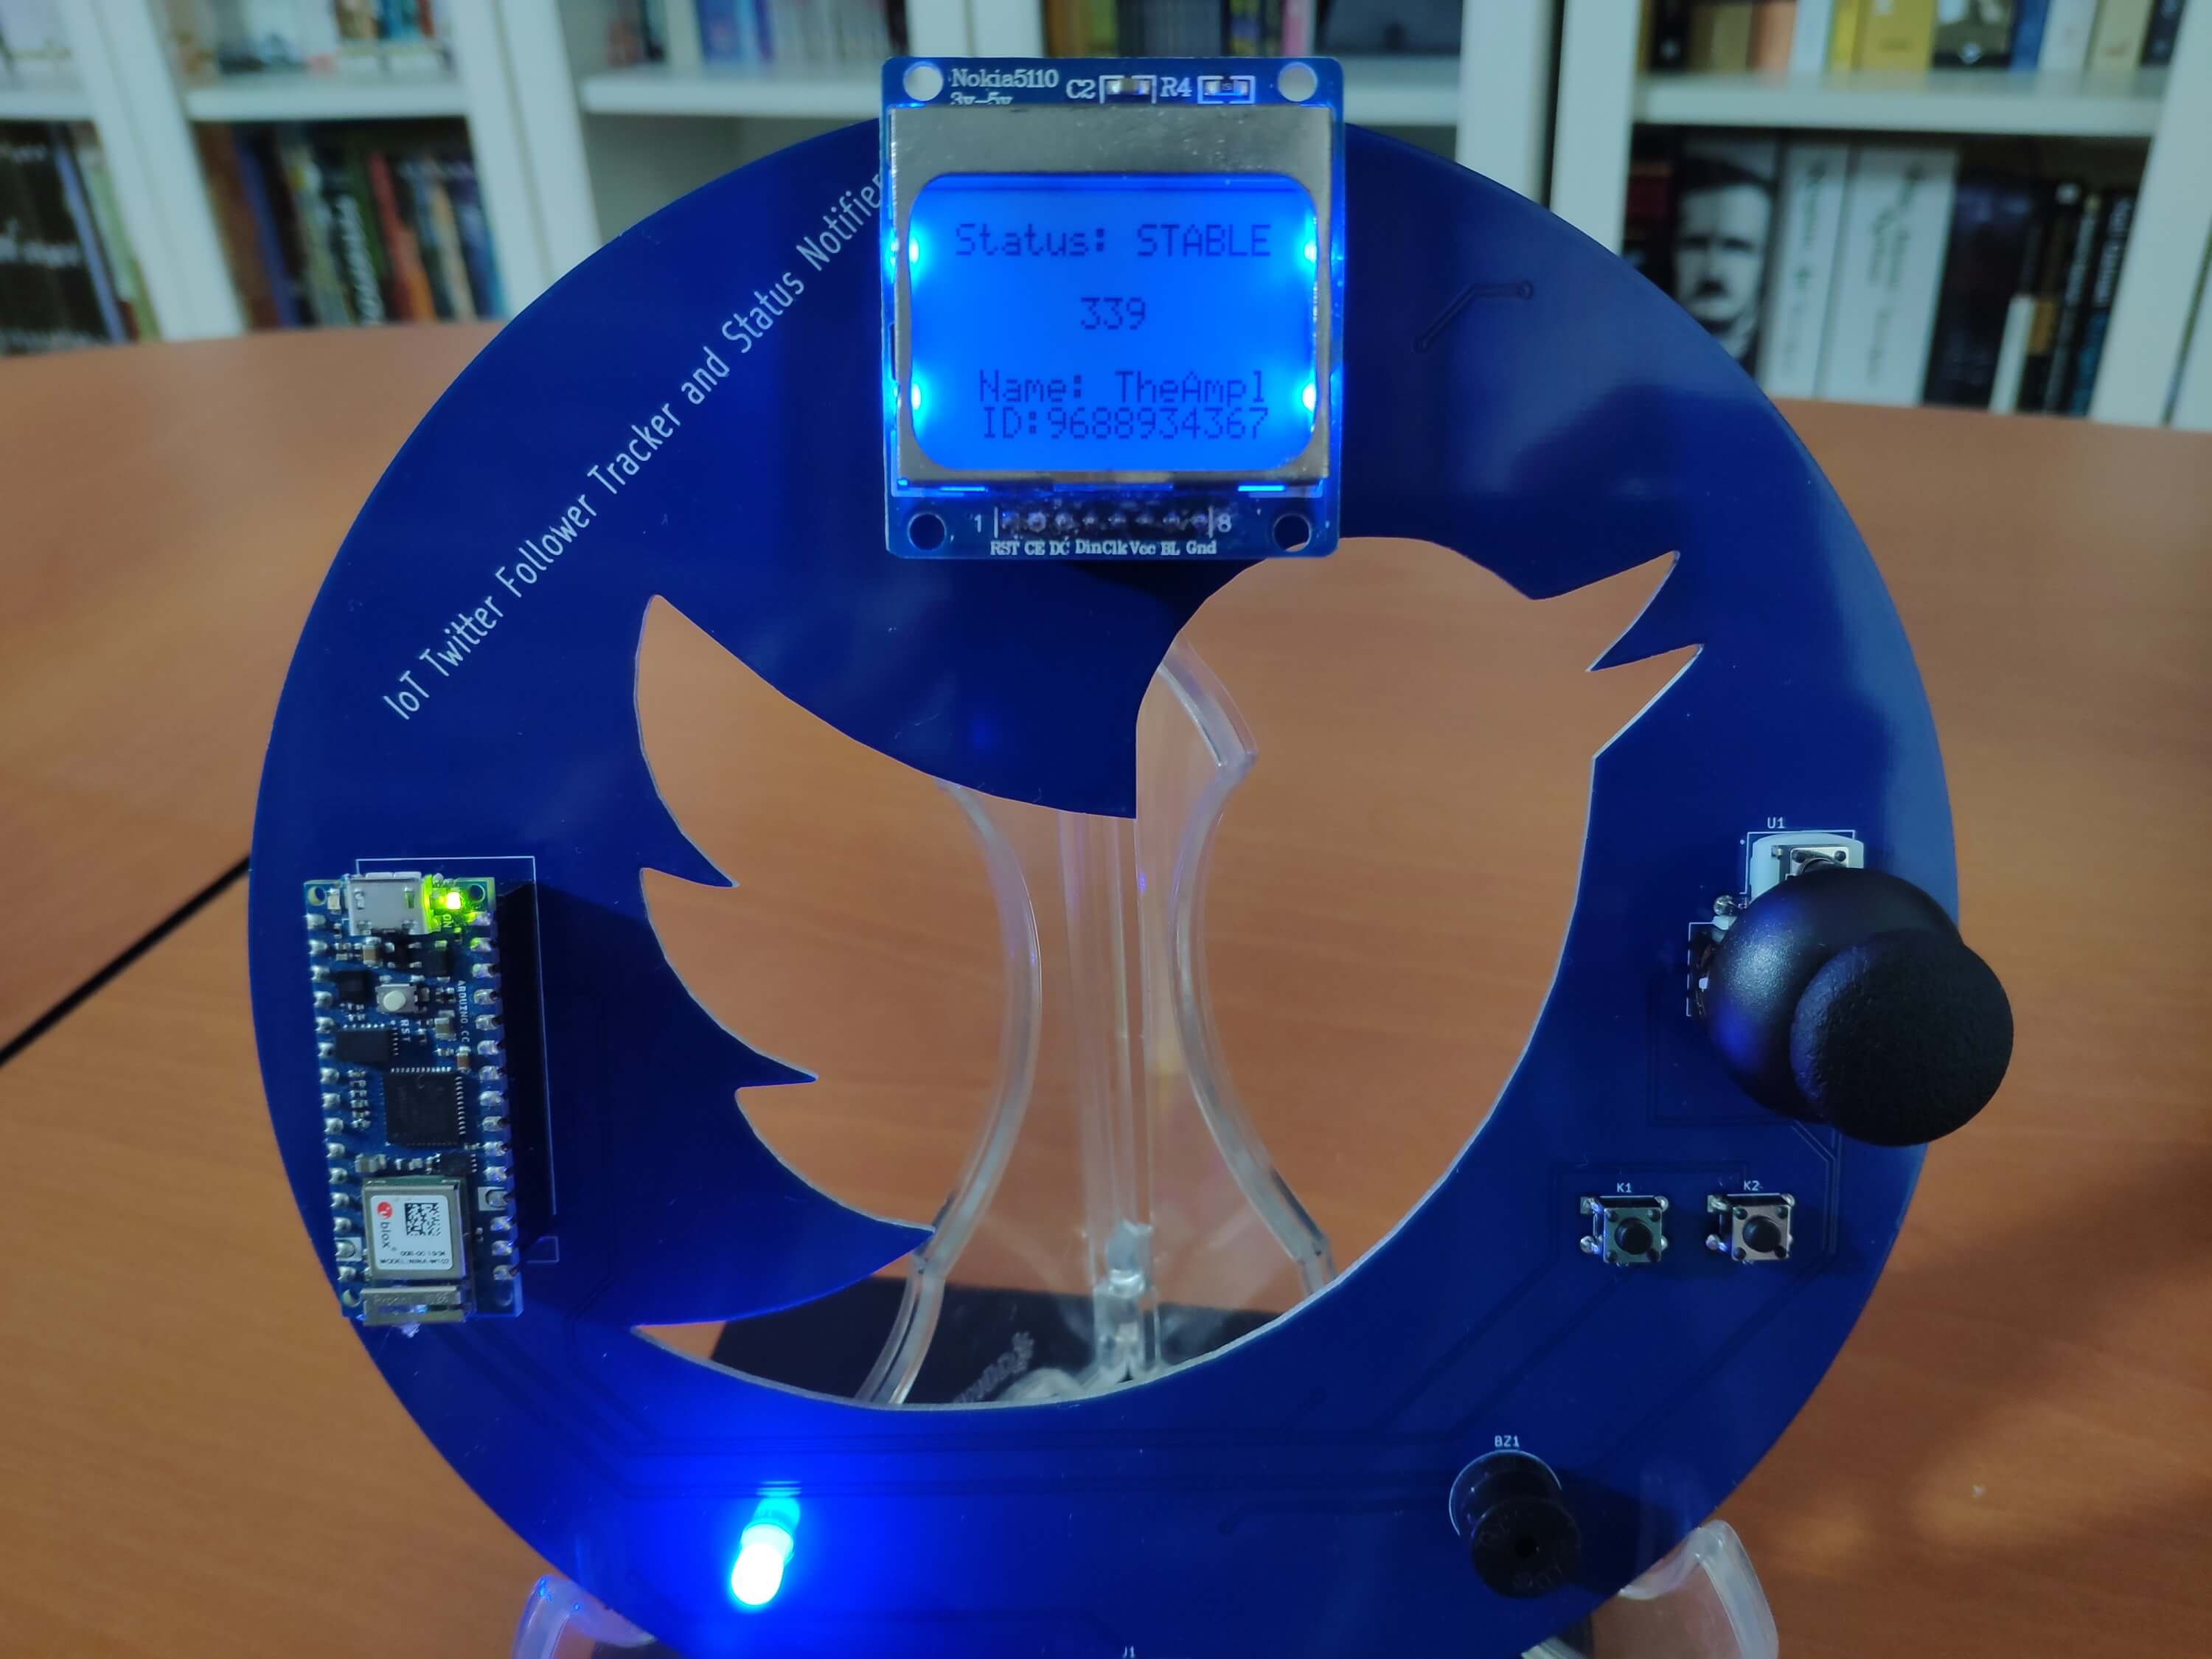
Step 1: Designing and soldering the Twitter Follower Tracker PCB
Before prototyping my PCB design, I tested all connections and wiring with the Arduino Nano 33 IoT on the breadboard.
Figure - 61.3
Then, I designed the Twitter Follower Tracker and Status Notifier PCB by using KiCad. I attached the Gerber file of the PCB below, so if you want, you can order this PCB from PCBWay to create a stylish and fitting apparatus to display the follower count of a selected account and get notified when there is a change, inspired by the Twitter logo :)
Click here to inspect and order this PCB directly on PCBWay.
Figure - 61.4
First of all, by using a soldering iron, I attached headers (female), COM-09032 analog joystick, buzzer, 5mm common cathode RGB LED, 6x6 pushbuttons, 1K resistors, and the power jack.
Component list on the PCB:
A1 (Headers for Arduino Nano 33 IoT)
S1 (Headers for Nokia 5110 Screen)
U1 (COM-09032 Analog Joystick)
BZ1 (Buzzer)
D1 (5mm Common Cathode RGB LED)
K1, K2 (6x6 Pushbutton)
R1, R2, R3, R4, R5 (1K Resistor)
J1 (Power Jack)
Figure - 61.5
Figure - 61.6
Figure - 61.7
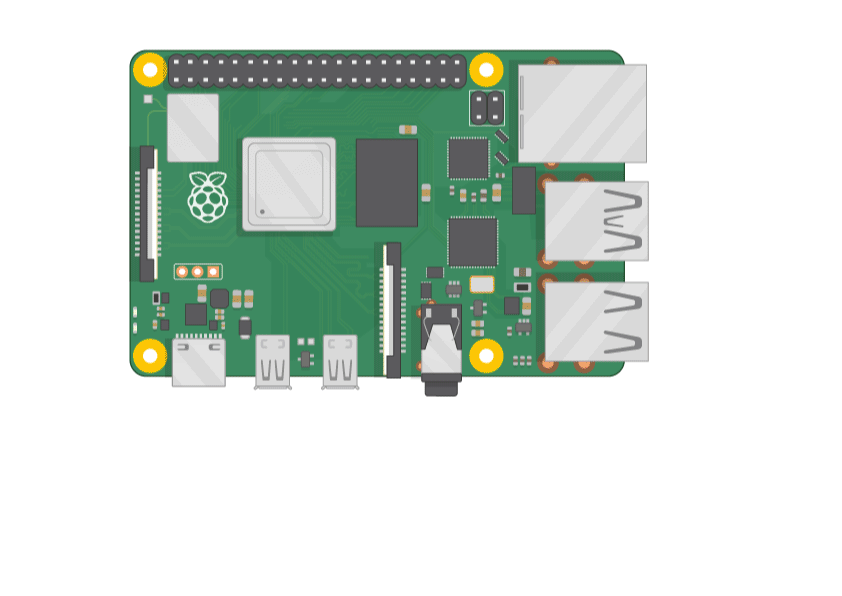
Step 2: Setting up a LAMP web server on Raspberry Pi
If you are a novice in programming with Raspberry Pi, you can inspect well-explained instructions and tutorials on the official Raspberry Pi website.
To go to the official Raspberry Pi setting up tutorial, click here.
Figure - 61.8
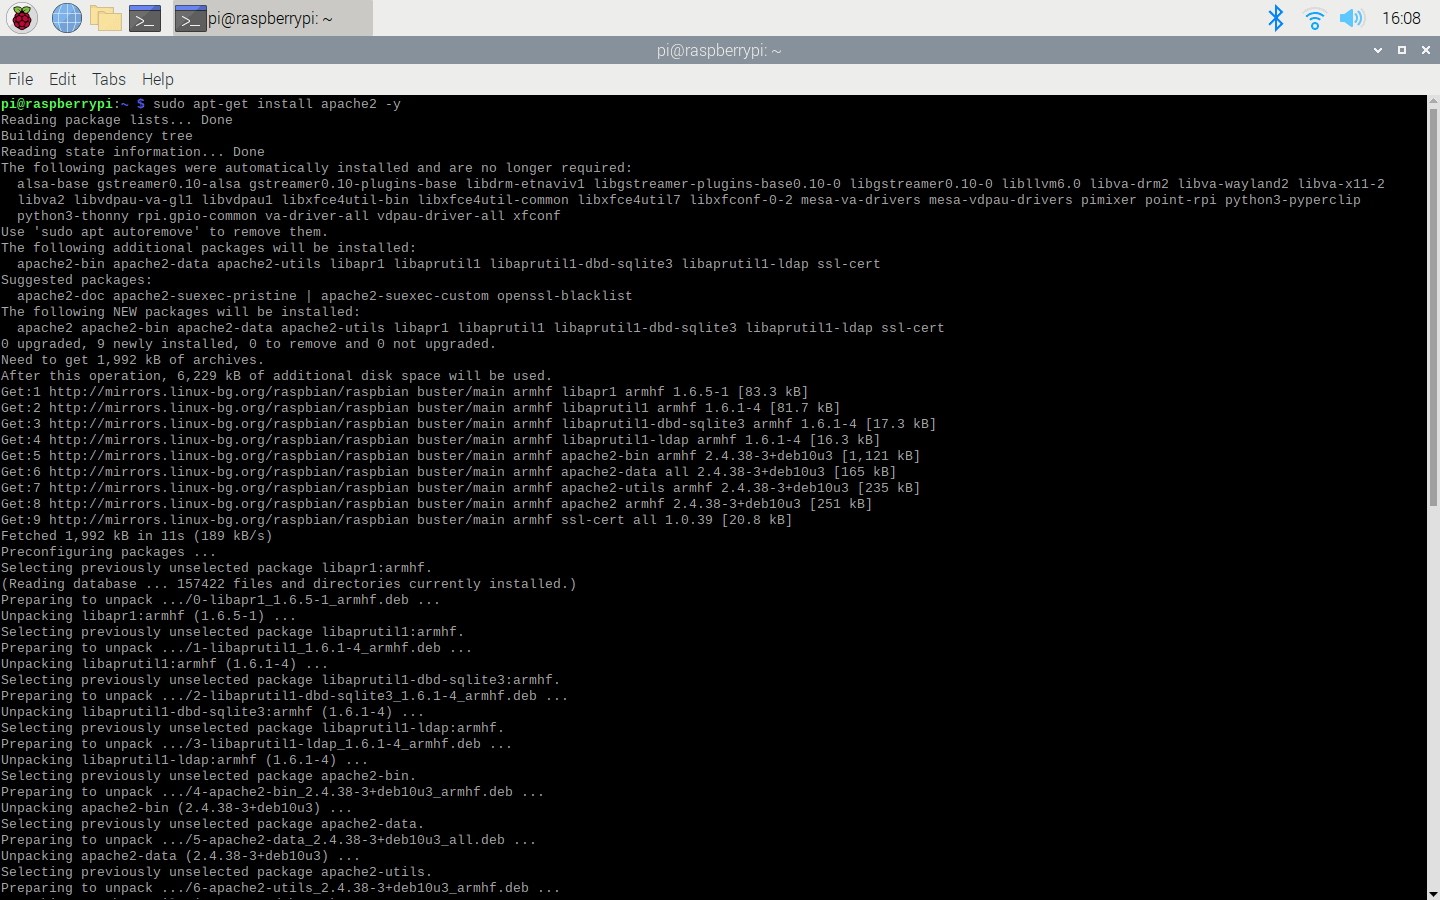
⭐ Open a terminal window by selecting Accessories > Terminal from the menu.
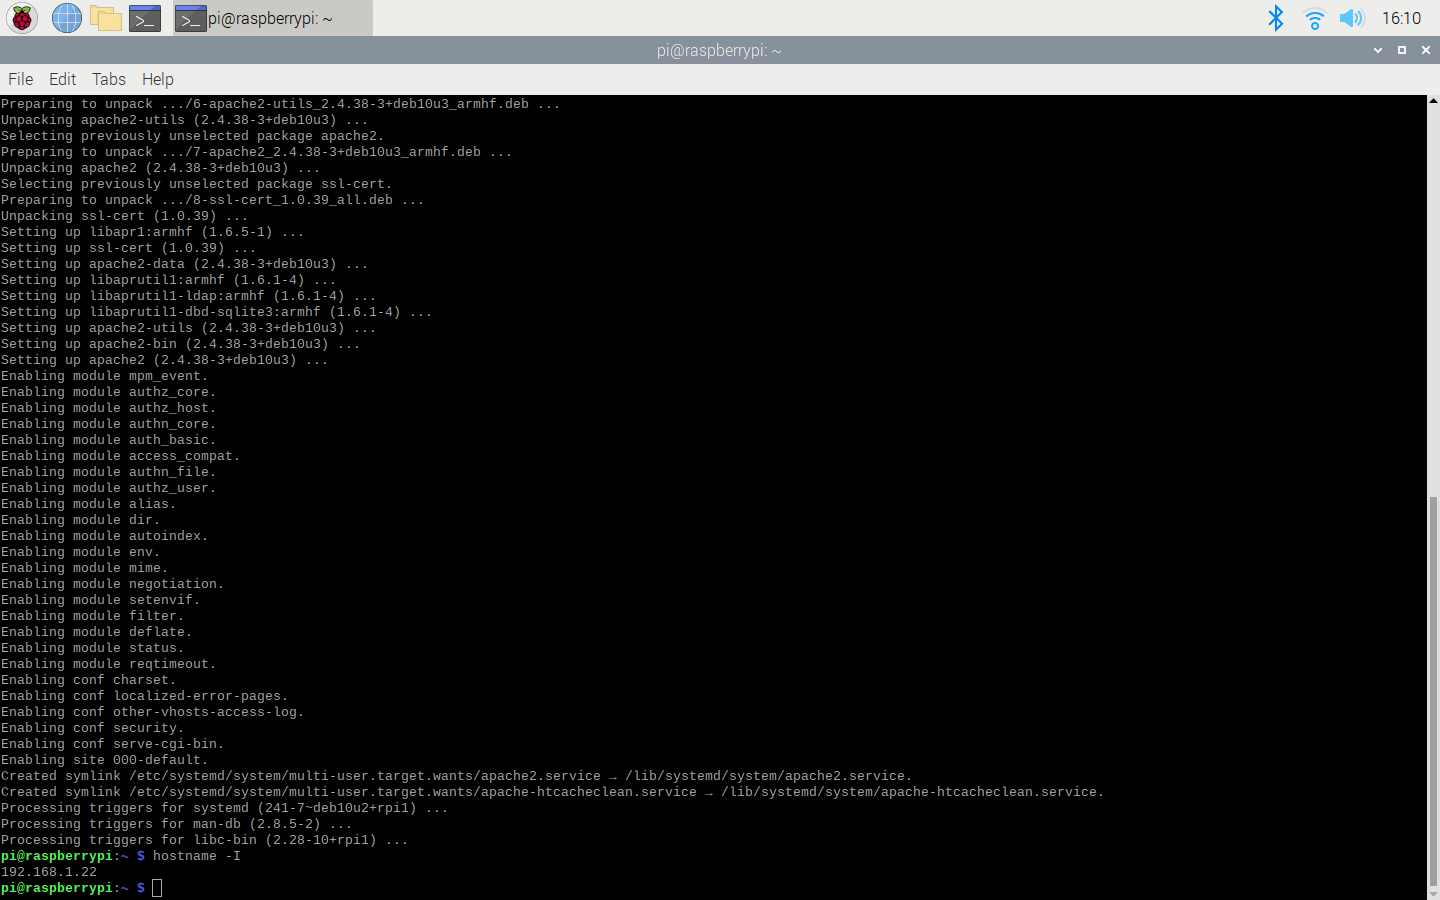
⭐ Install the apache2 package by typing the following command into the terminal and pressing Enter:
sudo apt-get install apache2 -y
Figure - 61.9
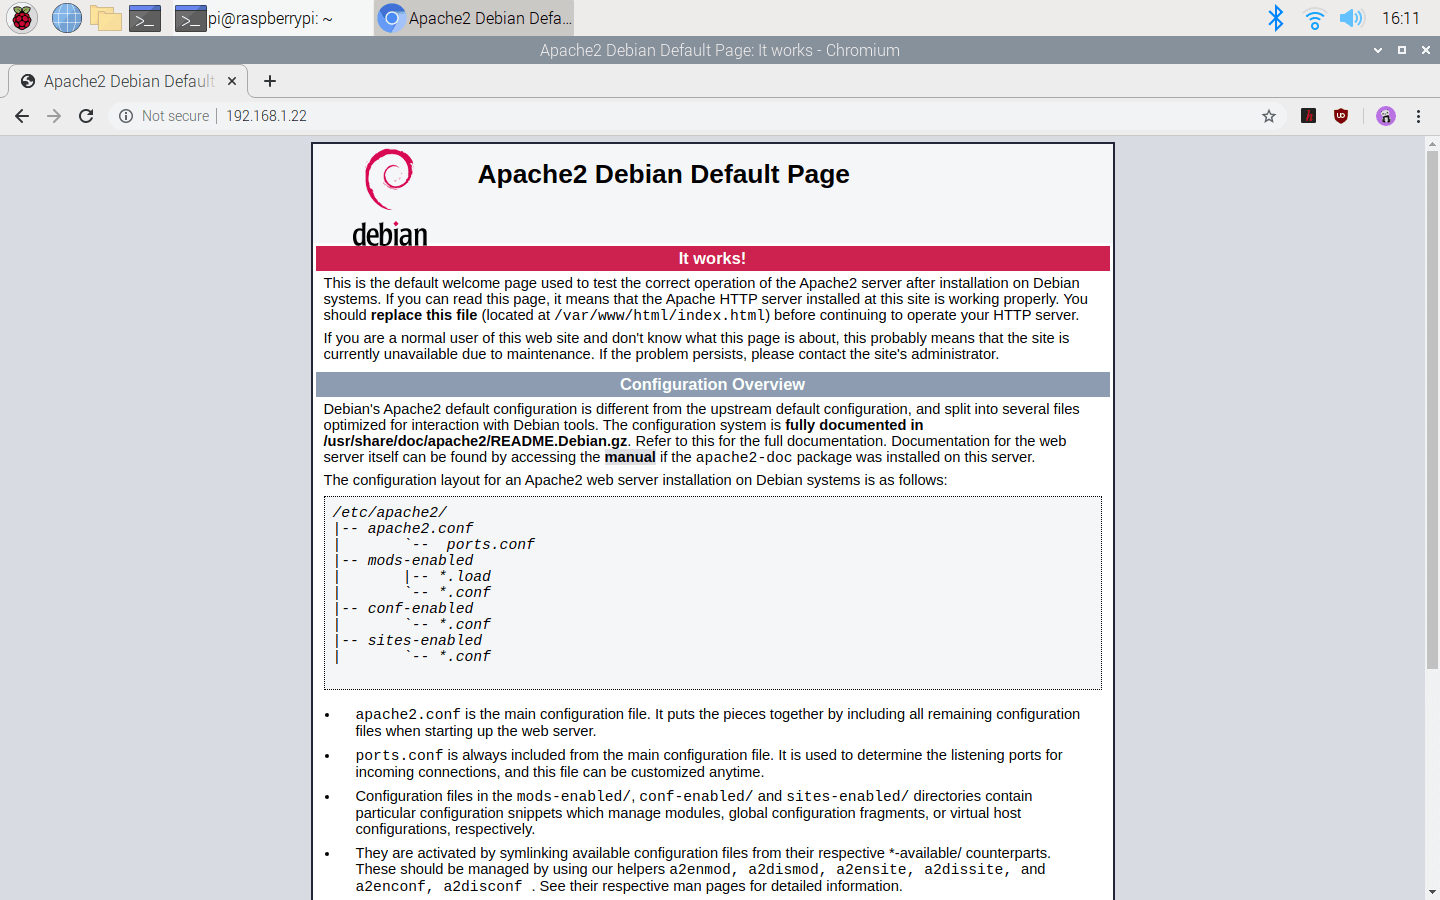
⭐ To test the server, open Chromium by selecting Internet > Chromium Web Browser from the menu and enter http://localhost.
⭐ If you want, you can use the IP address of your Raspberry Pi as well.
hostname -I
Figure - 61.10
Figure - 61.11
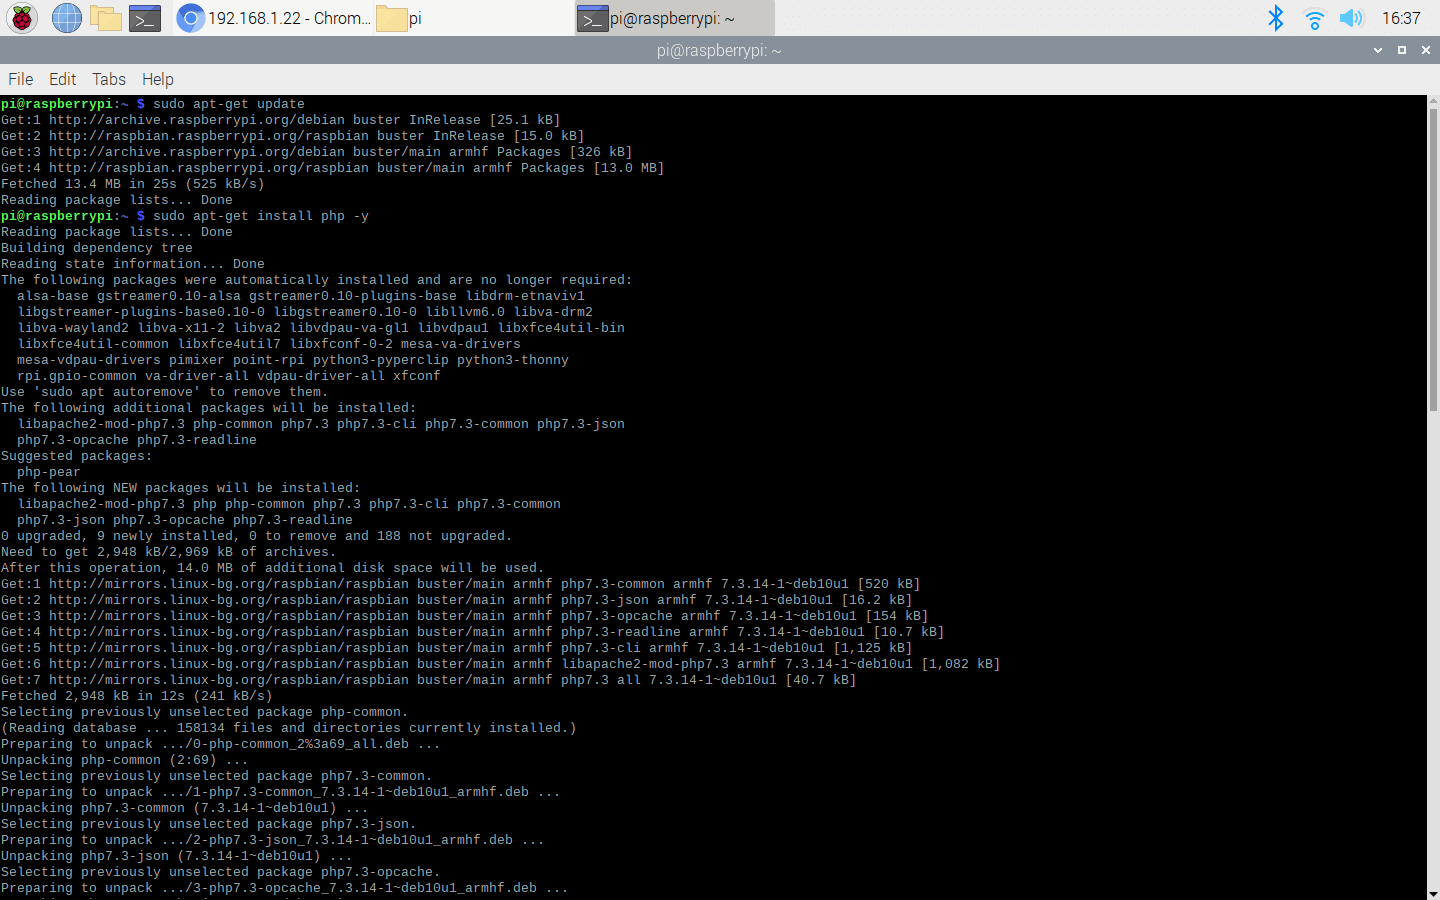
⭐ Install the PHP package with the following command:
⭐ Do not forget to update the Pi.
sudo apt-get update
sudo apt-get install php -y
Figure - 61.12
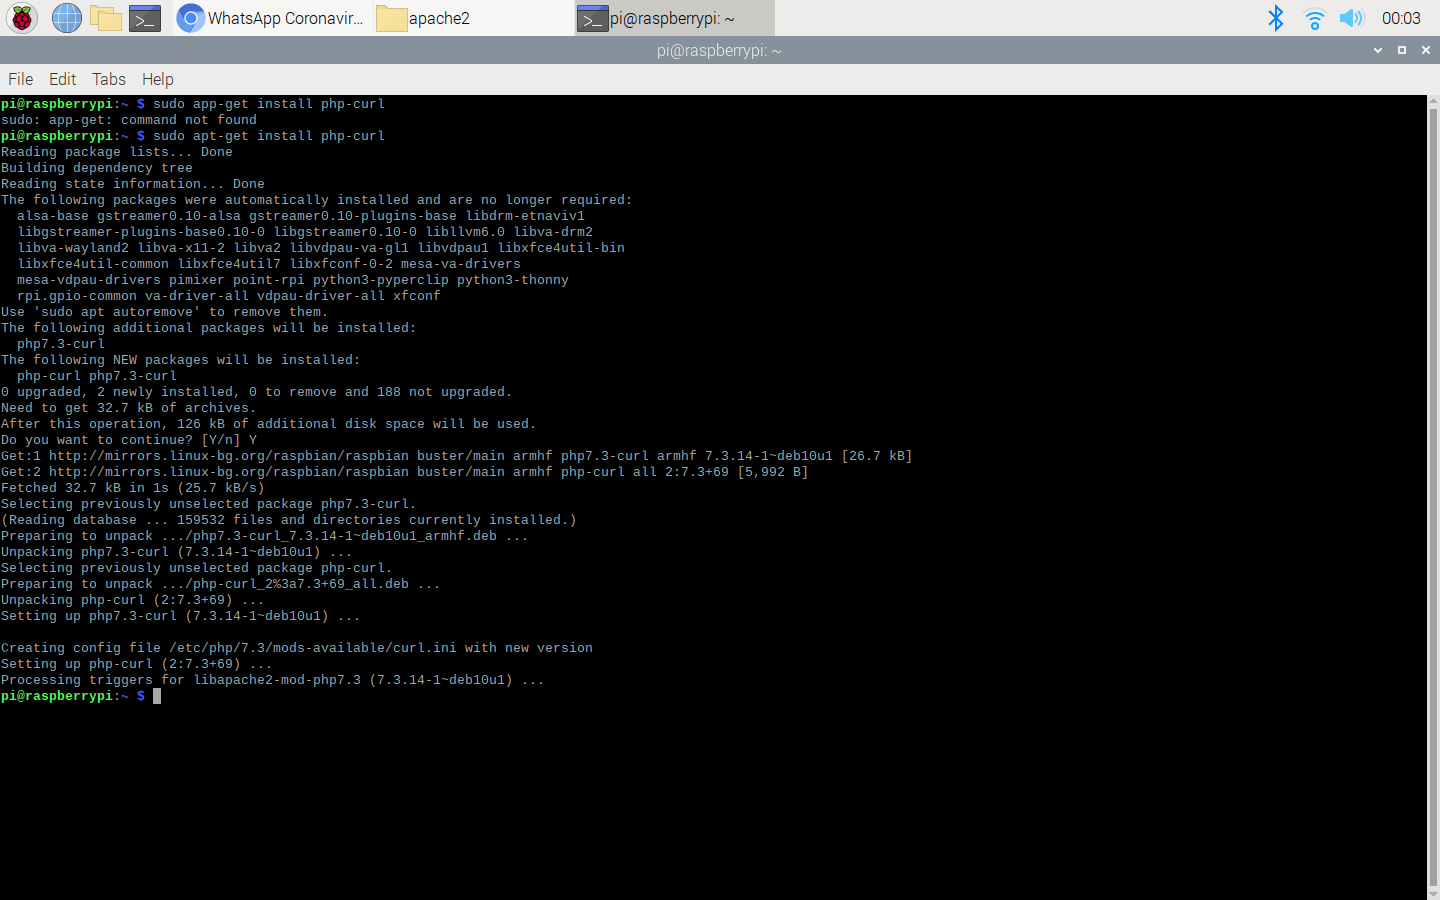
⭐ To be able to obtain information from the cdn.syndication.twimg (CDN), install the php-curl package:
sudo apt-get install php-curl
Figure - 61.13
⭐ Then, restart the apache server to be able to use the installed packages on the localhost:
sudo service apache2 restart
Step 3: Developing the Twitter Follower Tracker web application in PHP to elicit information from the CDN
Although Twitter provides an API to collate information on Twitter accounts, tweets, replies, etc., I decided to use a content delivery network (CDN) in this project since the Twitter API requires an authentification process and key.
CDN: cdn.syndication.twimg
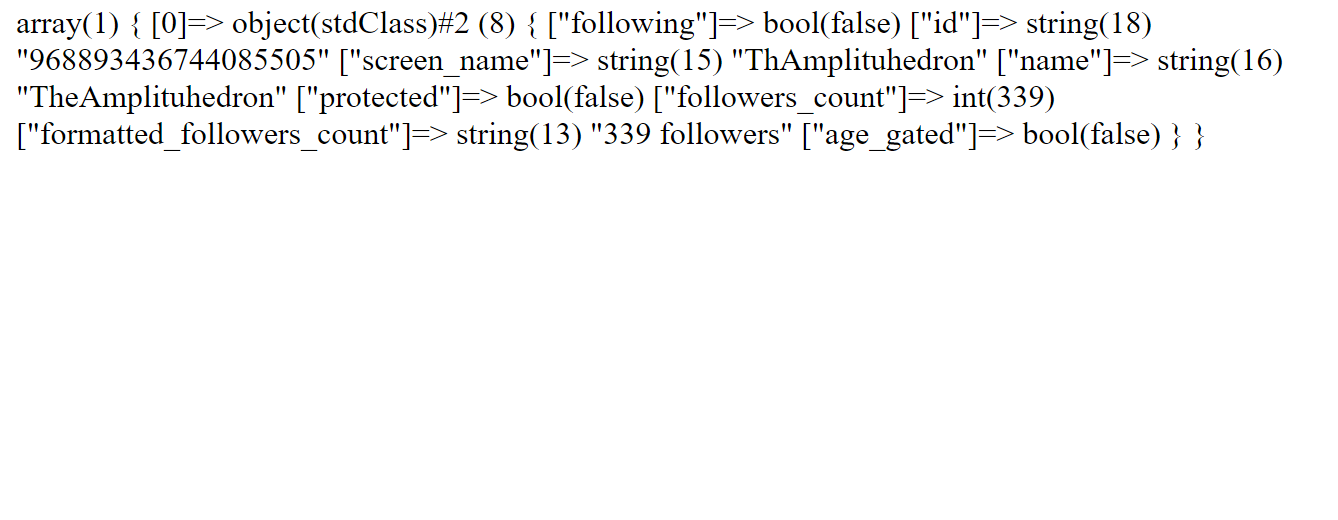
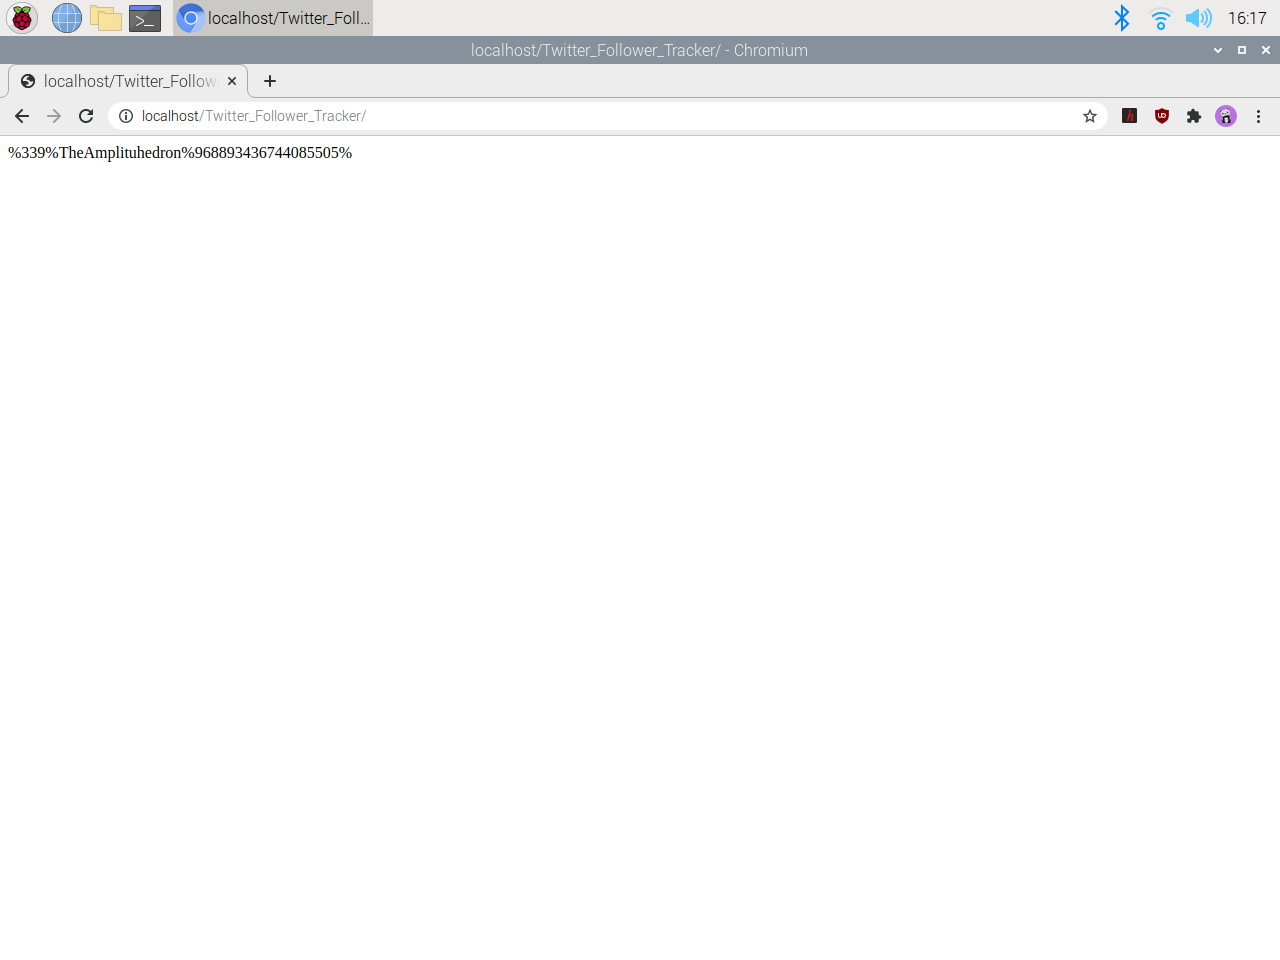
⭐ CDN uses screen names of Twitter accounts to collect and return this information in JSON:
The web application consists of one file - index.php. You can download the web application below to install it on your Raspberry Pi - Twitter_Follower_Tracker.zip.
💻 index.php
⭐ Define the twitter_follower_tracker class and its functions.
⭐ In the __init__ function, define the screen name of the Twitter account, such as ThAmplituhedron.
⭐ In the get_followers function, print information of the given Twitter account.
Follower Count
Account Name
Account ID
⭐ Syntax:
%follower_count%account_name%account_ID%
%339%TheAmplituhedron%968893436744085505%
⭐ Define the twitter class object.
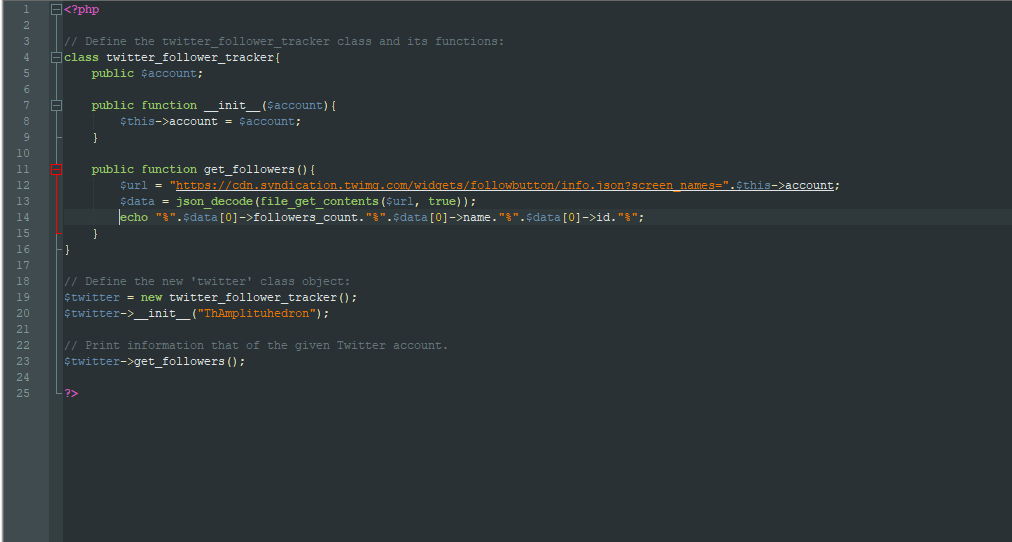
// Define the twitter_follower_tracker class and its functions:
class twitter_follower_tracker{
	public $account;

	public function __init__($account){
		$this->account = $account;
	}

	public function get_followers(){
		$url = "https://cdn.syndication.twimg.com/widgets/followbutton/info.json?screen_names=".$this->account;
		$data = json_decode(file_get_contents($url, true));
		echo "%".$data[0]->followers_count."%".$data[0]->name."%".$data[0]->id."%";
	}
}

// Define the new 'twitter' class object:
$twitter = new twitter_follower_tracker();
$twitter->__init__("ThAmplituhedron");

// Print information that of the given Twitter account.
$twitter->get_followers();
Figure - 61.15
Step 3.1: Setting up the web application on Raspberry Pi
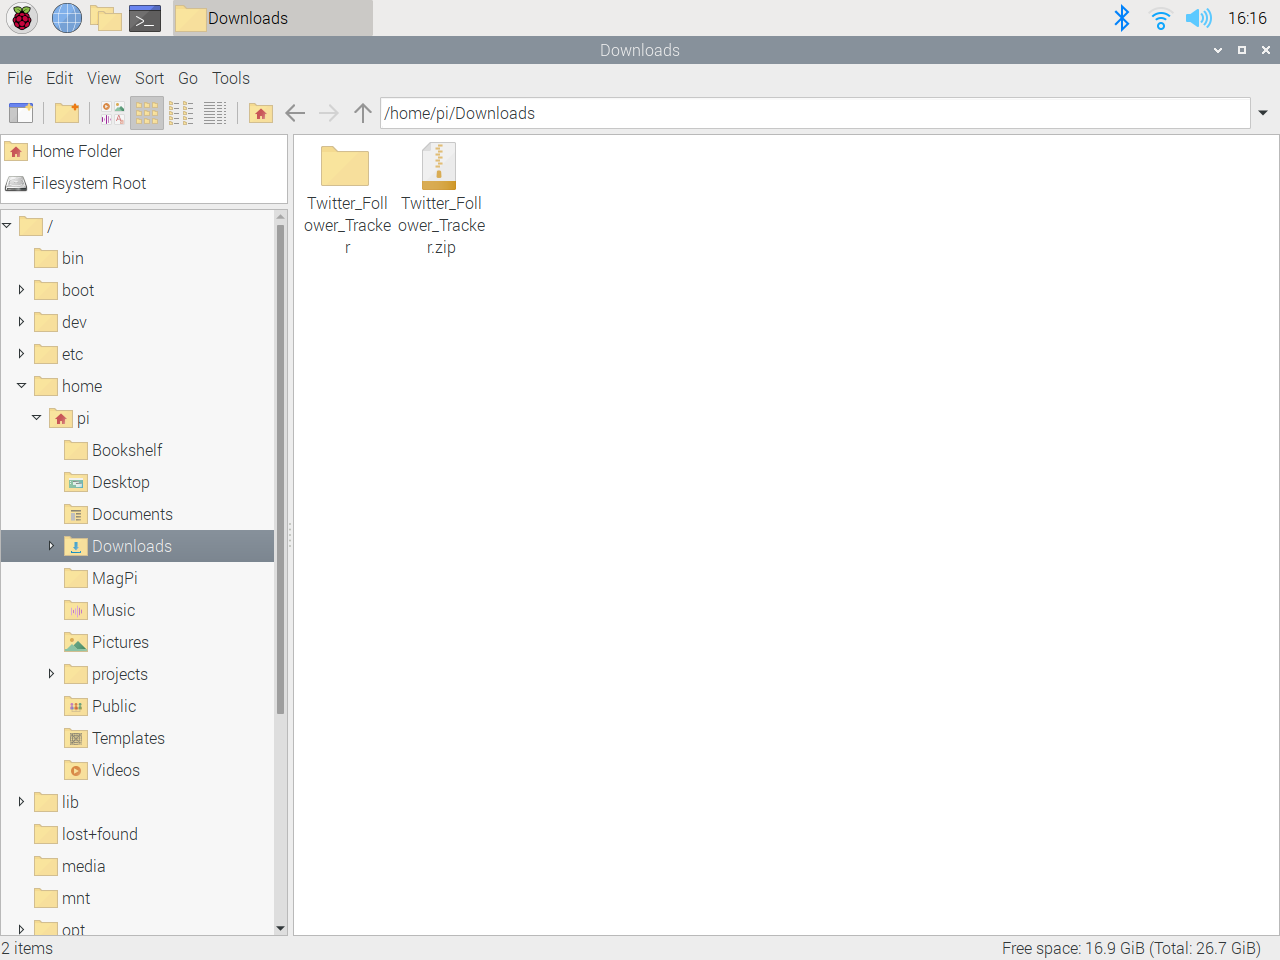
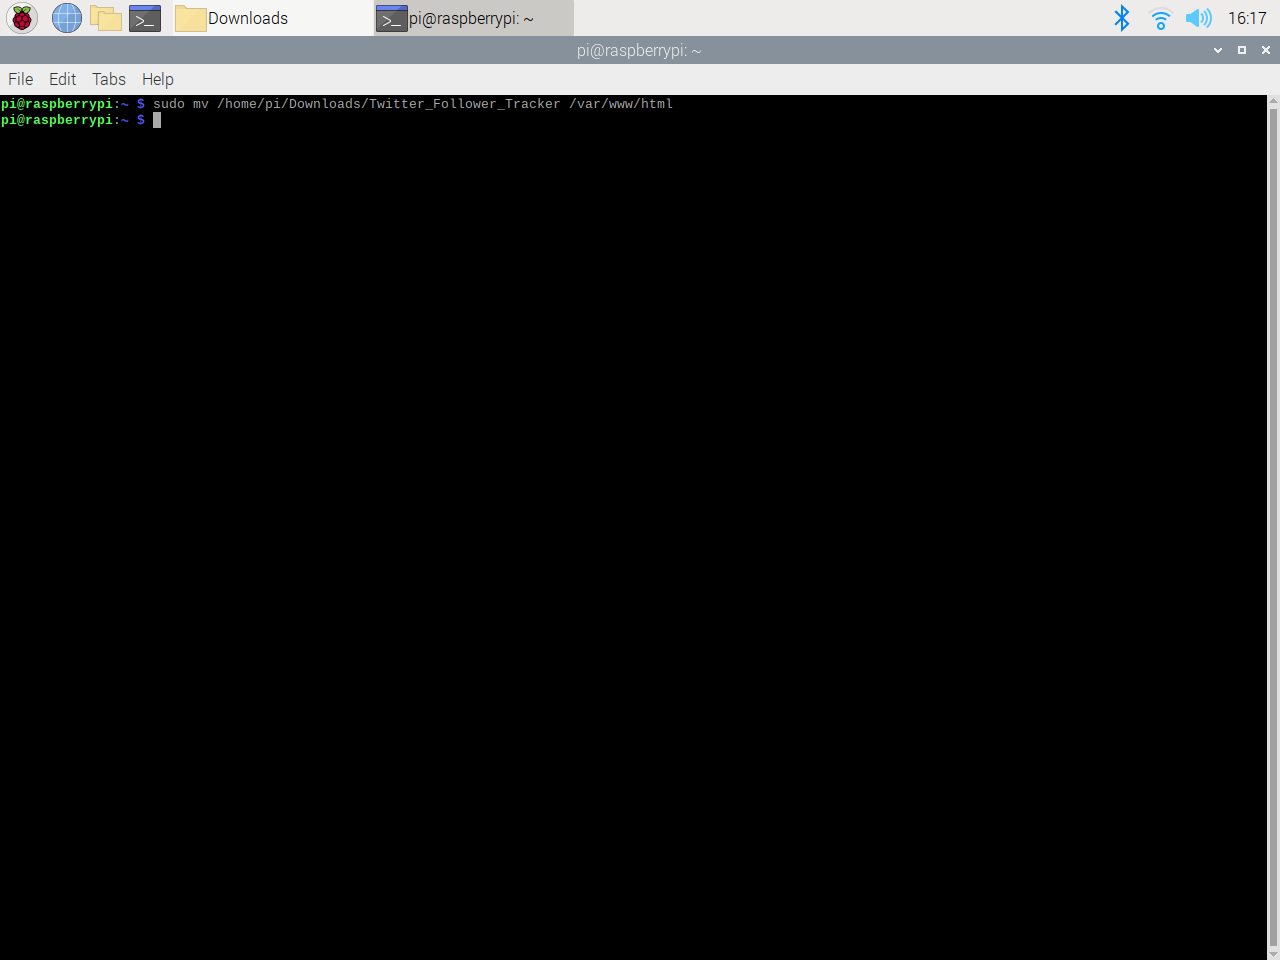
⭐ First of all, extract the Twitter_Follower_Tracker.zip folder and move the application folder (Twitter_Follower_Tracker) to the apache server (/var/www/html) by using the terminal since the apache server is a protected location.
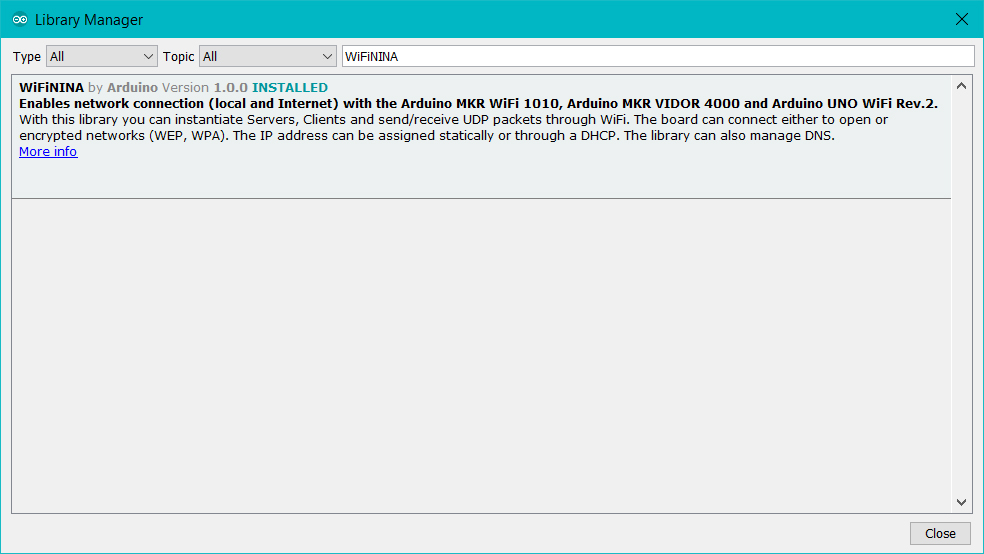
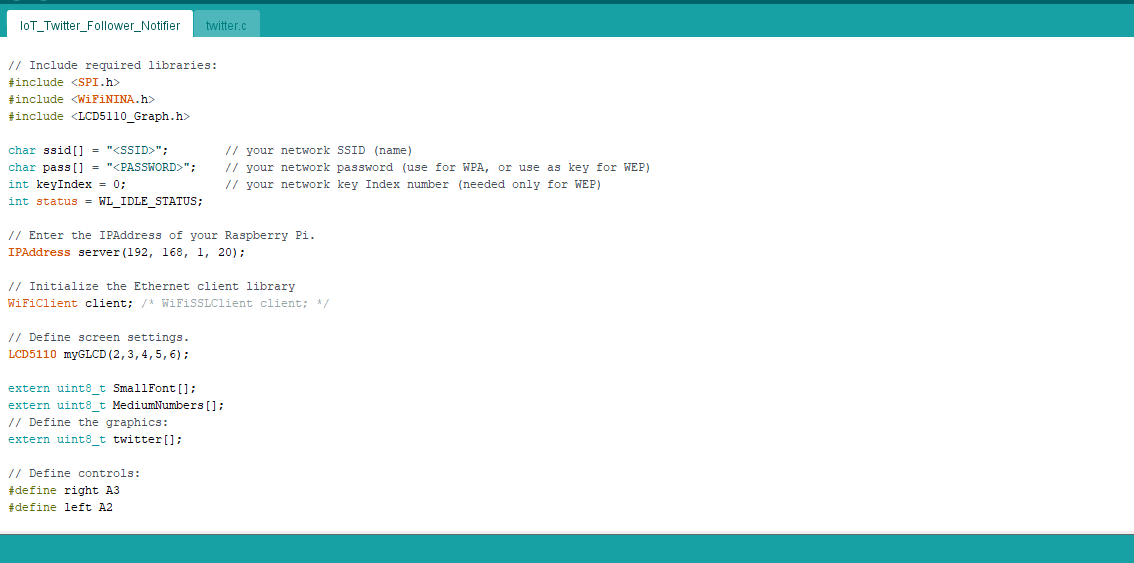
⭐ Include required libraries and define the WiFi settings.
// Include required libraries:
#include <SPI.h>
#include <WiFiNINA.h>
#include <LCD5110_Graph.h>

char ssid[] = "<SSID>";        // your network SSID (name)
char pass[] = "<PASSWORD>";    // your network password (use for WPA, or use as key for WEP)
int keyIndex = 0;              // your network key Index number (needed only for WEP)
int status = WL_IDLE_STATUS;

// Enter the IPAddress of your Raspberry Pi.
IPAddress server(192, 168, 1, 20);

// Initialize the Ethernet client library
WiFiClient client; /* WiFiSSLClient client; */
⭐ Define the Nokia 5110 screen settings and the graphics (monochrome images).
⭐ Initiate the screen and check for the WiFi module to verify the connection.
// Initiate screen.
myGLCD.InitLCD();
myGLCD.setFont(SmallFont);
// Check for the WiFi module:
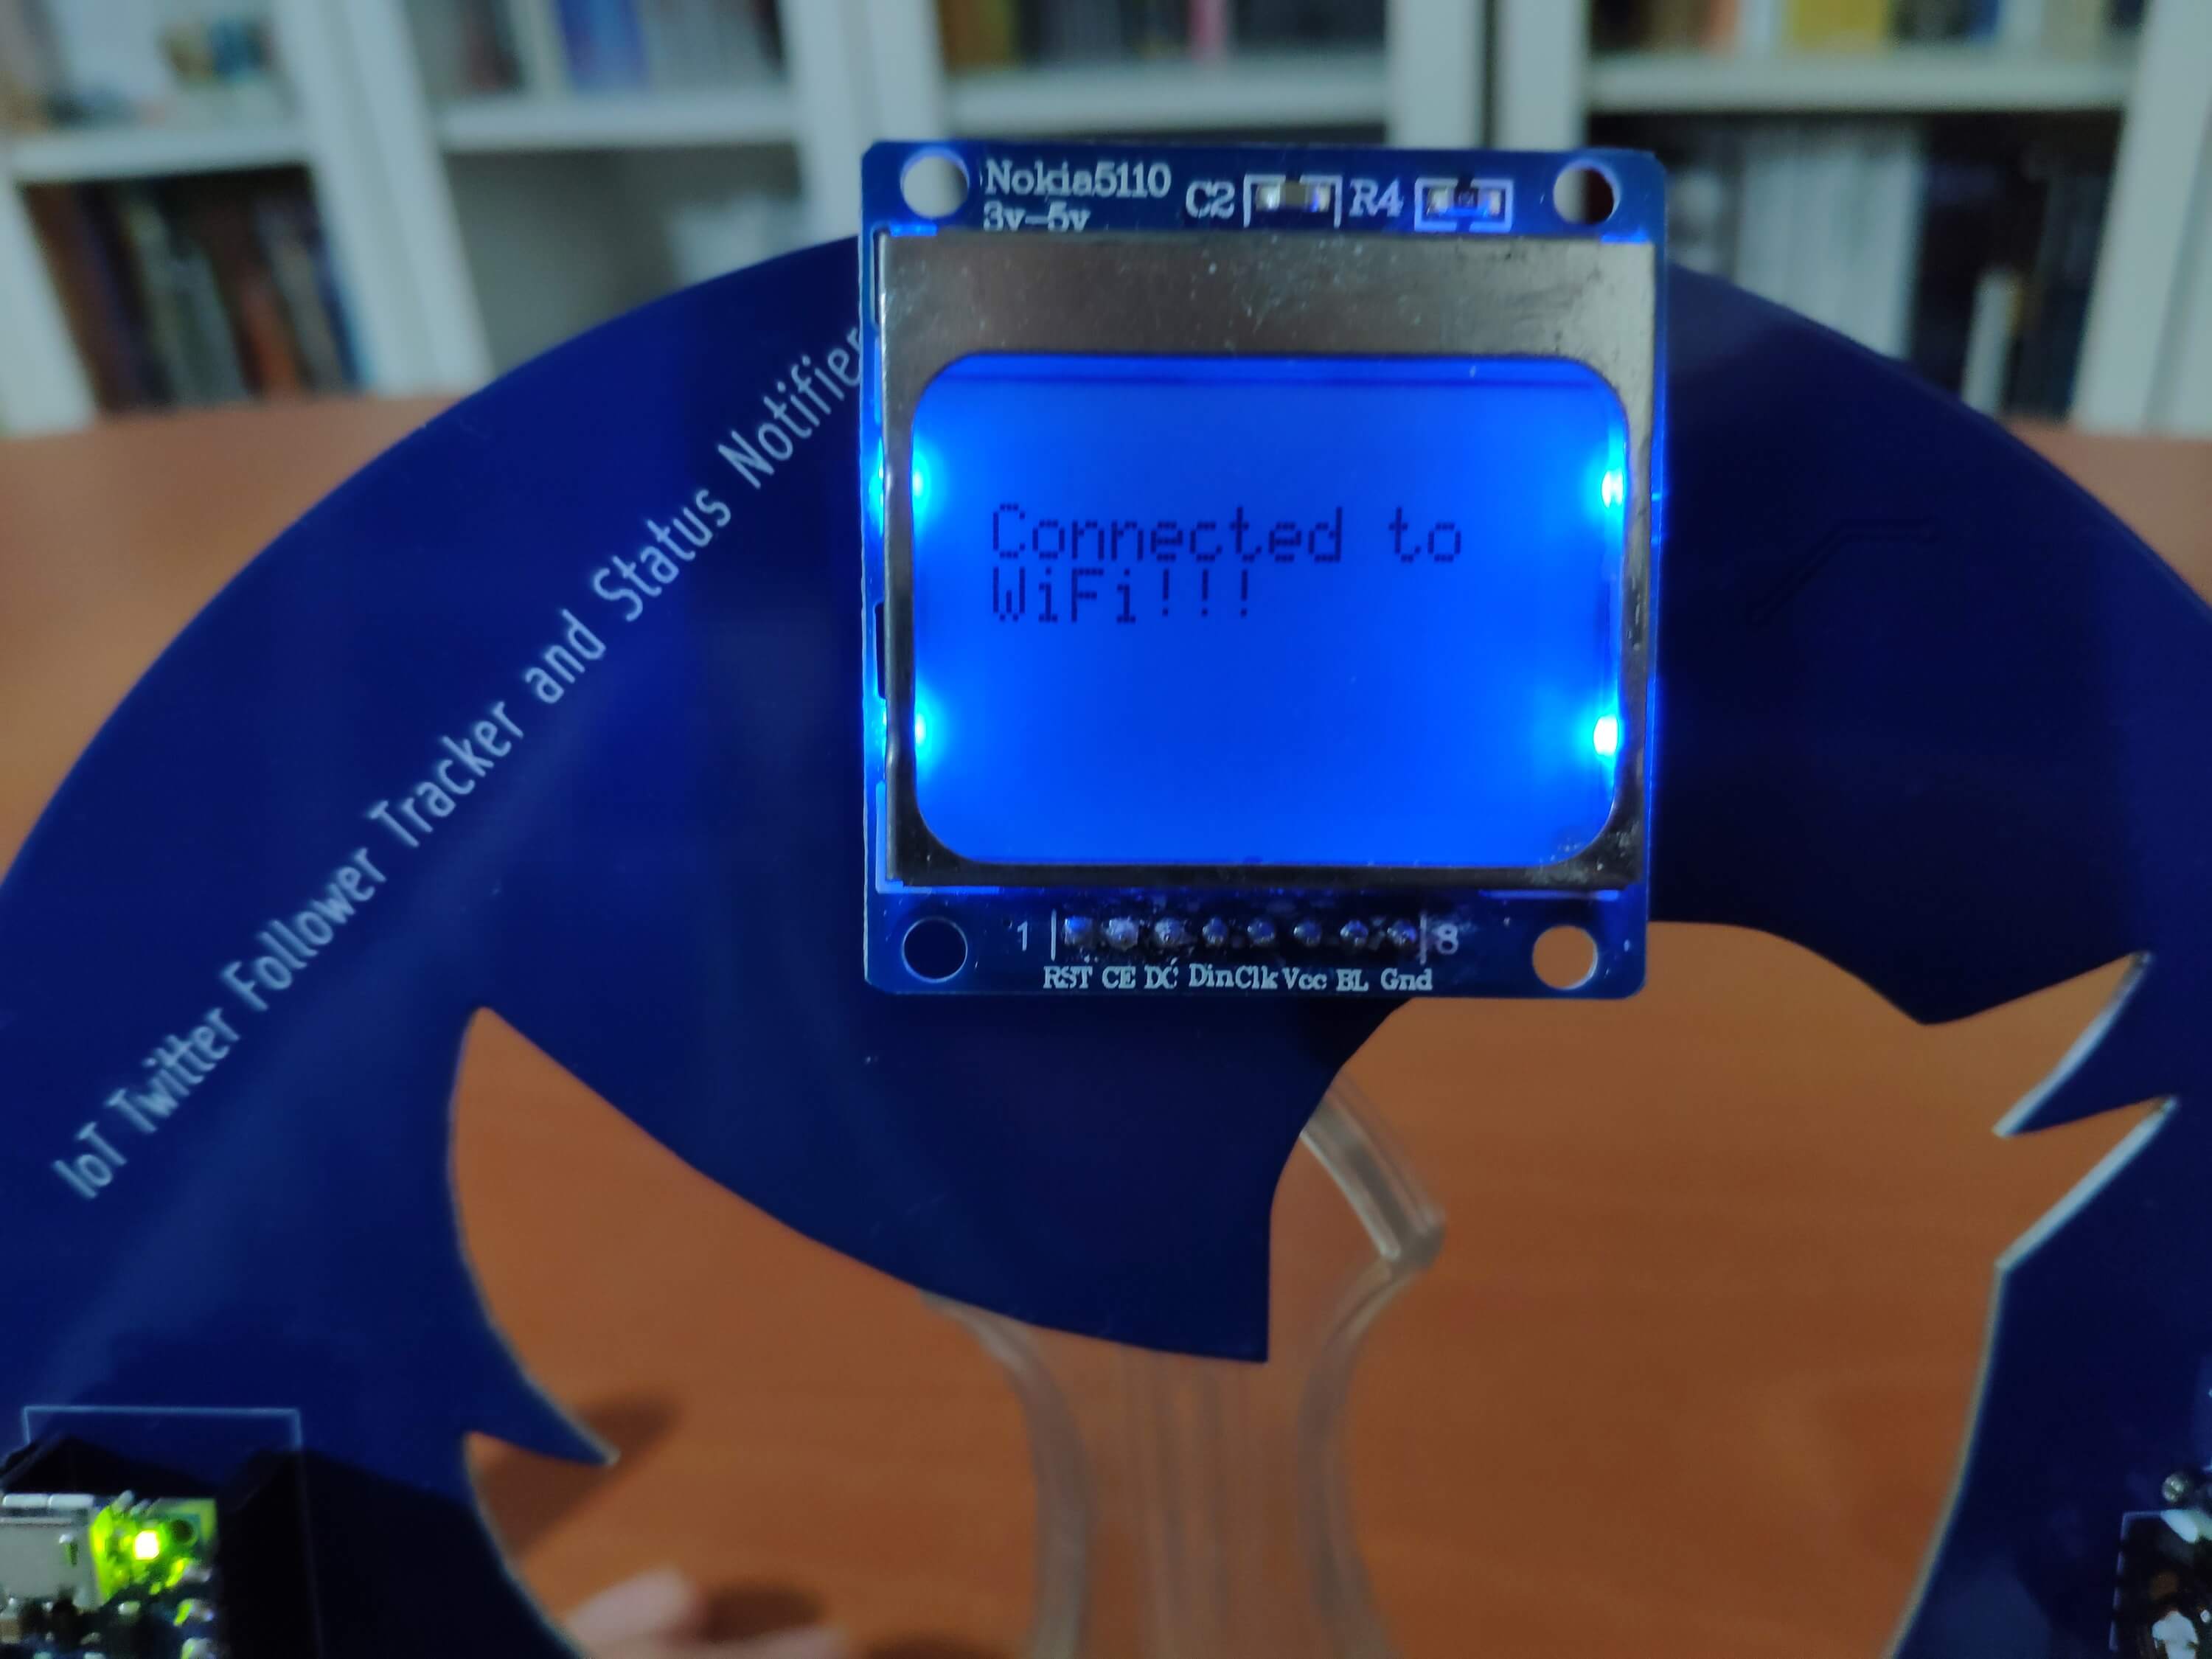
if (WiFi.status() == WL_NO_MODULE) { myGLCD.print("Connection Failed!", 0, 8); myGLCD.update(); while (true); }
// Attempt to connect to the WiFi network:
while (status != WL_CONNECTED) {
myGLCD.print("Waiting...", 0, 8);
myGLCD.print("Attempting to", 0, 16);
myGLCD.print("connect to", 0, 24);
myGLCD.print("WiFi !!!", 0, 32);
myGLCD.update();
// Connect to WPA/WPA2 network. Change this line if using open or WEP network:
status = WiFi.begin(ssid, pass);
// Wait 10 seconds for connection:
delay(10000);
}
⭐ In the read_controls function, read joystick and control button values.
Step 5.1: Getting information from the web application and using the analog joystick to scroll text
⭐ In the make_a_get_request function:
⭐ Connect to the web application named Twitter Follower Tracker.
⭐ If the connection is successful, make a Get request to obtain the Twitter account information:
Follower Count
Account Name
Account ID
⭐ If there are incoming bytes available, get the response from the web application.
⭐ Split the response string by the predefined delimiter (%) to glean information as substrings - follower_count, account_name, and account_id.
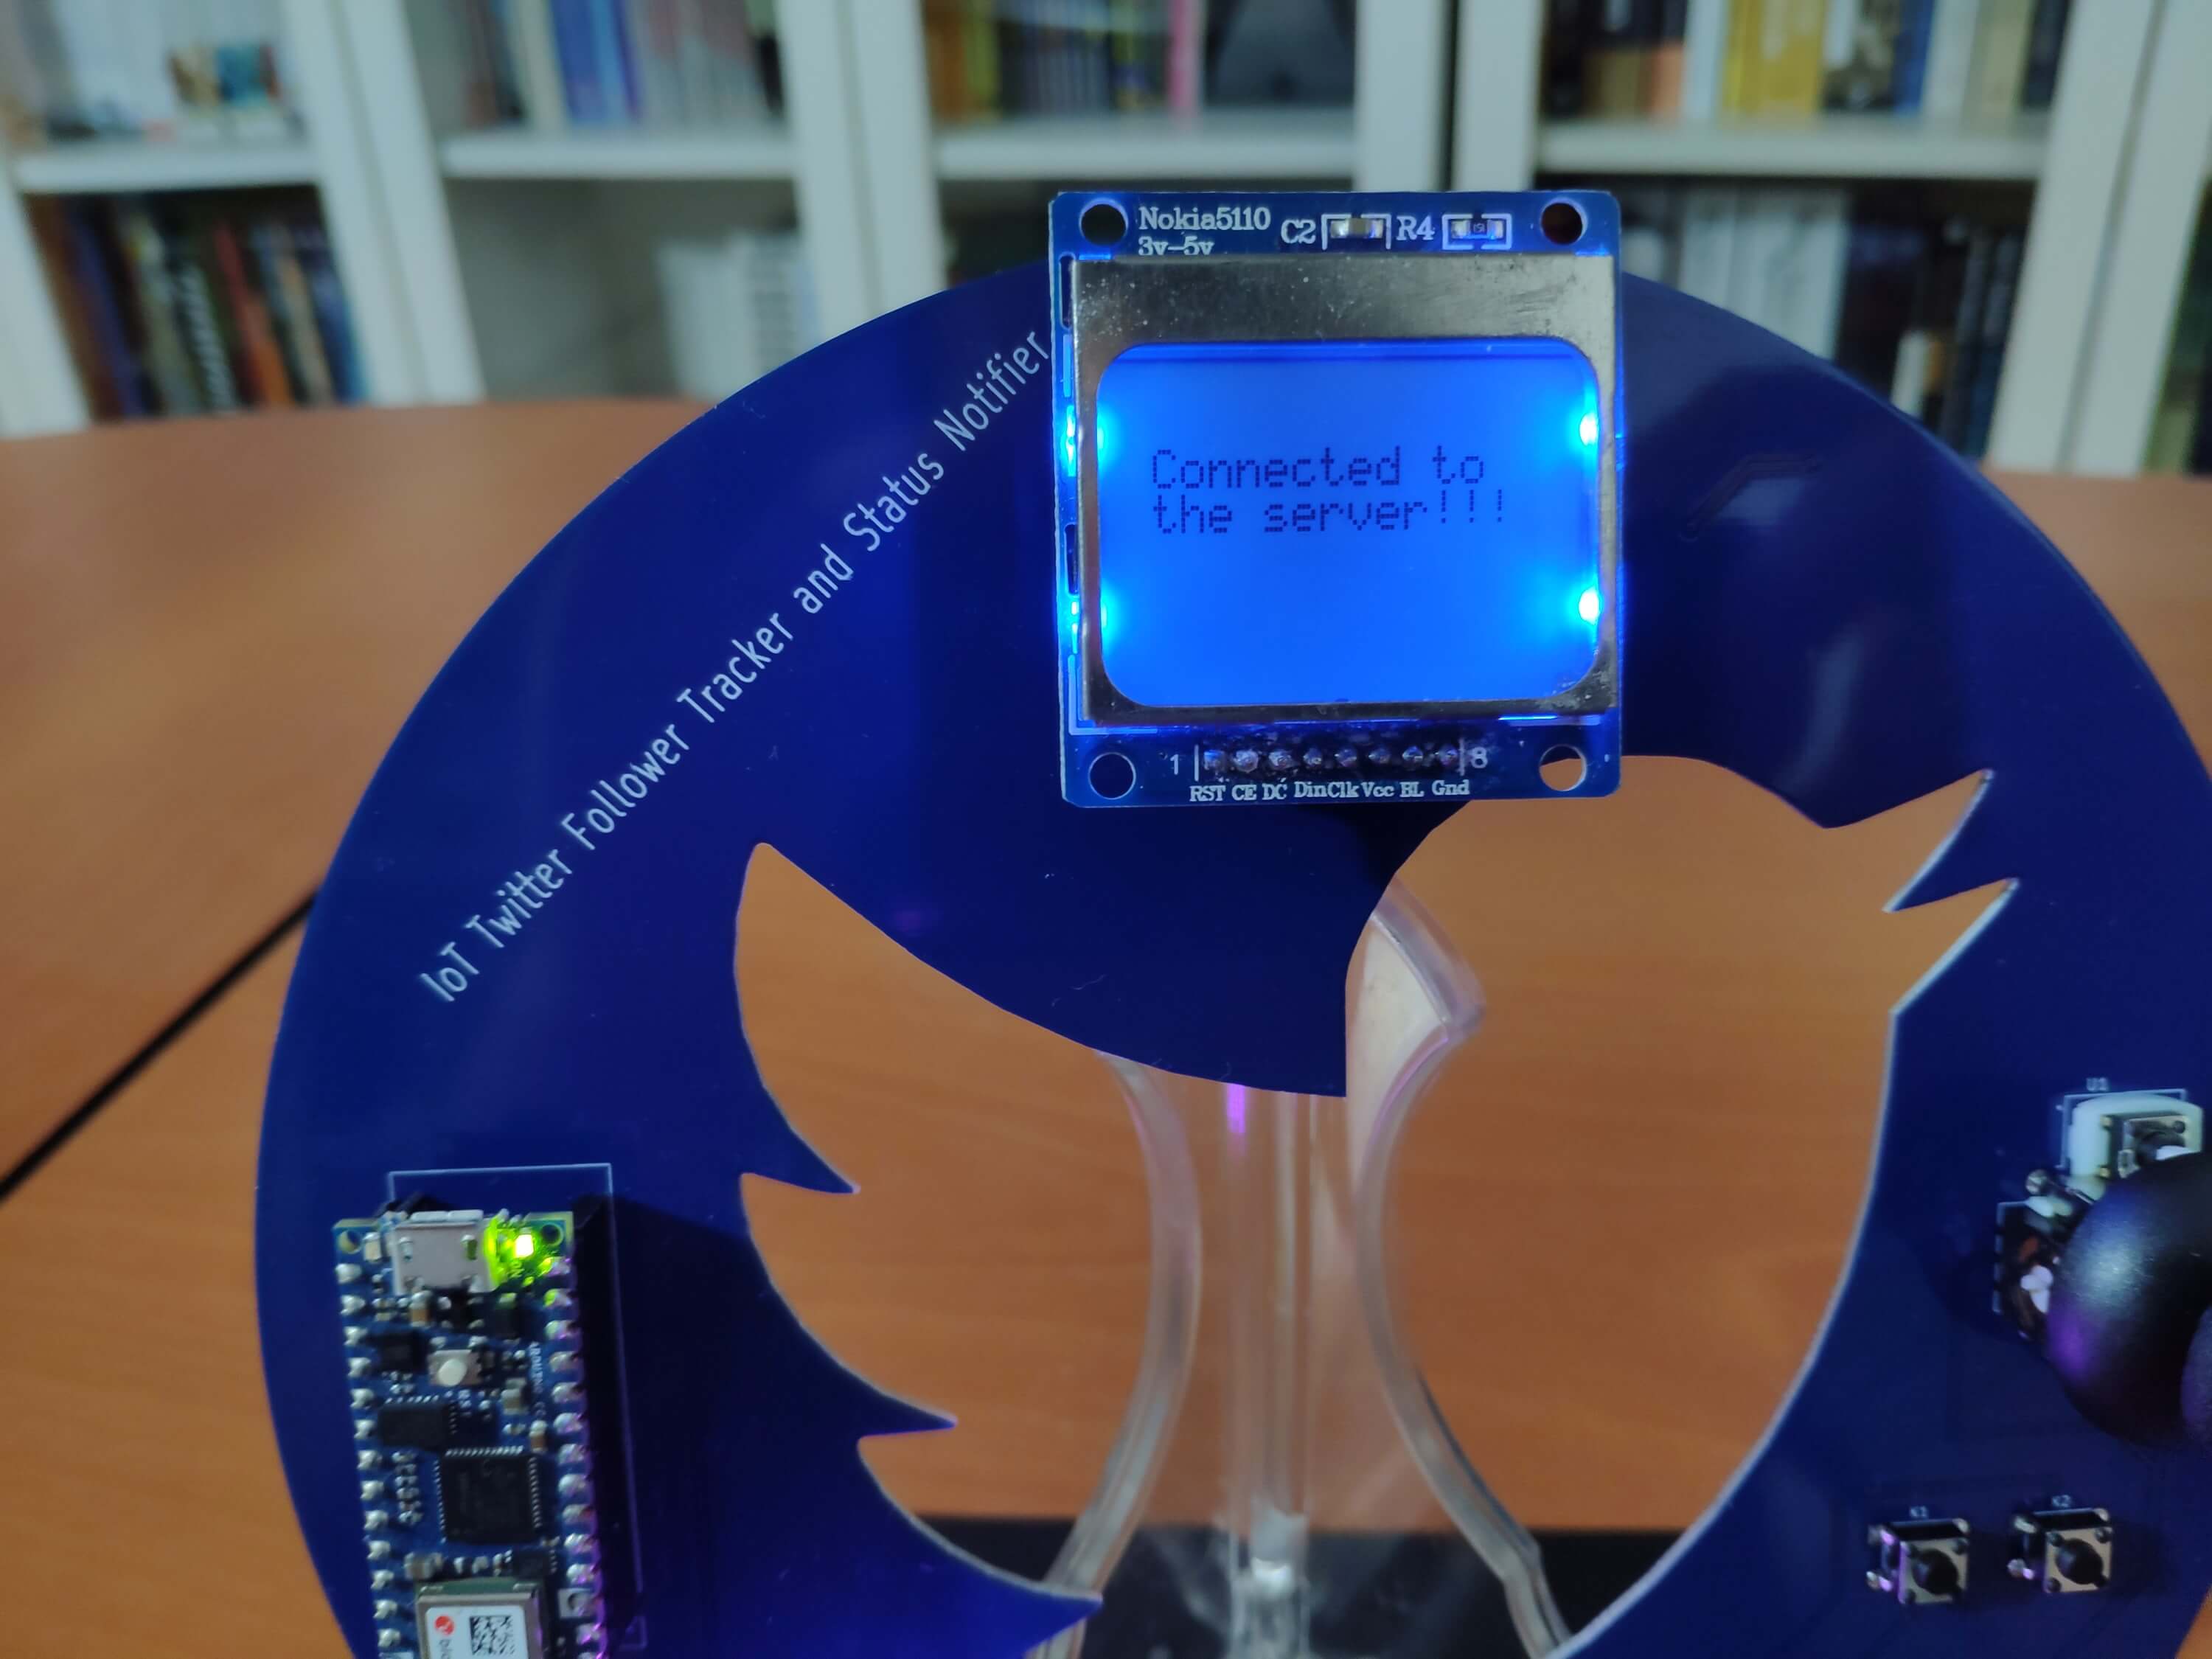
void make_a_get_request(String application){
  // Connect to the web application named Twitter_Follower_Tracker. Change '80' with '443' if you are using SSL connection.
  if(client.connect(server, 80)){
    // If successful:
    myGLCD.print("Connected to", 0, 8);
    myGLCD.print("the server!!!", 0, 16);
    myGLCD.update();
    // Make an HTTP Get request:
    client.println("GET " + application + " HTTP/1.1");
    client.println("Host: 192.168.1.20");
    client.println("Connection: close");
    client.println();
  }else{
    myGLCD.print("Connection", 0, 8);
    myGLCD.print("Error!!!", 0, 16);
    myGLCD.update();
  }
  delay(2000); // Wait 2 seconds after connection...
  // If there are incoming bytes available, get the response from the web application.
  String response = "";
  while (client.available()) { char c = client.read(); response += c; }
  if(response != "" && response.endsWith("%")){
    // Split the response string by a pre-defined delimiter in a simple way. '%'(percentage) is defined as the delimiter in this project.
    int delimiter_1, delimiter_2, delimiter_3, delimiter_4;
    delimiter_1 = response.indexOf("%");
    delimiter_2 = response.indexOf("%", delimiter_1 + 1);
    delimiter_3 = response.indexOf("%", delimiter_2 + 1);
    delimiter_4 = response.indexOf("%", delimiter_3 + 1);
    // Glean information as substrings.
    follower_count = response.substring(delimiter_1 + 1, delimiter_2);
    account_name = response.substring(delimiter_2 + 1, delimiter_3);
    account_id = response.substring(delimiter_3 + 1, delimiter_4);
  }
}
⭐ In the scrolling_text function:
⭐ Scroll a given string using the X-axis of the analog joystick on a given y coordinate (row).
void scrolling_text(String text, int y){
  int len = text.length();
  // Scroll text using the joystick (VRX).
  if(joystick_x <= 45) x--;
  if(joystick_x >= 900) x++;
  if(x>84) x = 84;
  if(x<=-(len*6)) x = -(len*6);
  // Print.
  myGLCD.print(text, x, y);
  myGLCD.update();
  delay(25);
}
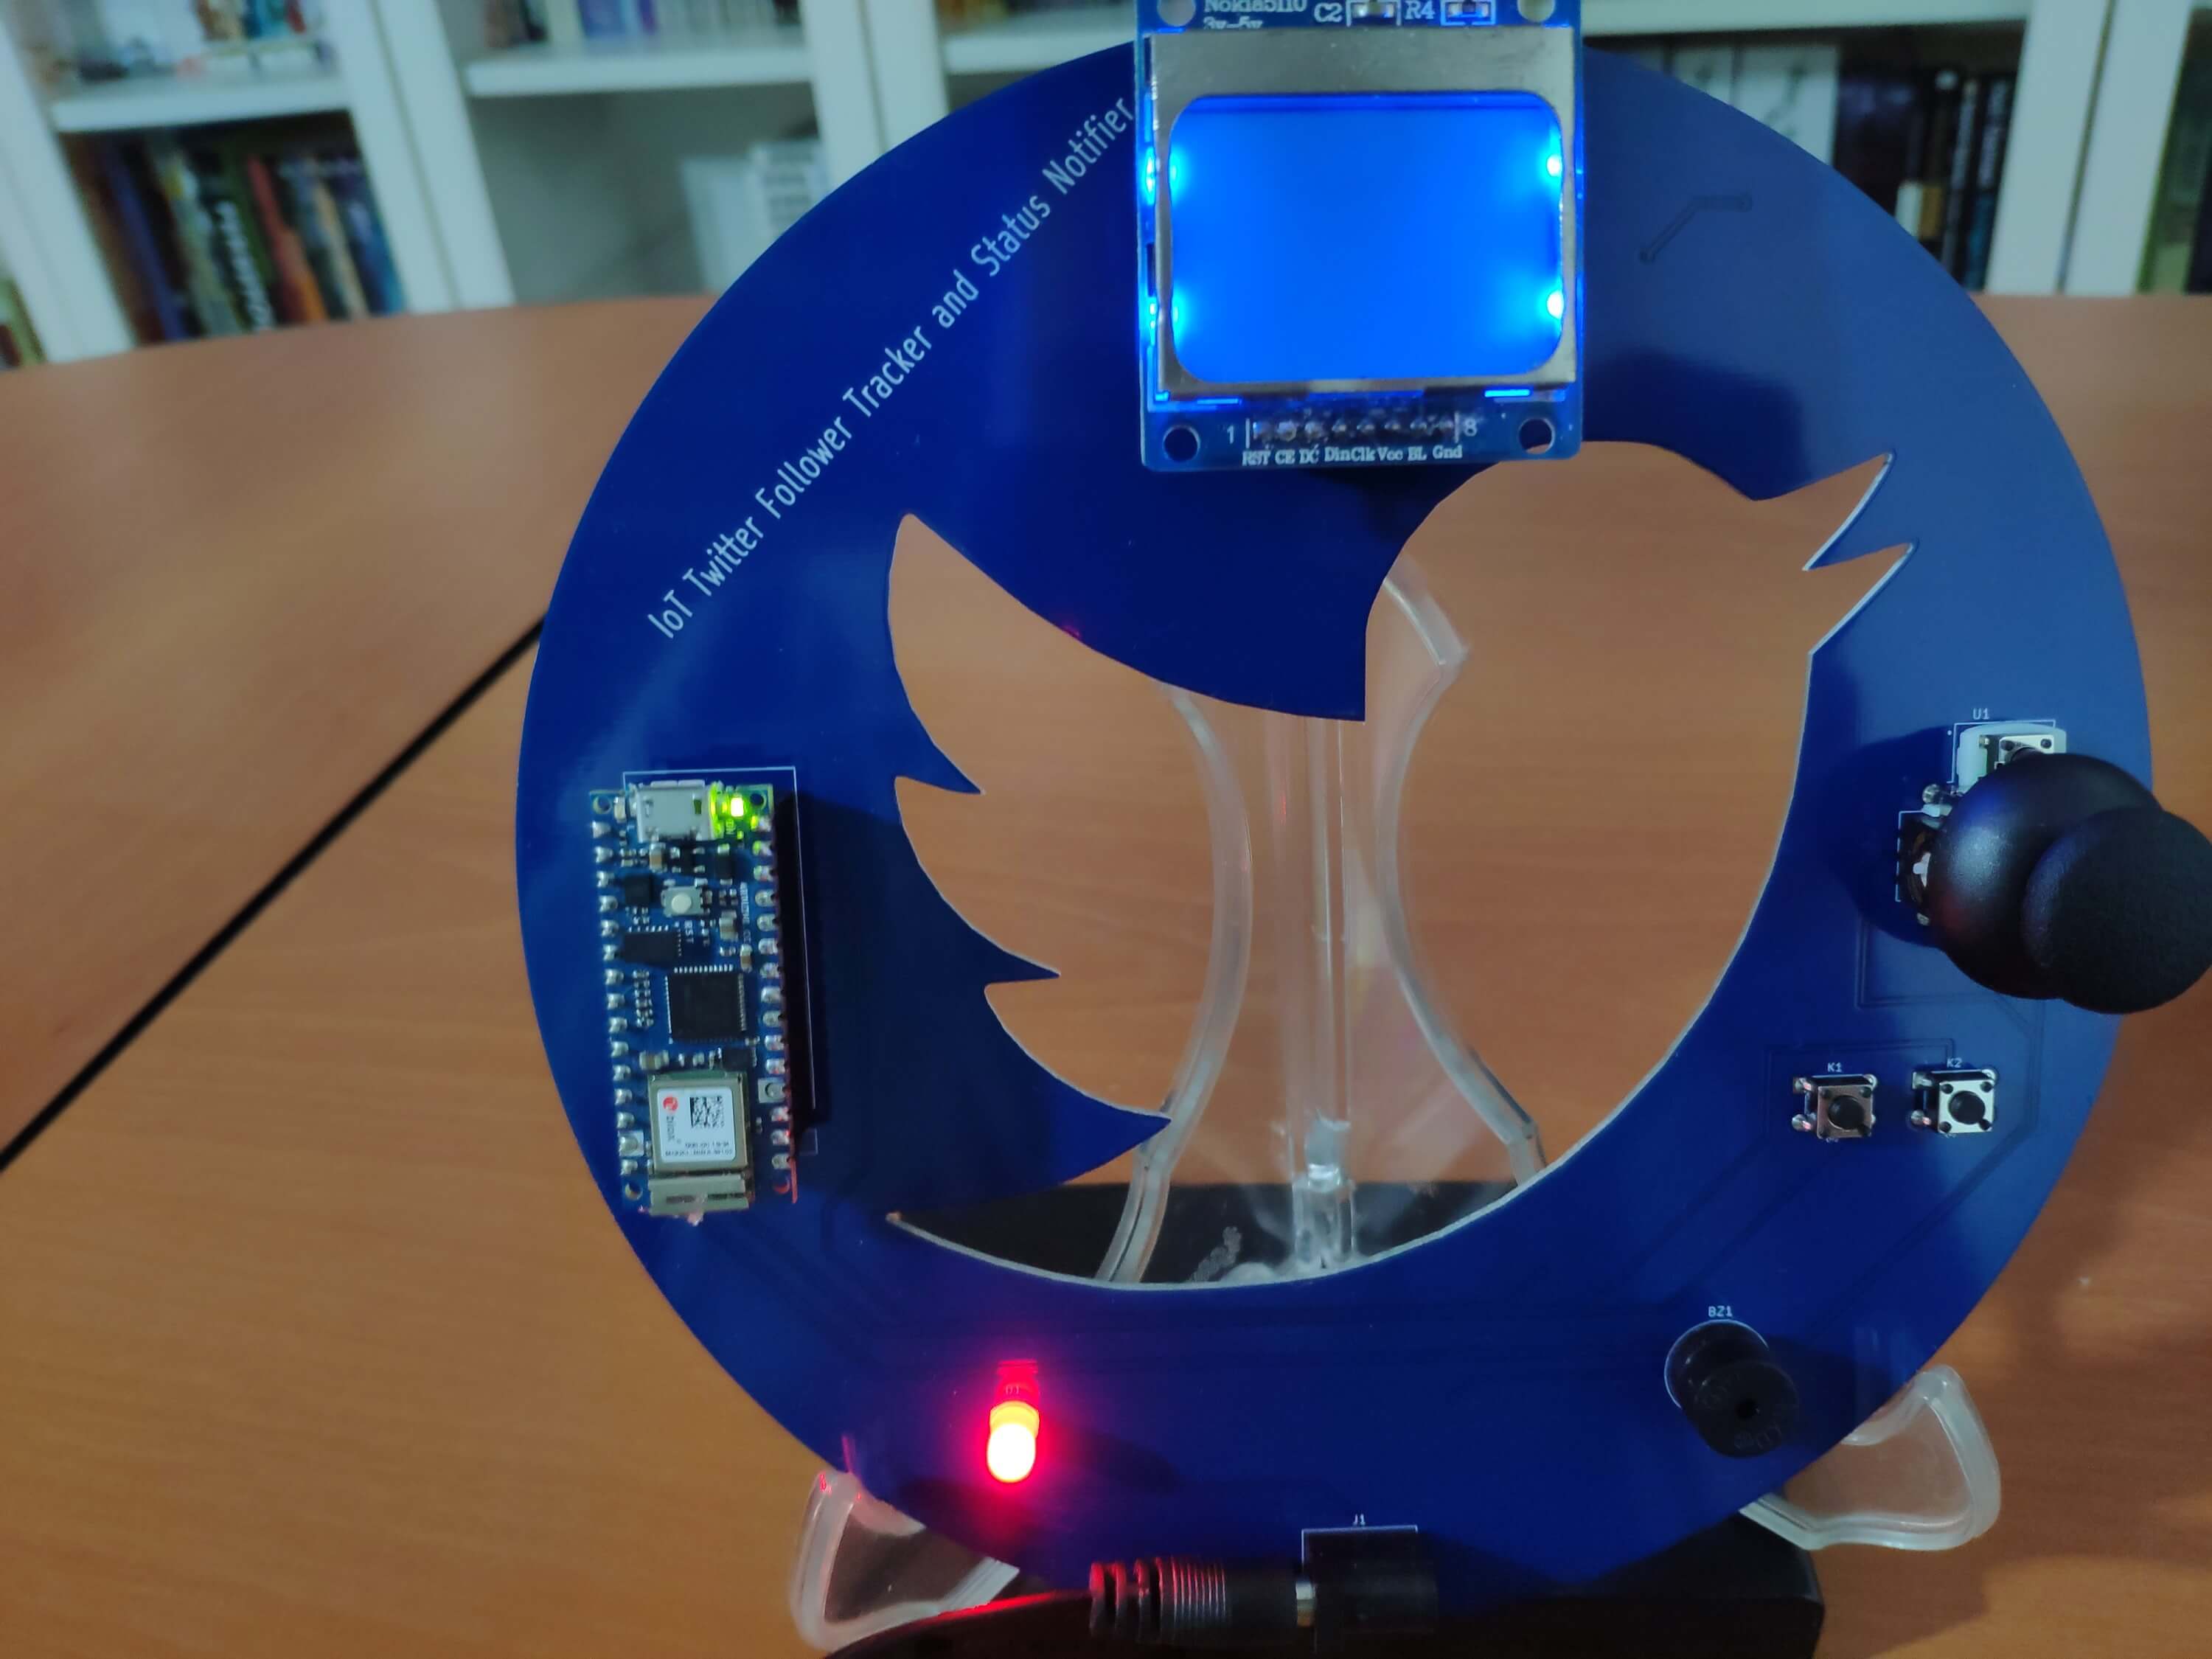
After completing and uploading the code, I attached all required components to the board via headers - the Arduino Nano 33 IoT and the Nokia 5110 Screen.
Figure - 61.27
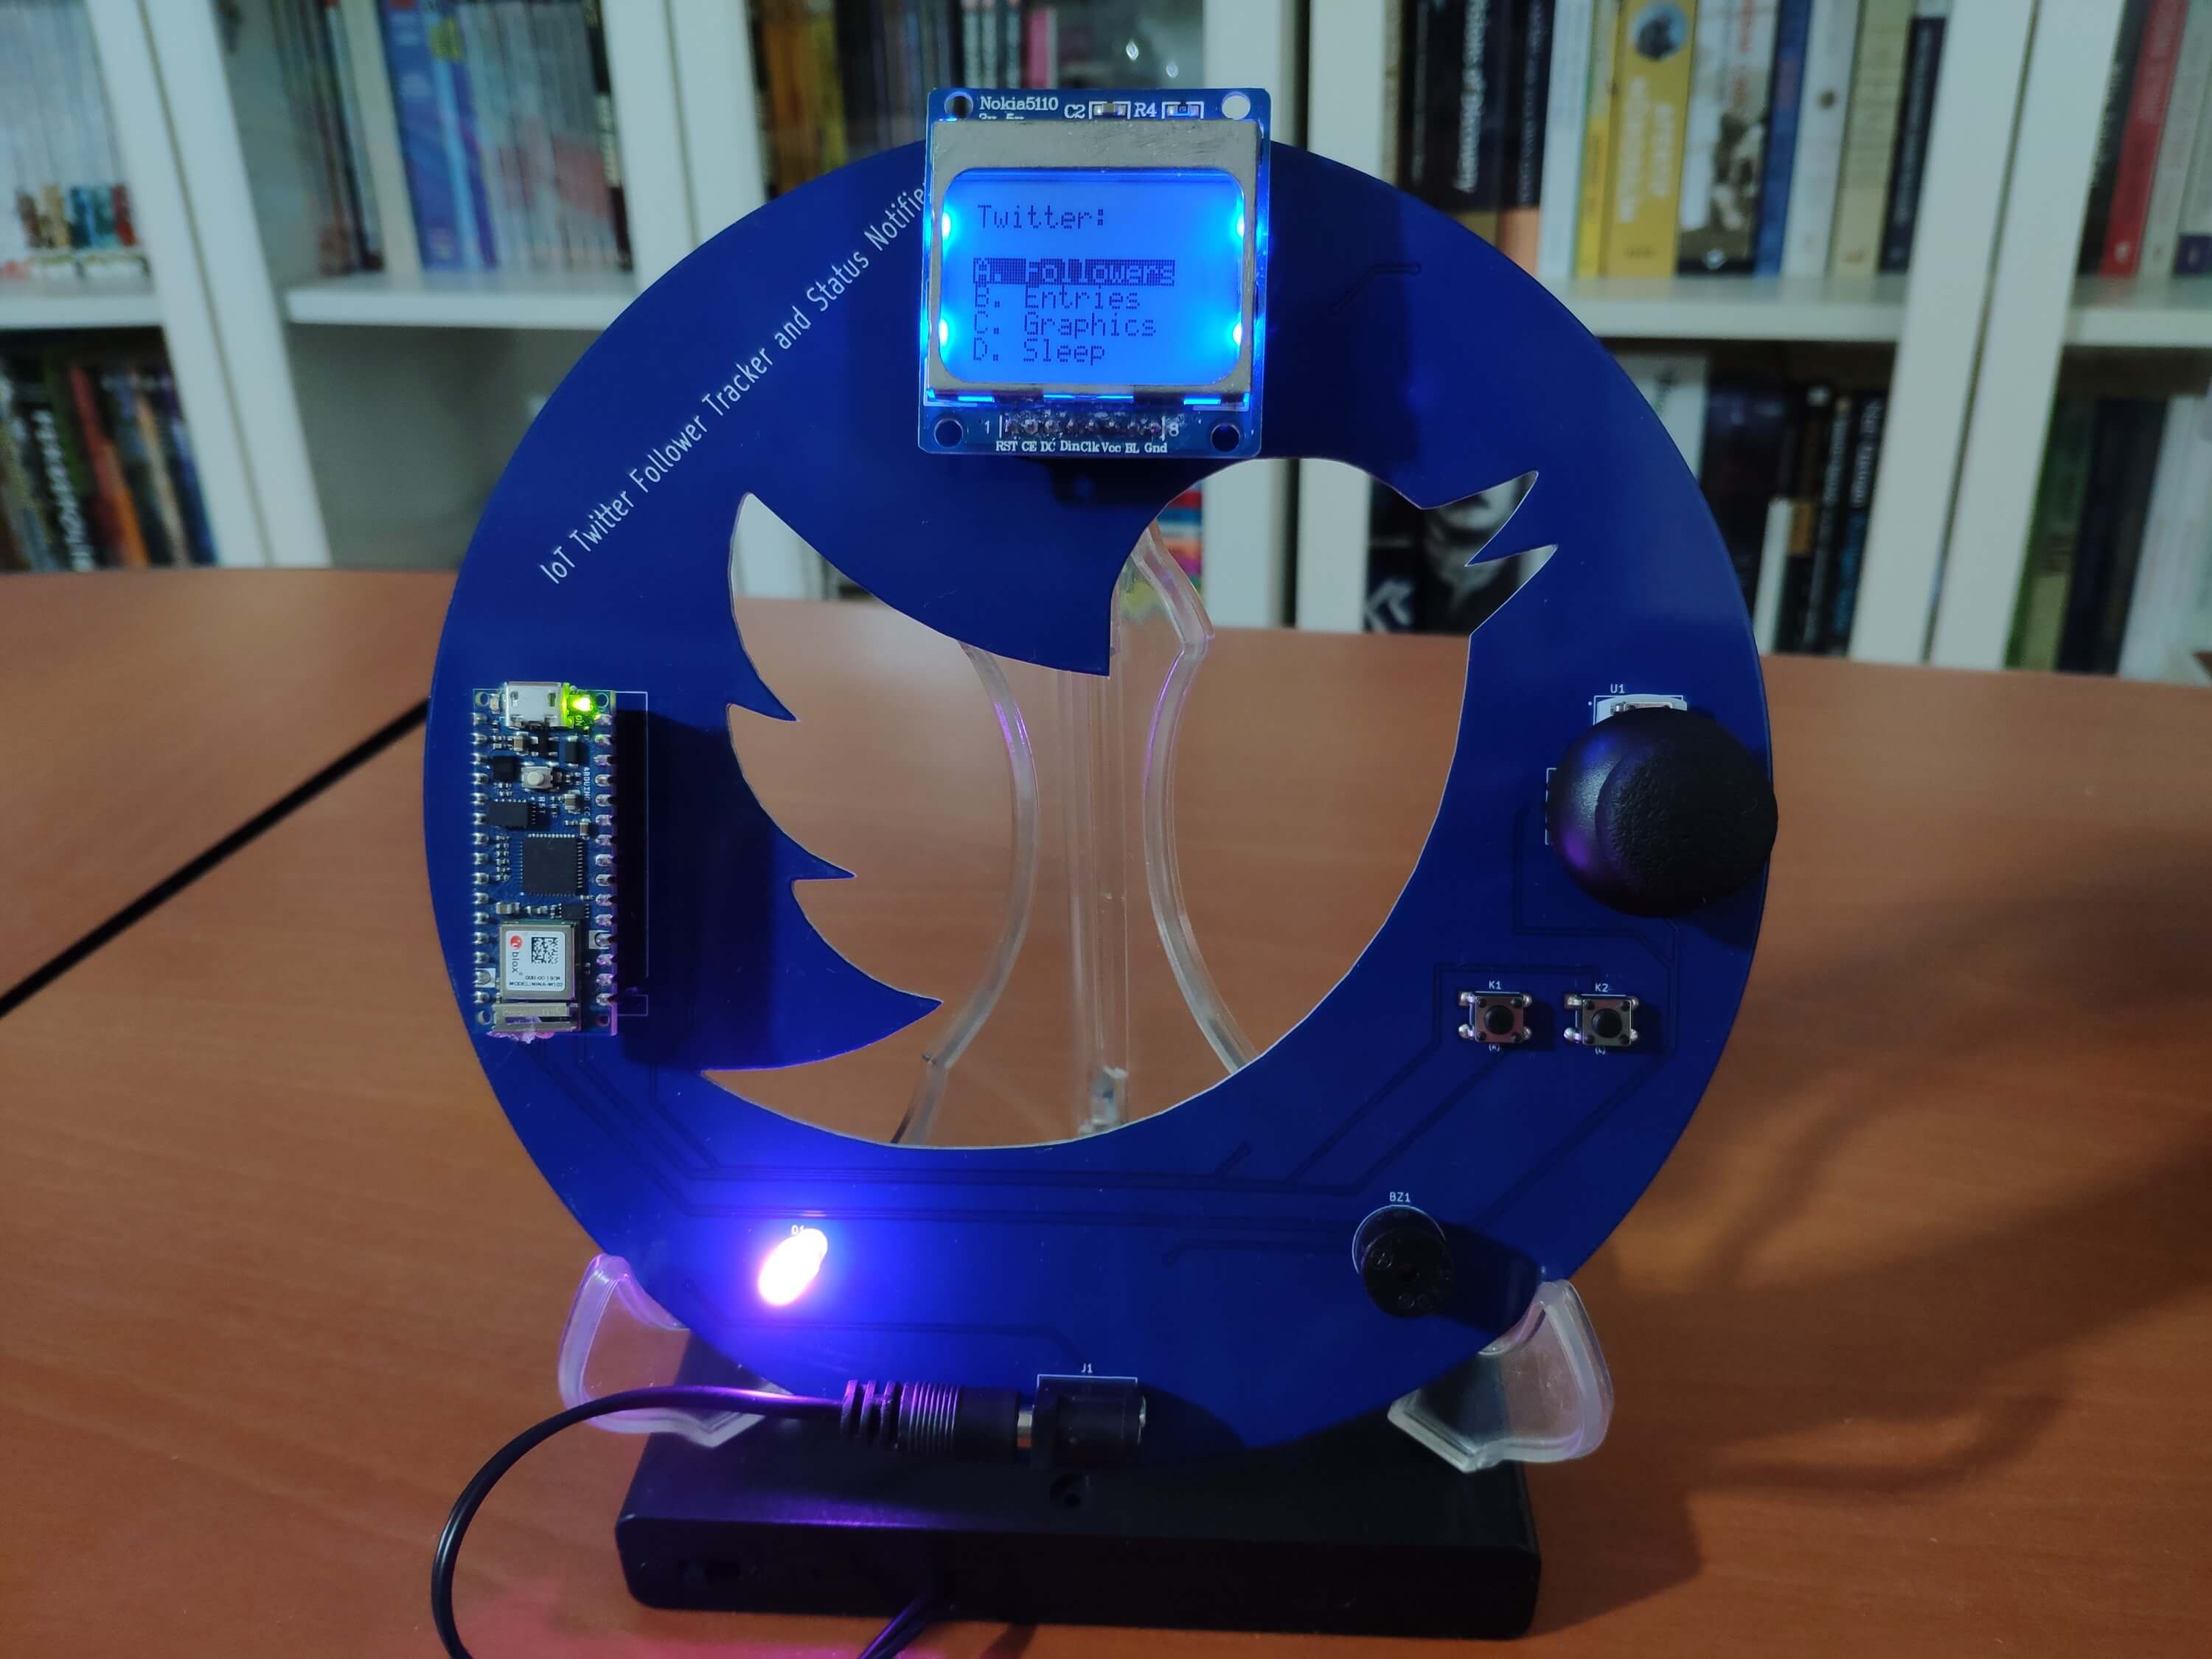
Modes and Features
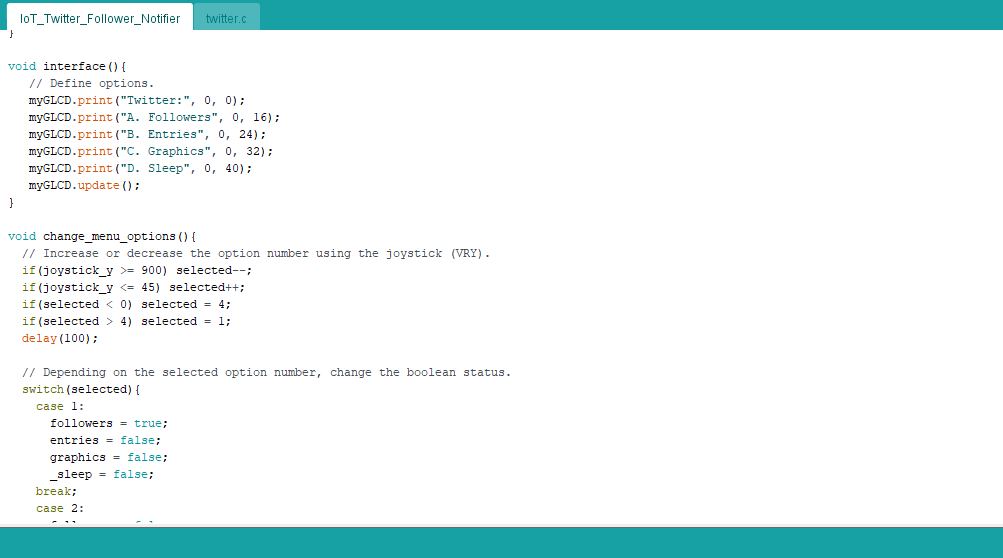
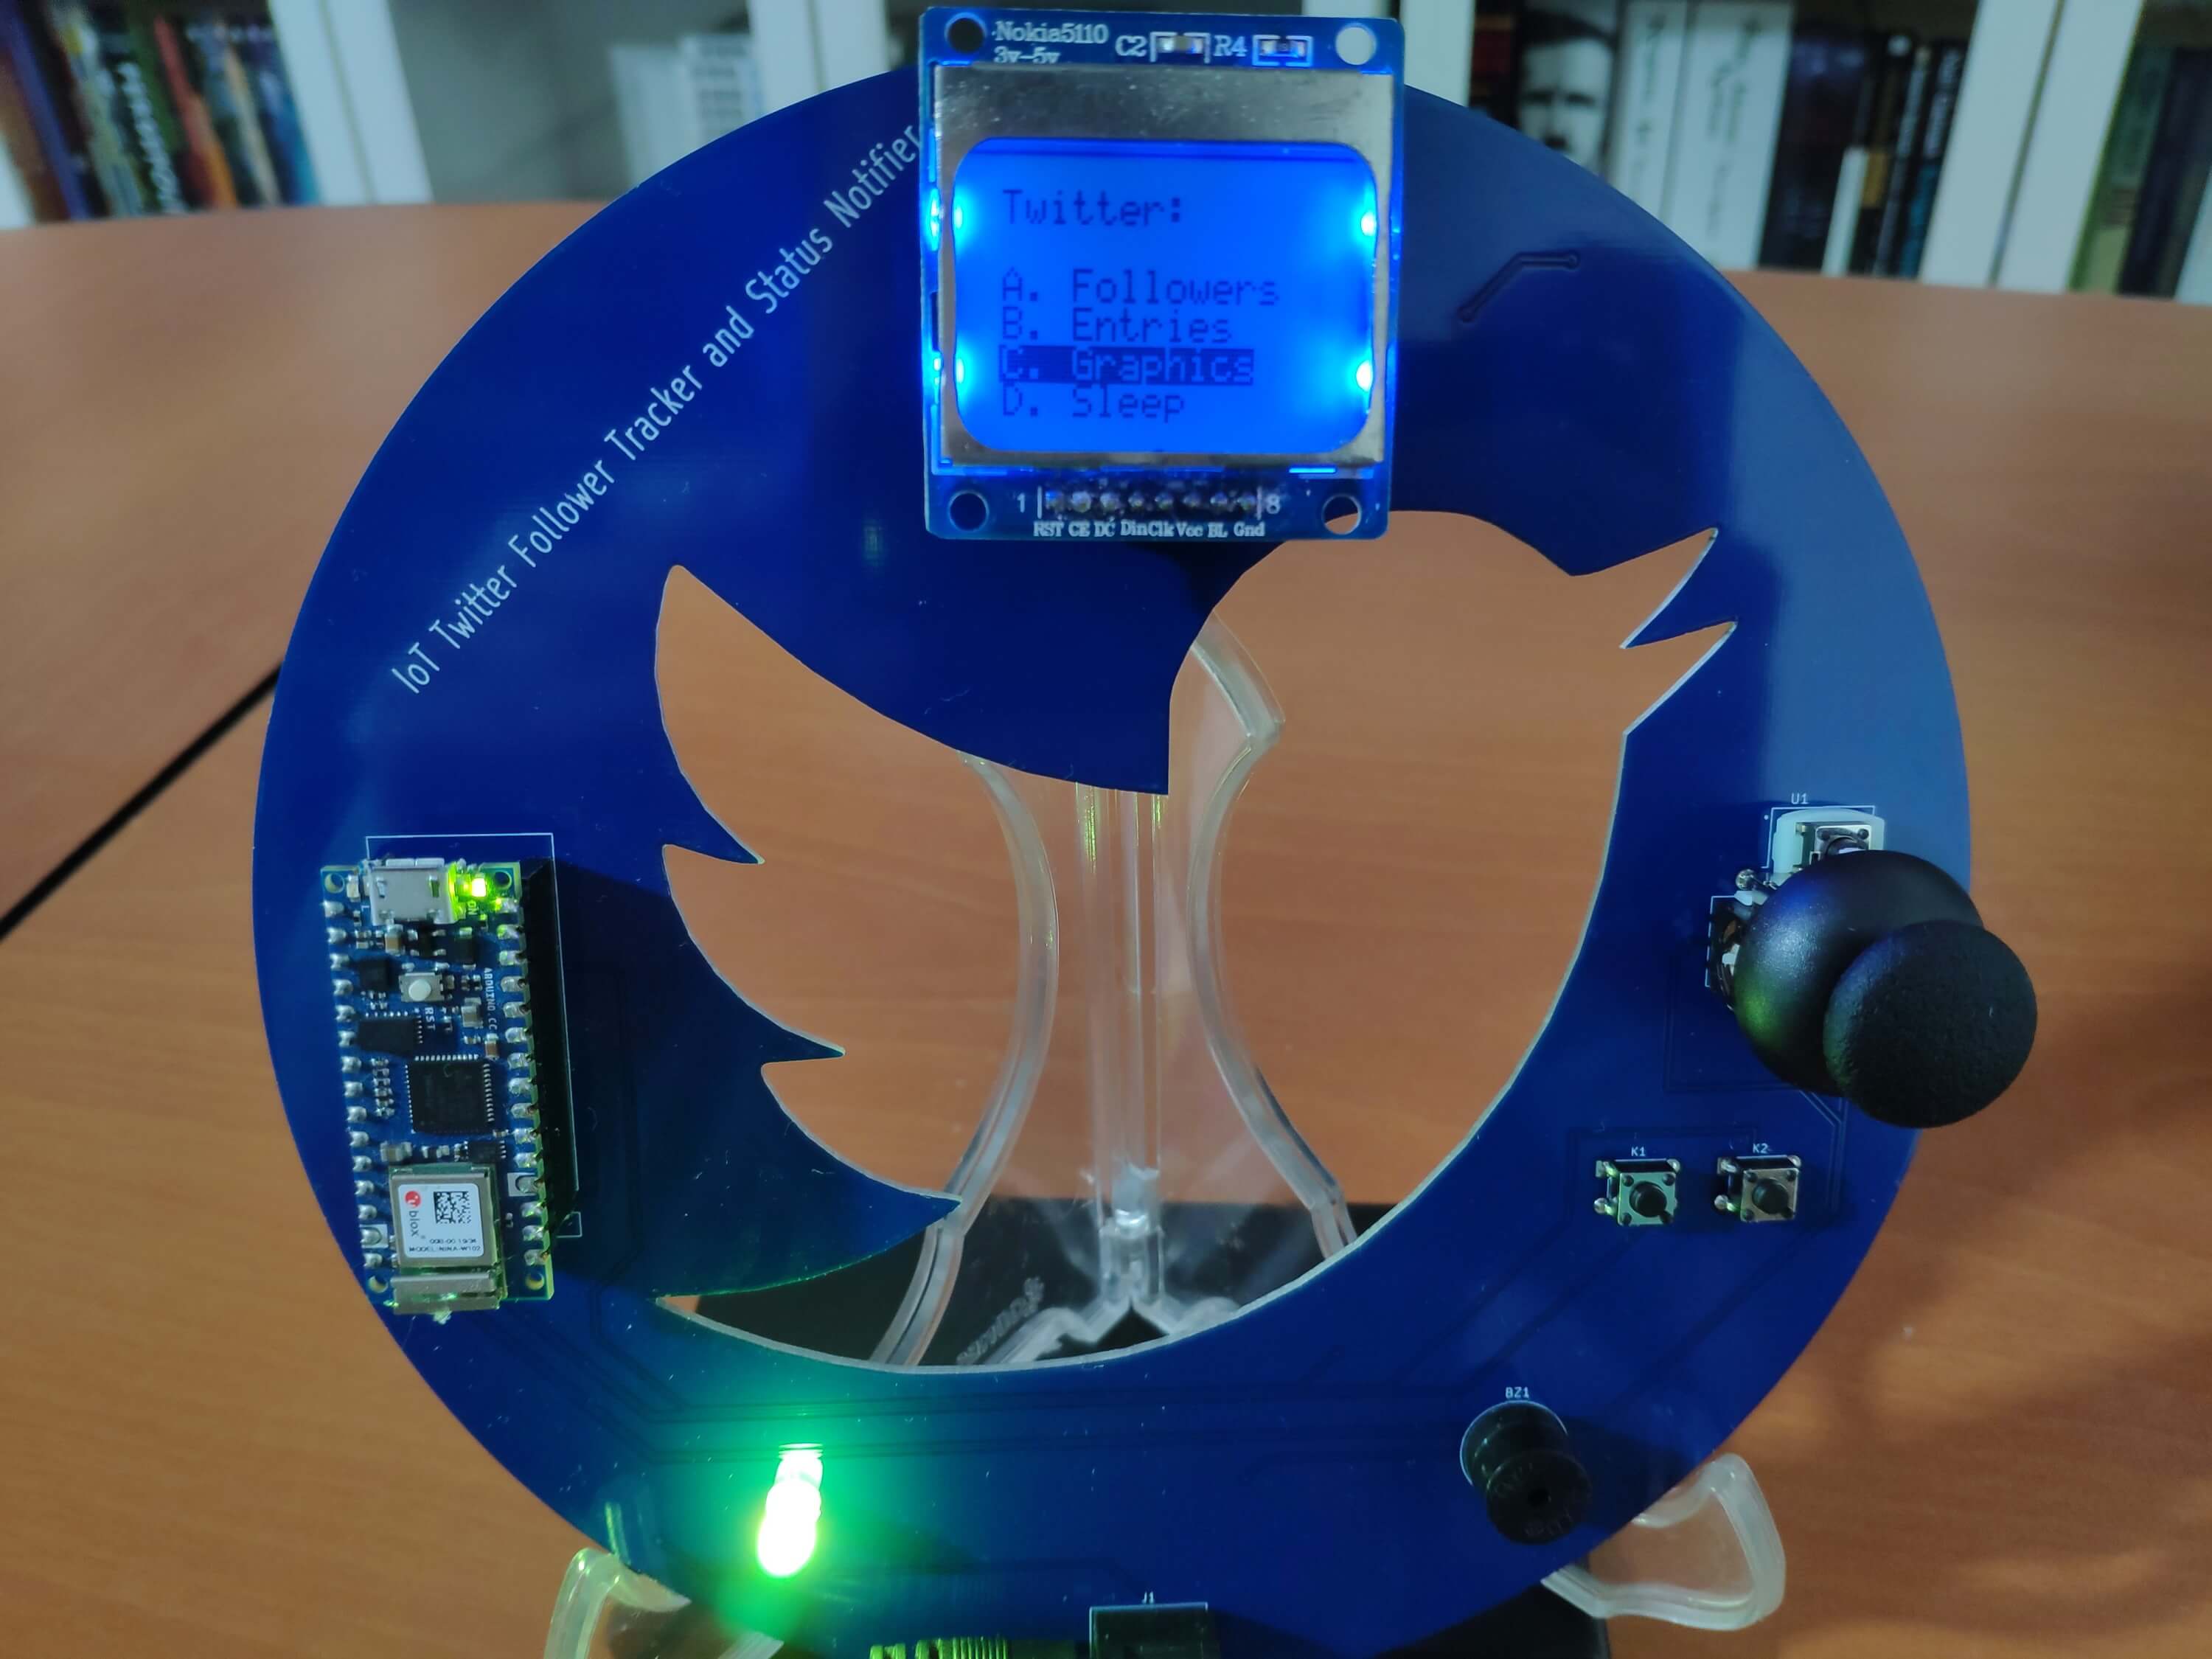
📊🔄 First of all, the device checks for a successful WiFi connection. Then, if connected, it displays the interface (menu).
Figure - 61.28
Figure - 61.29
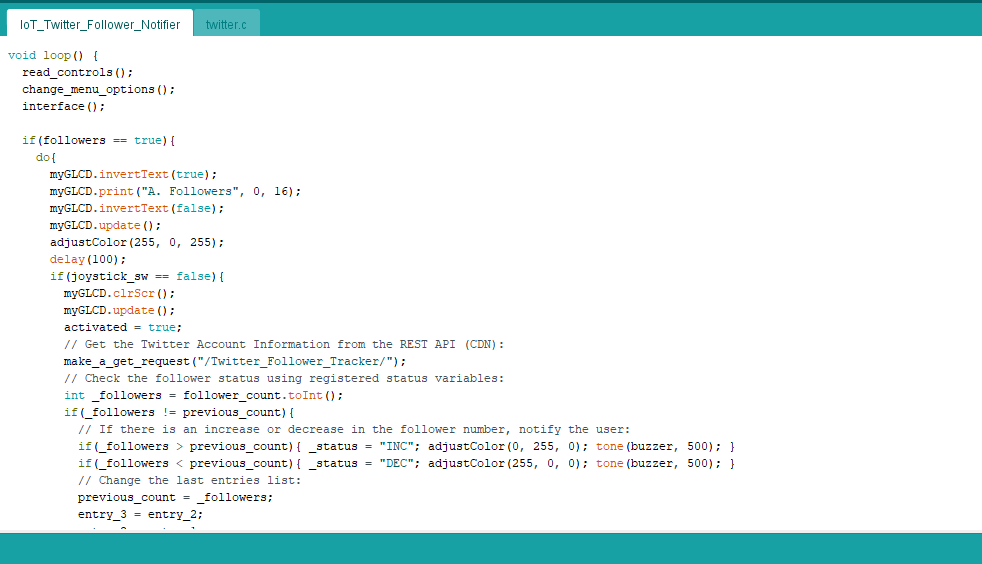
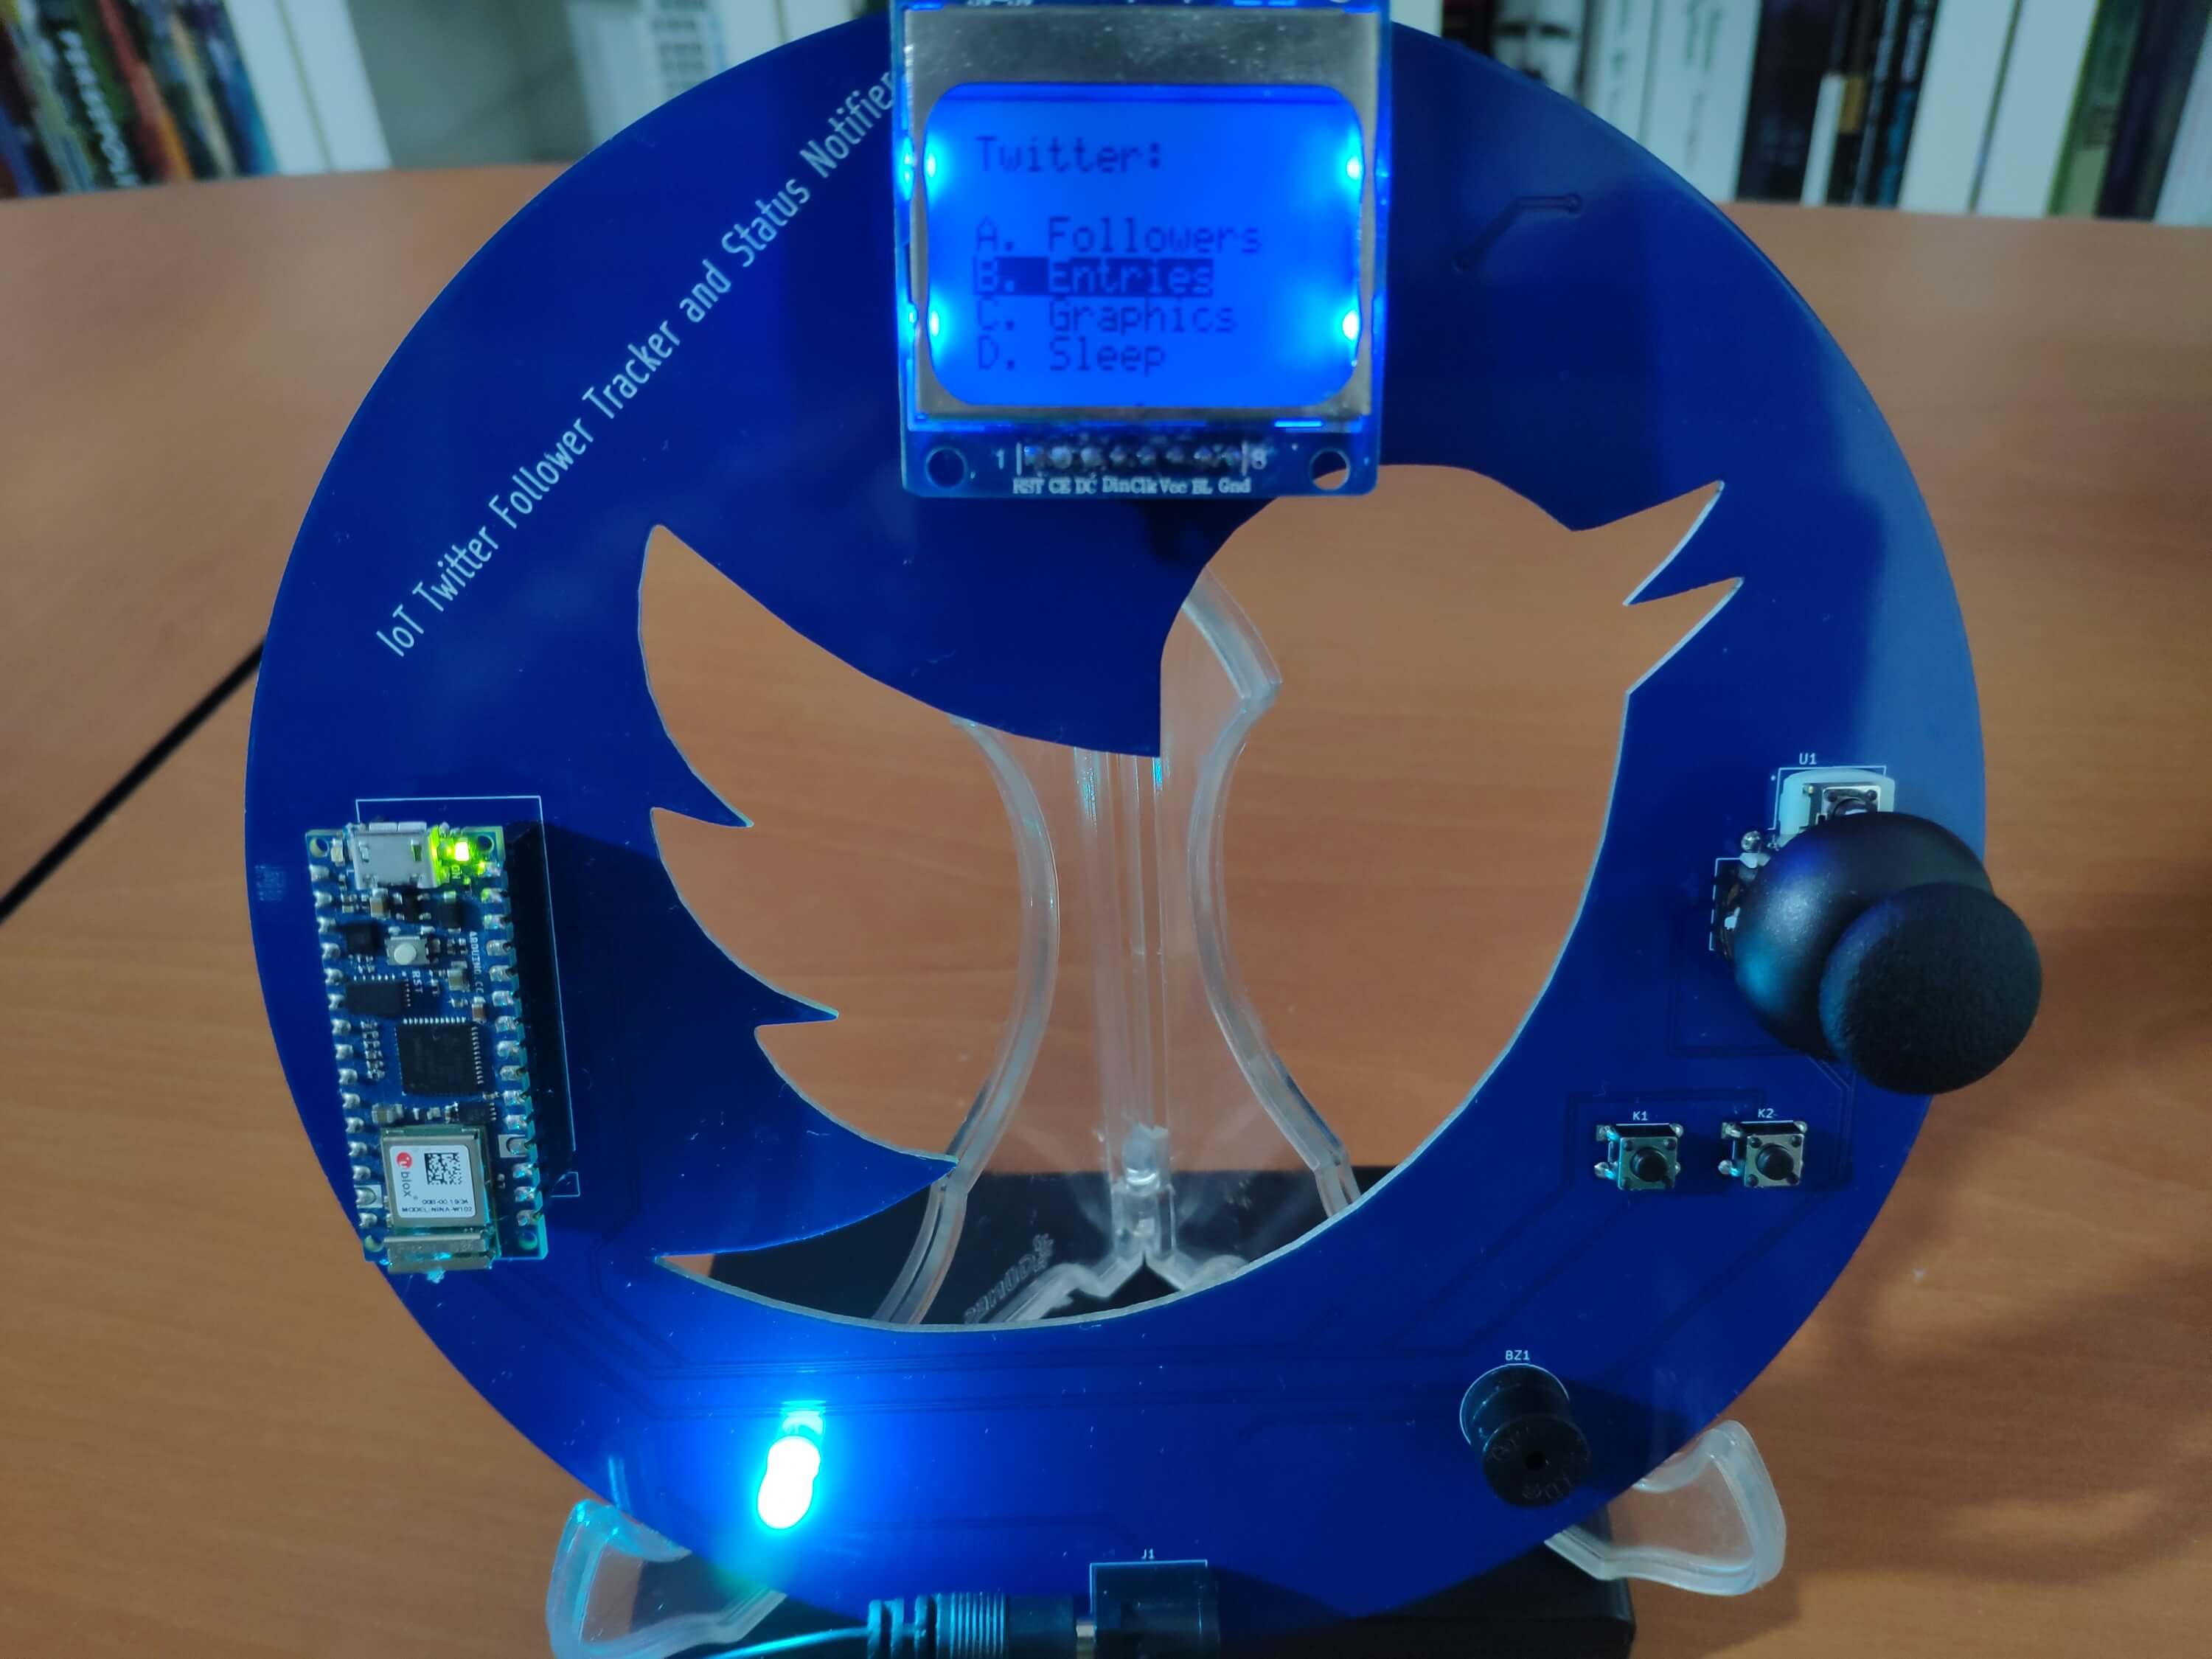
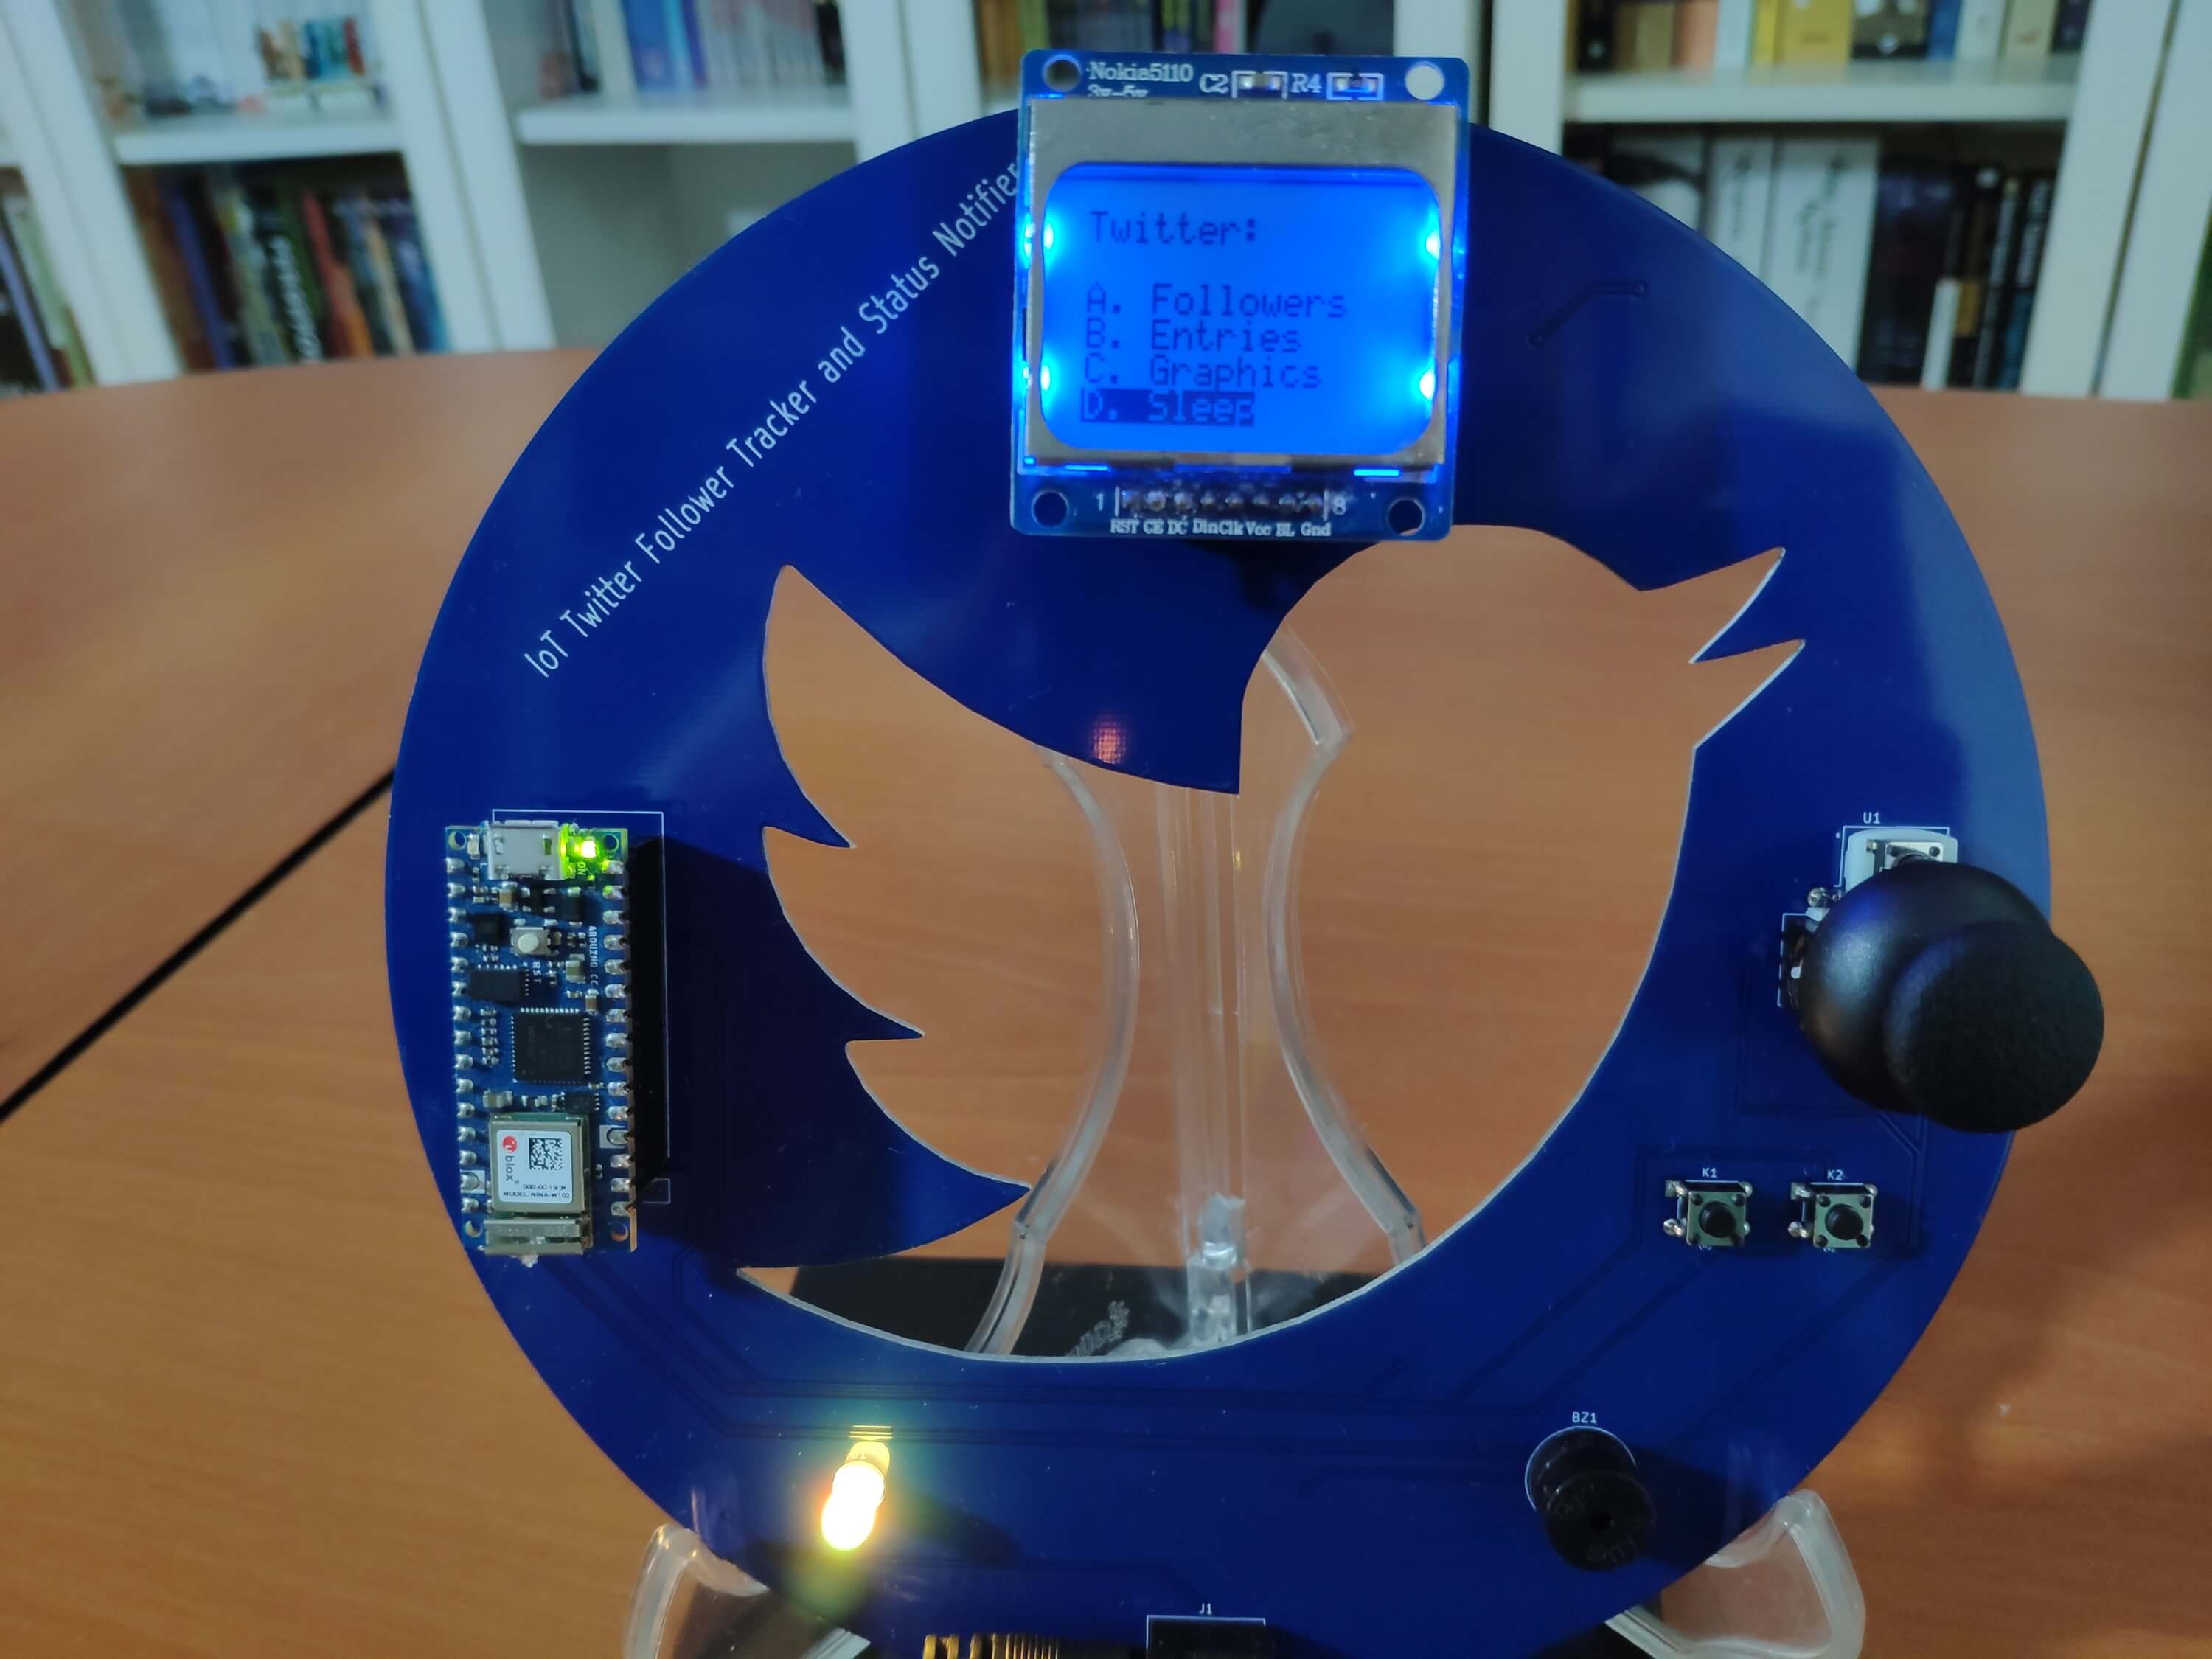
📊🔄 The device shows four different modes on the interface:
A. Followers
B. Entries
C. Graphics
D. Sleep
📊🔄 The device allows the user to select a mode (option) on the interface via the analog joystick:
Y-axis (>= 900) ➡ Go Up
Y-axis (<= 45) ➡ Go Down
SW ➡ Activate
📊🔄 While selecting a mode on the interface with the Y-axis of the analog joystick, the device turns the RGB LED to a different color for each mode:
Followers ➡ Purple
Entries ➡ Cyan
Graphics ➡ Yellow
Sleep ➡ Orange
Figure - 61.30
📊🔄 After activating any modes, the device lets the user return to the interface by pressing the Right button.
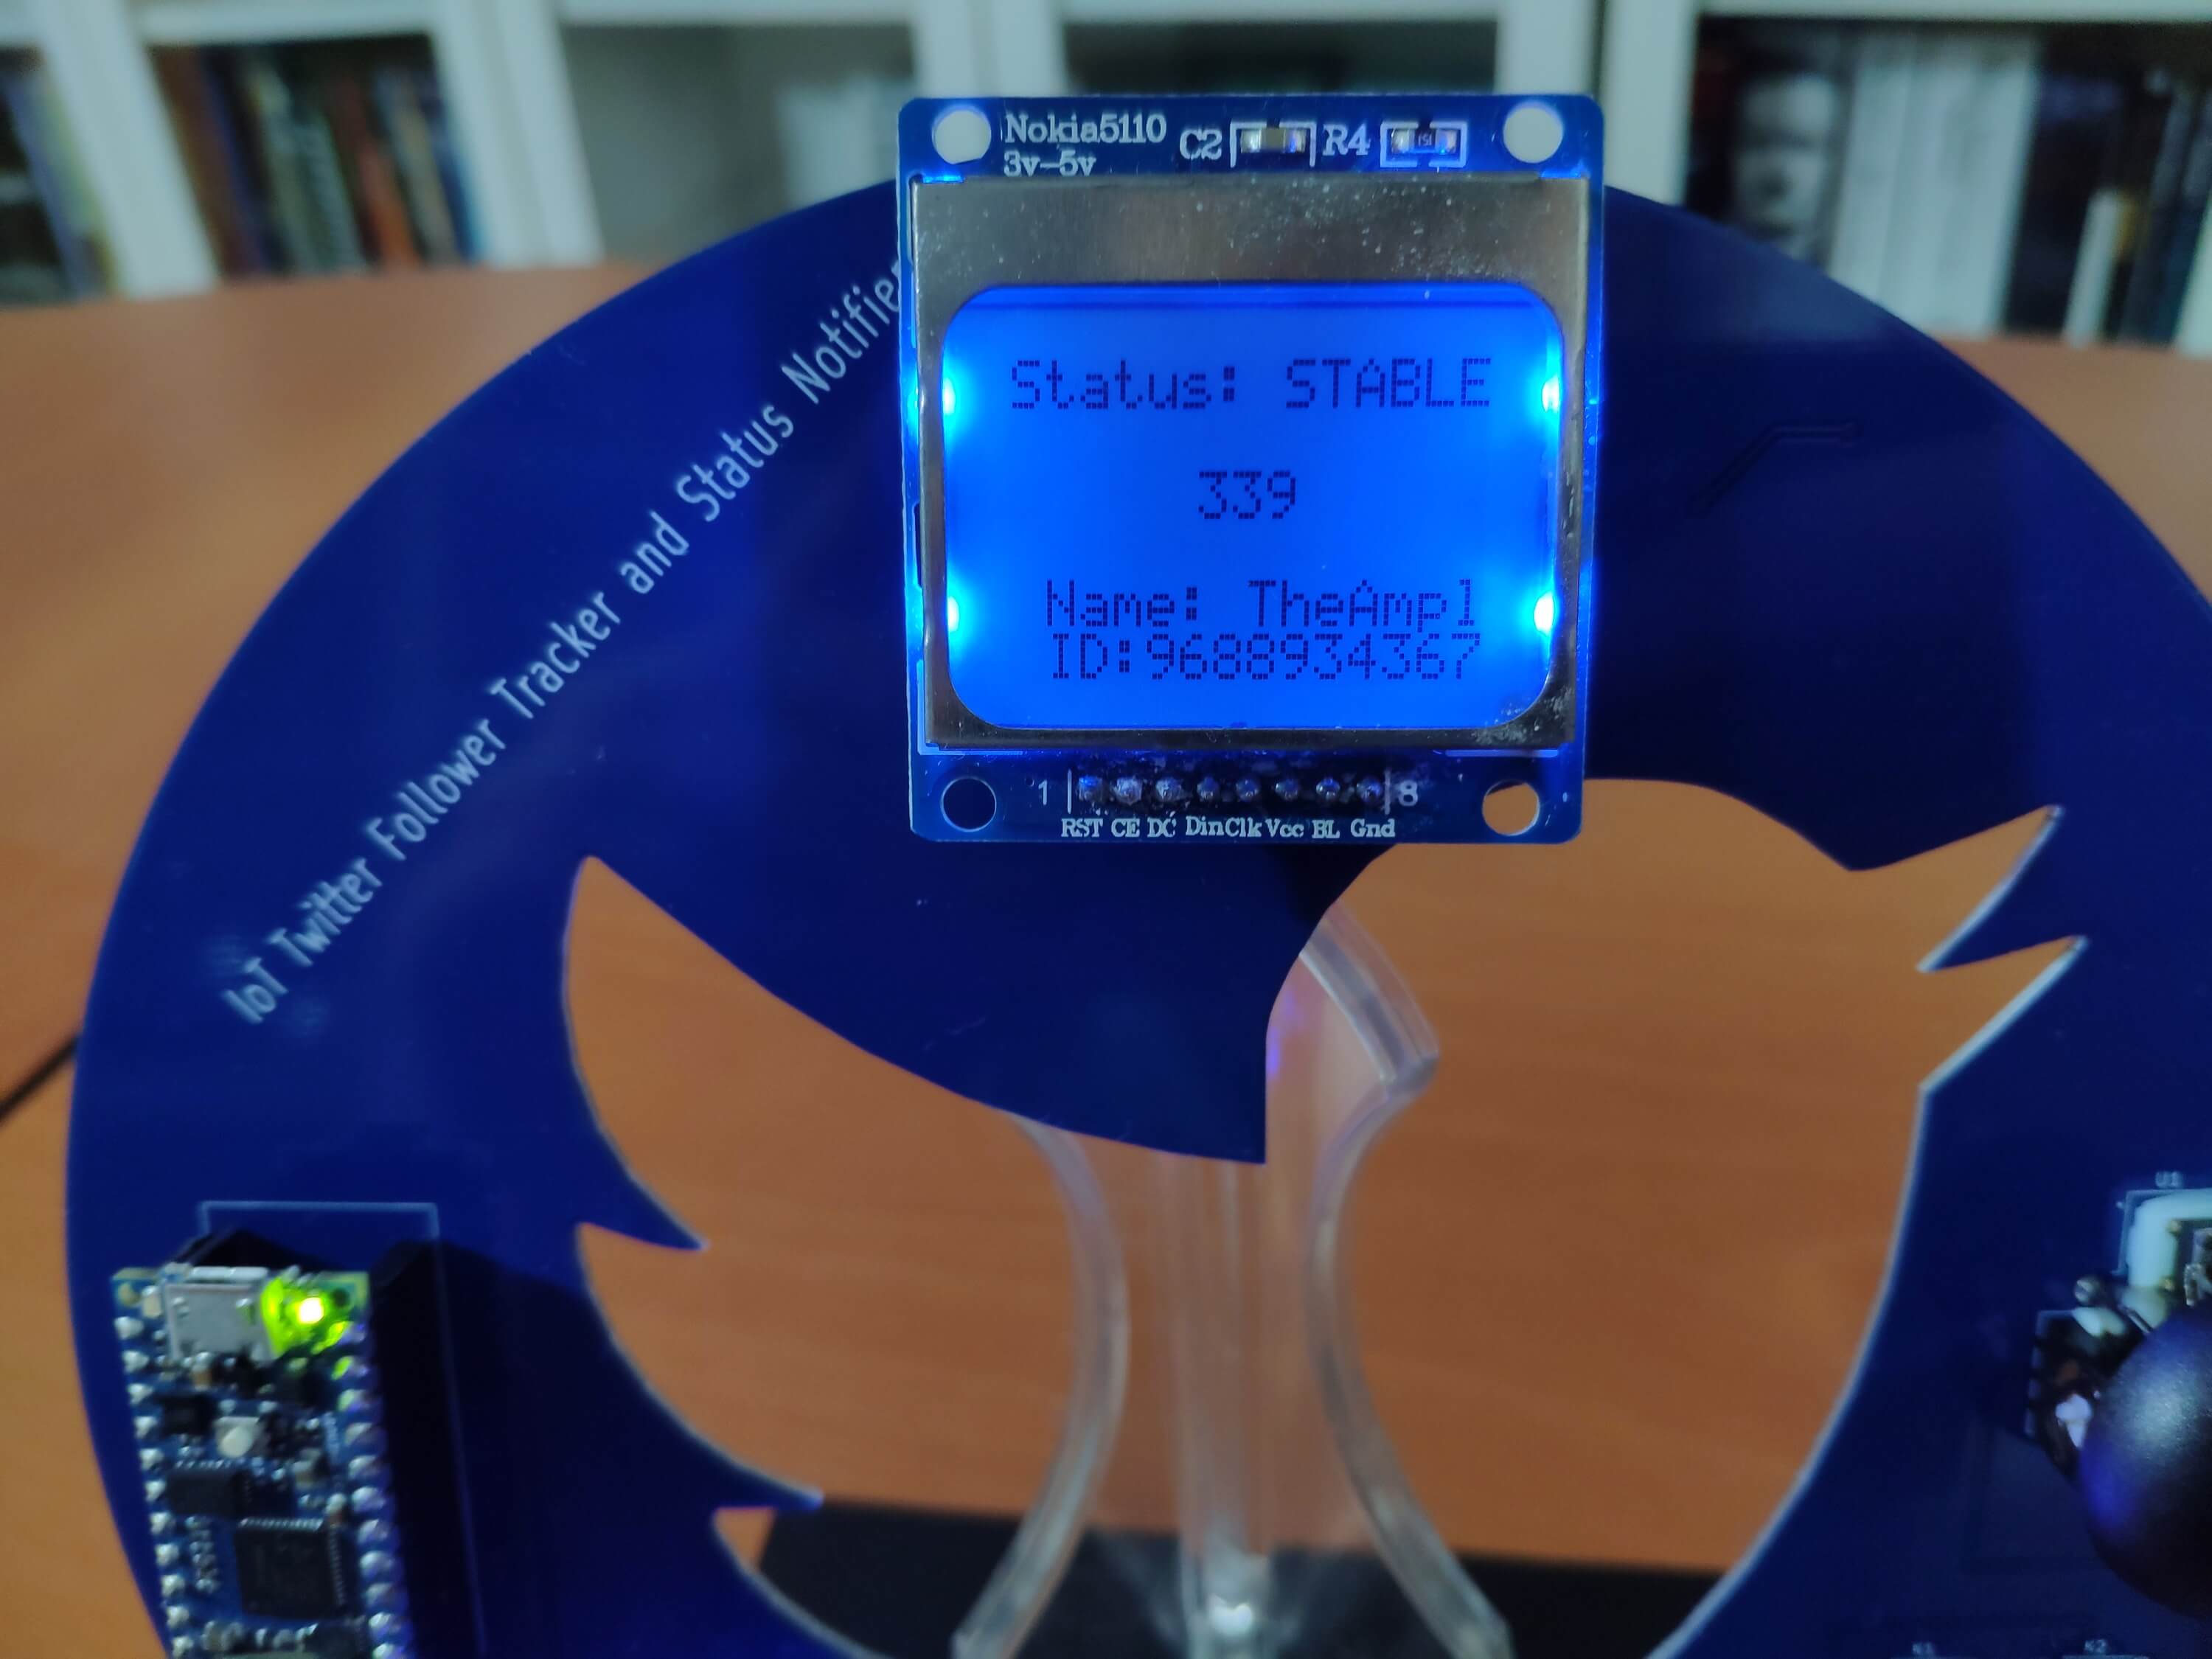
📌 A. Followers
Figure - 61.31
📊🔄 The device connects to the web application (Twitter Follower Tracker) to obtain the Twitter account information:
Follower Count
Account Name
Account ID
Figure - 61.32
📊🔄 The device checks the current follower status in comparison to the previously registered follower count:
STABLE
INC
DEC
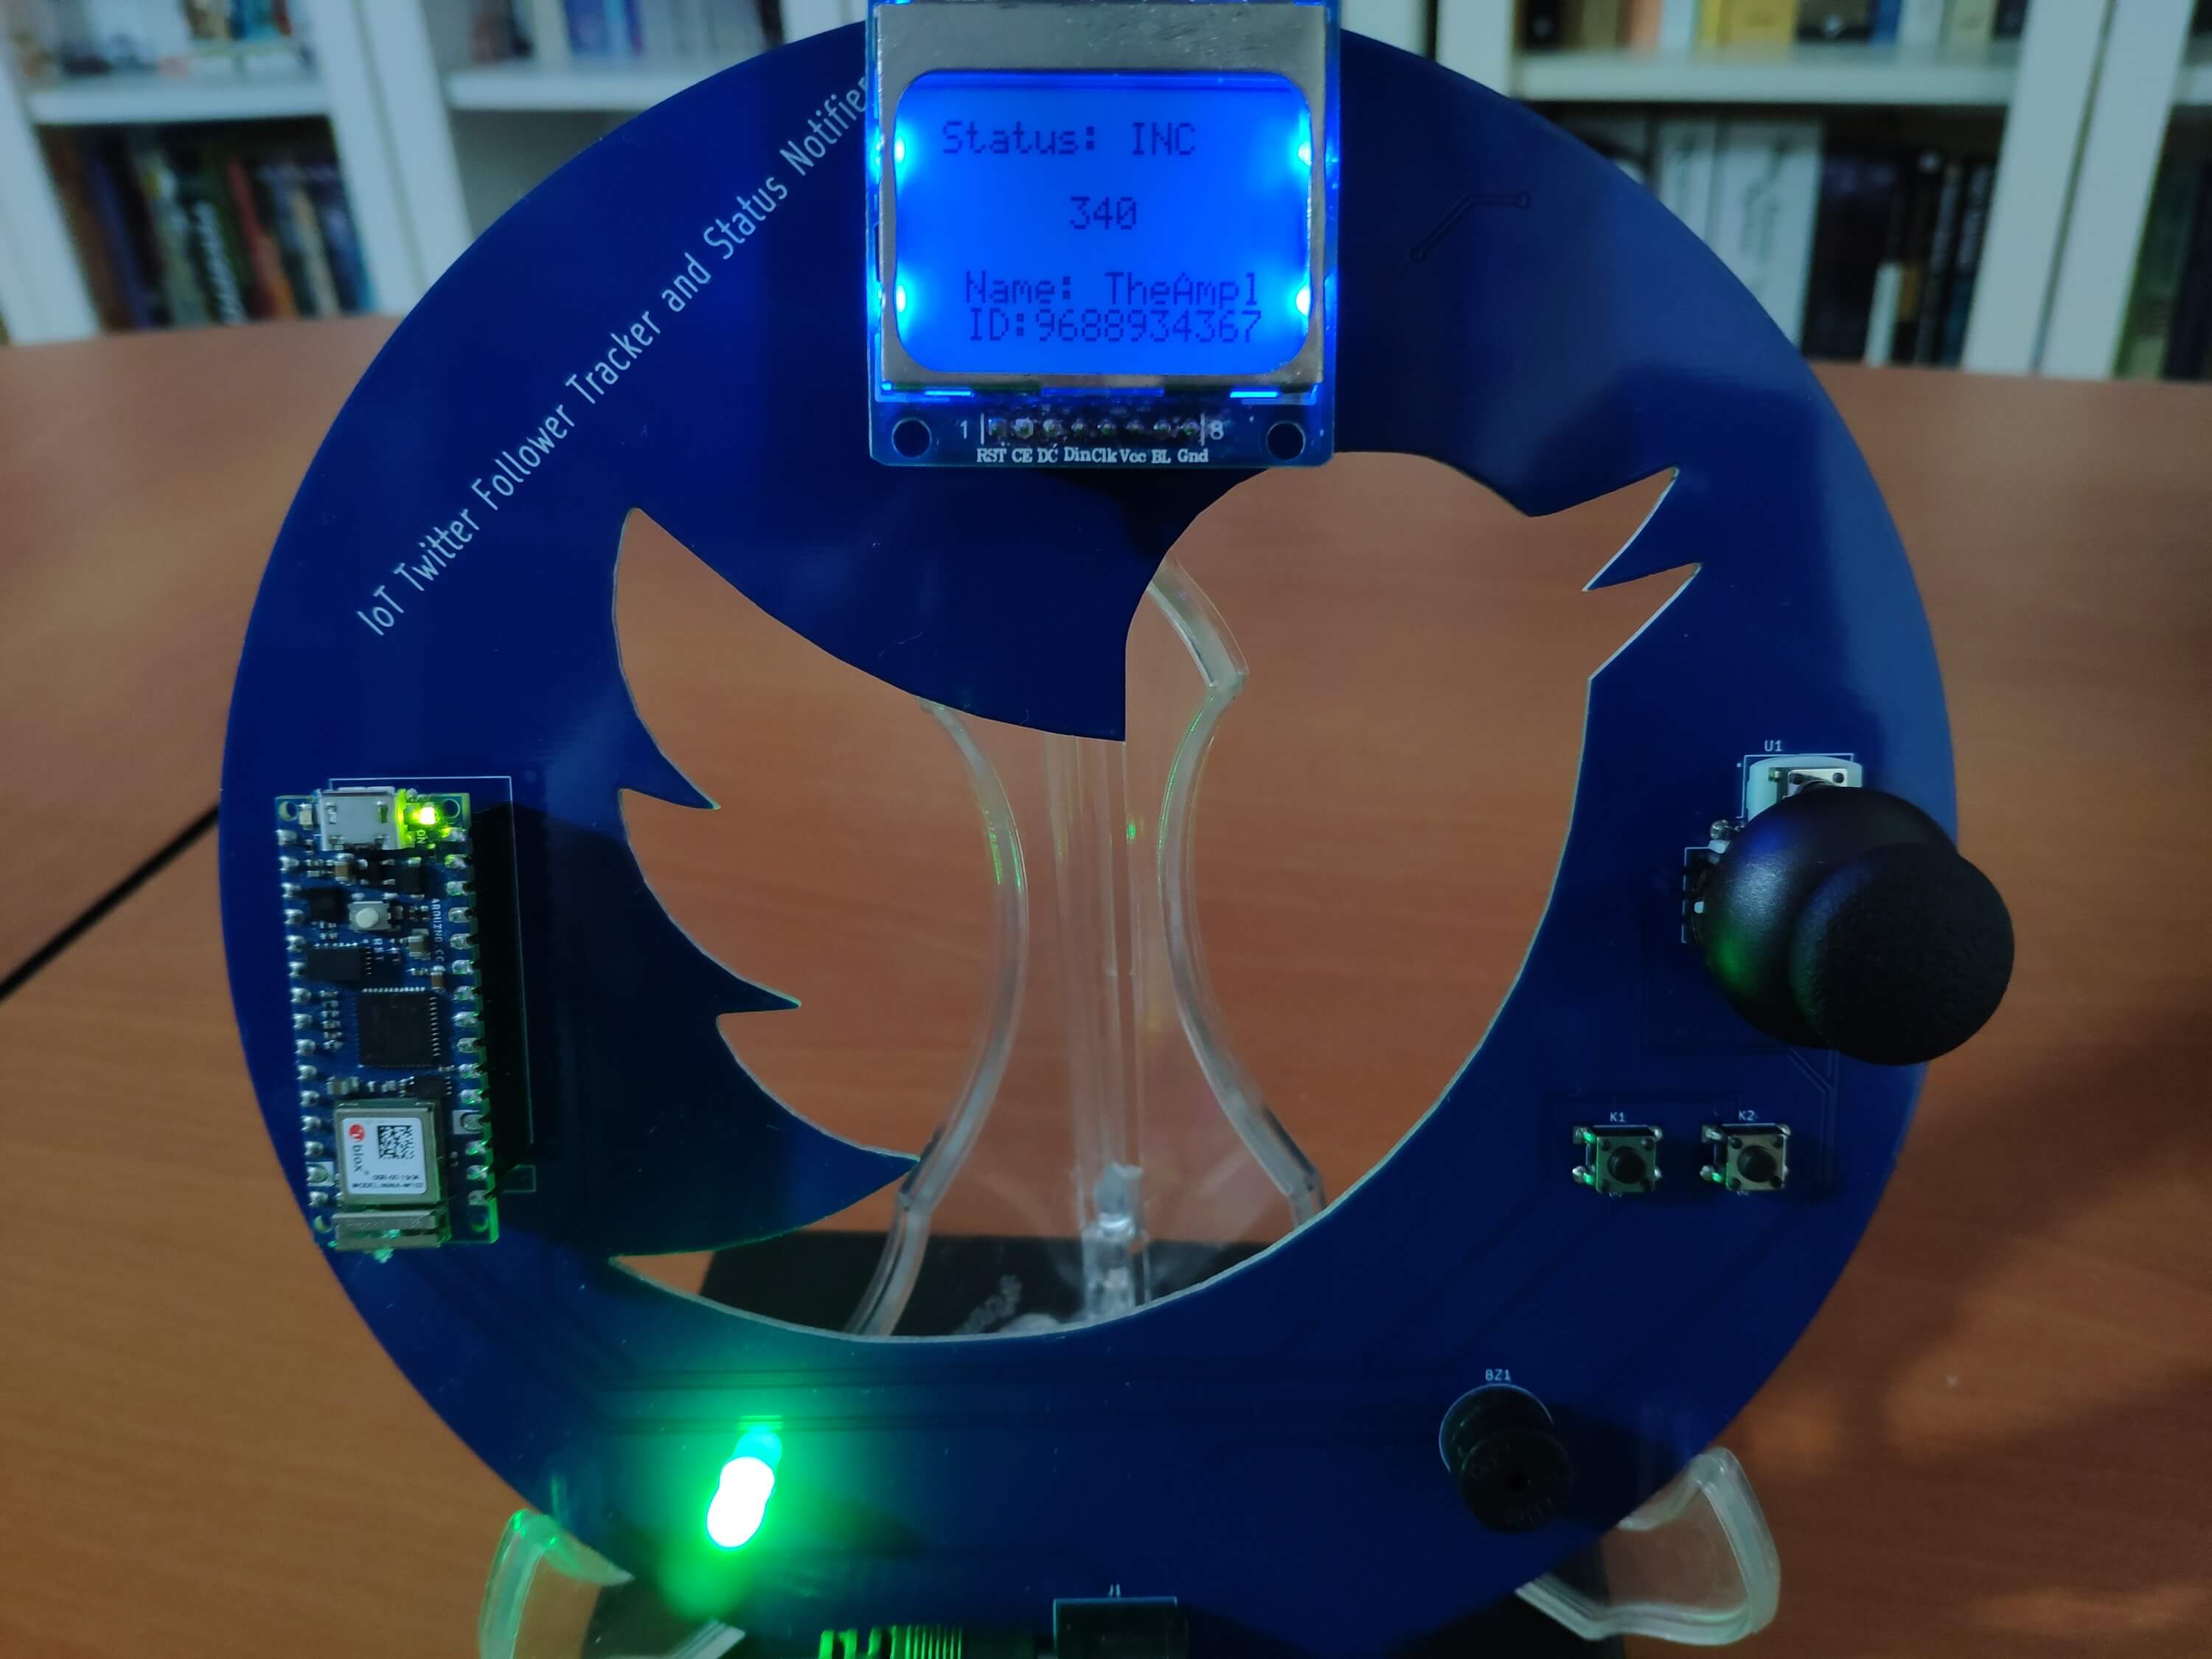
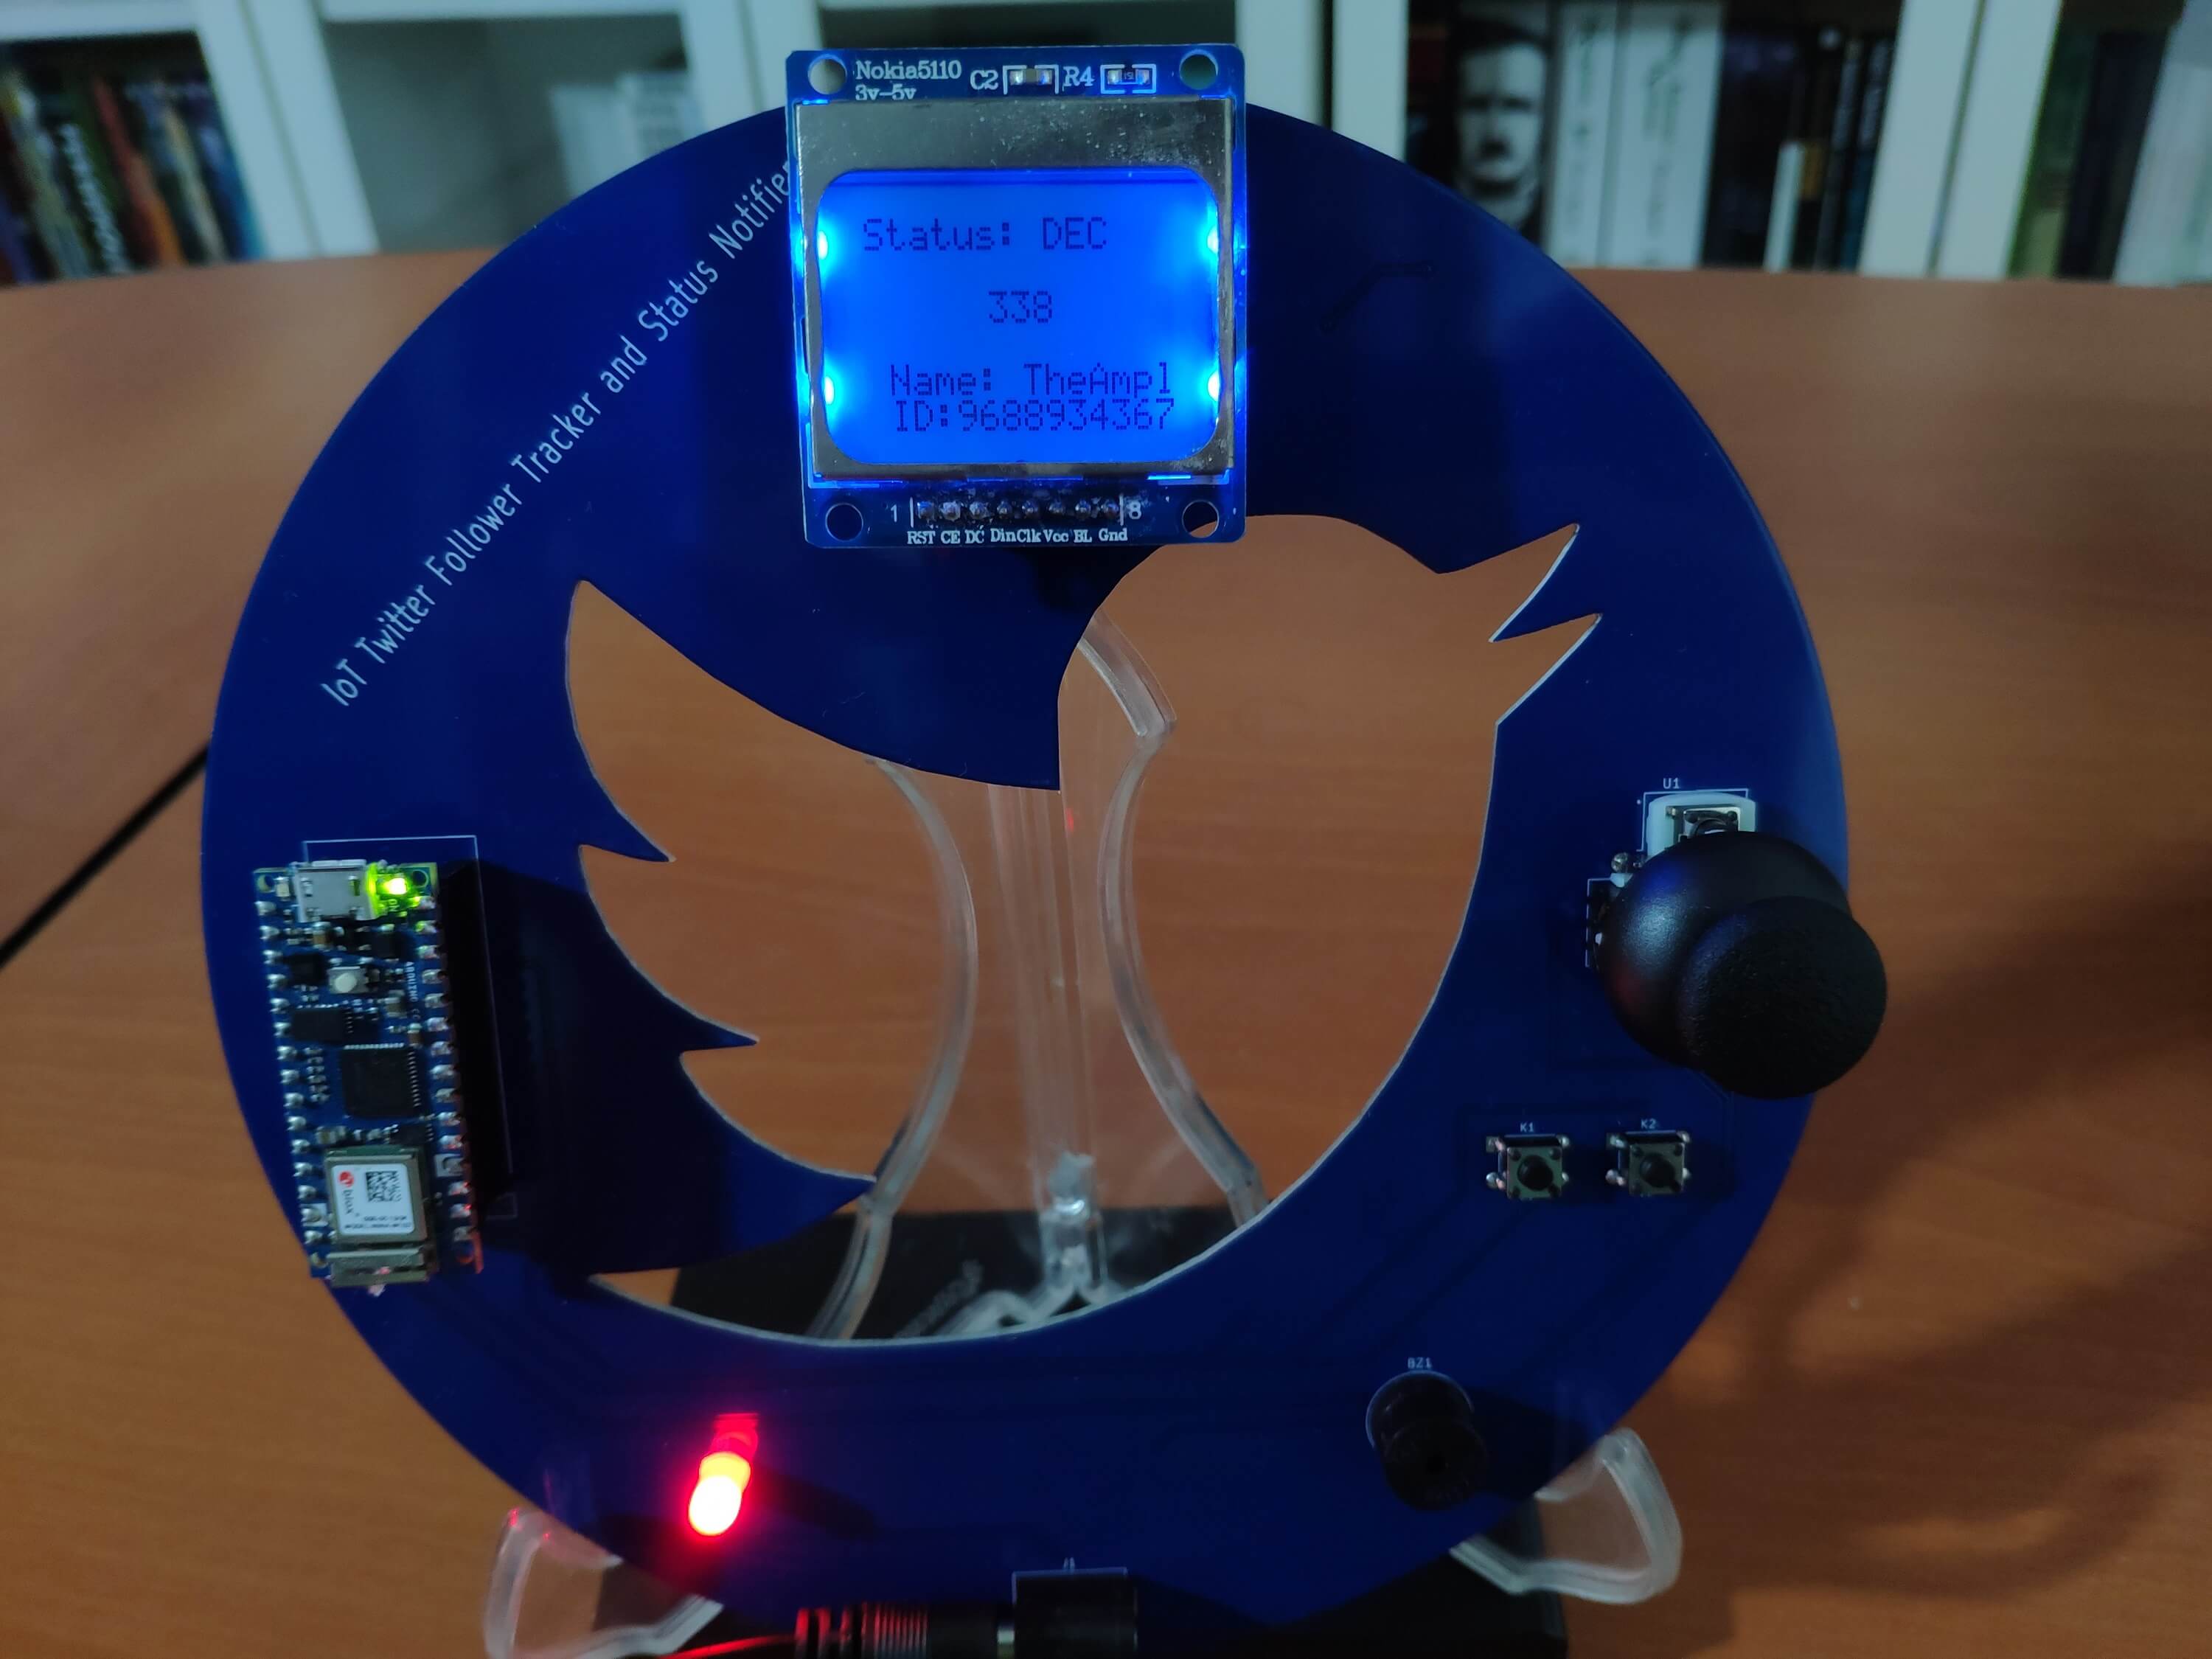
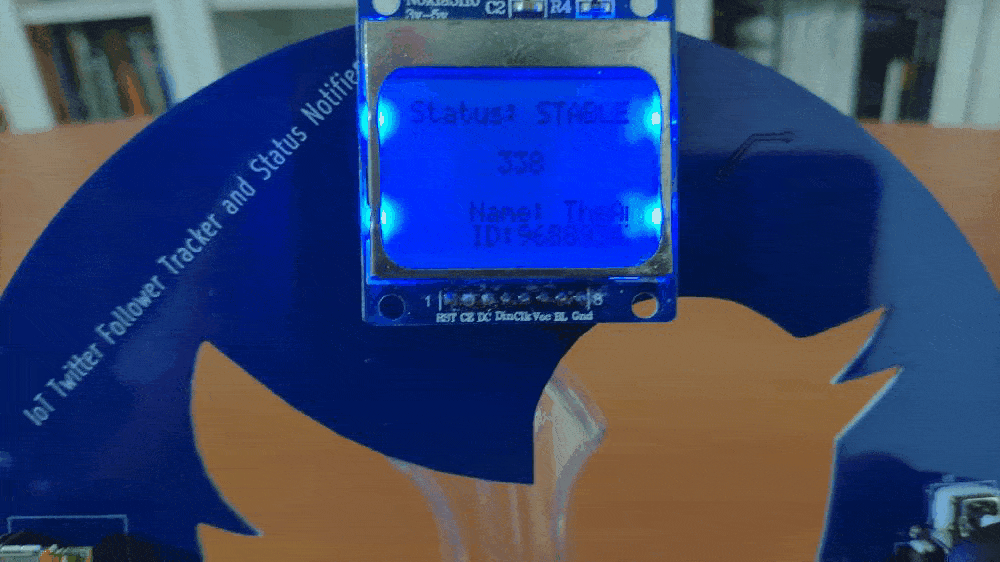
📊🔄 Then, the device displays the current follower status, the current follower count, the account name, and the account ID.
Figure - 61.33
📊🔄 If the current follower status is STABLE, which means no change in the follower count, the device turns the RGB LED to blue.
Figure - 61.34
📊🔄 If the current follower status is INC, which means an increase in the follower count, the device turns the RGB LED to green and notifies the user via the buzzer.
Figure - 61.35
📊🔄 If the current follower status is DEC, which means a decrease in the follower count, the device turns the RGB LED to red and notifies the user via the buzzer.
Figure - 61.36
📊🔄 If the Left button is pressed, the device halts the buzzer (notification) and keeps displaying the account information.
📊🔄 The device allows the user to scroll the fetched account information with the X-axis of the analog joystick.
Figure - 61.37
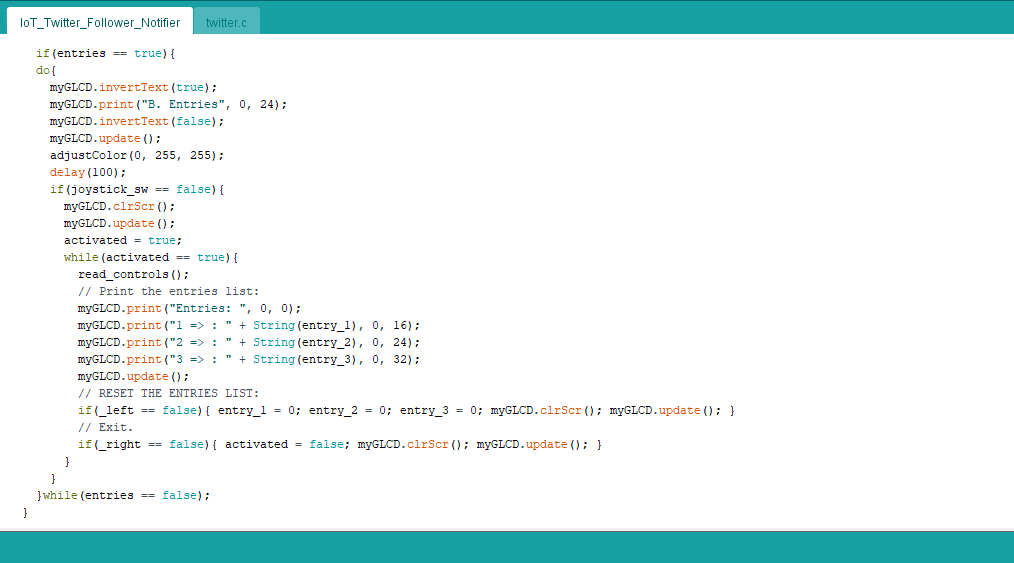
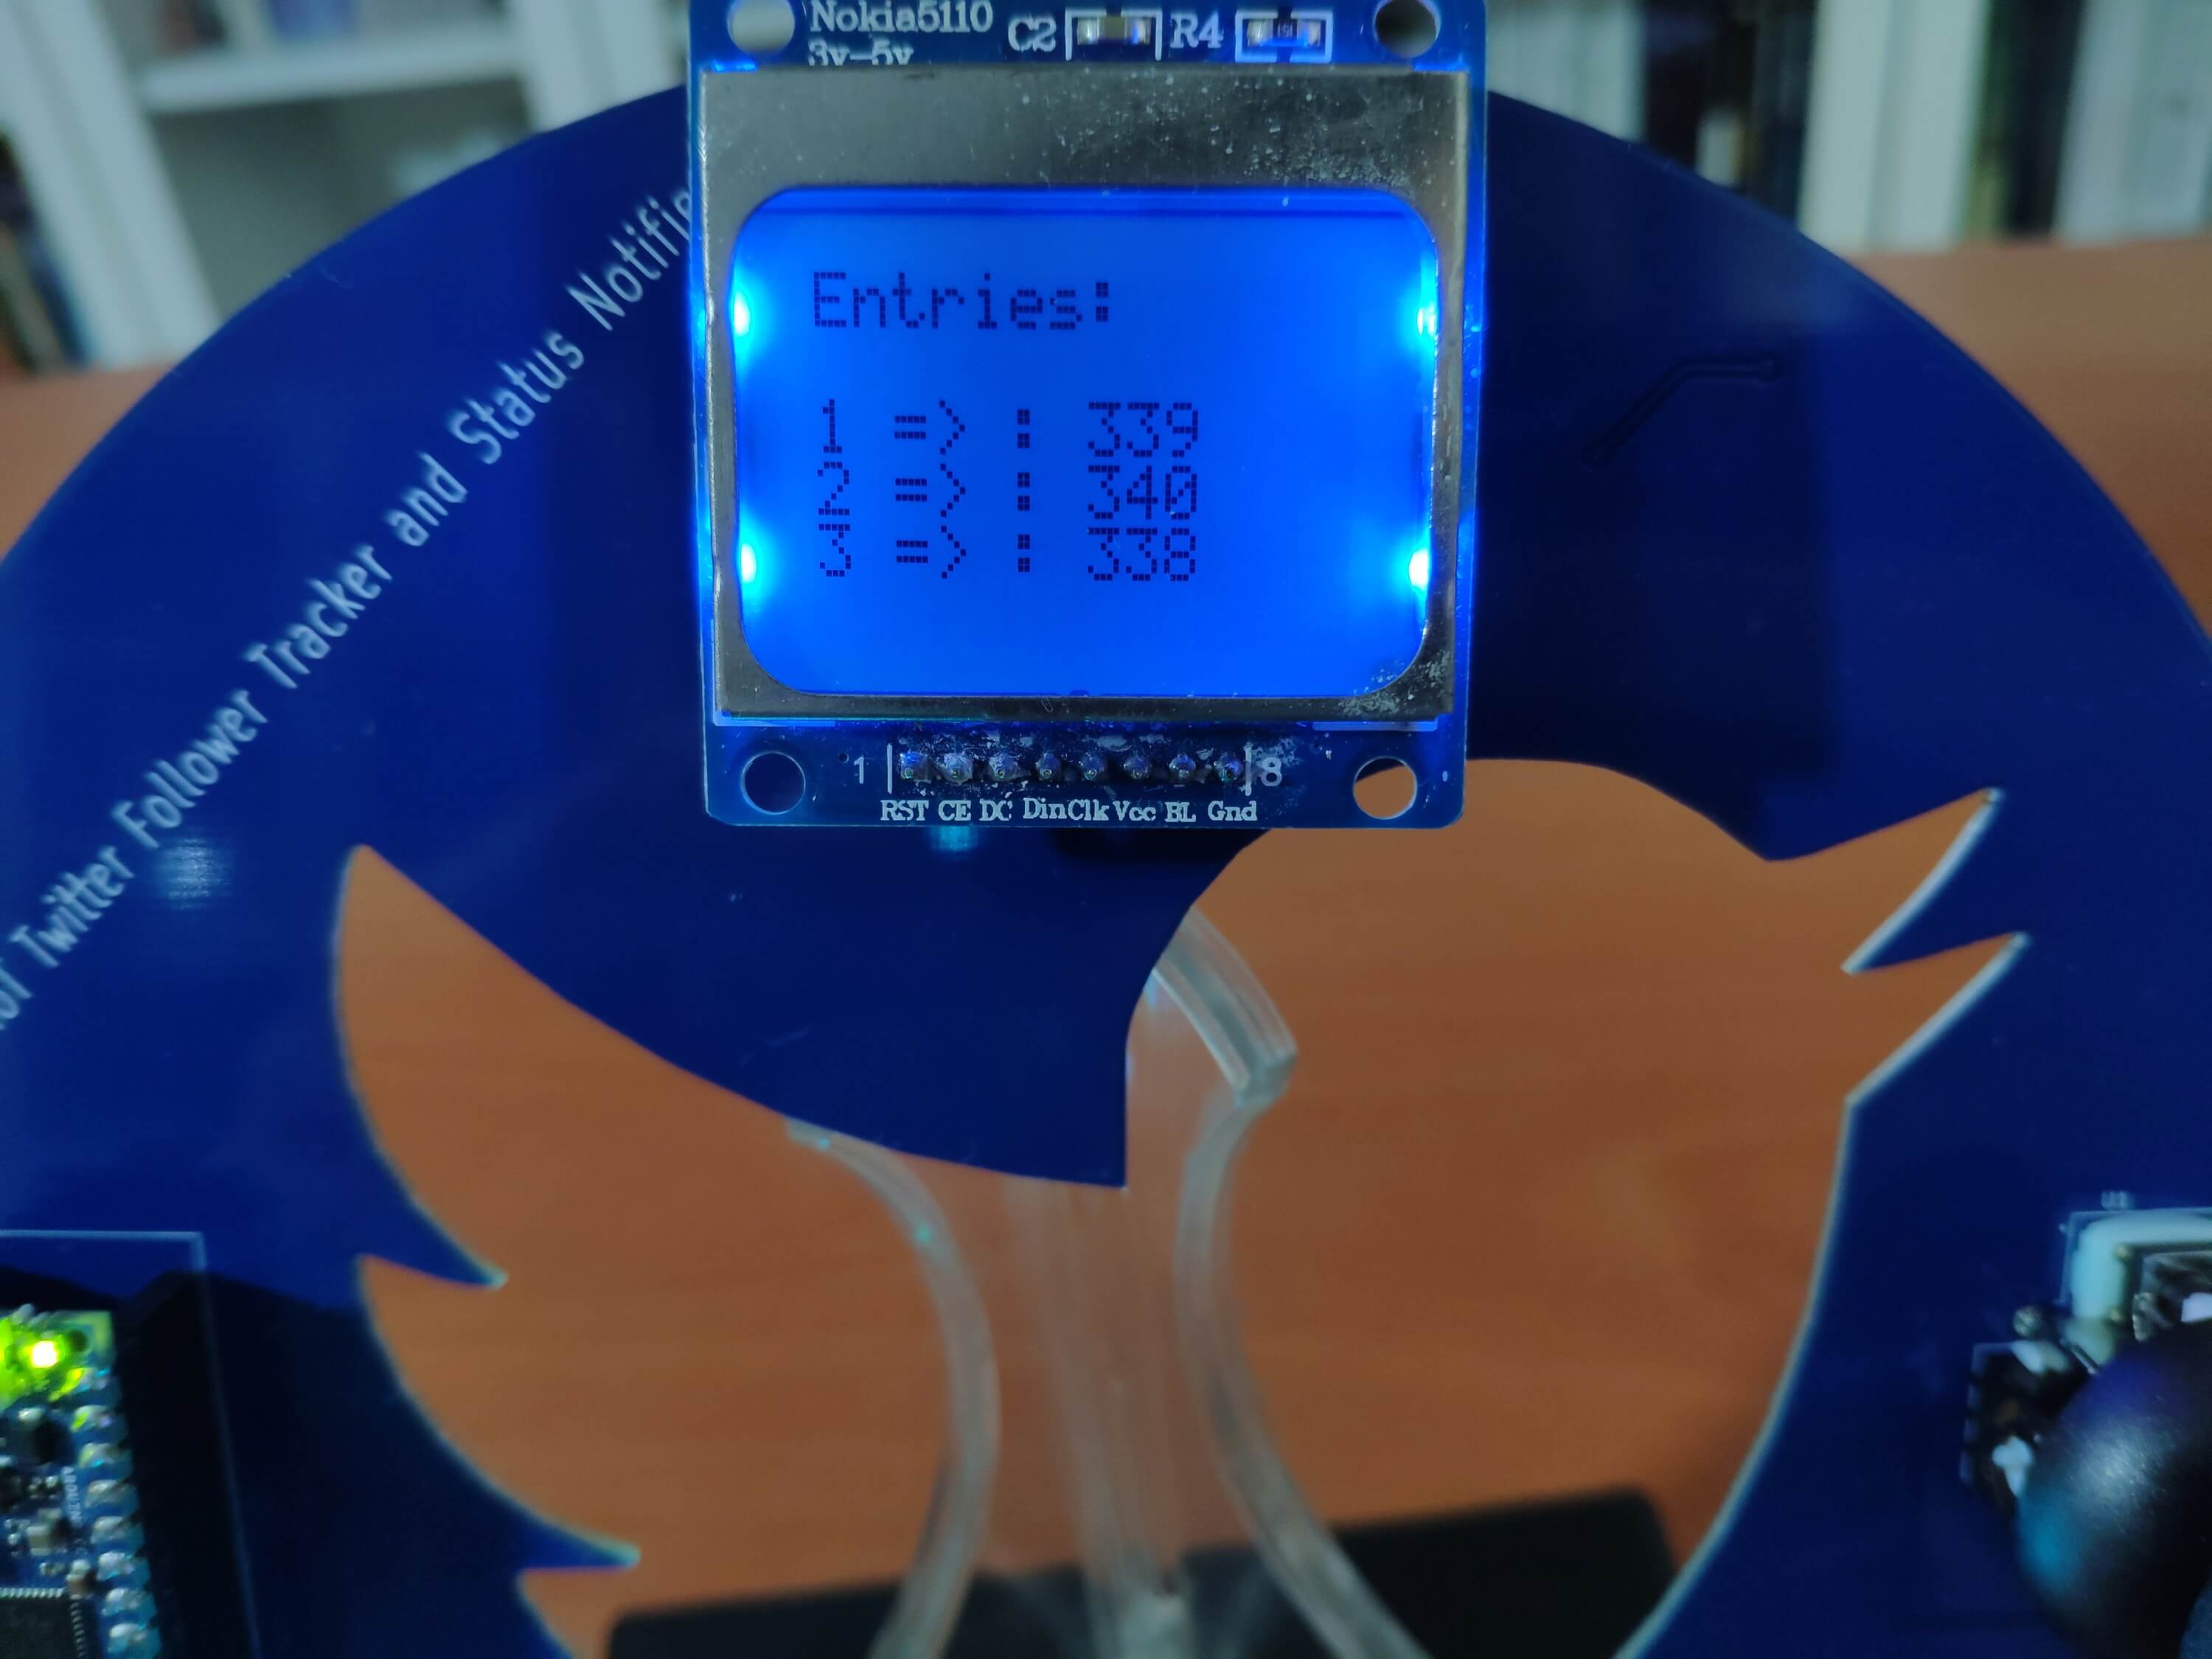
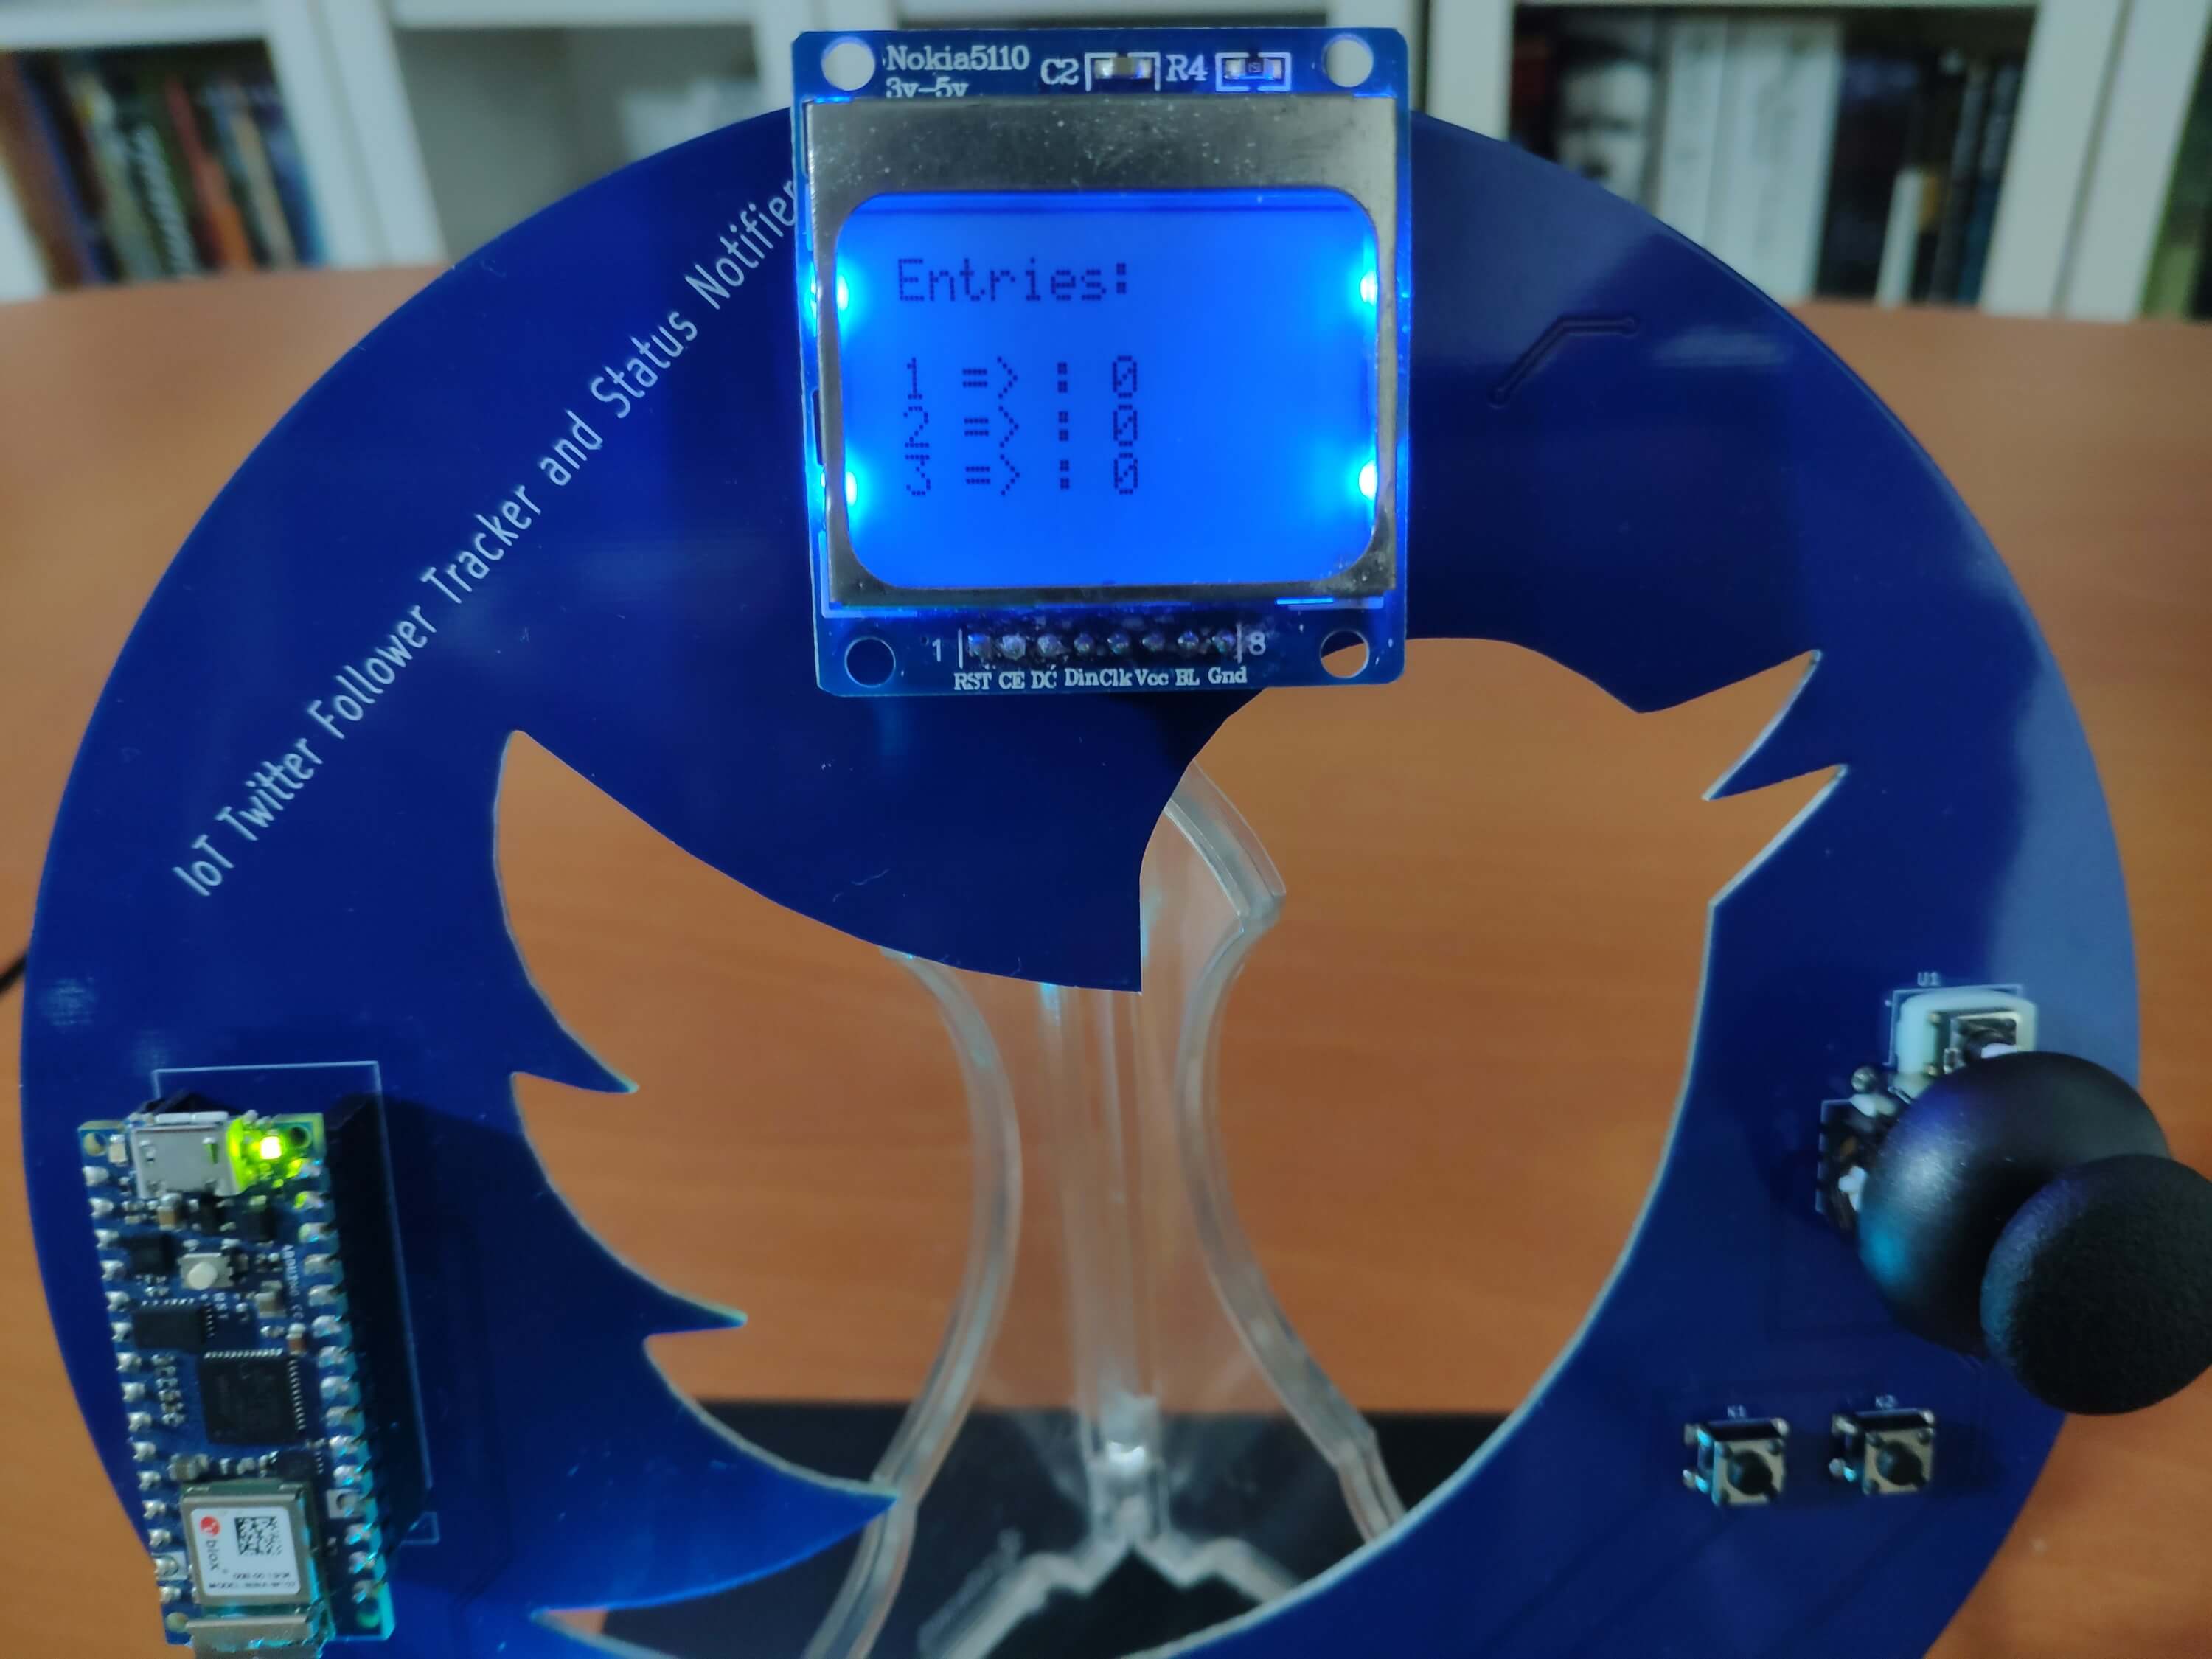
📌 B. Entries
Figure - 61.38
📊🔄 The device displays the last three registered follower counts (entries) chronologically.
Figure - 61.39
📊🔄 If the Left button is pressed, the device resets the entries (follower counts) list.
,
Figure - 61.40
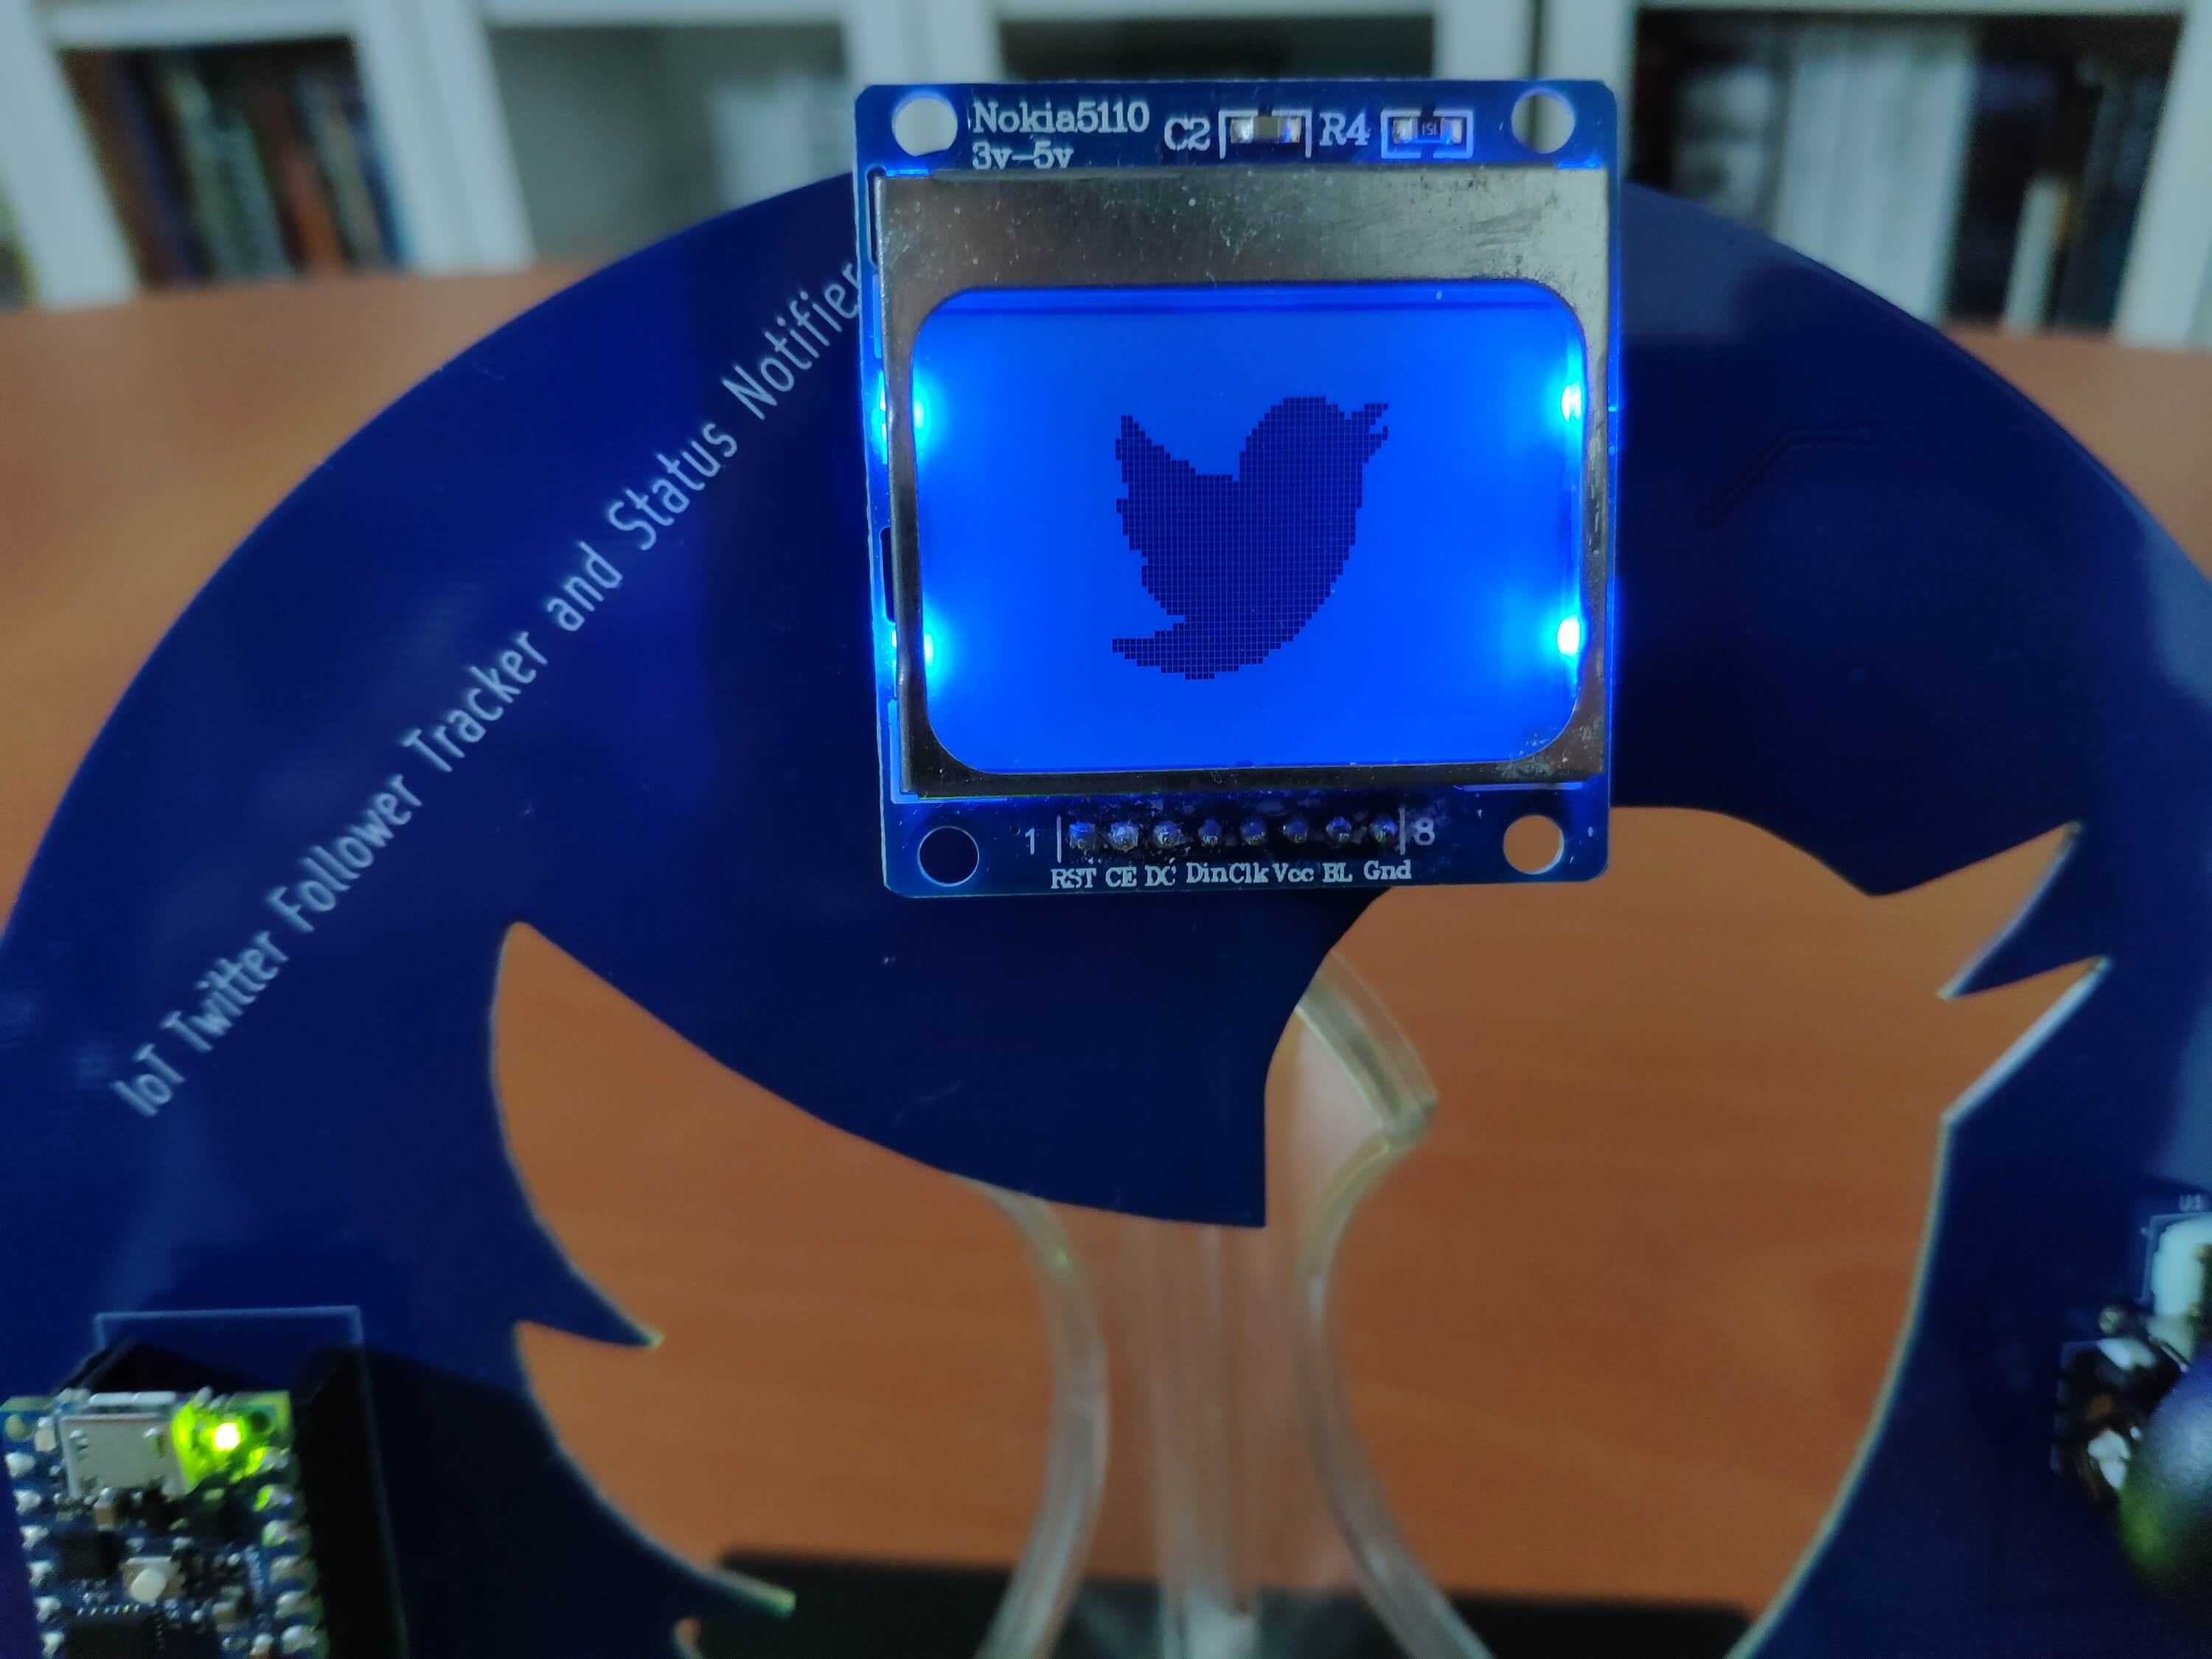
📌 C. Graphics
Figure - 61.41
📊🔄 The device shows the Twitter logo (monochrome image) as the screensaver.
Figure - 61.42
📌 D. Sleep
Figure - 61.43
📊🔄 The device activates the sleep mode in 10 seconds while printing the remaining seconds.
Figure - 61.44
📊🔄 The device displays the color pattern - red, green, blue, purple, white - during the sleep mode.
Figure - 61.45
Videos and Conclusion
After completing all steps above, I placed the device on my desk by utilizing a plastic easel as a fitting and stylish decoration for my room. It works stupendously :)
<?php

// Define the twitter_follower_tracker class and its functions:
class twitter_follower_tracker{
	public $account;

	public function __init__($account){
		$this->account = $account;
	}

	public function get_followers(){
		$url = "https://cdn.syndication.twimg.com/widgets/followbutton/info.json?screen_names=".$this->account;
		$data = json_decode(file_get_contents($url, true));
		echo "%".$data[0]->followers_count."%".$data[0]->name."%".$data[0]->id."%";
	}
}

// Define the new 'twitter' class object:
$twitter = new twitter_follower_tracker();
$twitter->__init__("ThAmplituhedron");

// Print information that of the given Twitter account.
$twitter->get_followers();

?>