Get the highest accuracy and efficiency when measuring altitude with BMP180 Pressure Sensors by using a tilt sensor and a vibration motor.
Advertisement:
Read Later
Get the highest accuracy and efficiency when measuring altitude with BMP180 Pressure Sensors by using a tilt sensor and a vibration motor.
Components :
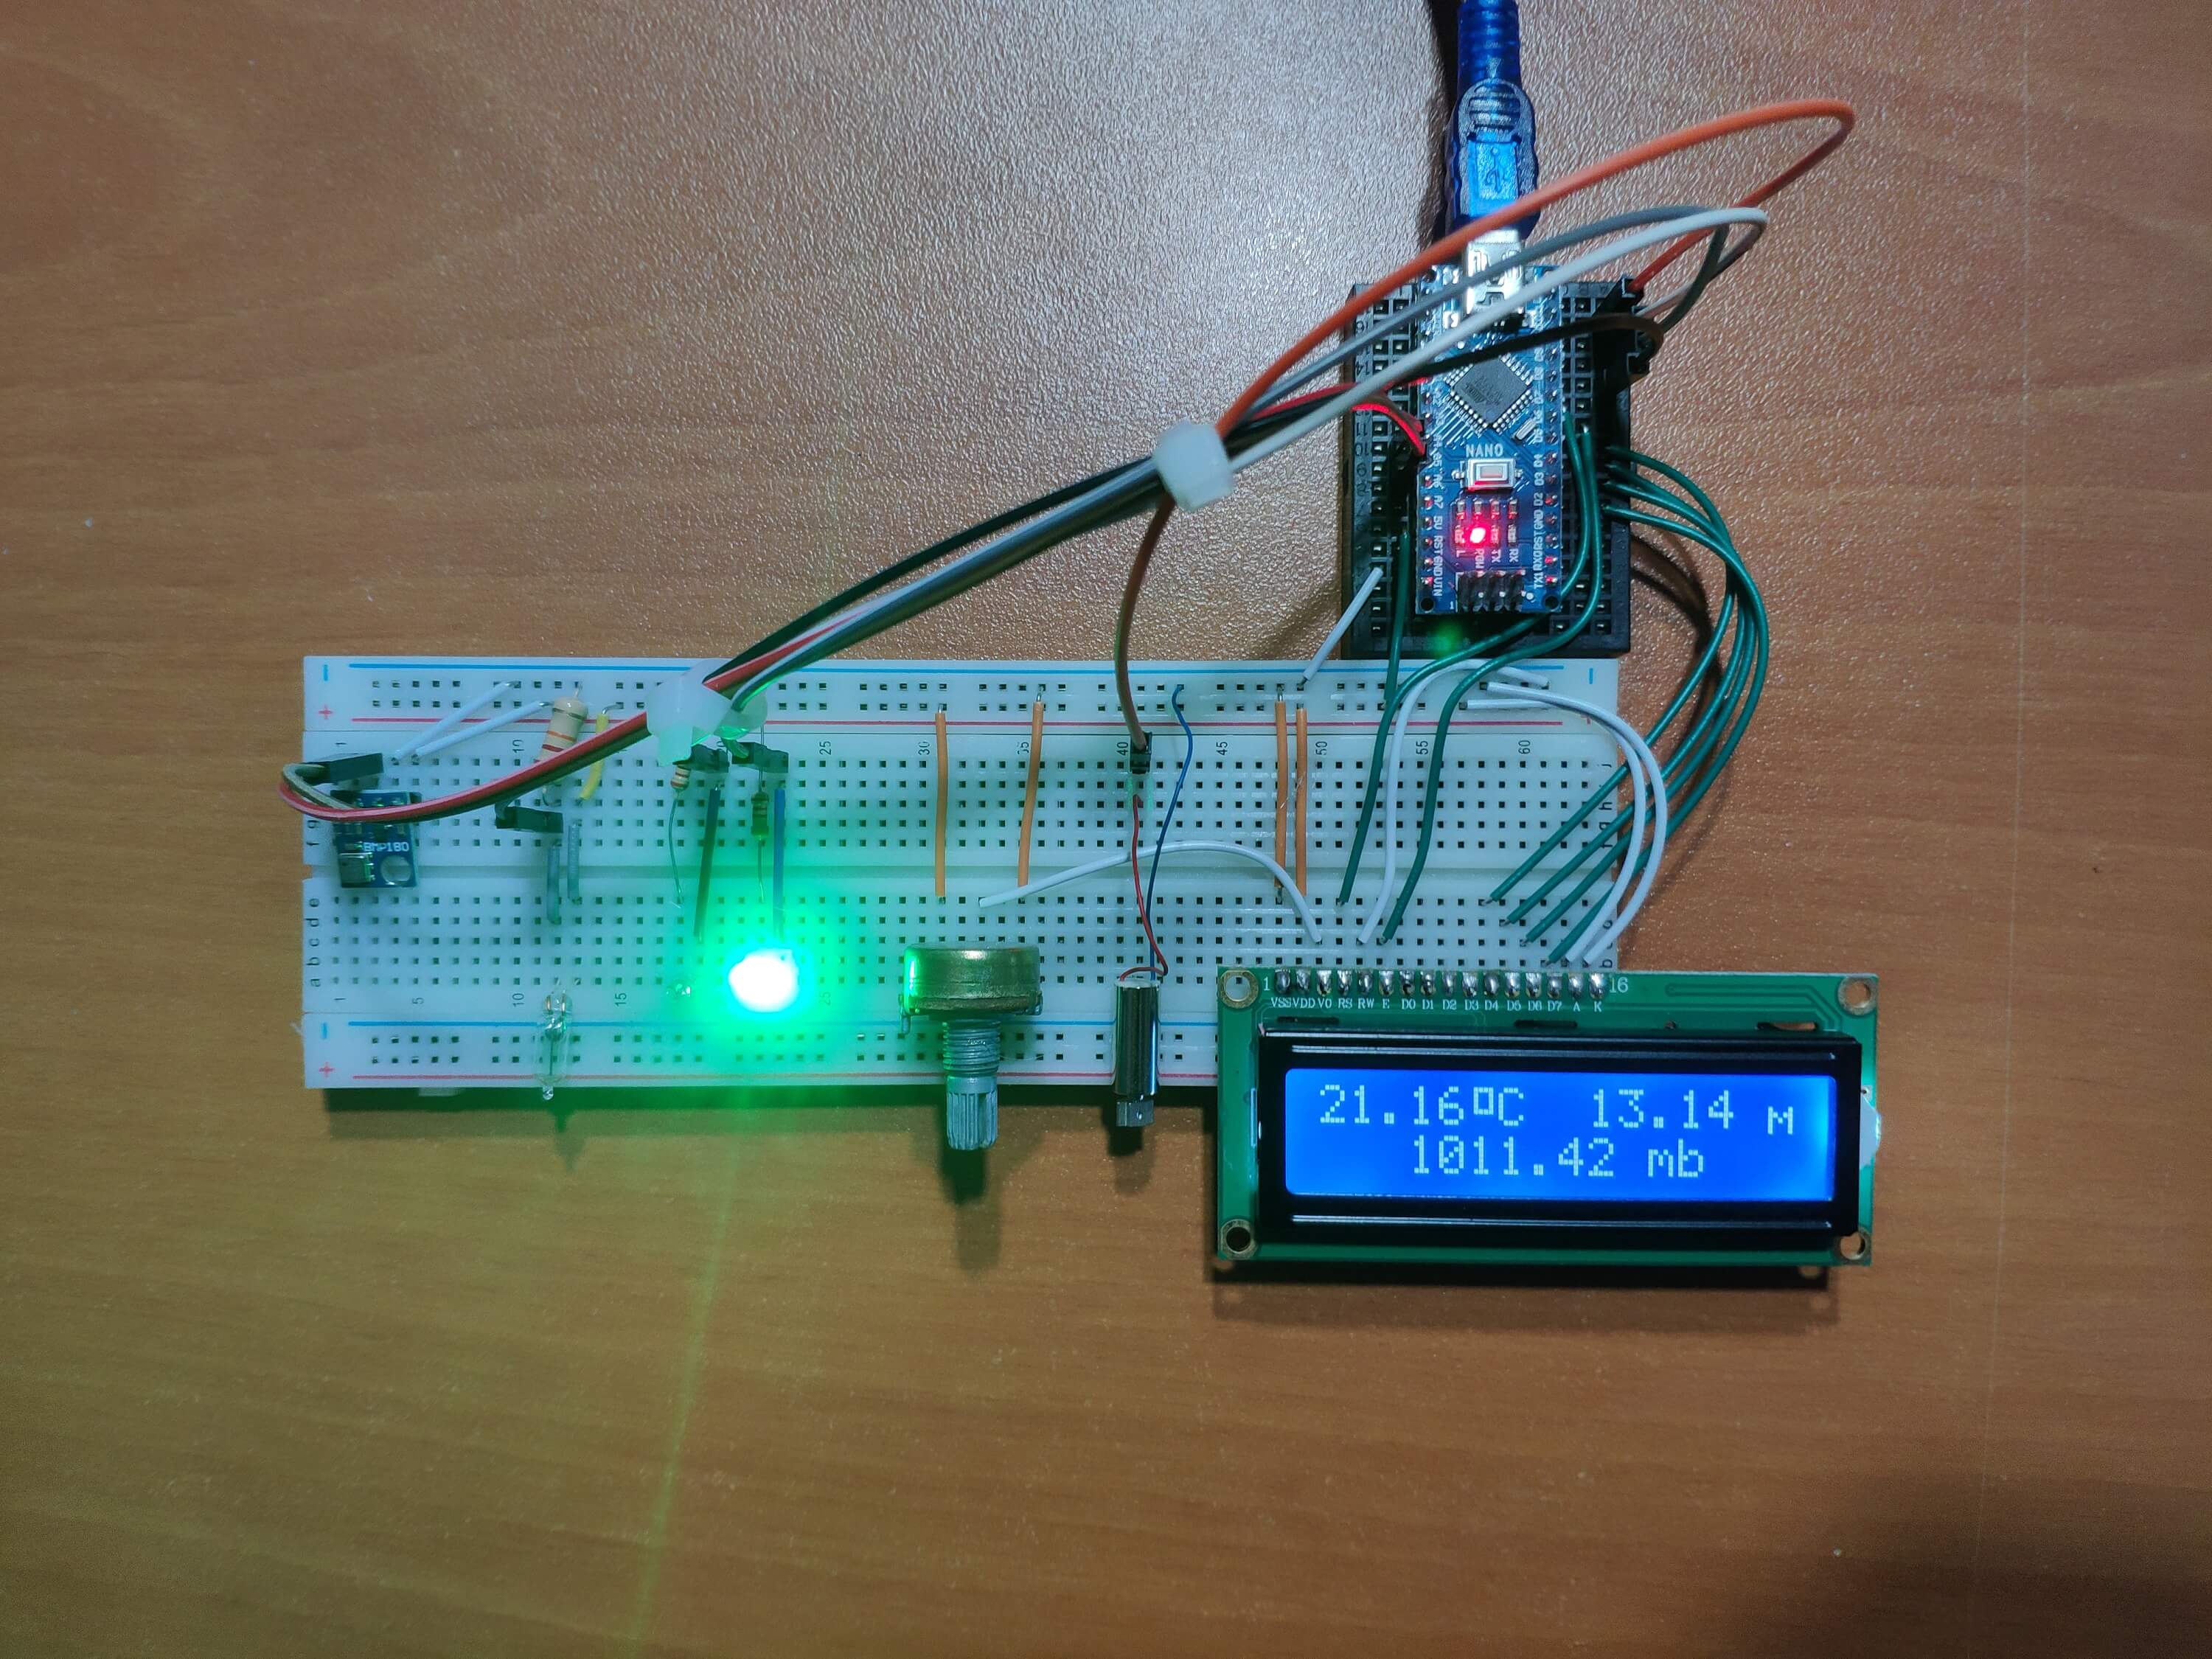
Arduino Nano R3[1]BMP180 Barometric Pressure Sensor[1]Tilt Sensor(Mercury Sensor)[1]Vibration Motor[1]5 mm LED: Red[1]5 mm LED: Green[1]Rotary Potentiometer[1]LCD Screen (16, 2)[1]Breadboard[1]Mini Breadboard[1]Resistor 221 ohm[2]Resistor 10k ohm[1]Male/Female Jumper[1]Male/Male Jumper[1]Soldering Iron[1]Hot Glue Gun[1]When I used my BMP180 barometric pressure sensor, I needed to know whether breadboards on which it is attached are on a flat plain or not to make sure that my measurements related to pressure, temperature and altitude are accurate, hence the use of the tilt sensor. I choose using a mercury sensor instead of using a tilt sensor module like KY-020 due to its accuracy. According to the data digitally generated by the mercury sensor, when it is detected that BMP180 barometric pressure sensor on a tilted plain, vibration motor pins are activated as a notification and a reminder along with the dedicated false led pin.

It is easy to use for a sensor managing a very complex readings. First of all, download its library and get more information before continuing to read here.
After downloading SFE_BMP180 library, solder male header to the module and connect SDA, SCl pins to the dedicated pins defined in the source code down below.


Now, you can get pressure, temperature and altitude values from BMP180 sensor with regard to a baseline pressure in mb, defined at the source code.


If you want to, you can use a tilt sensor module instead a mercury sensor.
Connect its first leg to GND, 10K resistor and D8 in this order, and its second led to 5V directly.
After that, read - digitalRead(tilt); - the data digitally generated as 0 and 1, or LOW and HIGH.


To control the vibration motor, just write HIGH or LOW to the dedicated pin, in this case it is D11.

On a flat plain;
Tilt sensor is HIGH,
OK is HIGH,
FALSE is LOW,
Vibration motor is LOW,
Pressure, temperature and altitude values are displayed.
On a tilted plain;
Tilt sensor is LOW,
OK is LOW,
FALSE is HIGH,
Vibration motor is HIGH,
Error message is displayed - "Please balance on a flat plain!".
All board connections are well-explained at the source code down below.
Make components connections as explained down below and the project fritzing file.


Source Code
Download
         /////////////////////////////////////////////
        //    The Vibrating Pressure, Altitude     //
       //      Temperature and Tilt Detector      //
      //       ----------------------------      //
     //             (Arduino Nano)              //
    //             by Kutluhan Aktar           //
   //                                         //
  /////////////////////////////////////////////

// Get pressure, temperature and altitude values from a BMP180 sensor with regard to a baseline pressure in mb.
// Detect a tilted plain with the data produced by a tilt sensor digitally as 0 and 1, or LOW and HIGH.
// Also, if this sensor and Arduino Nano are not balanced on a flat plain, get notified by the vibration generated by a vibration motor, and FALSE and OK led.
//
// On a flat plain;
// Tilt sensor is HIGH,
// OK is HIGH,
// FALSE is LOW,
// Vibration motor is LOW,
// Pressure, temperature and altitude values are displayed.
//
// On a tilted plain;
// Tilt sensor is LOW,
// OK is LOW,
// FALSE is HIGH,
// Vibration motor is HIGH,
// Error message is displayed - "Please balance on a flat plain!".
//
// Connections
// Arduino Nano(CH340) :
//                                BMP180 Pressure Sensor
// A4 --------------------------- SDA
// A5 --------------------------- SCL
//                                LCD Screen (16, 2)
// D7 --------------------------- rs
// D6 --------------------------- en
// D5 --------------------------- d4
// D4 --------------------------- d5
// D3 --------------------------- d6
// D2 --------------------------- d7
//                                Tilt Sensor(Mercury Sensor)
// GND + 10K + D8 --------------- Leg(1)
// 5V --------------------------- Leg(2)
//                                OK Led
// D9 --------------------------- +
//                                FALSE Led
// D10 -------------------------- +
//                                Vibration Motor
// D11 -------------------------- +
// GND -------------------------- -


// Include the LiquidCrystal library.
#include

// Initialize the library by associating any needed LCD interface pin with the arduino pin number it is connected to.
const int rs = 7, en = 6, d4 = 5, d5 = 4, d6 = 3, d7 = 2;
LiquidCrystal lcd(rs, en, d4, d5, d6, d7);


// Celcius sign.
byte celcius[8] = {
0b01111,
0b01001,
0b01001,
0b01001,
0b01111,
0b00000,
0b00000,
0b00000
};
// Meter sign.
byte meter[8] = {
0b00000,
0b00000,
0b00000,
0b10001,
0b11011,
0b10101,
0b10001,
0b10001
};

// Your sketch must #include this library, and the Wire library.
// (Wire is a standard library included with Arduino.):

#include
#include

// You will need to create an SFE_BMP180 object, here called "pressure":

SFE_BMP180 pressure;

// Connect BMP180 SDA and SCL pins to the labeled pins below.
// Any Arduino pins labeled: SDA  SCL
// Nano, Uno, Pro:            A4   A5
// Mega2560, Due:             20   21
// Leonardo:                   2    3

// Define a baseline pressure (sea-level or other) in mb to predict altitude.
#define p0 1013

// Define temperature, pressure, and baseline pressure variables.
char status;
double T,P,a;

// Define Tilt Sensor digital pin.
#define tilt 8
// Define OK and FALSE led.
#define OK 9
#define FALSE 10
// Define vibration motor digital pin.
#define vibration 11

void setup() {
// Initialize LCD screen.
lcd.begin(16, 2);
// Create celcius sign.
lcd.createChar(1, celcius);
// Create meter sign.
lcd.createChar(2, meter);

// Initialize the sensor (it is important to get calibration values stored on the device).
pressure.begin();

pinMode(tilt, INPUT);
pinMode(OK, OUTPUT);
pinMode(FALSE, OUTPUT);
pinMode(vibration, OUTPUT);

}

void loop() {
if(digitalRead(tilt) == HIGH){
  lcd.clear();
  // If the system on a flat plain.
  while(digitalRead(tilt) == HIGH){
  digitalWrite(OK, HIGH);
  digitalWrite(FALSE, LOW);
  // Deactivate vibration motor.
  digitalWrite(vibration, LOW);
  // Get data from BMP180 Pressure Sensor.
  get_temperature_and_pressure();

  digitalRead(tilt);
  }
}else if(digitalRead(tilt) == LOW){
  lcd.clear();
  // If tilt sensor is activated.
  while(digitalRead(tilt) == LOW){
  digitalWrite(OK, LOW);
  digitalWrite(FALSE, HIGH);
  // Activate vibration motor.
  digitalWrite(vibration, HIGH);
  // Display error message.
  lcd.setCursor(0,0);
  lcd.print("Please balance");
  lcd.setCursor(0,1);
  lcd.print("on a flat plain!");

  digitalRead(tilt);
  }
}


}

void get_temperature_and_pressure(){
// You must first get a temperature measurement to perform a pressure reading.

// Start a temperature measurement:
// If request is successful, the number of ms to wait is returned.
// If request is unsuccessful, 0 is returned.

  status = pressure.startTemperature();
  if (status != 0){
     // Wait for the measurement to complete:
     delay(status);
     // Retrieve the completed temperature measurement:
     // Note that the measurement is stored in the variable T.
     // Function returns 1 if successful, 0 if failure.
     status = pressure.getTemperature(T);
     if (status != 0){
      lcd.setCursor(0,0);
      lcd.print(T);
      lcd.write(1);
      lcd.print("C");
      // Start a pressure measurement:
      // The parameter is the oversampling setting, from 0 to 3 (highest res, longest wait).
      // If request is successful, the number of ms to wait is returned.
      // If request is unsuccessful, 0 is returned.
      status = pressure.startPressure(0);
        if (status != 0){
          // Wait for the measurement to complete:
          delay(status);
          // Retrieve the completed pressure measurement:
          // Note that the measurement is stored in the variable P.
          // Note also that the function requires the previous temperature measurement (T).
          // (If temperature is stable, you can do one temperature measurement for a number of pressure measurements.)
          // Function returns 1 if successful, 0 if failure.
          status = pressure.getPressure(P,T);
            if (status != 0){
              lcd.setCursor(3, 1);
              lcd.print(P);
              lcd.print(" mb");
              // Determine your altitude from the pressure reading,
              // use the altitude function along with a baseline pressure (sea-level or other).
              // Parameters: P = absolute pressure in mb, p0 = baseline pressure in mb.
              // Result: a = altitude in m.
              a = pressure.altitude(P,p0);
              lcd.setCursor(9, 0);
              lcd.print(a);
              lcd.print(" ");
              lcd.write(2);
              }
          }
      }

   }

   delay(1000);

 }

Fritzing File
Download
1 ) Arduino Nano V3
2 ) BMP180 Temperature Module Atmospheric Pressure Sensor
3 ) DC1.5-3V Micro Coreless Motor Vibration Motor
4 ) Rotary Potentiometer
5 ) Plastic For Rotary Taper Potentiometer Hole 6mm Knob
6 ) LCD Display Module Blue Backlight For Arduino
7 ) Breadboard
8 ) Mini Breadboard
9 ) Resistor Kit for Arduino