Advertisement:

Read Later
In this tutorial, I will show you how to use the 3-wire Serial LCD Module from DFRobot with Arduino.
Introduction(1)
The 3-wire Serial LCD Module uses a 128x64 liquid crystal display that supports Chinese characters, English characters, and even graphics. It can exhibit 4 lines and 12 English characters / 6 Chinese characters per line. It is suitable for interactive work with Arduino.
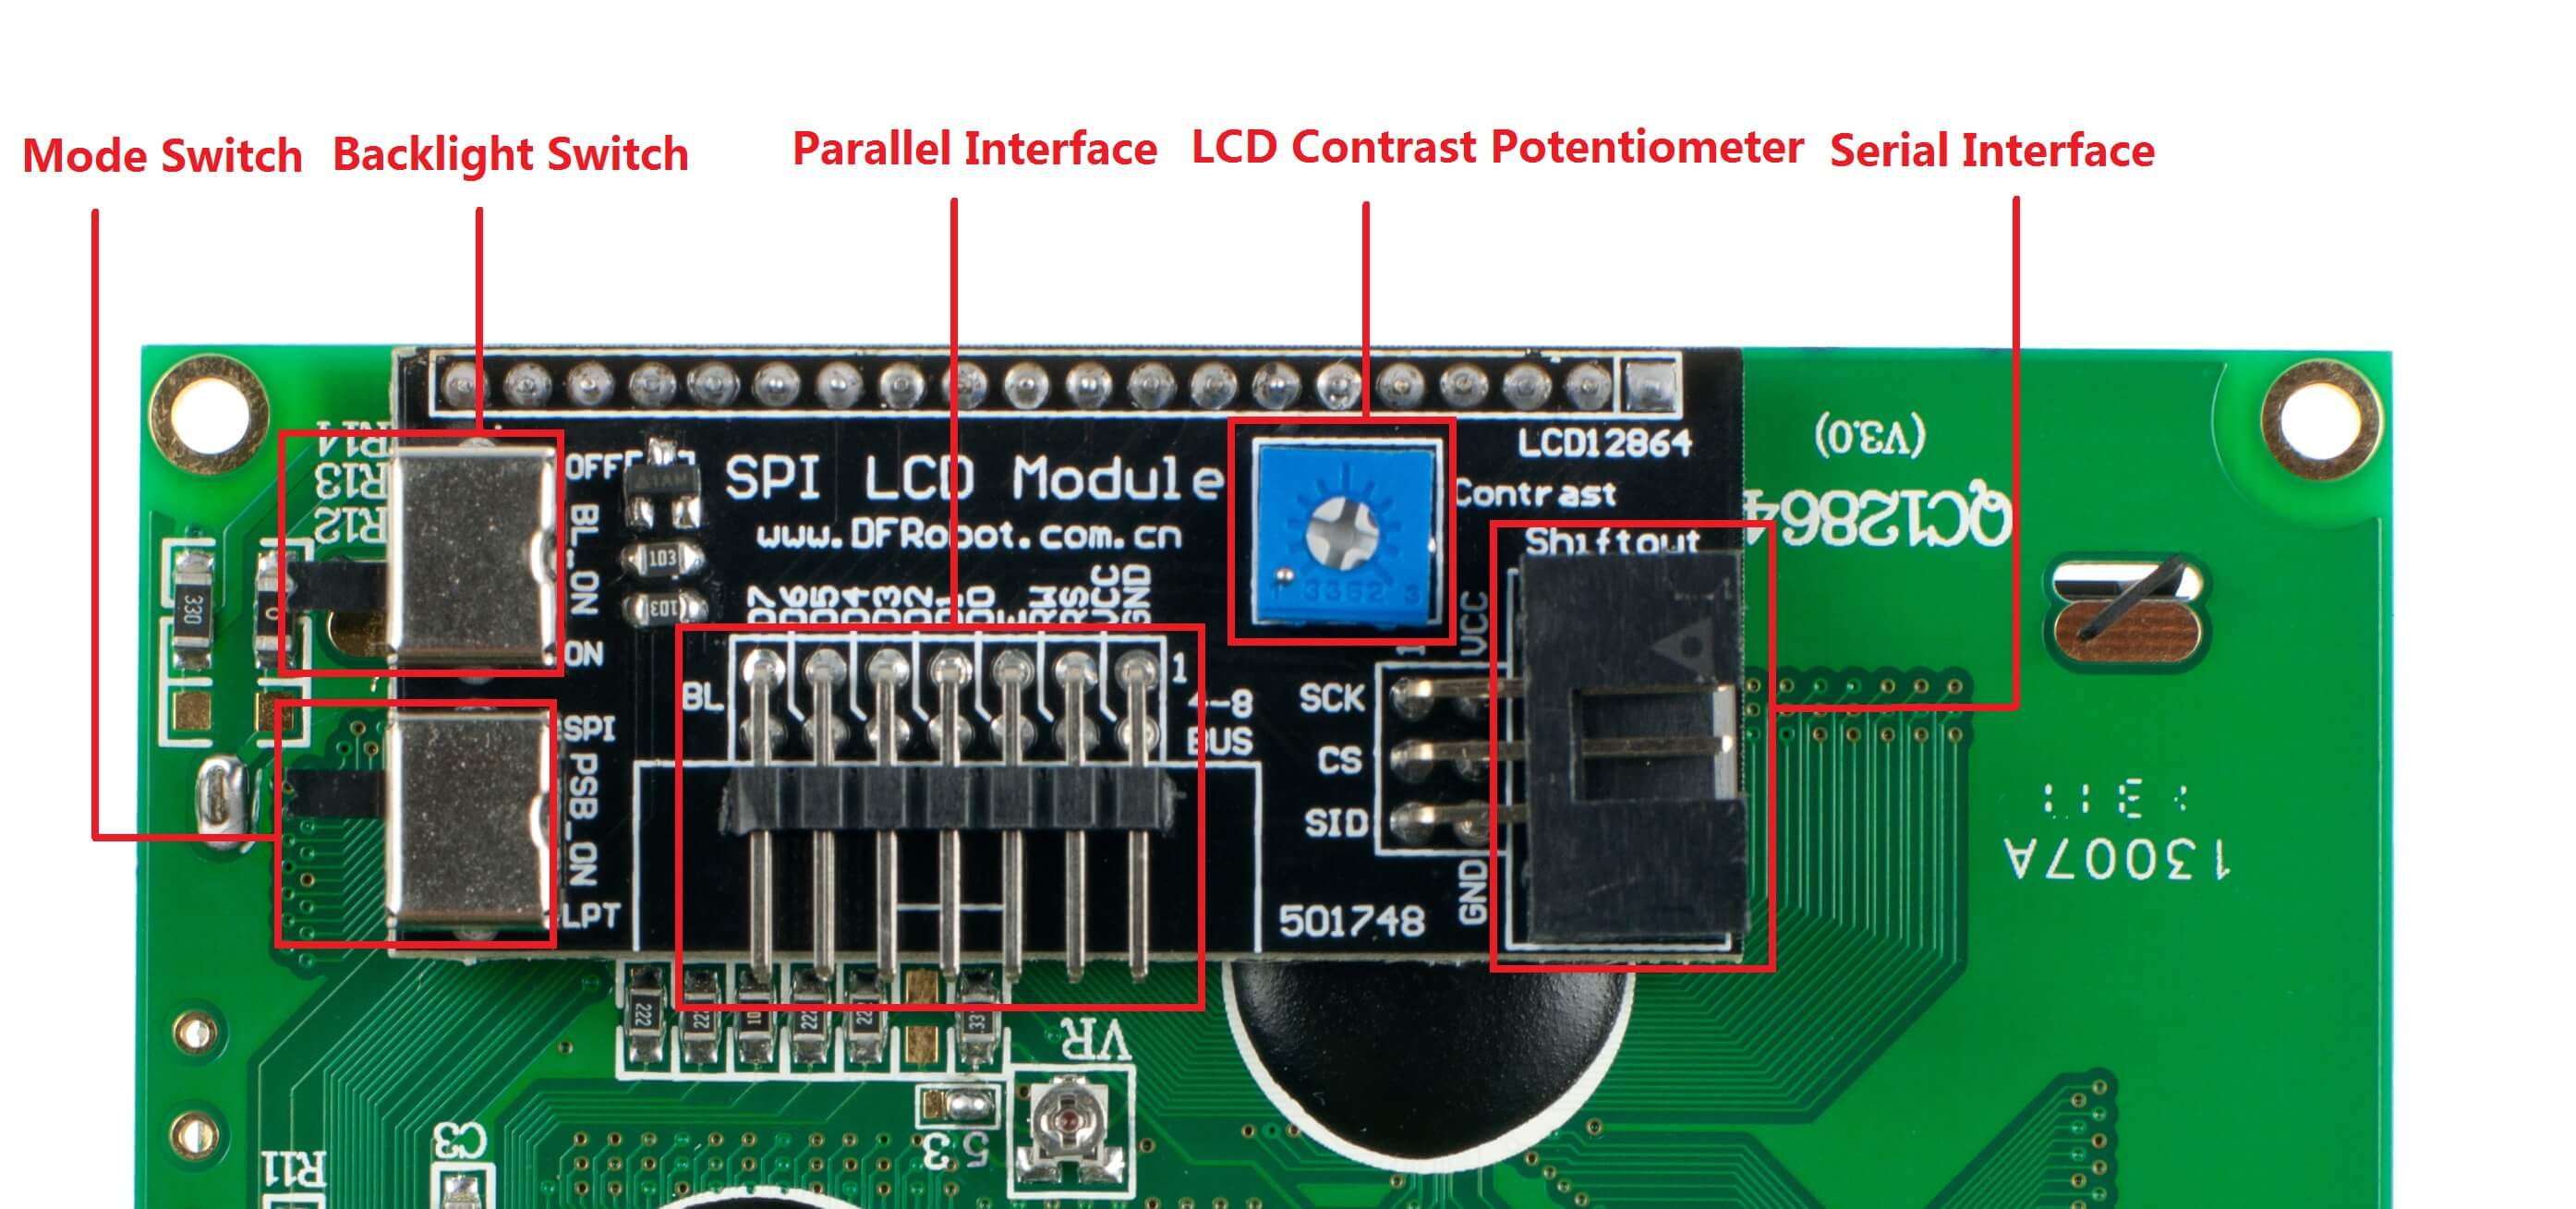
It features a backlight control, parallel or serial control, contrast adjust.
There are two modes - parallel and serial. And, the LCD is shipped in Parallel version by default. To switch to the 3-wire mode, set the PSB_ON switch to SPI.
I will discuss the 3-wire mode (SPI) in the following sections.
Connections(1)

For more information, click here.
Download the required library for the 3-wire Serial LCD SPI mode from here.
This code is the example code in the library - logos included.
-------------- Arduino --------------

/***********************************************
1. SPI Interface Inatruction
      clockPin --> SCK(EN)
      latchPin --> CS(RS)
      dataPin --> SID(RW)
 2. Connection:
    1)Turn the BL_ON Switch to the "ON" side;
    2)Turn the PBS_ON Switch to the "SPI" side

Method1:
      LCD                   Arduino
      EN                 Digital Pin 2
      RS                 Digital Pin 7
      RW                 Digital Pin 10
      VCC                     5V
      GND                     GND;

Method2:
      LCD                          Arduino
      SCK       clockPin(defined in the "initDriverPin" function)
      CS        latchPin(defined in the "initDriverPin" function)
      SID       dataPin (defined in the "initDriverPin" function)
      VCC                            5V
      GND                           GND
***********************************************/

#include "LCD12864RSPI.h"
#include "DFrobot_bmp.h"
#include "DFrobot_char.h"

#define AR_SIZE( a ) sizeof( a ) / sizeof( a[0] )

unsigned char wangzhi[]=" www.DFRobot.cn ";//

unsigned char en_char1[]="ST7920 LCD12864 ";//

unsigned char en_char2[]="Test, Copyright ";//

unsigned char en_char3[]="by DFRobot ---> ";//

void setup()
{
  LCDA.initDriverPin(2,7,10);
  LCDA.Initialise(); // INIT SCREEN
  delay(100);
  LCDA.DrawFullScreen(logo);//LOGO
  delay(5000);
}

void loop()
{
LCDA.CLEAR();
delay(100);
LCDA.DisplayString(0,0,en_char1,16);//
delay(10);
LCDA.DisplayString(1,0,en_char2,16);//
delay(10);
LCDA.DisplayString(2,0,en_char3,16);//
delay(10);
LCDA.DisplayString(3,0,wangzhi,16);//
delay(5000);
LCDA.CLEAR();
delay(100);
LCDA.DisplayString(0,0,show1,16);//
delay(10);
LCDA.DisplayString(1,0,show2,16);//
delay(10);
LCDA.DisplayString(2,0,show3,16);//
delay(10);
LCDA.DisplayString(3,0,wangzhi,16);//LOGO
delay(5000);
}
Result:
You can inspect my electronics project in which I used DFRobot 3-wire Serial LCD Module from here.
(1) https://wiki.dfrobot.com/3-wire_Serial_LCD_Module__Arduino_Compatible___SKU_DFR0091_